Tag Archives: marshmallows

S’mores Layer Cake

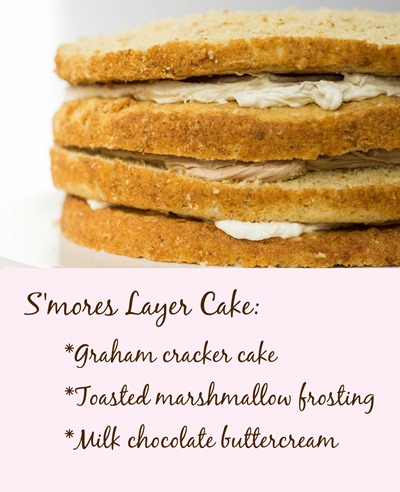
Graham cracker cake layered with toasted marshmallow and milk chocolate buttercreams. This cake embodies the flavors you love in a s’more!

s'mores in cake form OMG this was a huge hit

It’s cake birthday season here! We kicked things off with a bang last weekend celebrating Matt’s Mom’s and my sister-in-law’s overlapping birthdays. And since it was a double birthday, I knew that the dessert had to be extra special.

FOUR layer s'mores cake with the best toasted marshmallow frosting AND milk chocolate frosting

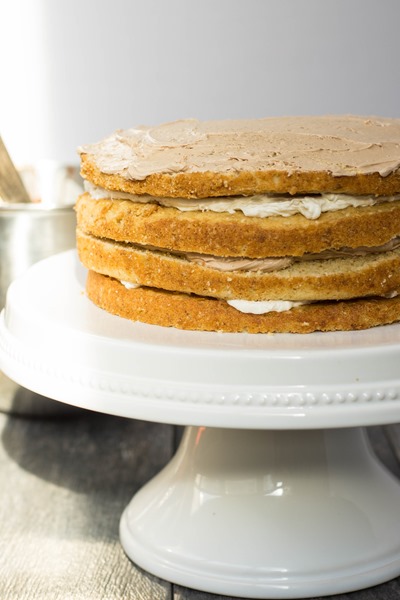
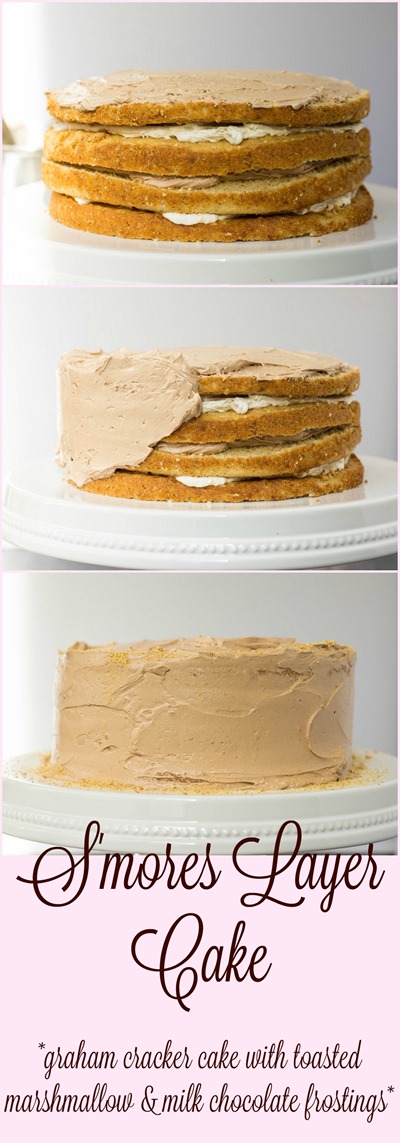
And what could be more special than a four-layer cake made to embody the flavors of a classic s’more? We start with a cake batter infused with graham cracker crumbs, ice a couple of layers with toasted marshmallow buttercream, and then slather the whole thing in the lightest creamiest milk chocolate frosting you will ever have.

the best s'mores cake for celebrations!

While I don’t believe in “naked” cakes (who ever decided that less frosting was better than more?), it was fun to photograph the pre-frosted cake because the layers were oh so pretty. I didn’t want to slice into the finished product before serving and this ended up working out nicely. But as I said, I’m partial to more frosting than less, so be sure to slather your cake generously. It will insure that you have an extra special cake for any birthday celebration.

5.0 from 1 reviews
S'mores Layer Cake
 
Graham cracker cake layered with toasted marshmallow and milk chocolate buttercreams. This cake embodies the flavors you love in a s’more!
Author:
Recipe type: Dessert
Makes: Serves 16
Ingredients
Graham Cracker Cake:
  • 340g (1 ½ cups) unsalted butter, softened at room temperature
  • 212g (1 cup) granulated sugar
  • 117g (½ cup) light brown sugar, packed
  • 330g (3 cups) cake flour
  • 112g (1 cup) finely ground graham cracker crumbs (plus optional additional crumbs for decorating) :
  • 7½g (1 ½ teaspoons) baking powder
  • 2 ½g (½ teaspoon) salt
  • 150 milliliters (10 tablespoons) whole milk
  • 330g (6 large) whole eggs at room temperature
  • 30 milliliters (2 tablespoons) pure vanilla extract
Toasted Marshmallow Buttercream:
  • 80g (1 ½ cups) mini marshmallows
  • 80g (½ cup) powdered sugar
  • 113g (½ cup) unsalted butter, softened at room temperature
  • 115g (¾ cup) marshmallow fluff
  • ½ teaspoon vanilla
Milk Chocolate Buttercream:
  • 130g milk chocolate, melted and cooled for 30 minutes
  • 225g (1 cups) unsalted butter, softened
  • 180g (1 cup plus 2 tablespoons) confectioners' sugar, sifted
  • 15 milliliters (1 tablespoons) cold whole milk
  • 5 milliliters (1 teaspoon) pure vanilla extract
  • ¼ teaspoon ground cinnamon
Instructions
Graham Cracker Cake:
  1. Pre-heat oven to 325 degrees; grease and flour two 9-inch round cake pans; line bottoms of pans with parchment paper and grease and flour the parchment paper; set aside
  2. In a medium bowl, whisk together cake flour, graham cracker crumbs, baking powder and salt; set aside
  3. In a small bowl, whisk together milk, eggs and vanilla; set aside
  4. In the large bowl of an electric mixer, beat together butter and sugars on medium-high speed for several minutes until light and fluffy
  5. Reduce mixer to low speed and slowly add one third of the dry ingredients; add half of the wet ingredients and repeat with both until just combined; do not overmix
  6. Divide batter evenly into prepared baking pans and bake in center of the oven for 33-37 minutes or until a knife comes out clean or with very few moist crumbs from center of cake
  7. Let cake layers cool on a cooling rack for ten minutes before carefully removing from pans to cool completely
  8. When cake layers have completely cooled, use a serrated knife to carefully cot each layer horizontally to create four total cake layers (continue with directions below or see note for advance preparation)
Toasted Marshmallow Buttercream:
  1. Pre-heat oven to broil; line a cookie sheet with parchment paper and spray with nonstick cooking spray
  2. Put marshmallows on prepared cookie sheet and place on lower rack of oven for one to two minutes until nicely browned on top; remove pan and spray a set of tongs with cooking spray; use them to carefully flip marshmallows over onto other sides
  3. Broil marshmallows again for one to two minutes or until nicely browned on other side; remove from oven and set aside
  4. In the large bowl of an electric mixer with paddle attachment, beat butter and sugar on low speed just until combined; add marshmallow fluff and vanilla and mix on medium high speed until light and creamy (about three minutes); scrape sides of the bowl with spatula
  5. Add half of toasted marshmallows and mix on medium speed for thirty seconds; add remaining marshmallows and mix on medium speed two minutes (there will still be bits of crunch marshmallow but they should be mostly combined)
Milk Chocolate Buttercream:
  1. In the large bowl of an electric mixer with a paddle attachment, beat the butter on medium-high speed until very light and creamy
  2. Add half of sugar and mix on low speed for one minute; add remaining sugar and mix again on low speed
  3. Beat on medium high speed until light and fluffy; reduce speed to low and slowly add milk, vanilla, and cinnamon; scrape the sides of the bowl and mix on low again and slowly add the melted chocolate
  4. Increase speed to medium-high and beat for 2-3 minutes or until frosting is creamy and light
To put cake together:
  1. Place one layer of cake on serving plate; top with half of toasted marshmallow buttercream and spread evenly to cover cake layer; top with second layer of cake and spread ⅔ cup milk chocolate frosting over that layer
  2. Place third layer of cake down and spread remaining marshmallow frosting over that; place fourth cake layer on top and frost entire cake with remaining milk chocolate frosting
Notes
For advance preparation, wrap cooled cake layers well with seran and store at room temperature overnight or for one month in freezer
Make sure milk chocolate has cooled for 30 minutes before making chocolate frosting
Frostings best made right before building cake
Store cake in refrigerator and bring to room temperature before serving; best best enjoyed same day
Graham cracker cake slightly adapted from Food and Wine
Toasted marshmallow frosting from Sweetapolita
Milk chocolate buttercream adapted from chile chocolate buttercream

Make something from the blog? Be sure to share it on Instagram with the tag #KeepItSweetDesserts.

You might also like:

Graham Cracker Cookies with Toasted Pumpkin Marshmallow Filling
Graham Cracker Cookies with Toasted Pumpkin Marshmallow Filling

Peanut Butter S’mores Parfaits

Peanut Butter S’mores Parfaits

Hot Cocoa Cookies

Hot Cocoa Cookies

S’mores Layer Cake

Graham cracker cake layered with toasted marshmallow and milk chocolate buttercreams. This cake embodies the flavors you love in a s’more!

s'mores in cake form OMG this was a huge hit

It’s cake birthday season here! We kicked things off with a bang last weekend celebrating Matt’s Mom’s and my sister-in-law’s overlapping birthdays. And since it was a double birthday, I knew that the dessert had to be extra special.

FOUR layer s'mores cake with the best toasted marshmallow frosting AND milk chocolate frosting

And what could be more special than a four-layer cake made to embody the flavors of a classic s’more? We start with a cake batter infused with graham cracker crumbs, ice a couple of layers with toasted marshmallow buttercream, and then slather the whole thing in the lightest creamiest milk chocolate frosting you will ever have.

the best s'mores cake for celebrations!

While I don’t believe in “naked” cakes (who ever decided that less frosting was better than more?), it was fun to photograph the pre-frosted cake because the layers were oh so pretty. I didn’t want to slice into the finished product before serving and this ended up working out nicely. But as I said, I’m partial to more frosting than less, so be sure to slather your cake generously. It will insure that you have an extra special cake for any birthday celebration.

5.0 from 1 reviews
S'mores Layer Cake
 
Graham cracker cake layered with toasted marshmallow and milk chocolate buttercreams. This cake embodies the flavors you love in a s’more!
Author:
Recipe type: Dessert
Makes: Serves 16
Ingredients
Graham Cracker Cake:
  • 340g (1 ½ cups) unsalted butter, softened at room temperature
  • 212g (1 cup) granulated sugar
  • 117g (½ cup) light brown sugar, packed
  • 330g (3 cups) cake flour
  • 112g (1 cup) finely ground graham cracker crumbs (plus optional additional crumbs for decorating) :
  • 7½g (1 ½ teaspoons) baking powder
  • 2 ½g (½ teaspoon) salt
  • 150 milliliters (10 tablespoons) whole milk
  • 330g (6 large) whole eggs at room temperature
  • 30 milliliters (2 tablespoons) pure vanilla extract
Toasted Marshmallow Buttercream:
  • 80g (1 ½ cups) mini marshmallows
  • 80g (½ cup) powdered sugar
  • 113g (½ cup) unsalted butter, softened at room temperature
  • 115g (¾ cup) marshmallow fluff
  • ½ teaspoon vanilla
Milk Chocolate Buttercream:
  • 130g milk chocolate, melted and cooled for 30 minutes
  • 225g (1 cups) unsalted butter, softened
  • 180g (1 cup plus 2 tablespoons) confectioners' sugar, sifted
  • 15 milliliters (1 tablespoons) cold whole milk
  • 5 milliliters (1 teaspoon) pure vanilla extract
  • ¼ teaspoon ground cinnamon
Instructions
Graham Cracker Cake:
  1. Pre-heat oven to 325 degrees; grease and flour two 9-inch round cake pans; line bottoms of pans with parchment paper and grease and flour the parchment paper; set aside
  2. In a medium bowl, whisk together cake flour, graham cracker crumbs, baking powder and salt; set aside
  3. In a small bowl, whisk together milk, eggs and vanilla; set aside
  4. In the large bowl of an electric mixer, beat together butter and sugars on medium-high speed for several minutes until light and fluffy
  5. Reduce mixer to low speed and slowly add one third of the dry ingredients; add half of the wet ingredients and repeat with both until just combined; do not overmix
  6. Divide batter evenly into prepared baking pans and bake in center of the oven for 33-37 minutes or until a knife comes out clean or with very few moist crumbs from center of cake
  7. Let cake layers cool on a cooling rack for ten minutes before carefully removing from pans to cool completely
  8. When cake layers have completely cooled, use a serrated knife to carefully cot each layer horizontally to create four total cake layers (continue with directions below or see note for advance preparation)
Toasted Marshmallow Buttercream:
  1. Pre-heat oven to broil; line a cookie sheet with parchment paper and spray with nonstick cooking spray
  2. Put marshmallows on prepared cookie sheet and place on lower rack of oven for one to two minutes until nicely browned on top; remove pan and spray a set of tongs with cooking spray; use them to carefully flip marshmallows over onto other sides
  3. Broil marshmallows again for one to two minutes or until nicely browned on other side; remove from oven and set aside
  4. In the large bowl of an electric mixer with paddle attachment, beat butter and sugar on low speed just until combined; add marshmallow fluff and vanilla and mix on medium high speed until light and creamy (about three minutes); scrape sides of the bowl with spatula
  5. Add half of toasted marshmallows and mix on medium speed for thirty seconds; add remaining marshmallows and mix on medium speed two minutes (there will still be bits of crunch marshmallow but they should be mostly combined)
Milk Chocolate Buttercream:
  1. In the large bowl of an electric mixer with a paddle attachment, beat the butter on medium-high speed until very light and creamy
  2. Add half of sugar and mix on low speed for one minute; add remaining sugar and mix again on low speed
  3. Beat on medium high speed until light and fluffy; reduce speed to low and slowly add milk, vanilla, and cinnamon; scrape the sides of the bowl and mix on low again and slowly add the melted chocolate
  4. Increase speed to medium-high and beat for 2-3 minutes or until frosting is creamy and light
To put cake together:
  1. Place one layer of cake on serving plate; top with half of toasted marshmallow buttercream and spread evenly to cover cake layer; top with second layer of cake and spread ⅔ cup milk chocolate frosting over that layer
  2. Place third layer of cake down and spread remaining marshmallow frosting over that; place fourth cake layer on top and frost entire cake with remaining milk chocolate frosting
Notes
For advance preparation, wrap cooled cake layers well with seran and store at room temperature overnight or for one month in freezer
Make sure milk chocolate has cooled for 30 minutes before making chocolate frosting
Frostings best made right before building cake
Store cake in refrigerator and bring to room temperature before serving; best best enjoyed same day
Graham cracker cake slightly adapted from Food and Wine
Toasted marshmallow frosting from Sweetapolita
Milk chocolate buttercream adapted from chile chocolate buttercream

Make something from the blog? Be sure to share it on Instagram with the tag #KeepItSweetDesserts.

You might also like:

Graham Cracker Cookies with Toasted Pumpkin Marshmallow Filling
Graham Cracker Cookies with Toasted Pumpkin Marshmallow Filling
Peanut Butter S’mores Parfaits

Peanut Butter S’mores Parfaits

Hot Cocoa Cookies

Hot Cocoa Cookies

Hot Cocoa Cookies

This shop has been compensated by Collective Bias, Inc. and its advertiser. All opinions are mine alone. #SweetenTheSeason #CollectiveBias #ad

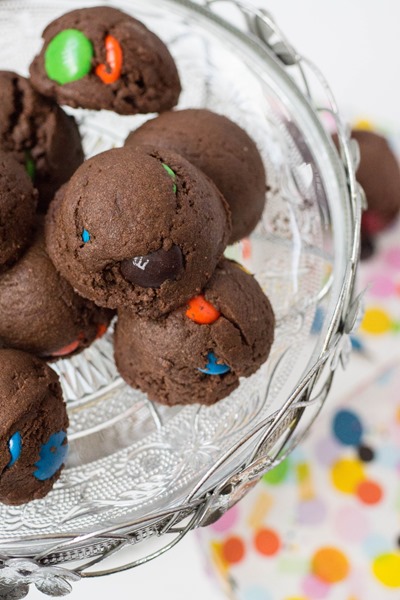
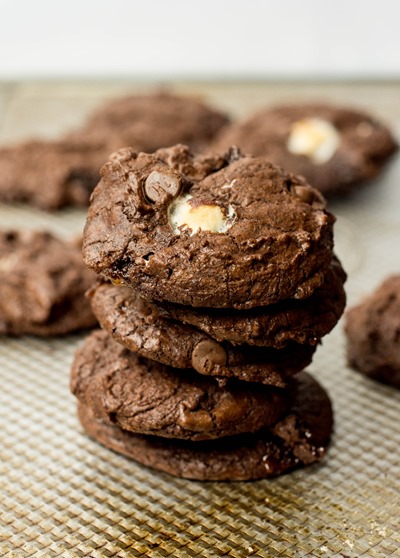
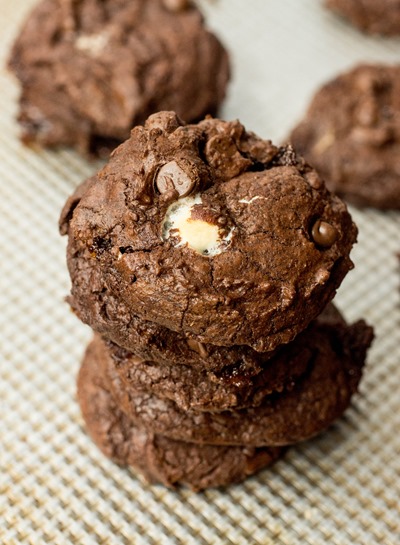
Rich, fudgy and ultra chocolatey cookies with melted marshmallows taste like the best cup of hot cocoa you’ve ever had!

Hot Cocoa Cookies for the holidays! #SweetenTheSeason #CollectiveBias #ad

It’s no secret that I love baking cookies, especially for the holidays. While I don’t bake and ship thousands of cookies to customers anymore, I still go through many, many batches to give as gifts and bring to parties. Holiday season is cookie season!

IN LOVE with these Hot Cocoa Cookies for Christmas and the holidays #ad

Since I like to do a lot of baking throughout the holidays, it helps to have some good go-to recipes that are fairly easy (none of that messy rolling dough, etc.) and exceptionally delicious. It’s even better when I can find some inexpensive ingredients (thanks, Walmart!) that happen to come together to make an ultra rich and satisfying cookie. And this Hot Cocoa Cookie is all that and more. In fact, quite a few people said it was the “best” cookie they’d ever had.

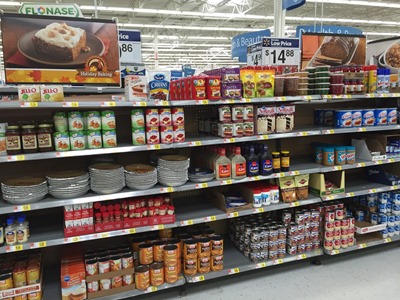
(Just an aside, I had to go to Walmart TWICE to get the ingredients I needed because the first time I actually FORGOT my wallet. Each time, I was happy to find all of the baking ingredients conveniently set up for holiday baking.)

Walmart Holiday Baking #ad

Walmart Holiday Baking #ad

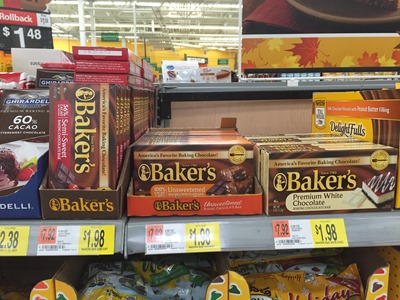
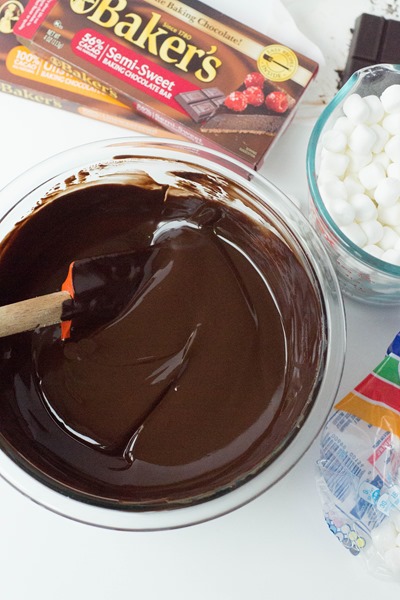
These cookies start with a lot of chocolate (BAKER’S Unsweetened Chocolate and BAKER’S Semi-Sweet Chocolate), almost a full POUND in one batch. Then they are finished with more chocolate (chips) and JET-PUFFED Miniature Marshmallows. The cookies are super fudgy and the ultimate chocolate experience. Imagine the best hot chocolate you’ve ever had, not the kind from the packet, the kind where you are basically drinking liquid heaven, and then transform that hot chocolate into a cookie.

I can't wait to bake these hot cocoa cookies #ad

Hot Cocoa Cookies!!! #ad

5.0 from 1 reviews
Hot Cocoa Cookies
 
Rich, fudgy and ultra chocolatey cookies with melted marshmallows taste like the best cup of hot cocoa you’ve ever had!
Author:
Recipe type: Dessert
Makes: ~2 ½ dozen cookies
Ingredients
  • 113g (1/2 cup) unsalted butter
  • 170g (6 ounces) BAKER’S Semi-Sweet Chocolate, roughly chopped
  • 200g (7 ounces) BAKER'S Unsweetened Chocolate, roughly chopped
  • 160g (~1 cup + 3 tablespoons) all-purpose flour
  • 2g (3/4 teaspoon) baking powder
  • 2g (1/2 teaspoon salt)
  • 150g (~3 large whole) eggs at room temperature
  • 215g (~1 cup) granulated sugar
  • 235g (~1 cup, packed) light brown sugar
  • 10 milliliters / 2 teaspoons vanilla extract
  • 200g (~1 cup) milk chocolate chips
  • 100g (1½ cups) JET-PUFFED Miniature Marshmallows
Instructions
  1. Pre-heat oven to 350 degrees; line baking sheets with parchment paper and set aside
  2. Place semi-sweet and unsweetened chocolate with butter in a microwave-safe bowl
  3. Microwave the ingredients for a minute and stir; microwave again for 30-second increments until everything is almost melted; stir the remaining lumps until smooth (alternatively, you can melt the butter and chocolate in a heavy duty pop over medium heat stirring constantly); set aside
  4. In a medium bowl, whisk together dry ingredients (flour, baking powder, and salt) and set aside
  5. In the large bowl of a stand mixer, combine eggs, sugars and vanilla; beat on high speed for about 5 minutes or until mixture is light and pale in color
  6. Reduce the speed of your mixer and add in melted chocolate
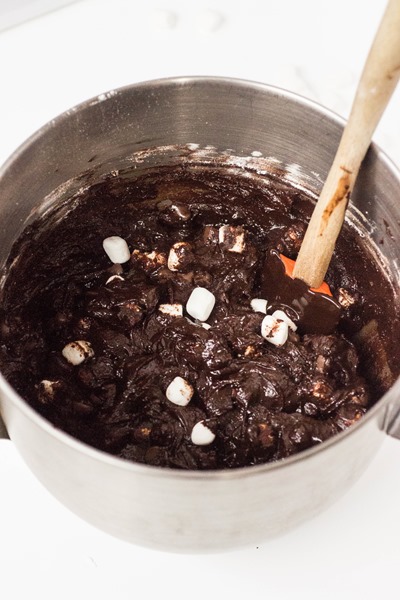
  7. When that is well-combined, stir in flour mixture but do not over-mix; stir in chocolate chips and marshmallows
  8. Use a large cookie dough scoop and place dough on a baking sheet lined with parchment paper, 1-2 inches apart;
  9. Bake cookies for 12 minutes and set aside on a wire rack to cool
Notes
Recipe can be doubled
Store cookies at room temperature up to 5 days in a ziplock bag or freeze for up to two months; separate layers of cookies with parchment paper to avoid sticking


These Hot Cocoa Cookies might be the best cookies ever #ad

Be sure to visit your local Walmart for your own holiday baking inspiration!

Make something from the blog? Be sure to share it on Instagram with the tag #KeepItSweetDesserts.

You might also like:

Smoked Sea Salt Chocolate Fudge Caramel Cookies

Smoked Sea Salt Chocolate Fudge Cookies

Mega M&M Cookies

Mega M&M Cookies

Peanut Butter S’mores Parfaits

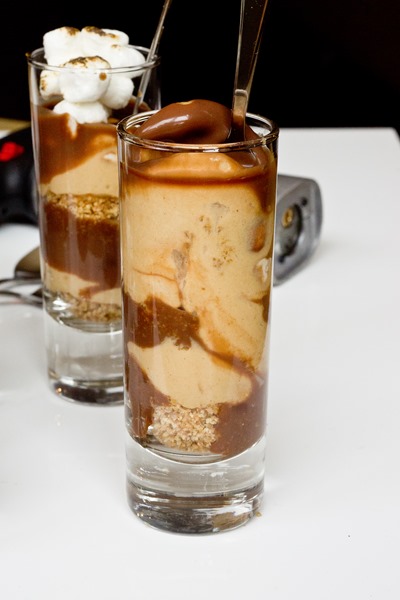
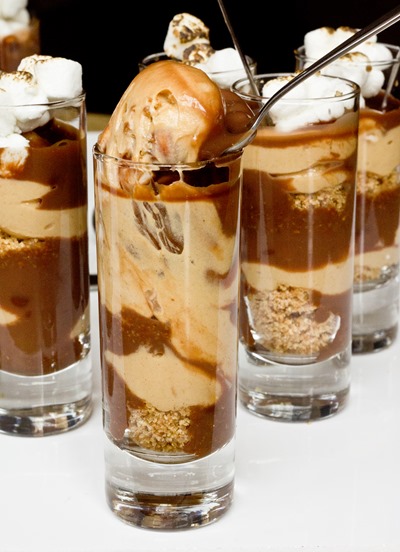
Mini dessert parfaits layered with graham cracker crumble, peanut butter marshmallow mousse, milk chocolate ganache and toasted marshmallows!

No-Bake Peanut Butter S’mores Parfaits - so much fun for summer entertaining!

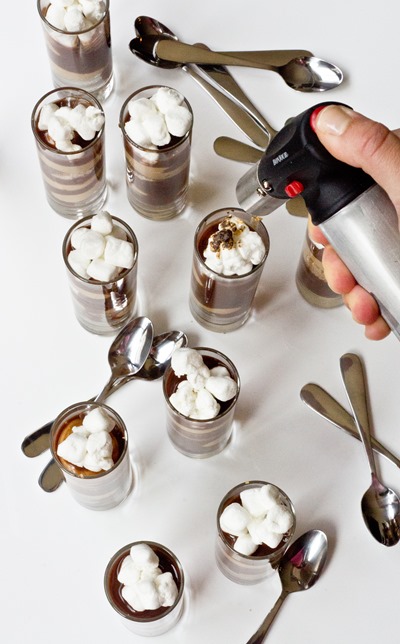
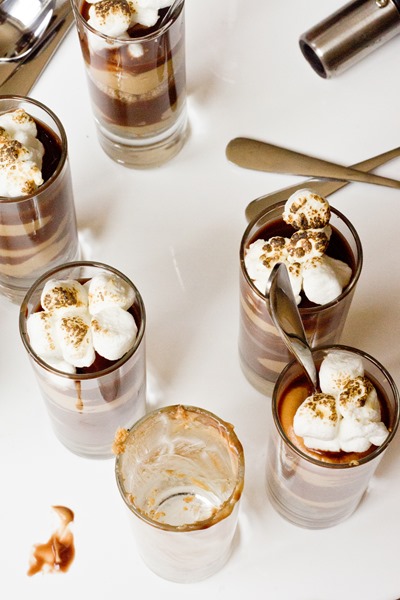
I haven’t posted any s’mores recipes for you this summer, I was waiting until I had something extra special.  These little parfaits… they certainly are that!  Peanut butter and milk chocolate play starring rolls, but the other classic s’mores components are here and prominent.  There is marshmallow infused into the peanut butter mousse (gotta love marshmallow fluff!) and then toasted marshmallows top each adorable shot-glass dessert.

Peanut Butter S'mores Parfaits OMG

I couldn’t resist digging into one for… you know, the good of the photo shoot.  Ha, who am I kidding?  I just couldn’t resist.

Peanut Butter S'mores Parfaits OMG these are good

Peanut Butter S’mores Parfaits
 
Author:
Recipe type: Dessert
Makes: 1 dozen mini parfaits
Ingredients
  • Graham Cracker Crumble (recipe below)
  • Peanut Butter Marshmallow Mousse (recipe below)
  • Milk Chocolate Ganache (recipe below)
  • 28g (~1/2 cup) mini marshmallows
Instructions
  1. Put about one teaspoon of graham cracker crumble on the bottom of each shot glass
  2. Pipe peanut butter mousse into each parfait glass so that they are ⅓ of the way full (you can also use a spoon but I find that this helps for a “cleaner” look)
  3. Layer each parfait with about one teaspoon of chocolate ganache
  4. Repeat layers and top each parfait with mini marshmallows; chill in refrigerator until ready to eat
  5. When ready to serve, use a blow torch to gently char the marshmallows right before serving
Notes
You will need 12 tall shot glasses (alternatively, you can use four larger sized glasses of choice for full-sized desserts, just scale up the size of each layer when putting them together)
I recommend making the components below around the same time, the mousse can be made earlier in the day if needed
Parfaits are best enjoyed immediately but leftovers can be stored in the refrigerator and enjoyed for up to five days
If making for someone who is gluten-intolerant, make sure all ingredients are labeled “gluten-free”
Inspired by these No-Bake S’mores Cheesecakes

Graham Cracker Crumble
 
Author:
Recipe type: Dessert
Ingredients
  • 85g (3/4 cups) finely ground graham cracker crumbs (~5 full sheets)
  • 42g (3 tablespoons) unsalted butter, melted
Instructions
  1. Stir together graham cracker crumbs and butter;  set aside until ready to use
Notes
Use gluten-free graham crackers if making gluten-free

Peanut Butter Marshmallow Mousse
 
Ingredients
  • 155g (~1/2 cup) creamy peanut butter, do not use a natural version
  • 70g (~1/3 cup) marshmallow fluff
  • 175 milliliters (3/4 cup) heavy whipping cream, cold
Instructions
  1. In the large bowl of an electric mixer with a paddle attachment, combine peanut butter and fluff on low to medium speed until well combined; set aside
  2. In a separate large bowl for the electric mixer with whisk attachment, beat cream on medium-high speed just until stiff peaks form (will take a few minutes); mix in the peanut butter mixture on medium speed until smooth and creamy

Milk Chocolate Ganache
 
Ingredients
  • 113g milk chocolate, roughly chopped
  • 120 milliliters ( ½ cup) heavy cream
Instructions
  1. Place chocolate in a medium heat-safe bowl and set aside
  2. Pour cream into a medium heavy duty sauce-pan and place over medium heat; bring to boil and remove from heat immediately
  3. Pour hot cream over chocolate and let stand for 5 minutes; whisk mixture until smooth; use before ganache is set and hard


Peanut Butter S'mores Parfaits - they will disappear in minutes!

Graham Cracker Cookies with Toasted Pumpkin Marshmallow Filling
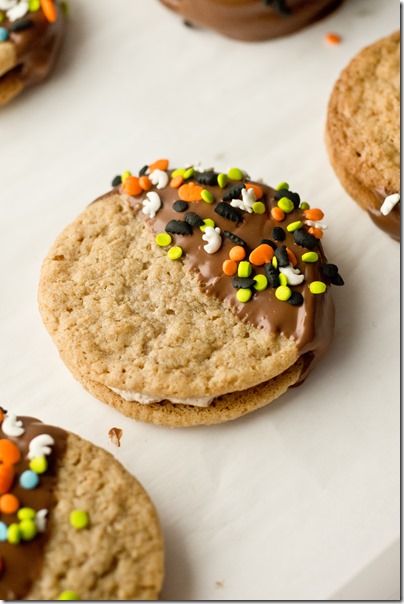
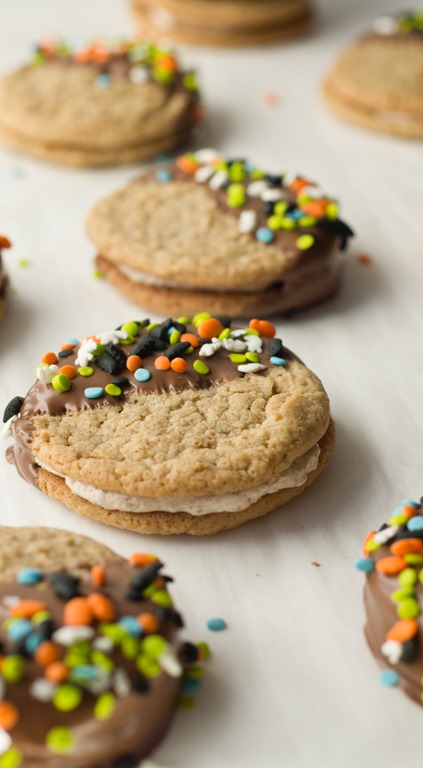
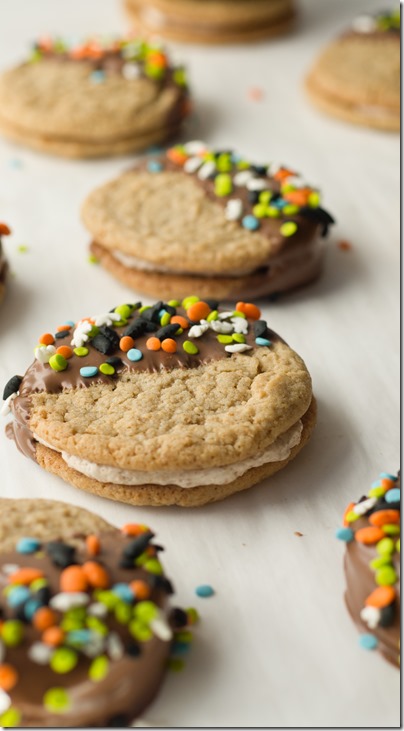
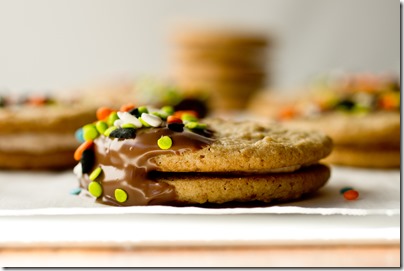
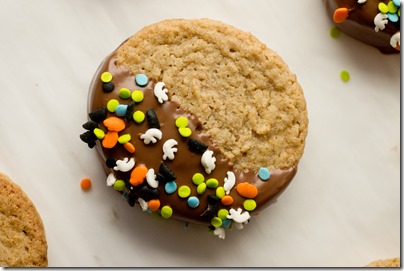
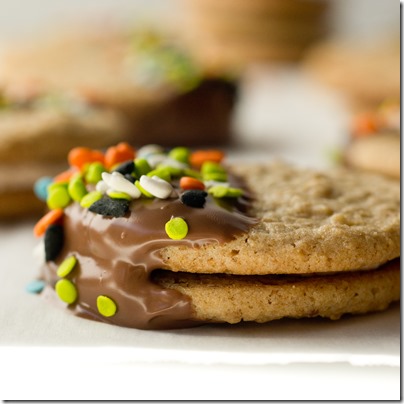
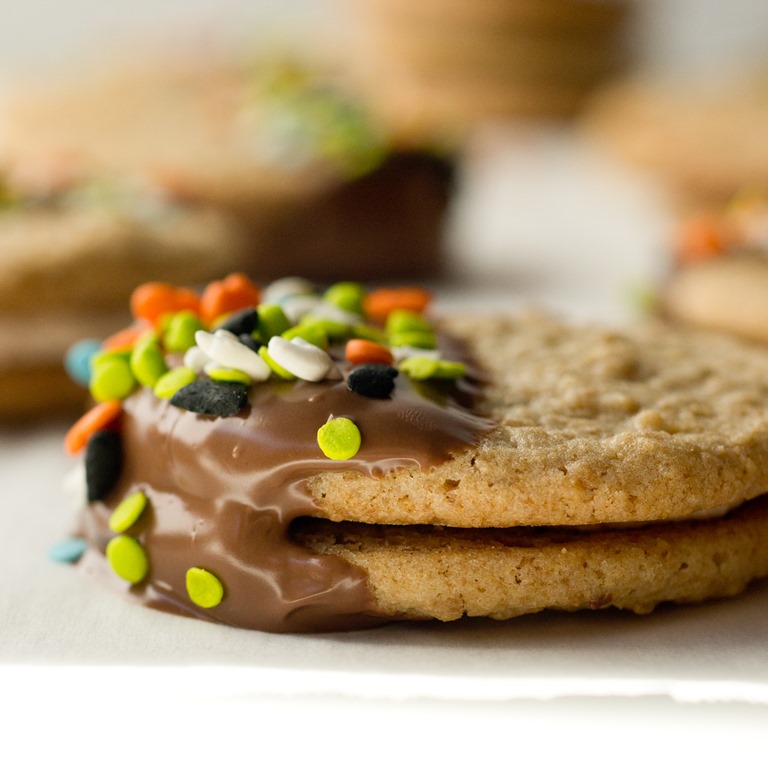
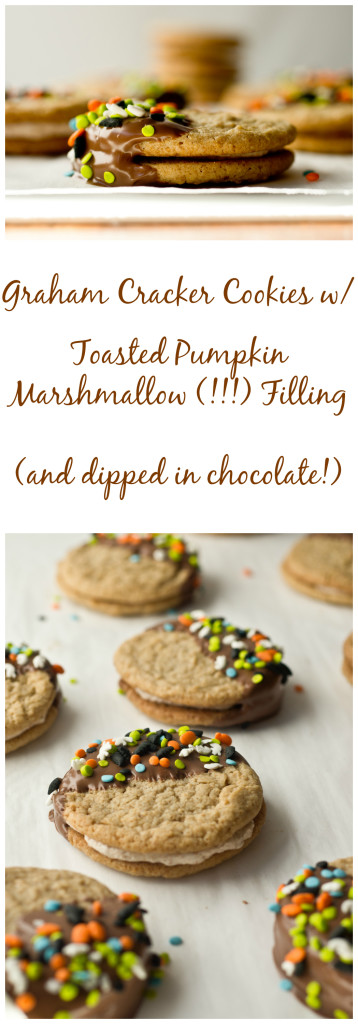
Chewy Graham Cracker flavored cookies filled with a toasted pumpkin marshmallow buttercream are the best cookie for fall!  Dip them in chocolate and decorate with colored sprinkles for a festive treat.

Graham Cracker Cookies with Toasted Pumpkin Marshmallow Filling
These cookies.

Where do I even begin?  First of all, the graham cracker cookie is chewy, slightly crispy on the outside, and flavored like a graham cracker (duh) with just the perfect hint of salt.  It would make a great dunking cookie (milk, hot chocolate, pumpkin pie coffee, you name it).  But, why leave the cookie alone when I could sandwich it with buttercream, dip it in chocolate and decorate it with jimmies?  Yeah, exactly.

Graham Cracker Cookies with Toasted Pumpkin Marshmallow Filling
So second of all, this buttercream.  Ever since devouring this cake a couple of weeks ago, I could not get, Sweetapolita’s toasted marshmallow buttercream out of my head.   The flavor of the toasted marshmallows is perfectly present, and I actually really like the bits of crunch you get from the browned marshmallows.  Well, I couldn’t leave well enough alone.  I had to take that buttercream and infuse it with fall’s favorite flavors.  Given that I’ve had two huge bags of pumpkin marshmallows in my pantry since last year, this was the perfect opportunity to finally use them!

Graham Cracker Cookies with Toasted Pumpkin Marshmallow Filling
And third, the chocolate.  Honestly, you really don’t need to do this, but I wanted my cookies to really shine as a special fall treat.  So, I dipped them in milk chocolate and covered them with some cute Halloween sprinkles.  For those of you who enjoy pumpkin treats year round, you could swap the sprinkles for different colors depending on the season.

Graham Cracker Cookies with Toasted Pumpkin Marshmallow Filling
4.0 from 1 reviews
Graham Cracker Cookies with Toasted Pumpkin Marshmallow Filling
 
Chewy Graham Cracker flavored cookies filled with a toasted pumpkin marshmallow buttercream are the best cookie for fall! Dip them in chocolate and decorate with colored sprinkles for a festive treat.
Author:
Recipe type: Dessert
Makes: 14 cookie sandwiches
Ingredients
Chewy Graham Cracker Cookies
  • 4 ¼ ounces (1 cup) honey graham cracker crumbs (about 8 sheets)
  • 5⅝ ounces (~1¼ cup) all-purpose flour
  • ½ teaspoon baking soda
  • ½ teaspoon salt
  • 6 ounces (3/4 cup / 1½ sticks) unsalted butter, softened at room temperature
  • 3 ¾ ounces (1/2) cup granulated sugar
  • 4⅛ ounces (1/2 cup) packed light brown sugar
  • 1 egg at room temperature
  • 1 teaspoon vanilla extract
Toasted Pumpkin Marshmallow Filling
  • 1 ½ cups pumpkin marshmallows (25 marshmallows)
  • ½ cup powdered sugar
  • ½ cup butter (1 stick)
  • ¾ cup marshmallow fluff
  • ½ teaspoon vanilla
  • ½ teaspoon pumpkin pie seasoning
Optional Decorations
  • 12 ounces milk chocolate, roughly chopped
  • ⅔ cup sprinkles
Instructions
Chewy Graham Cracker Cookies
  1. Pre-heat oven to 350
  2. Whisk graham cracker crumbs, flour, baking soda and salt in a medium bowl and set aside
  3. In the large bowl of an electric mixer, beat butter and sugars on high speed until light and fluffy
  4. Beat in egg and vanilla
  5. Reduce mixer speed to low and slowly add dry ingredients but do not overmix; use a spatula to make sure all cookie batter is combined
  6. Use a small cookie dough scoop or tablespoon to make cookie dough balls on a baking sheet lined with parchment paper (about 1½ tablespoons each)
  7. Bake cookies for 9-11 minutes and remove from oven
  8. Allow cookies to cool on a cooling rack before serving
Toasted Pumpkin Marshmallow Filling
  1. Pre-heat oven to broil; line a cookie sheet with parchment paper and spray with nonstick cooking spray
  2. Put marshmallows on prepared cookie sheet and place on lower rack of oven for thirty to ninety seconds until nicely browned on top; remove pan and use tongs to flip marshmallows over onto other sides
  3. Broil marshmallows again for thirty to ninety seconds or until nicely browned on other side; remove from oven and set aside
  4. In the large bowl of an electric mixer with paddle attachment, beat butter and sugar on low speed just until combined; add marshmallow fluff, vanilla and pumpkin pie seasoning and mix on medium high speed until light and creamy (about three minutes); scrape sides of the bowl with spatula
  5. Add toasted marshmallows, mix on medium speed two minutes (there will still be bits of crunch marshmallow but they should be mostly combined)
  6. Spread or pipe frosting onto bottom of half of the cookies, about one tablespoon each; lightly press remaining cookies down onto frosting to create sandwiches
Optional decorations
  1. Once cookies have been cooled and frosted, place chocolate in a microwave-safe bowl
  2. Line a baking sheet with wax paper or parchment paper and set aside
  3. Melt chocolate in the microwave on high heat for thirty seconds; stir well and microwave again for thirty-second increments stirring in-between until melted
  4. Dip cookie sandwiches halfway into melted chocolate, place on  and immediately cover with sprinkles
  5. Place baking sheet in fridge for one hour or until chocolate has hardened
  6. Place cookie sandwiches in a ziplock bag or sealed container and store at room temperature in a cool place up to five days
Notes
Cookie adapted from these s’mores cookies and buttercream adapted from Sweetapolita

 
Graham Cracker Cookies with Toasted Pumpkin Marshmallow Filling
Please make them.  Just don’t drop them on the floor like I did.

Make something from the blog? Be sure to share it on Instagram with the tag #KeepItSweetDesserts.

This post contains affiliate links.

You might also like:

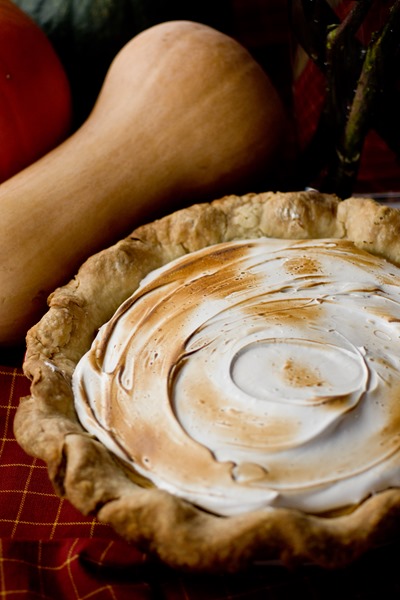
Butternut Squash Pie with Brown Sugar Marshmallow Topping

Roasted Butternut Squash Pie with Brown Sugar Marshmallow Topping

Graham Cracker Cookies with Roasted Pumpkin Marshmallow Filling 17
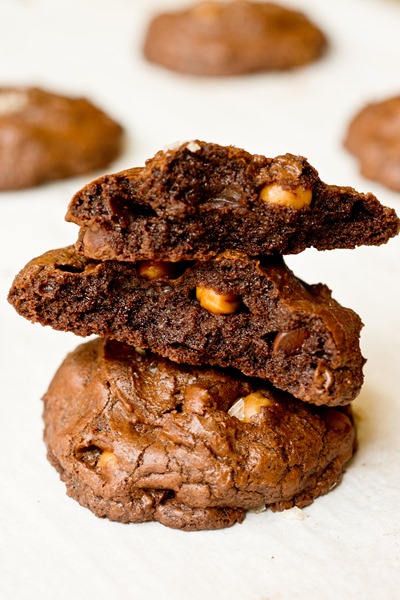
Key Lime Crispy Bars with Toasted Marshmallow Cream {Gluten Free} (Guest Post)

A refreshing no-bake gluten-free marshmallow treat that is easy to make and perfect for a summer sweet tooth!  Topped off with a toasted marshmallow cream, these aren’t your typical marshmallow treats!

Key Lime Krispie Bars 2

Well, we are off to Hawaii tomorrow for our vacation.  I couldn’t be more excited!  This is the longest vacation I’ve taken since starting Keep It Sweet Desserts, and that is giving me a little anxiety.  However, my plan is to zone out as much of the real-life stress as possible and just soak up the Hawaii sunshine and relax for 8 days.  In all of the pre-vacation craze, my awesome sister offered to take a little work off my hands and guest blog for me today!  The soon-to-be Harvard student made a twist on one of her favorite no-bake treats that I think you will enjoy!  Thanks, Jess!!!

Key Lime Krispie Bars 1

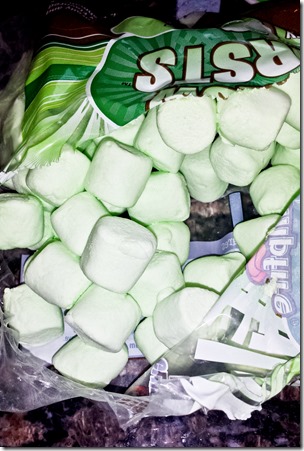
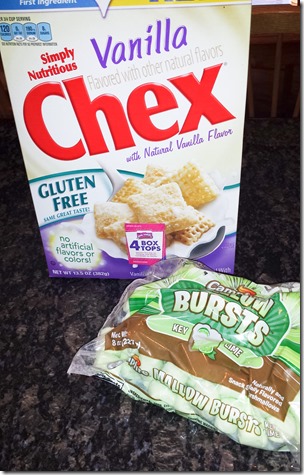
I’m not a big dessert person. Chocolate-y things don’t really do it for me, and I don’t ever “crave” sugar. Having said that, though, there are a couple of sweets that I LOVE. 1) Anything to do with marshmallows and 2) Anything to do with Key Lime. Since I am gluten free, S’MORES are a no-go and key lime pie just isn’t the same when you take away the crust. So when I found these key lime marshmallows in my local Walmart, and the new gluten free Vanilla Chex Cereal, I knew what I had to do. I had to make key lime rice crispy treats. And so I did.

Key Lime Krispie Bars 3

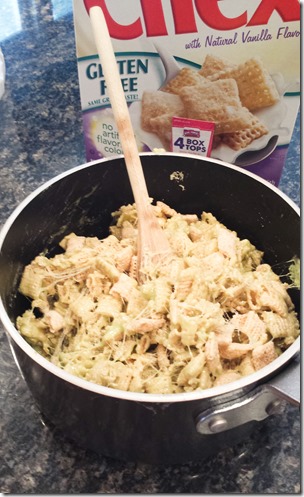
Like all rice crispy treat recipes, this is super simple, and all I did was substitute Rice Krispies cereal for Vanilla Chex.

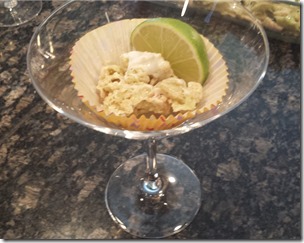
I wasn’t happy with the slime-green color of my crispy bars, so I decided to make a marshmallow cream to drizzle over it. Enter: toasted marshmallow cream.

The best part about these is that there is no waiting involved. Enjoy and happy eating.


Key Lime Crispy Bars with Toasted Marshmallow Cream {Gluten Free}

Serves 24

Ingredients:

4 Tablespoons of butter (or margarine), divided
2 cups plain marshmallows
2 cups key lime marshmallows
6 cups gluten-free Vanilla Chex Cereal
1 ½ cups Marshmallow Fluff

Directions:

Spray a 13 x 9 pan with baking spray and set aside
Melt 3  tablespoons of butter in large saucepan over low heat; add Marshmallows and stir until completely melted; remove from heat
Add Chex and stir until coated
Press cereal and marshmallow mixture into prepared baking pan
In the same saucepan, melt 1 tablespoon butter with Marshmallow Fluff; stir until thin and creamy
Pour Fluff mixture over cereal
Cut and serve
20130803_123424

Don’t forget to enter the fun Keep it Sweet Desserts giveaway!


Chewy No-Bake “Thin Mint” Bars

Chewy No-Bake “Thin Mint” Bars

Sometimes I have a million recipe ideas going through my head at a time and can’t get into the kitchen fast enough.

And sometimes I have baker’s block.

Chewy No-Bake “Thin Mint” Bars

Every cookie or brownie variation will feel overdone and the creative section of my brain goes into freeze mode.

Sometimes I really get stuck and just need a day or two out of the kitchen, and sometimes all I need is a visit down unused ingredients lane.

Chewy No-Bake “Thin Mint” Bars

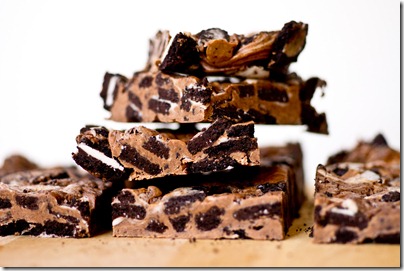
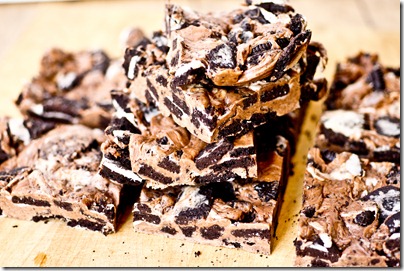
Half a bag of marshmallows that are living on the edge of stale? Check.  An open package of Oreos that I need to bake with before Matt eats the last sleeve? Got that.   A half-used package of chocolate mint candies that was hidden in the back of the drawer for months? Don’t mind if I do.  Oh yeah, and butter.  I always have butter.

Chewy No-Bake “Thin Mint” Bars

I’m so glad I took advantage of what I had on hand because these bars came together quickly, with minimal dish washing and no oven time.  Sometimes the best baking is no baking at all!  Especially when the end result tastes like a Thin Mint.

Take that Girl Scouts.

Head over to Fox to get the recipe for my Chewy No-Bake “Thin Mint” Bars!

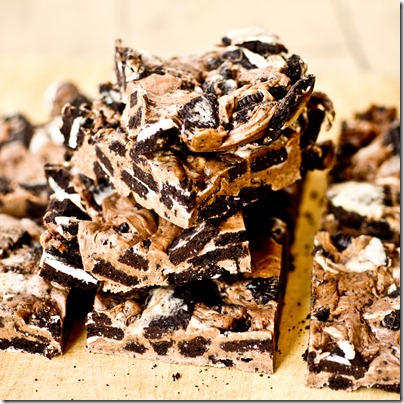
Kitchen Sink Cookies and Bars

Kitchen Sink Cookies 15

What a weekend.  Matt and I went to Philadelphia to celebrate the wedding of one of my best friends since 4th grade.  She was a gorgeous bride and I was so happy to be a bridesmaid and such a big part of the celebration.  Not going to lie, though, one of the highlights of the weekend may have been the wedding cake.  After a week of limiting my carbs to make sure the dress would fit, I was extra excited for dessert.  Matt and I shared so that we could try both options: vanilla bean cake with caramel buttercream and a chocolate chip pound cake with cookies ‘n cream filling topped with cream cheese icing.  They deserve a lot of credit for such an amazing cake selection.  Not to mention the fact that it was a stunning 6-tier wedding cake!
On the downside, after a bad cold all last week, a Friday night without sleep (long story) and full Saturday of wedding activities, I woke up feeling really lousy on Sunday and lost my voice.  Not being able to talk is extremely frustrating!  However, struggling to communicate with people for 24 hours reminded me how lucky I am to have all of my senses on a regular basis.  It is amazing how all the little things are so easy to take for granted!

Kitchen Sink Cookies 11

Now, as for these cookies (and bars), this is my latest post for The Secret Recipe Club.  This month I got to choose a recipe from Life’s Simple Measures.  The Kitchen Sink Cookies were actually perfect since you can put almost anything in them you want.  Given that we are moving and trying to use up food we have on hand, it was a great way to deplete a few of my baking ingredients.  [Sidenote:  It is a good thing we aren’t moving far because I still have an entire kitchen of baking ingredients to use.  I also told myself no more baking before we move next Tuesday but I already have my eye on the brown bananas just dying to get used for something delicious.  Any suggestions? ]

Jess’s blog has a lot of other great baked good recipes that I considered including these Cinnamon Bun Scones, Double-Apple Mini Bundt Cakes and Candied Bacon Chocolate Chip Cookies.  Be sure to check out her blog!

[print_this]

Kitchen Sink Cookies

Yield: 5 dozen cookies or 24 bars

Ingredients

  • 1 1/2 cups rolled oats
  • 1 3/4 cups Rice Krispies
  • 1 1/2 cups mini marshmallows
  • 3/4 cup milk chocolate chips
  • 1/2 cup semi-sweet chocolate chunks
  • 1/2 cup semi-sweet chocolate chips
  • 2 cups all-purpose flour
  • 1 teaspoon baking powder
  • 1/2 teaspoon baking soda
  • 1 teaspoon salt
  • 2 sticks (1 cup) unsalted butter, softened
  • 1 1/4 cup light brown sugar, packed
  • 1/2 cup granulated sugar
  • 2 large eggs
  • 1/2 tablespoon vanilla extract

Cooking Directions

  1. In a medium bowl, combine cereals, marshmallows and chocolate; set aside
  2. In another bowl, whisk together flour, baking powder, baking soda and salt; set aside
  3. In a large bowl, use an electric mixer to beat the butter and sugars on high speed until light and fluffy
  4. On medium speed, mix in eggs and vanilla
  5. Stir in flour mixture until well-combined
  6. Stir in cereal/marshmallow/chocolate mixture
  7. Refrigerate cookie dough for two hours or until chilled
  8. When ready to bake, pre-heat oven to 350 degrees
  9. If making cookies, line baking sheets with parchment paper and use a cookie dough scoop or tablespoon (1 1/2 tablespoons each) to place cookie dough balls on sheets 2 inches apart
  10. Bake cookies 10-12 minutes or until golden brown
  11. Transfer parchment paper to a wire rack with cookies still intact and allow to cool completely before serving (well, unless you like a gooey, delicious mess)
  12. If making bars, line a 13×9 pan with parchment paper and press cookie dough into pan
  13. Bake for ~40 minutes or until golden brown and knife comes out clean from the center
  14. Allow pan to cool on a wire rack

Adapted from Life’s Simple Measures [/print_this]

Kitchen Sink Cookies 9

What was the highlight of your weekend?


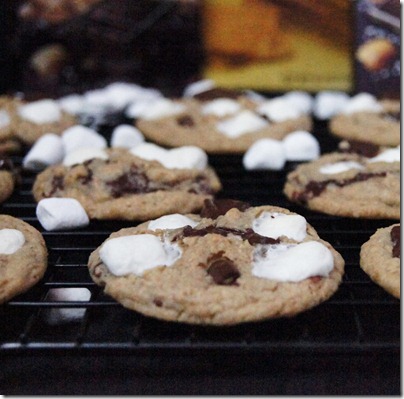
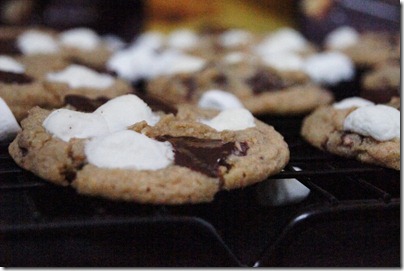
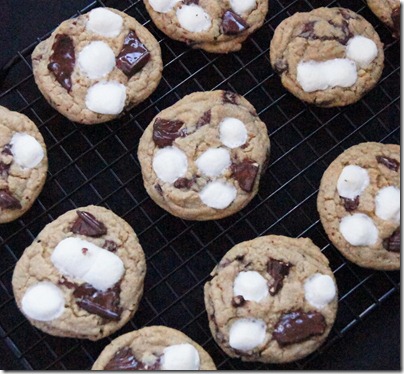
Grown Up S’mores Cookies

Grown Up Smores Cookies 9

I blame these cookies on Matt.

Grown Up Smores Cookies 19

And really, you should too.  So if when you make them, and if when you eat a couple12, it’s his fault, not mine.

Grown Up Smores Cookies 27

Sorry, Matt, I still love you.

Grown Up Smores Cookies 17

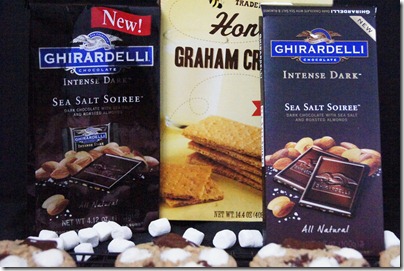
You see, I got this wonderful assortment of chocolate in the mail from GHIRARDELLI and didn’t know what to do with it.  But then Matt suggested s’mores and I remembered this recipe from Tracey’s blog.  She said they were the best s’mores cookies of every recipe she had tried.  And if you read her blog, you know to trust her.  Just look at this post, the girl knows what she’s doing!

Grown Up Smores Cookies 23

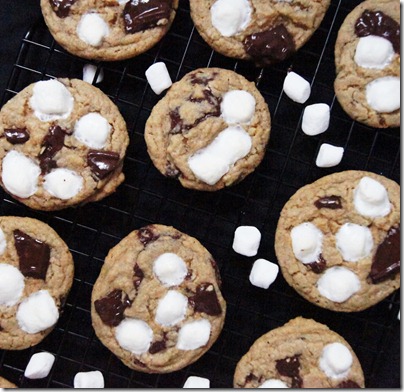
So I decided to kick the cookies up a notch with the Intense Dark Sea Salt Soiree chocolate in place of your typical milk chocolate.  The hint of bitterness from the higher cocoa percentage and salty bite makes the cookies a little more mature in flavor.  The crunch from the almonds then adds a nice texture balance to the chewy cookie.

Go try it for yourself, and when you lose count of how many cookies you’ve inhaled, just remember that it’s not my fault.

[print_this]

Grown-up S’mores Cookies

Makes ~3 dozen cookies

Ingredients:

1 cup honey graham cracker crumbs (about 8 sheets)

1 1/4 cup all-purpose flour
1/2 teaspoon baking soda
1/2 teaspoon salt
3/4 cup (1 1/2 sticks) unsalted butter, softened at room temperature

1/2 cup granulated sugar
1/2 cup packed light brown sugar
1 large egg at room temperature
1 teaspoon vanilla extract
7 ounces separated GHIRARDELLI Intense Dark Sea Salt Soiree chocolate, chopped
1 cup mini marshmallows
Directions:
Pre-heat oven to 350
Whisk graham cracker crumbs, flour, baking soda and salt in a medium bowl and set aside
In the large bowl of an electric mixer, beat butter and sugars on high speed until light and fluffy
Beat in egg and vanilla
Stir in half of chocolate (about 3 1/2 ounces)
Use a cookie dough scoop or tablespoon to make cookie dough balls on a baking sheet lined with parchment paper (about 1 1/2 tablespoons each)
Bake cookies for 9 minutes and remove from oven
Quickly press a couple of pieces of chocolate and 3-4 marshmallows into each cookie
Return cookies to oven immediately and bake for 2-3 minutes or until cookies are browned around the edges; allow cookies to cool on a cooling rack before serving

Source: Tracey’s Culinary Adventures, adapted from Cookie Madness[/print_this]

Grown Up Smores Cookies 3

Disclaimer: I received free samples of GHIRARDELLI chocolate in the mail through the Foodbuzz Tastemaker program.  All of the opinions expressed in this post are my own.

What are you blaming on someone else right now?

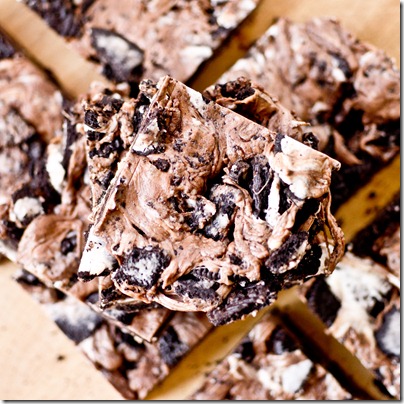
Pumpkin S’more Muffins

Pumpkin S'more Muffins 4

So the Northeast kind of got slapped in the face by the end of summer.  We were welcomed back to work on the day after Labor Day with grey skies and non-stop rain.  Well hello, real life!

Despite the unofficial end of a quick but wonderful summer, today actually wasn’t too bad.  Starting work on a Tuesday instead of Monday is always a plus and next week will be the same!  Matt and I have a weekend trip planned for just the two of us.  I like to think of it as a little belated anniversary celebration, but it also overlaps with his birthday on Monday!  It should be a fun few days.

The second thing that kept today’s mood up is that the next few weeks are going to continue to be crazy but also really great.  After this weekend, I can still look forward to the WifeStyle Conference, my 5-year reunion in Atlanta  with my best friends (!!!), the excuse to eat copious amounts of food High Holidays and  an exciting opportunity that (hopefully) has come my way.  Cross your fingers for me.

Pumpkin S'more Muffins 15

And finally, what made today even better was the smell of some amazing fall baked goods in my apartment.  Yesterday when we got home, Matt and I both spent some time in the kitchen.  He made a huge pot of turkey chili (so perfect for this dreary weather) and I had a mini baking marathon.  I know I’ve said this before, but spending time in the kitchen is the best therapy.  Over the last couple of months, I’ve been a little busier than usual and haven’t had much time to bake.  Just a few hours of quality time with my mixer reminded me of that sense of joy I get when I make something that I know will put a smile on someone’s face.

One of my favorite things about fall is pumpkin.  To be honest, I eat pumpkin all year long, but it isn’t until the fall that most people are ready to celebrate the flavor with me.  Since I love pumpkin muffins and the entire world is obsessed with s’mores, I figured I should combine the two into Pumpkin S’more Muffins.

Pumpkin S'more Muffins 11

This recipe is so easy thanks to the help of a cake mix, but if you want to make your muffin batter from scratch and have a couple of extra minutes, this is my favorite recipe.

[print_this]

Pumpkin S’more Muffins

Yield: Makes 2 dozen muffins

Ingredients

  • 5 or 6 graham cracker sheets
  • 1 15.25 ounce box yellow cake mix
  • 1 small can (15 ounces) pumpkin, not pumpkin pie filling
  • 1/2 cup water
  • 1/3 cup (~3) egg whites
  • 1/2 tablespoon pumpkin pie spice
  • 3/4 cup mini semi-sweet chocolate chips
  • 2 cups mini marshmallows

Cooking Directions

  1. Pre-heat oven to 350 degrees and prepare 2 muffin tins by greasing or spraying with cooking spray
  2. Break graham cracker sheets into pieces and fit them into muffin tins to act as a crust; set aside remaining graham crackers and crumbs for topping
  3. Combine cake mix, pumpkin, water, egg whites and pumpkin pie spice with an electric mixer on low speed just until combined
  4. Stir in chocolate chips
  5. When batter is ready, fill each prepared cup with about 1/2 cup of batter
  6. Bake for 12-14 minutes, or until toothpick comes out clean
  7. Remove muffins from oven and press 4-5 marshmallows into top center of each and sprinkle with graham cracker crumbs
  8. Place back in oven for 1-2 or until marshmallows have puffed
  9. Remove from oven and allow to cool before removing muffins from pans

[/print_this]

Adapted from these brownies

Pumpkin S'more Muffins 13

What made today a good day for you?

Individual S’mores Brownies

Individual Smores Brownies 7

You may or may not be on s’mores overload.  For some reason, as many recipes as I’ve seen that put s’mores in some form of cookie/brownie/rice krispie treat, etc. it just doesn’t get old.

Individual Smores Brownies 22

So of course when I was putting together some baked good packages for a friend I had to include something s’mores.  I wanted it to be something that would travel in the mail without losing its form or taste in a couple of days.  These Individual S’mores Brownies seemed up for the challenge.

Individual Smores Brownies 10

I used a simple crust of graham cracker, my favorite brownie recipe, and topped them off with marshmallows and graham cracker crumbs.  They are easy to make but cute and delicious to eat.  The graham crackers add a nice texture to each bite and of course the gooey marshmallow tops it off nicely.

Individual Smores Brownies 1

Take these to your next barbecue!

Individual Smores Brownies 14

[print_this]

Individual S’mores Brownies

Yield: Makes 2 dozen brownies

Ingredients

  • 5 or 6 graham cracker sheets
  • 4 ounces unsweetened chocolate
  • 3/4 cup unsalted butter (1 1/2 sticks)
  • 2 cups sugar
  • 3 large eggs
  • 1 teaspoon vanilla extract
  • 1 cup all purpose flour
  • 2 cups mini marshmallows

Cooking Directions

  1. Pre-heat oven to 350 degrees and prepare 2 muffin tins by greasing or spraying with cooking spray
  2. Break graham cracker sheets into pieces and fit them into muffin tins to act as a crust; set aside remaining graham crackers and crumbs for topping
  3. Melt butter and chocolate in large sauce pan over low to medium heat
  4. You can also melt chocolate and butter in the microwave (I recommend heating for 30 seconds at a time and stirring to prevent burning the chocolate)
  5. Whisk in sugar
  6. Whisk in eggs and vanilla
  7. Whisk in flour until smooth
  8. When batter is smooth, spoon about 3 tablespoons of batter into each prepared cup
  9. Bake for 15-18 minutes, or until tops are puffed up slightly and toothpick comes out clean
  10. Remove brownies from oven and press 4-5 marshmallows into top center of brownies and sprinkle with graham cracker crumbs
  11. Place back in oven for 1-2 or until marshmallows have puffed
  12. Remove from oven and allow to cool before removing brownies from pans

[/print_this]

Inspired by Young Married Chic and Hot Blondies.  Brownie recipe from Bakers.

Individual Smores Brownies 29

What is your favorite way to enjoy s’mores?

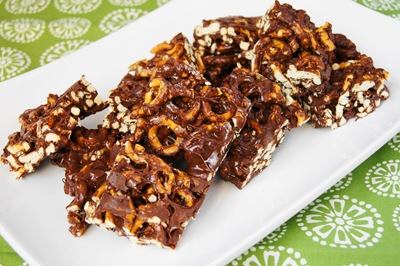
Chewy Chocolate Covered Pretzel Bars

chewy chocolate covered pretzel bars 16

This has been one of those weeks so far:

  • Our bedroom A/C has been broken since last Monday but won’t be fixed until next Monday, never mind the 100 degree weather
  • I thought I figured out the source of my daily stomach pains but was proved wrong, the mystery continues
  • As a result of the two items listed above, I’ve barely been sleeping and my stress-relieving gym trips are suffering/barely happening

Okay, is my whining enough already?

chewy chocolate covered pretzel bars 5

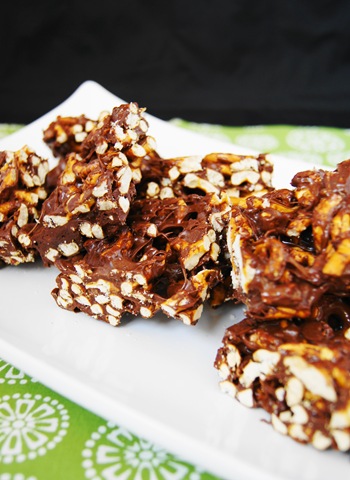
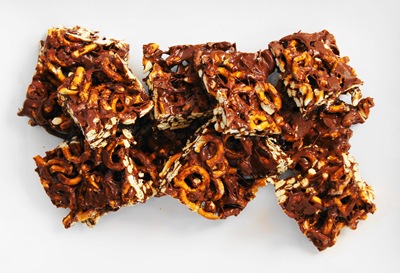
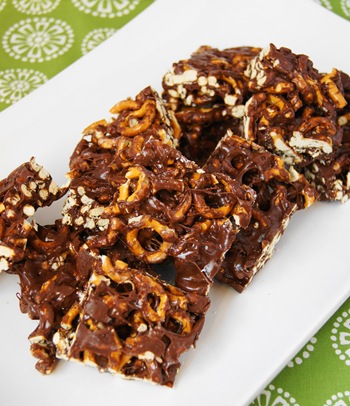
On the other hand, I found a delicious and easy no-bake (ie no hot oven) treat to make!  These Chewy Chocolate Covered Pretzel Bars are kind of perfect for drowning my summer sorrows.  They are chewy and crunchy at the same time with more of that salty and sweet combo that we all seem to know and love.  The bars are actually quite addicting if you ask me!

chewy chocolate covered pretzel bars 10

[print_this]

Chewy Chocolate Covered Pretzel Bars

Yield: Serves 24

Ingredients

  • 3 tablespoons unsalted butter
  • 1 10.5-ounce bag mini marshmallows
  • 1 1/4 cup dark chocolate chips or chunks
  • 6 cups salted pretzel pieces

Cooking Directions

  1. Melting butter over low-medium heat in a large pot
  2. Add the marshmallows and stir until they are completely melted
  3. Remove pot from heat, and stir in chocolate
  4. Add pretzels to the mixture and stir
  5. Once everything is combined, press the ingredients into a 13X9 pan lined with foil and allow to cool
  6. Once cool, remove bars from the pan; the easiest way to do this is to flip the pan upside down and peel off the foil
  7. Cut the bars in to large pieces (I made slices in a 6X4 matrix) and serve or store in an air-tight container for up to 3 days

[/print_this]

chewy chocolate covered pretzel bars 19

What are you whining about this week? Vent in the comments!

Peanut Butter Chocolate Chip Cookie Dough Mini S’mores Pies

This will be the first in a series of guest posts throughout the summer.  I have some great bloggers joining us to share some of their favorite desserts!  I’m excited to start with Erin from The Spiffy Cookie.  She has a wonderful blog with creative and delicious recipes and this one is amazing!  Some of my favorite sweets that she posted include these Blueberry Blondie Cheesecake Bars, Peanut Butter Cup S’mores Ice Cream, and this Cookies and Cream Peanut Butter Pie.  I want all of it!  She has some great savory dishes too, but you know me and desserts:-)

Why hello there! My name is Erin and I’m guest posting here today from The Spiffy Cookie. I had the pleasure of Lauren guest posting on my blog last month with her Cream Cheese & Jelly Pound Cake, and am just as excited to now guest post on Keep It Sweet. Especially since I have some killer mini s’mores pies to share.

The blogosphere is overflowing with all kinds of s’mores recipes this summer and I cannot get enough of it. But I wanted to enhance this traditional treat by either incorporating chocolate chip cookie dough, or peanut butter cupsinstead of plain old (boring) chocolate. Like Lauren, I am a huge peanut butter fan but cookie dough in a s’more is something I don’t think I have seen yet. But again, peanut butter is so good! Dilemma.

I’ve never been good at big decisions, and yes dessert is exactly that, so I put up a poll-tweet to help the decision process. Most followers said “both”, so what the heck, I decided to do both in combination! What could possibly go wrong? Oh no it’s too much I cannot bear it… not possible. Prepare yourself for deliciousness.

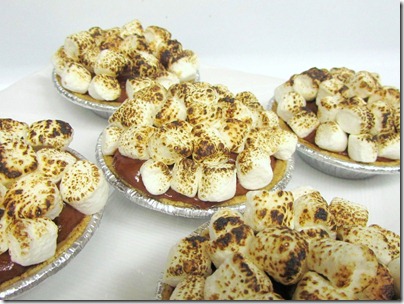
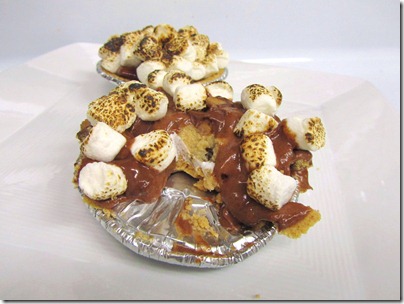
A chewy and soft nugget of cookie dough is hidden underneath a peanut butter-chocolate mousse mixed with little bits of peanut butter cups and topped by toasted marshmallows. Do you have your spoon ready yet? Because you’re going to need it.

[print_this]

Peanut Butter Chocolate Chip Cookie Dough Mini S’mores Pies

Yield: Makes 6 mini pies

Ingredients

  • 1 package Keebler “Ready Crust” Mini Graham Cracker Pie Crusts
  • 6 tablespoons marshmallow creme
  • 3 large chocolate chip cookie dough balls*, cut in half
  • 4 oz (1/2 cup) semi-sweet chocolate chips
  • 1 cup heavy cream
  • 3 oz (1/3 heaping cup) peanut butter
  • 2 oz reduced fat cream cheese, room temperature
  • 1/4 cup powdered sugar
  • 1/3 cup chopped miniature peanut butter cups
  • 2 cups mini marshmallows

Cooking Directions

  1. Begin by spreading 1 tablespoon of marshmallow creme in each of the mini crusts. Do this gently so the crusts don’t break. Then place 1 cookie dough half, cut side down, on the creme. Set aside.
  2. Melt chocolate over a double boiler. Set aside. Whip cream to soft peaks. Set aside.
  3. In a stand mixer, fitted with the paddle attachment, cream together the peanut butter, cream cheese and sugar. Slowly add melted chocolate and continue to cream until smooth and softened. Gently fold whipped cream into chocolate – peanut butter mixture by hand, followed by the chopped peanut butter cups.
  4. Evenly spread the mousse into the prepared graham cracker crusts (you will have leftover mousse) and refrigerate pie until ready to serve, or at least a couple of hours.
  5. Before serving, top the pies with a handful of mini marshmallows, about 1/3 cup each.
  6. Place them on a baking sheet and put under the preheated broiler for 30 seconds (watch closely because they will burn fast), or toast marshmallows with a kitchen torch.

[/print_this]

*chocolate chip cookie dough balls

Source: Adapted from Confessions of a Cookbook Queen and Serious Eats.

If you want more s’mores inspiration, check out my peanut butter s’mores ice cream.

clip_image002

Double Chocolate Mint Krispie Treats

Double Chocolate Mint Crispy Treats 9

First of all, a huge thank you for all of your inspiring comments on Sunday’s post!  I was actually a little nervous to hit publish but I’m so glad I did.  I love this community:-)

Now, let’s get back to the desserts!  For the shower, I made some of my old favorites and a couple of new recipes.  Additionally, I made cookie brownie layer bars, a strawberry birthday cake (recipe to come!) and these Double Chocolate Minty Treats.

Double Chocolate Mint Crispy Treats 3

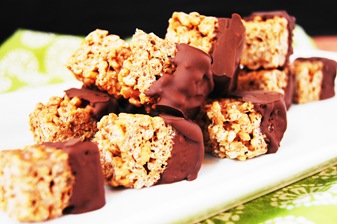
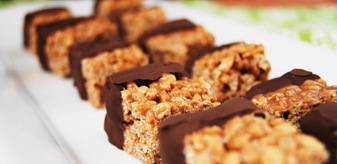
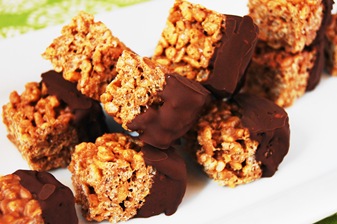
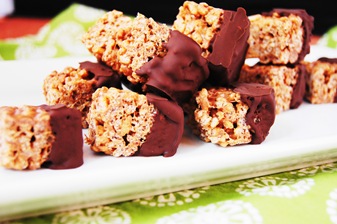
Coming up with the menu for an event like this is so much fun.  Just like with my Thanksgiving dinner party, I wanted to have a variety of delicious and fun pick-up desserts.  After accounting for chocolate, caramel, peanut butter and sweet and salty, I knew I needed to fill the hole for Sara’s love of chocolate with mint.  Madison’s rice krispie treat pops immediately caught my eye, but I knew I didn’t have time to make individual pops for a big crowd.  Instead, I made the rice krispie treats in their regular form and dipped them in chocolate to keep them special, fun and delicious.  It turns out these were the favorite for quite a few people so I think the recipe was definitely a success!

Double Chocolate Mint Crispy Treats 10

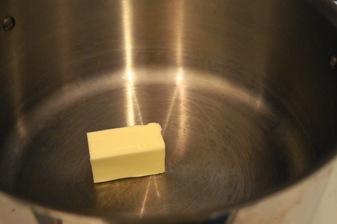
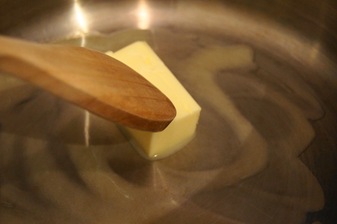
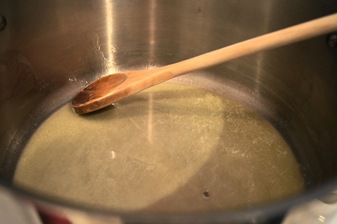
Start by melting butter in a large pot

Butter in pot 1 Butter in pot 2 Butter in pot 3

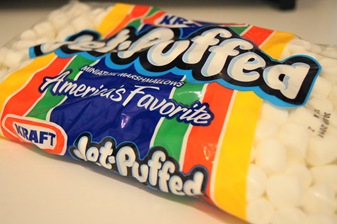
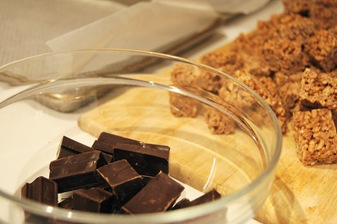
Add the marshmallows and stir until they are completely meltedmarshmallows melting marshmallows 2 melting marshmallows 3melting marshmallows 5

Remove pot from heat, and stir in Andes

adding andes 1adding andes 3 adding andes 4

Add rice krispies to the mixture and stir

adding rice crispieseverything mixed

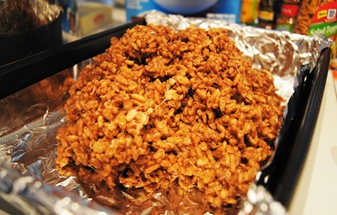
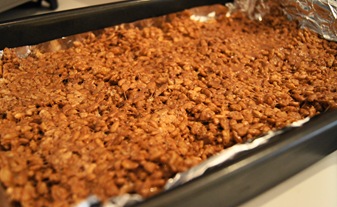
Once everything is combined, press the ingredients into a 13X9 pan lined with foil and allow to cool

put in pan 1 in pan

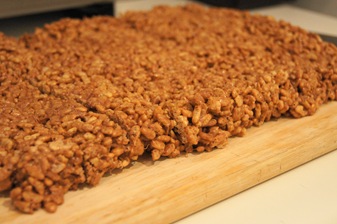
Once cool, remove the rice krispie treats from the pan; the easiest way to do this is to flip the pan upside down and peel off the foil

on cutting board 1

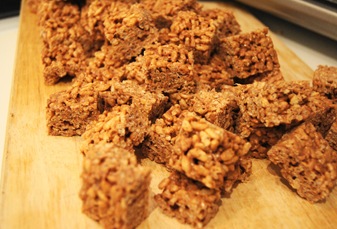
Cut the treats in to small cubes (I made slices in a 9X7 matrix)

on cutting board 4

Now set up a space to dip your treats in chocolate; I suggest lining 2 jelly roll pans with wax paper for the chocolate to harden

chocolate 2

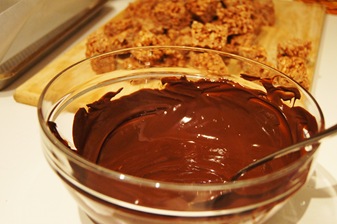
Melt chocolate in a microwave-safe bowl in 30 second increments, stirring in-between each until chocolate is smooth

chocolate 3

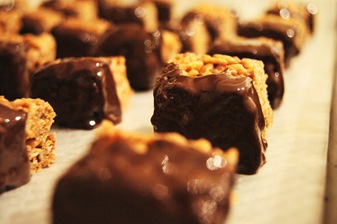
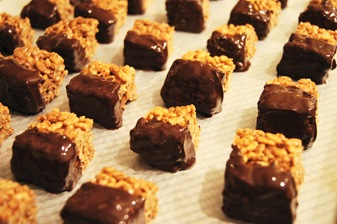
One at a time, dip rice krispie treats in the chocolate to cover half of each bar

dipped in chocolate 1 dipped in chocolate 2

Allow to cool for 1-2 hours[print_this]

Double Chocolate Mint Krispie Treats 

Adapted from Espresso and Cream


Makes ~60 rice krispie bites

Ingredients:

  • ½ stick (1/4 cup) unsalted butter
  • 1 10.5-ounce bag mini marshmallows
  • 1 heaping cup Andes (or mint chocolate candy of choice)
  • 7 cups rice krispies
  • 12 ounces semi-sweet chocolate for melting

Directions:

  • Melting butter over low-medium heat in a large pot
  • Add the marshmallows and stir until they are completely melted
  • Remove pot from heat, and stir in Andes
  • Add rice krispies to the mixture and stir
  • Once everything is combined, press the ingredients into a 13X9 pan lined with foil and allow to cool
  • Once cool, remove the rice krispie treats from the pan; the easiest way to do this is to flip the pan upside down and peel off the foil
  • Cut the treats in to small cubes (I made slices in a 9X7 matrix)
  • Now set up a space to dip your treats in chocolate; I suggest lining 2 jelly roll pans with wax paper for the chocolate to harden
  • Melt chocolate in a microwave-safe bowl in 30 second increments, stirring in-between each until chocolate is smooth
  • One at a time, dip rice krispie treats in the chocolate to cover half of each bar
  • Allow to cool for 1-2 hours

[/print_this]

Double Chocolate Mint Crispy Treats 6

Have you taken any big risks in your career? Are there risks you wish you had taken?

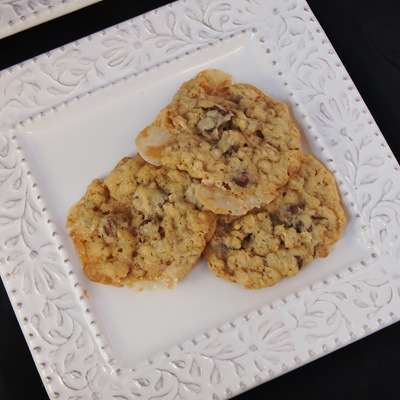
Oreo Mallow Clusters

Oreo Mallow Clusters

Happy Mother’s Day to all of my mom and soon-to-be mom friends! I hope that all of you had a great weekend.  I spent a lot of time in the kitchen but also a lot of time outside.  The sunny and  warm weather makes me so happy.  Yesterday I got to take a long walk along the water with a good friend.  We caught up on life and it was wonderful.  Today we celebrated Mother’s Day by grilling and eating outside with family.  The fresh air is like free therapy.
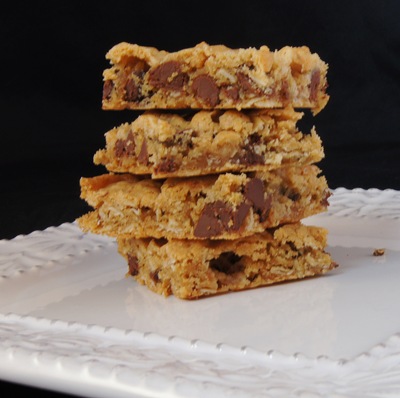
Oreo Mallow Clusters

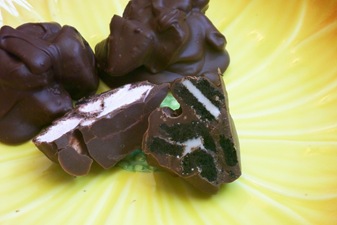
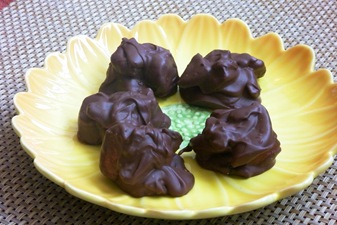
After the last chocolate cluster recipe I made, I knew I wanted to make another version.  They are so easy to whip up and so delicious.  Who doesn’t love homemade candy filled with delicious mix-ins?  So in the midst of a baking marathon, I made some Oreo Mallow Clusters in a matter of minutes.  They are milk chocolate clusters filled with Oreos and marshmallows (or in my case Peeps).  And you know what? Huge success.  It figures that this 10-minute recipe turned out so much better than an overly complicated dessert I also made.
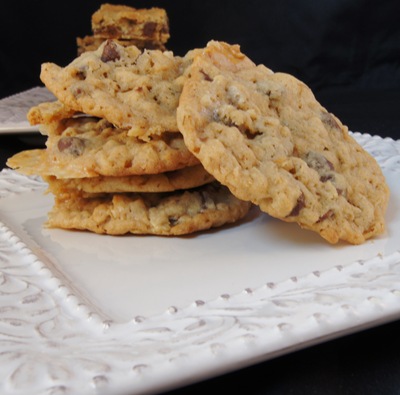
Oreo Mallow Clusters

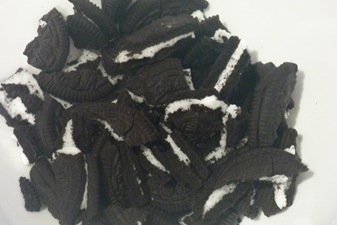
To make these, you will need some broken up Oreos

oreos

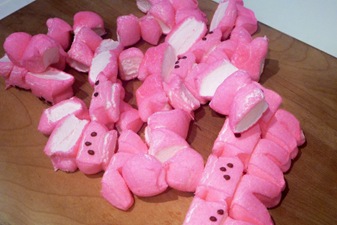
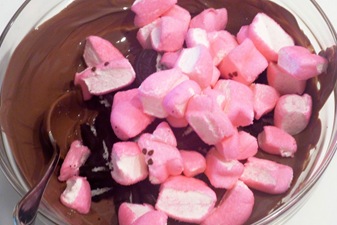
And chopped up Peeps (sorry bunnies)

peeps 2

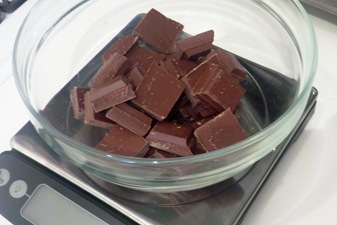
And of course milk chocolate

milk chocolate 1

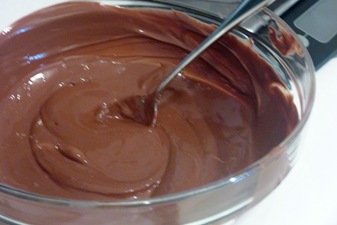
Just melt your chocolate

milk chocolate 2

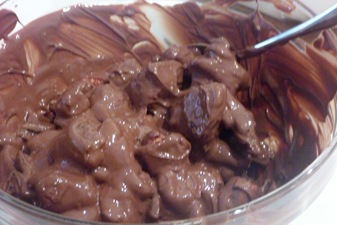
Stir in the mix-ins

all ingredientsall ingredients 2

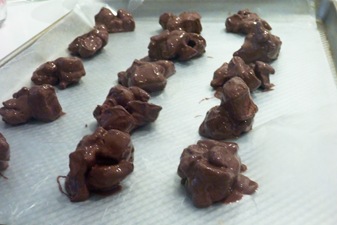
And drop clusters onto wax paper

clusters 1

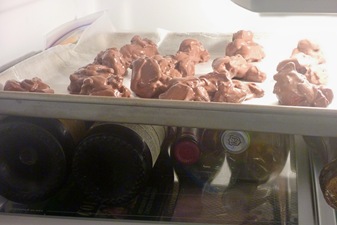
Chill in the refrigerator

Recipe for Oreo Mallow Clusters

[print_this]

Oreo Mallow Clusters

Ingredients (Makes 15 clusters)

  • 12 ounces high-quality milk chocolate
  • 1 1/3 cups Oreo chunks (~8 Oreos)
  • 2 cups chopped Peeps (~8 Peeps) or marshmallows

Instructions

  • Gently melt the chocolate in 30 second increments in a microwave-safe bowl, stirring in-between
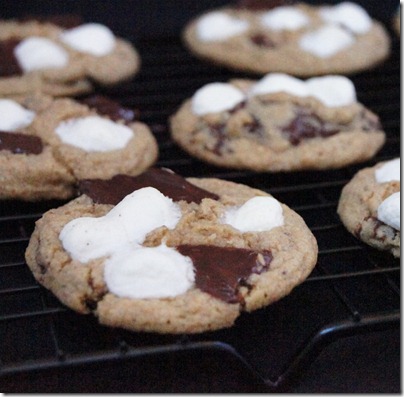
  • Once chocolate is completely melted, add Oreos and Peeps and stir until completely coated
  • Use a tablespoon to drop large clusters of the mix on a baking sheet lined with wax paper
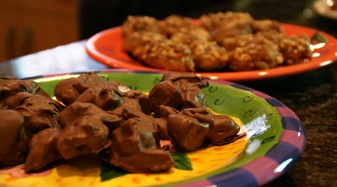
  • Chill chocolates in the refrigerator for 30 minutes or until candy is completely firm
  • Store chocolates in a cool place for up to 7 days

[/print_this]

Recipe for Oreo Mallow Clusters

P.S. The above picture was taken with my Dad’s DSLR, what an amazing quality difference!  I am FINALLY getting one and hopefully my blog will be prettier very soon.

How was your weekend?  Is the weather getting better where you live?