Tag Archives: winter

Brown Sugar Caramel Pear Crisp

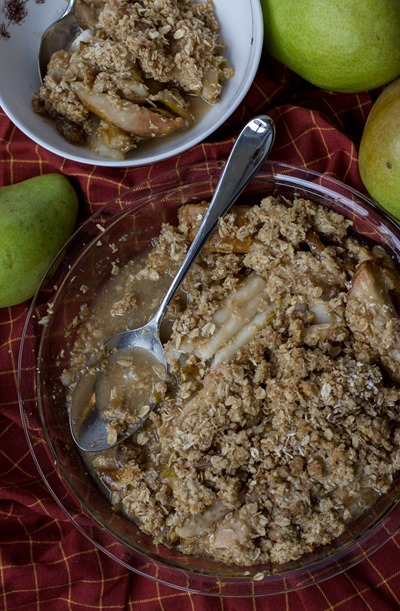
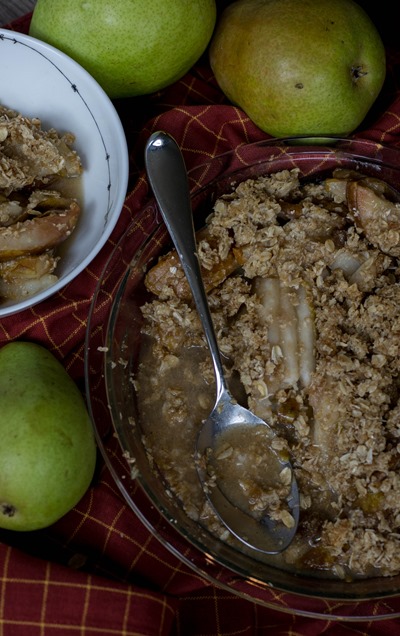
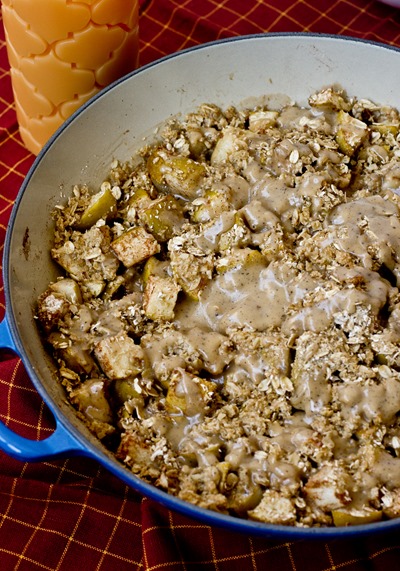
Warm caramel pear crisp topped with a crisp oatmeal topping is perfect the cold late winter days.

Brown Sugar Caramel Pear Crisp <- new go-to winter treat

Every February I get that feeling that Spring isn’t too far away. And while in some parts of the states that is probably true, here in the Northeast we don’t get real spring weather until close to May. So to make it through that long cold stretch, we need warm, comforting dessert.

Brown Sugar Caramel Pear Crisp <- we loved this recipe!

Crisps, crumbles and cobblers never fail to disappoint. Warm sweet fruit topped with a flavorful crumbly topping, often served with ice cream… what’s not to like? Here I took advantage of the plethora of pears we had while they are still in season. They paired so well with a brown sugar caramel. If you want, you can serve the crisp with ice cream and additional caramel sauce (the recipe makes more than enough for the crisp itself). However, this was really good enough to stand on it’s own. The pears almost melt in your mouth and the oatmeal-ful topping is so satisfying.

Brown Sugar Caramel Pear Crisp - SUCH a good recipe!!

Brown Sugar Caramel Pear Crisp
 
Warm caramel pear crisp topped with a crisp oatmeal topping is perfect the cold late winter days.
Author:
Recipe type: Dessert
Makes: Serves 6
Ingredients
Topping:
  • 55g (~1/2 cup) oat flour* (I pulsed my oatmeal in the food processor until it was the consistency of flour)
  • 40g (~1/2 cup) old fashioned oatmeal*
  • 70g (~1/3 cup, tightly packed) light brown sugar
  • ½g (¼ teaspoon) ground cinnamon
  • 55g (1/4 cup) cold unsalted butter, cut into small cubes
Filling:
  • 700g sliced ripe pears (about 4 large)
  • 15g (~2 tablespoons) oat flour* (I pulsed my oatmeal in the food processor until it was the consistency of flour)
  • ⅓ cup brown sugar caramel sauce (recipe below)
Instructions
  1. Pre-heat oven to 350 degrees
  2. In a medium bowl, prepare topping; mix together oat flour, oatmeal and brown sugar
  3. Add butter and use fingers to combine until mixture is slightly lumpy; set aside
  4. Prepare filling; in 9-inch round shallow baking dish (like a pie plate), stir together pears, oat flour and caramel sauce
  5. Distribute topping evenly over top of fruit
  6. Bake for about 20-25 minutes or until filling is bubbling and topping is lightly browned, if you see that topping has started to get to brown early, lightly cover with tin foil for remainder of baking time

Brown Sugar Caramel Sauce
 
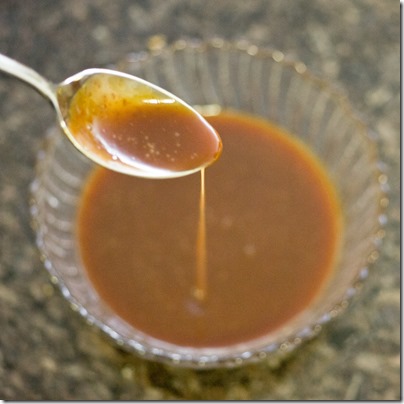
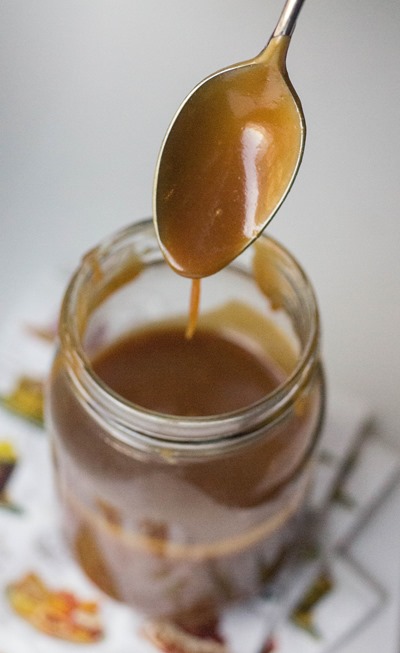
Brown sugar-based caramel sauce adds a special element to the pear crisp!
Author:
Recipe type: Dessert
Makes: 1 cup
Ingredients
  • 234g (1 cup tightly packed) light brown sugar
  • 113g (1/2 cup) unsalted butter, softened at room temperature
  • 118 milliliters (1/2 cup) whole milk
  • 5g (1 teaspoon) salt
Instructions
  1. Place the sugar, butter, and salt in a medium-sized heavy-duty pot over medium heat; stir until the butter and sugar have dissolved
  2. Sir in milk; increase heat to medium-high and continue to cook for four minutes (mixture should come to a boil within one minute); immediately remove from heat and stir; pour into a heat-proof bowl to cool
  3. Store in refrigerator up to one week before using; re-heat gently in microwave to loosen before using
Notes
Adapted from Recipe from The Level Headed Chef

Make something from the blog? Be sure to share it onInstagram with the tag #KeepItSweetDesserts.

You might also like:

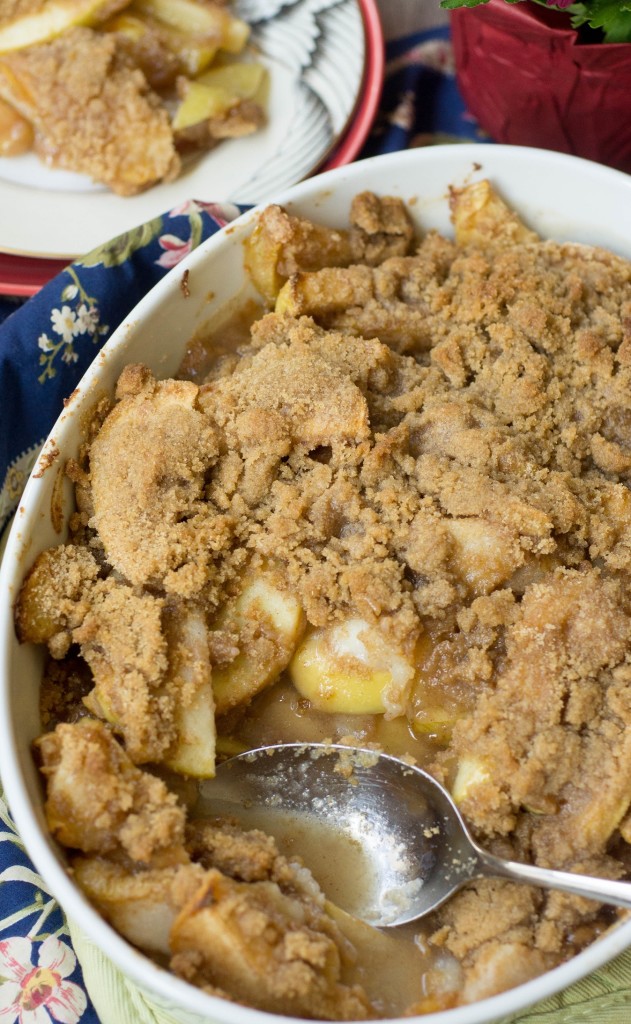
Apple and Pear Crisp

Obsessed with this pear and apple crisp!

Skillet Apple Crisp with Brown Butter Sauce

Skillet Apple Crisp with Brown Butter Sauce

Winter Fruit Crisp

Winter Fruit Crisp

Brown Sugar Chai Spiced Caramel Fondue

A chai spiced caramel sauce perfect for holiday entertaining.

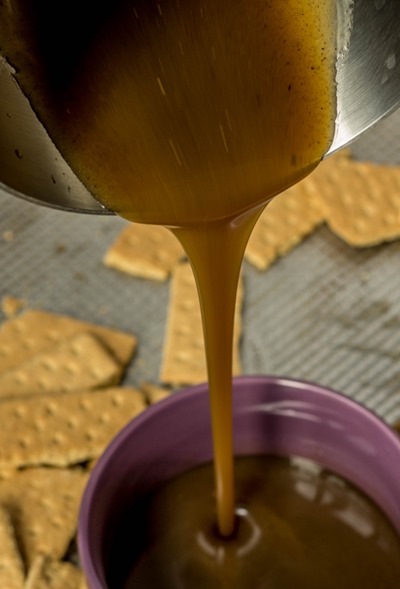
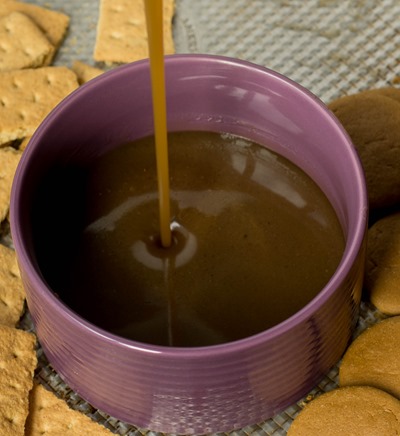
SO perfect for parties! This chai caramel sauce is perfect for dipping fruit and cookies

I’m very enthusiastically jumping onto the chai bandwagon! There’s no looking back now. (In fact, can we take a quick moment to drool over Christina’s chewy chai bars?)

In all serious, though, there’s no reason you shouldn’t be joining me. The flavors of chai are so warm and comforting. Cardamom is what really makes it special, but the clove, cinnamon, ginger and black pepper (yes, black pepper!), round it out. The spicy flavor tones end up being perfect to balance out a sweet brown-sugar based caramel.

I served this caramel fondue as a dip when we had friends over on a recent Sunday afternoon. It was able to sit out for a few hours as the flavors developed. And actually, there was a little bit leftover and it tasted even better the next day (a dream for holiday entertaining plans)! I loved dunking graham crackers into the fondue along side my almond milk latte, but I did catch some people even dunking their blondies. Yes, my friends are geniuses.

Chai Caramel Fondue! Serving this at every holiday party

Brown Sugar Chai Spiced Caramel Fondue
 
A chai spiced caramel sauce perfect for holiday entertaining.
Author:
Recipe type: Dessert
Makes: 1¼ cups
Ingredients
  • 195g (¾ cup + 1 tablespoon) light brown sugar, tightly packed
  • 30 milliliters (2 tablespoons) water
  • 118 milliliters (1/2 cup) heavy cream
  • 9g (2 teaspoons) unsalted butter, softened at room temperature
  • ½ teaspoon ground cardamom
  • ½ teaspoon ground ginger
  • ¼ teaspoon ground cinnamon
  • ⅛ teaspoon salt
  • ⅛ teaspoon black pepper
  • ⅛ teaspoon ground cloves
Instructions
  1. Whisk together brown sugar and water in a small heavy-duty saucepan; place over medium-high heat and cook without stirring for 3-4 minutes or until a deep amber brown and bubbling; remove from heat and immediately whisk in heavy cream and butter until smooth (be careful as the hot caramel may bubble up)
  2. Stir in remaining ingredients and then briefly stir over medium heat until smooth
  3. Serve warm; for a thicker dip (and for flavor more intensified), allow to cool in refrigerator for several hours before gently reheating
Notes
Adapted from Food and Wine
Can be stored in refrigerator up to one week

Make something from the blog? Be sure to share it on Instagram with the tag #KeepItSweetDesserts.

You might also like:

Salted Caramel without a Candy Thermometer

How to Make Salted Caramel

Peanut Butter Caramel Sauce

Peanut Butter Caramel Sauce

Vegan Apple Cake

A healthier spin on the classic apple dessert, this cake does not disappoint. No mixer needed for this apple cake!

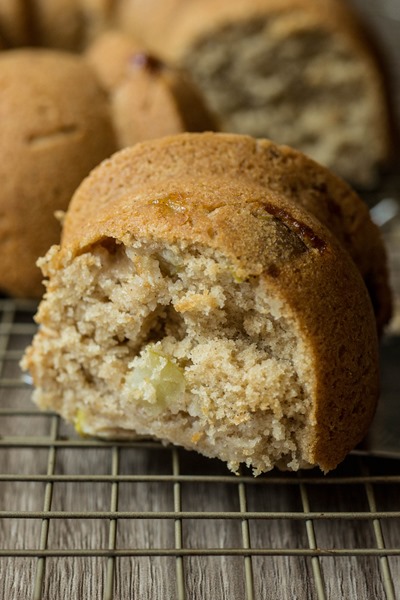
Vegan apple cake that still really tastes good!

I’m pretty lucky that any photos of this cake exist. I baked it one morning while L was napping and then was setting up my shoot that afternoon while he decided that an afternoon nap just wasn’t necessary. So I took the pictures quickly and then proceeded to rock / feed L to sleep. There are worse things. I know those moments are fleeting these days so rather than be frustrated by the lack of “real” nap, I try to enjoy the sweet moment of a sleeping baby while I can. However, I don’t recommend that move with a full bladder. Just saying.

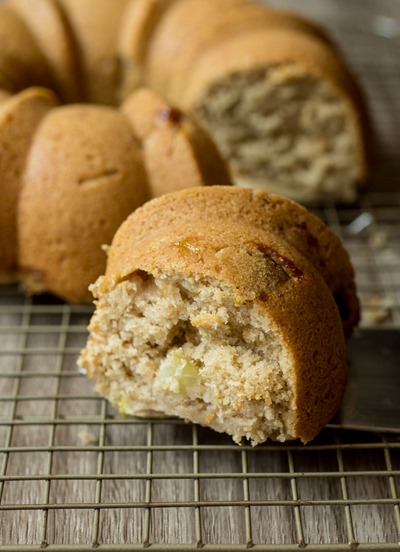
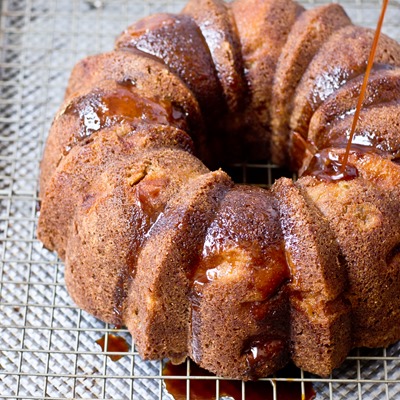
Awesome vegan apple cake

In the end it all worked out. L slept enough to play the late afternoon away, I got photos AND cuddle time. Oh yeah, and we got a pretty delicious cake. What’s interesting about this recipe is that you separate the apples so that you can top the batter with slices (which then end up on the bottom of the cake). I wasn’t sure how that would translate but I actually think it really helped seal in the moisture. That’s always a good thing when baking with whole wheat flour and less fat than a typical dessert.

Need a last minute high holiday dessert? This is dairy-free and perfect for your Rosh Hashanah spread. Don’t let the “vegan” scare you. There are no weird ingredients and you wouldn’t even know with the taste.

4.5 from 2 reviews
Vegan Apple Cake
 
A healthier spin on the classic apple dessert, this cake does not disappoint. No mixer needed for this apple cake!
Author:
Recipe type: Dessert
Makes: 12 servings
Ingredients
  • 237 milliliters (1 cup) almond milk
  • 5 milliliters (1 teaspoon) apple cider vinegar
  • 450g (~2 large) apples, peeled
  • zest and juice of one lemon
  • 160g (~1 cup + 2 ½ tablespoons) all-purpose flour
  • 150g (~1 cup) white whole wheat flour
  • 10g (2 teaspoons) baking powder
  • 2g (1 teaspoon) ground cinnamon
  • ½g (1/4 teaspoon) ground ginger
  • 160g (3/4 cup) granulated sugar
  • 118 milliliters (1/2 cup) canola oil
  • 15 milliliters (1 tablespoon) pure vanilla extract
  • 15g (1 tablespoon, packed) light brown sugar
Instructions
  1. Pre-heat oven to 350 degrees; grease a bundt pan with non-stick baking spray
  2. Combine milk and vinegar; set aside
  3. Slice one of the two apples (1/8 -¼ inch in thickness) into half-moons; mix with half of lemon juice and set aside
  4. Chop other apple into ¼-inch cubes and in another bowl, mix with remaining lemon juice; set aside
  5. In a large bowl, whisk together the flours, baking powder, cinnamon and ginger; set aside
  6. In a separate large bowl, whisk together the milk and vinegar, granulated sugar, oil and vanilla
  7. Slowly whisk in dry ingredients just until combined; fold in chopped apple
  8. Pour the batter into your prepared baking pan
  9. Place sliced apple on top of the batter and sprinkle with brown sugar
  10. Bake in the center of the oven for 35-40 minutes or until a skewer inserted into the cake comes out clean
Notes
Adapted from Cake Duchess


This apple cake was so good and it actually is vegan!

Make something from the blog? Be sure to share it on Instagram with the tag #KeepItSweetDesserts.

You might also like:

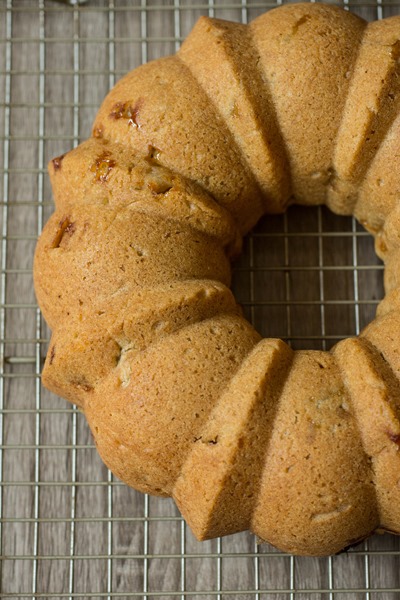
Vanilla Bean Apple Bundt Cake

Vanilla Bean Apple Bundt Cake

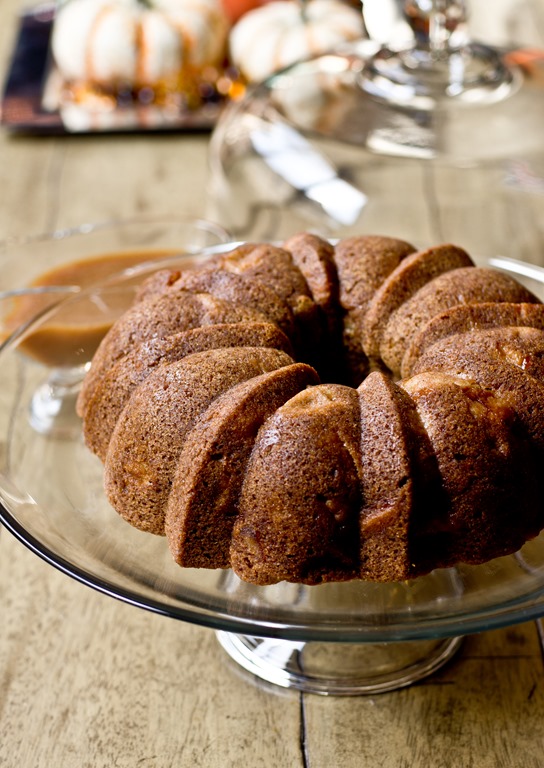
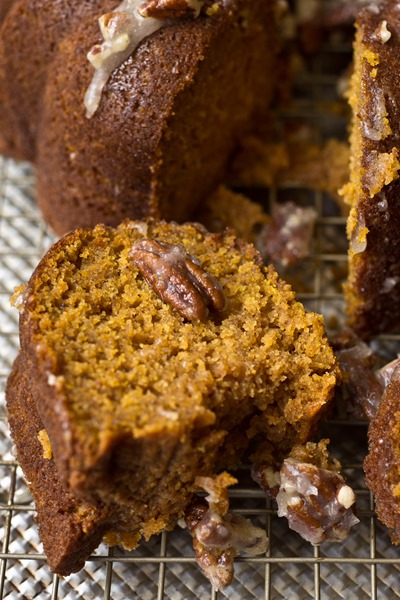
Pumpkin Cake with Pecan Pie Glaze

Pumpkin Cake with Pecan Pie Glaze

Vanilla Bean Bourbon Nectarine Bundt Cake

Vanilla Bean Bourbon Nectarine Bundt Cake

Apple Cake!!!

Chewy Milk Chocolate Ginger Cookies

Chewy ginger-flavored brown sugar cookies filled with milk chocolate chunks.  This is a great holiday cookie!

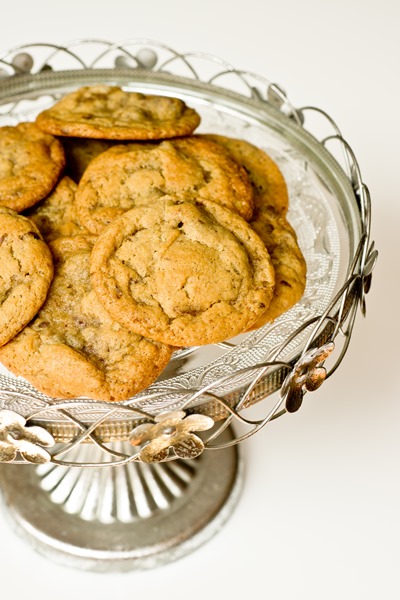
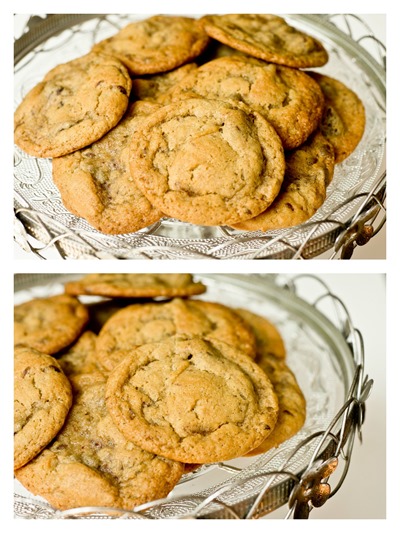
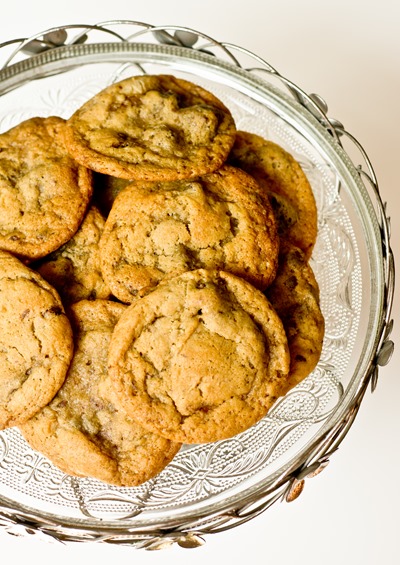
Chewy Milk Chocolate Ginger Cookies - great twist on a holiday flavor

I have a bit of a weakness for ginger cookies.  My dad loves gingersnaps, but unless they are super crunchy (ahem, teeth-breakingly so), he will probably tell you they are underbaked.  I, on the other hand, like crunchy, chewy, crispy, really any texture as long as you have a great ginger flavor.

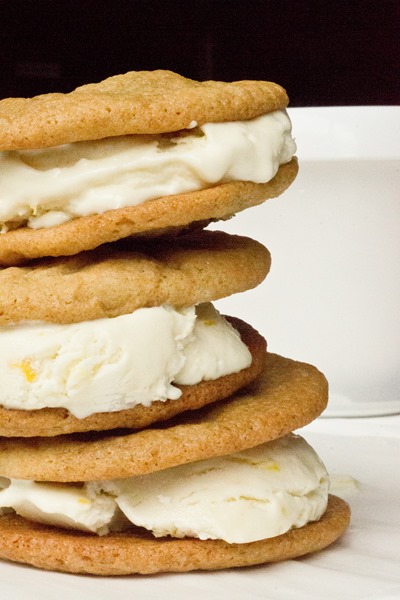
This cookie is a spin on the cookies I made for these ice cream sandwiches over the summer. I made a couple of small changes including enhancing the ginger flavor in order to balance the addition of the sweet milk chocolate.  Again, this is definitely NOT a gingersnap, but a brown-sugar-based cookie full of ginger flavor.  Make them now and maybe double the batch so you can freeze some for Christmas.  They would also make a great addition to any cookie gifts you are putting together.  Just make sure you chill the dough as directed to ensure that the flavor is in full force and the texture is the perfect balance of a chewy center and crispy edge.

Milk Chocolate Chunk Ginger Cookies - I couldn't stop eating them!

Chewy Milk Chocolate Ginger Cookies
 
Chewy ginger-flavored brown sugar cookies filled with milk chocolate chunks. This is a great holiday cookie!
Author:
Recipe type: Dessert
Makes: 3 dozen medium-sized cookies
Ingredients
  • 260g (~2 cups) all-purpose flour
  • 7 ½g (1/2 tablespoon) salt
  • 3g (1/2 tablespoon) ground ginger
  • 2 ½g (1/2 teaspoon) baking soda
  • 170g (1 ½ sticks) unsalted butter, softened at room temperature
  • 350g (~1½ cup tightly packed) light brown sugar
  • 5g (1 teaspoon) minced ginger
  • 100g (2 large) whole eggs
  • 15 milliliters / 1 tablespoons vanilla extract
  • 180g (~1¼ cups) milk chocolate, roughly chopped
Instructions
  1. Whisk together flour, salt, ginger and baking soda; set aside
  2. In the large bowl of an electric mixer, beat butter, sugar and minced ginger on medium-high speed until light and well mixed; scrape sides of bowl
  3. Add eggs and vanilla, mix well; scrape sides of bowl
  4. Add flour mixture and mix on low speed just until combined (do not overmix); stir in chocolate
  5. Chill dough for 24-48 hours (the longer chilling time helps the flavor and texture)
  6. When ready to bake, pre-heat oven to 350 degrees
  7. Use a medium cookie dough scoop or tablespoon to make cookie dough balls on a baking sheet lined with parchment paper (about 1½ tablespoons each) about 2 inches apart from one another
  8. Bake 12-14 minutes or until cookies are set on top and very lightly brown around the edges
  9. Allow cookies to cool before serving
  10. Store in a ziplock bag or airtight container for up to one week; freeze up to two months

Milk Chocolate Chunk Ginger Cookies - my new favorite cookie

Make something from the blog? Be sure to share it on Instagram with the tag #KeepItSweetDesserts.

You might also like:


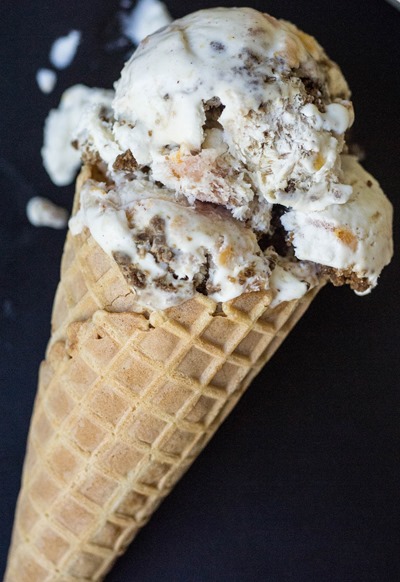
Gingersnap Peach Crumble Ice Cream

Gingersnap Peach Crumble Ice Cream


Ginger and Lemon Ice Cream Sandwiches

Ginger and Lemon Ice Cream Sandwiches


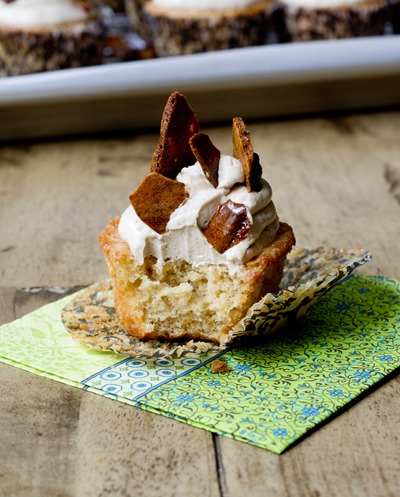
Brown Sugar Cupcakes with Cinnamon Ginger Buttercream & Ginger Cookie Pecan Brittle

Brown Sugar Cupcakes with Cinnamon Ginger Buttercream & Ginger Cookie Pecan Brittle

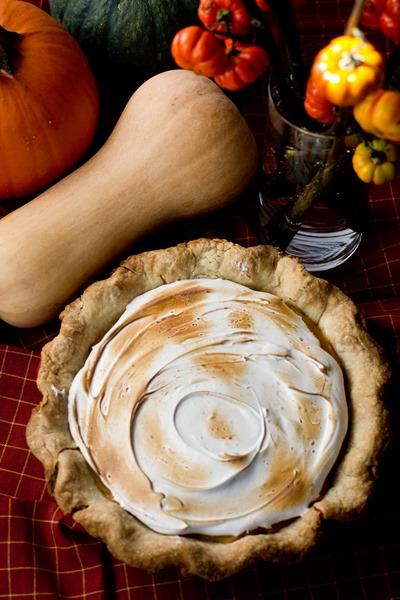
Roasted Butternut Squash Pie with Brown Sugar Marshmallow Topping

Flaky pie crust, flavorful roasted butternut squash filling and a sweet toasted brown sugar marshmallow topping make an amazing fall dessert. This is the perfect Thanksgiving pie!
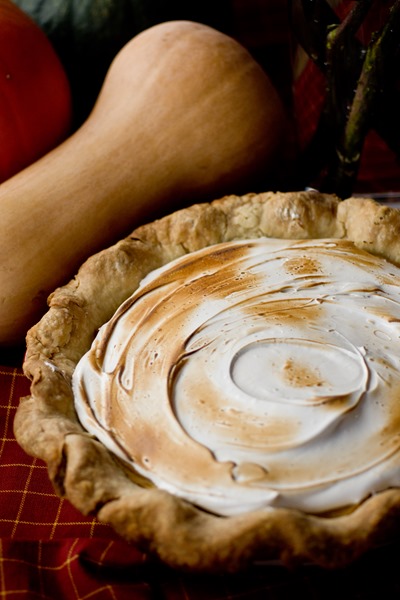
Roasted Butternut Squash Pie with Brown Sugar Marshmallow Topping- so gorgeous for the holidays

Today we are celebrating with a virtual bridal shower for a very dear friend of mine! Joanne is getting married in just a few weeks and I’m so happy to be a part of the celebration. Not only am I partaking in this virtual shower, but I was also honored to be asked to be a bridesmaid in the wedding.
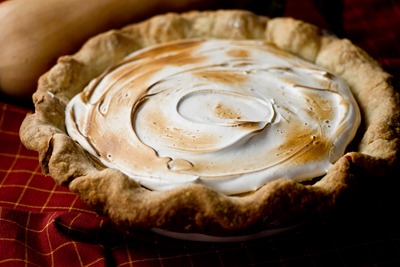
Roasted Butternut Squash Pie with Brown Sugar Marshmallow Topping- seriously good

I’ve known Joanne for four years now and she is truly such a wonderful person. We met over dinner and then quickly bonded later as we flew across the country without a moment of silence on the plane. Our friendship was instantaneous. In the past four years we’ve shared highs and lows and now we are celebrating a very wonderful high. Her happiness is contagious!
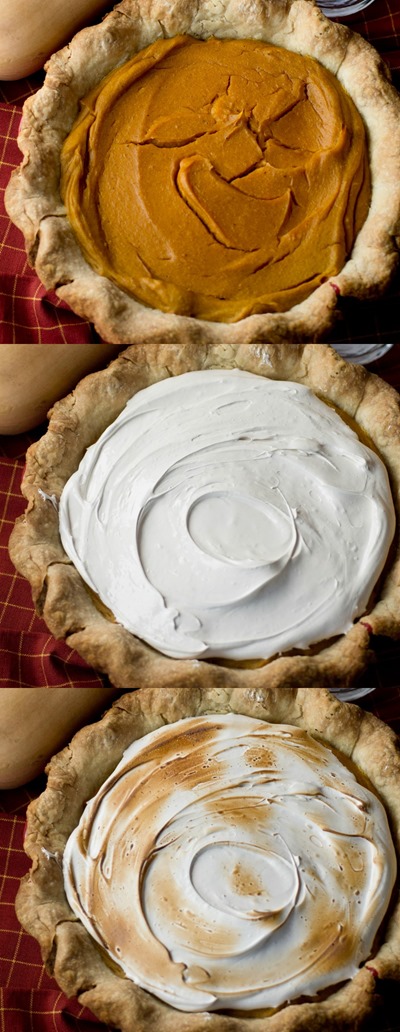
Flaky pie crust, flavorful roasted butternut squash filling and a sweet toasted brown sugar marshmallow topping make the perfect fall dessert.

Among many other things, Joanne and I share a love of winter squash. For her fall-themed virtual shower, I thought it would be the perfect ingredient to focus on. I wanted to make a very special dessert and I have a feeling that this pie, packed with our favorite vegetable (seriously, look at that bright orange hue in the photo above) was the perfect choice. The marshmallow topping adds a wonderful sweetness and the flavor from the brown sugar really compliments the pie. Thinking about what to make in a few weeks for Thanksgiving? This pie will not let you down.

Scroll down to see what our other blogging friends are sharing!

Roasted Butternut Squash Pie with Brown Sugar Marshmallow Topping
 
Flaky pie crust, flavorful roasted butternut squash filling and a sweet toasted brown sugar marshmallow topping make an amazing fall dessert. This is the perfect Thanksgiving pie!
Author:
Recipe type: Dessert
Makes: 1 9-inch pie; 8-10 servubgs
Ingredients
  • 1 unbaked 9-inch (4-cup volume) deep-dish pie crust dough, cold* (I used Audra’s pie crust recipe – so flaky!)
  • Butternut Squash Filling
  • 900g (~4 cups) cubed butternut squash (from ~2 ½ pound squash)
  • 2g (1 teaspoon) ground cinnamon
  • 1g (1/2 teaspoon ground nutmeg)
  • ½g (1/2 teaspoon ground ginger)
  • 118g light brown sugar, tightly packed
  • 150g (3 large) whole eggs at room temperature
  • 148 milliliters (1/2 cup + 2 tablespoons) heavy cream
  • 30 milliliters (2 tablespoons) bourbon (optional, can replace with vanilla)
  • Toasted Brown Sugar Marshmallow Topping
  • 115g (1/2 cup tightly packed) light brown sugar
  • 50 g (¼ cup) granulated sugar
  • 60g (3 large) egg whites at room temperature
  • 1g (1/4 teaspoon) cream of tartar
Instructions
  1. Roast squash: pre-heat oven to 425 degrees Fahrenheit; Line a large baking sheet with foil and coat with non-stick cooking spray
  2. Place squash on baking sheet and toss with cinnamon, nutmeg and ginger; cook in oven for 30-35 minutes or until fork tender; set aside to cool
  3. Reduce oven temperature to 350 degrees Fahrenheit and prepare to par-bake pie crust
  4. Roll out pie crust and press into a 9-inch glass or ceramic pie plate (do not overwork the crust); neatly trim the edges and crimp crust as desired; refrigerate pie place with crust for ten minutes so that dough is once again chilled
  5. When ready, line pie shell with foil and fill with pie weights, change or dried beans
  6. Bake for 25 minutes and then remove pie crust from oven; remove foil and pie weights; return to oven for an additional 10 minutes or until crust appears to be a very light gold (remember, you will be baking the rest of the pie for additional time)
  7. While crust is baking, prepare pie filling (you can use a large bowl with an immersion blender or a high-speed blender); place all filling ingredients in bowl or blender and combine on high speed until smooth (if using a high-speed blender like a Vitamix, start blender on low and gradually increase speed to high; blending will only take a couple of minutes)
  8. Pour filling into pie shell and bake for about 40-50 minutes or until filling is set; if crust begins to brown too much during baking, cover lightly with foil
  9. Set pie aside on cooling rack and prepare topping
  10. Place sugars, egg whites and cream of tartar in a the large bowl of an electric mixer or another heatproof bowl set up with a candy thermometer
  11. Place bowl over a medium pot or saucepan of simmering water, being careful that the water does not reach the bowl
  12. Whisk the topping ingredients constantly for several minutes or until sugar has dissolved and temperature reaches 160 degrees Fahrenheit
  13. Remove bowl from heat and use the whisk attachment on electric mixer to finish topping; beat on high speed for about six minutes minutes or until stiff glossy peaks form
  14. Spread or pipe decoratively over pie and use a torch or broiler to (carefully without burning) brown the marshmallow topping
Notes
Adapted from Food and Wine
Pie can be made one day in advance and refrigerated (you can wait to torch or broil the topping until prior to serving if desired)

Roasted Butternut Squash Pie with Brown Sugar Marshmallow Topping - so making this for Thanksgiving!
My pie-loving (but super-picky-dessert-eating) sister said this was the best pie she has ever eaten!
And now for the rest of the shower!

Cocktails:

Pumpkin Spice White Russian – Nutmeg Nanny

Warm Apple Pie Cocktail – Miss In The Kitchen

Bourbon Apple Cider Cocktail– Cook Like A Champion

Snacks/Savory:

Baked Brie with Honey and Sliced Almonds – The Lemon Bowl

Butternut Squash and Apple Galette – Warm Vanilla Sugar

Roasted Pumpkin Crostini – Annie’s Eats

Kale Salad with Maple Butternut Squash and Pomegranate Dressing – Blahnik Baker

Lemony-Pasta Stuffed Zucchini – Very Culinary

Pumpkin Dip with Apple Chips– Meadows Cooks

Sweet:

Pumpkin Cinnamon Roll Cake – The Baker Chick

Peanut Butter Fudge Pie with Salted Peanut Butter Caramel– Taste and Tell

Caramel Apple Upside Down Cake – The Girl in the Little Red Kitchen

Snickerdoodle Bundt Cake – Chocolate and Carrots

Roasted Butternut Squash Pie with Brown Sugar Marshmallow Topping – Keep It Sweet

Caramel Corn Chocolate Chip Cookies – The Cooking Actress

Caramel Cranberry Apple Galette – Bakeaholic Mama

Coconut Pecan Tarts – Bake or Break

Cranberry Margarita Cupcakes – Baker by Nature

Gingerbread Truffles – Dinners Dishes and Desserts
Make something from the blog? Be sure to share it on Instagram with the tag #KeepItSweetDesserts.

Butternut-Pumpkin Spice Sheet Cake with Bourbon-Vanilla Cream Cheese Frosting {Guest Post}

Today’s guest post is from a fellow new mom (how adorable is Avery?!) and talented baker. Steph from Girl Versus Dough makes some terrific baked goods and even had an e-book published earlier this year! Be sure to visit her blog and check out some of her other amazing recipes like Peaches and Cream Streusel Bread, S’mores Pretzel Hand Pies, and Sweet Potato Marshmallow Cinnamon Rolls!

Butternut-Pumpkin Spice Sheet Cake with Bourbon-Vanilla Cream Cheese Frosting

Hi there, fellow dessert lovers! My name is Stephanie and I write about my adventures in baking bread and other tasty, unique recipes over at Girl Versus Dough. I’m so honored to be a guest on Lauren’s blog today so she can have some extra snuggle time with her new baby boy.

It was just five short months ago that my own little one was born – and let me tell you, it’s the best thing ever. Getting to spend every day with my daughter is a joy and a treasure, and I am sure Lauren will tell you the same about her own experiences with her baby (well, when she can catch up on some sleep, that is! ;)). There’s just nothing like it. Of course, there’s also nothing like changing a verrrry full diaper or doing the fifth load of laundry in one day or downing that extra cup of coffee just to keep your eyelids open – but I digress.

Butternut-Pumpkin Spice Sheet Cake with Bourbon-Vanilla Cream Cheese Frosting

Having a little one to care for also makes it a wee more difficult to bake – and because you all love dessert as much as I do (I know this because you are on Lauren’s blog right now, where all the dessert yumminess in all the land resides), you know how upsetting this can be. But I’m happy to report that you can, in fact, have a baby and eat your cake, too, if you’ve got easy recipes on hand.

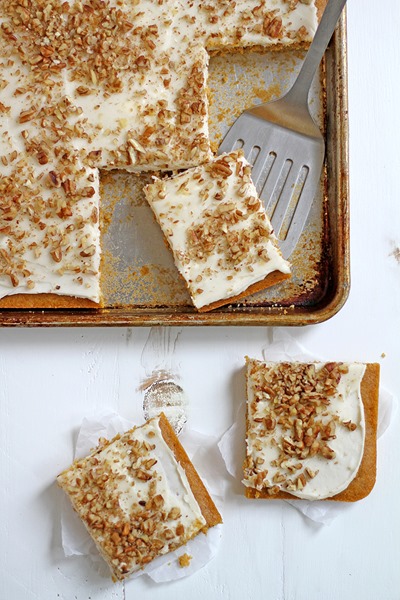
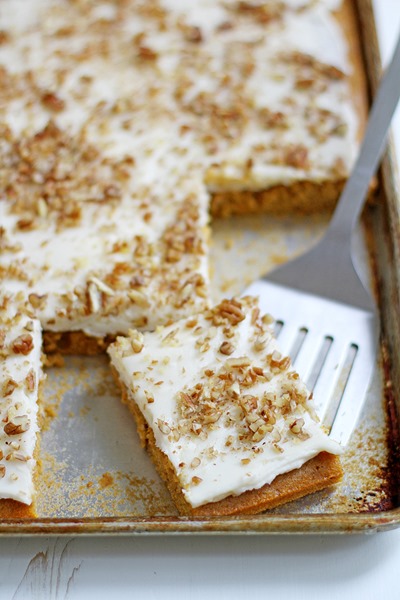
This butternut-pumpkin spice sheet cake (with a bourbon-vanilla cream cheese frosting, hello!) may sound like a complicated recipe, but it’s really very easy. I love it because it’s the perfect embodiment of fall flavors in cake form, it’s quick and simple to put together and because you bake it on a sheet pan, it serves a crowd (it also means the cake to frosting ratio is perfection).

The cake base is made with pureed pumpkin and butternut squash mixed with classic autumn spices, like cinnamon, cloves and cardamom. Once baked, the result is perfectly soft and dense with a moist crumb. Then you spread on the smooth cream cheese buttercream flavored with a bit of bourbon and vanilla, sprinkle some chopped pecans on top and wowza – it’s so good, it almost makes up for having to do that fifth load of laundry.

Forget the Halloween candy this year – I’m going straight for a slice (or three) of this cake. I highly recommend you do the same.

Butternut-Pumpkin Spice Sheet Cake with Bourbon-Vanilla Cream Cheese Frosting {Guest Post}
 
Author:
Recipe type: Dessert
Makes: 16 servings
Ingredients
  • For the Cake
  • 1 cup canned pumpkin (or mashed, cooked pumpkin)
  • ¾ cup mashed, cooked butternut squash
  • 1 cup granulated sugar
  • ½ cup packed brown sugar
  • 1 cup vegetable oil
  • 4 eggs
  • 2 cups all-purpose flour
  • 2 teaspoons baking powder
  • 2 teaspoons ground cinnamon
  • 1 teaspoon baking soda
  • ½ teaspoon ground cardamom
  • ¼ teaspoon ground cloves
  • ¼ teaspoon salt
  • ½ cup chopped pecans, for topping
  • For the Frosting
  • 10 ounces cream cheese, room temperature
  • ¾ cup (1½ sticks) unsalted butter, room temperature
  • 2 teaspoons bourbon
  • 2 teaspoons vanilla
  • 4 to 6 cups powdered sugar
Instructions
  1. Heat oven to 350 degrees F. Grease the bottom and sides of a 15-by-10 or 12-by-17-inch rimmed baking sheet (or a 13-by-9-inch pan*).
  2. In a large bowl, beat canned pumpkin, mashed butternut squash, sugars, oil and eggs until well combined. In a separate large bowl, whisk together flour, baking powder, cinnamon, baking soda, cardamom, cloves and salt until combined.
  3. Gradually mix dry ingredients into wet ingredients; stir just until combined.
  4. Pour and spread batter evenly into prepared baking sheet. Bake 20 to 25 minutes until a toothpick inserted in the center of the cake comes out clean. Cool cake completely in baking sheet on a cooling rack.
  5. Meanwhile, make the frosting: In a large bowl, beat cream cheese and butter 1 minute until well combined. Add bourbon, vanilla and 4 cups powdered sugar. Stir on medium speed until combined. Add more powdered sugar as needed to create a smooth, spreadable frosting.
  6. Spread frosting evenly over the top of the fully cooled cake (you may want to refrigerate the cooled cake for about 1 hour before frosting it so it's easier to frost). Top with chopped pecans.
Notes
If using a 13-by-9-inch pan, you may need to increase the baking time by a few minutes.

Butternut-Pumpkin Spice Sheet Cake with Bourbon-Vanilla Cream Cheese Frosting

Make something from the blog? Be sure to share it on Instagram with the tag #KeepItSweetDesserts.

Skillet Apple Crisp with Brown Butter Sauce {gluten-free}

Served warm, this skillet apple crisp is just what you need to fill you up at the end of a cool Fall day!

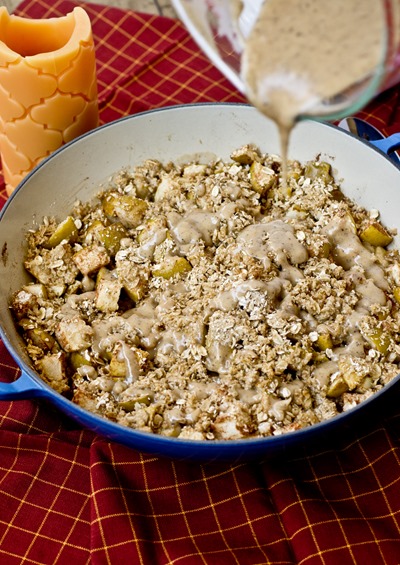
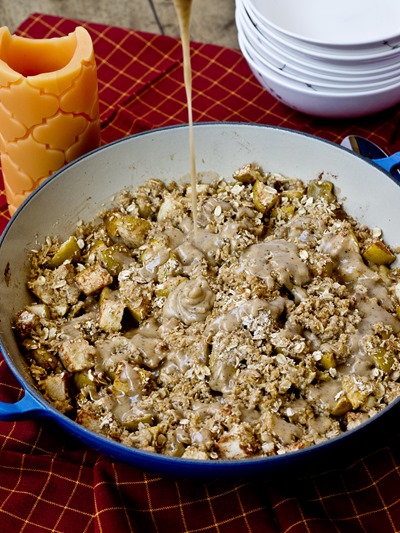
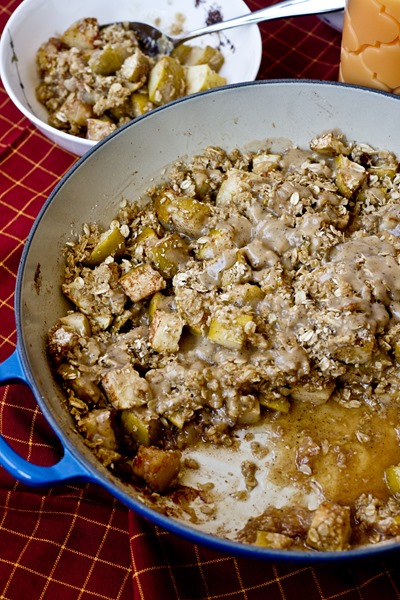
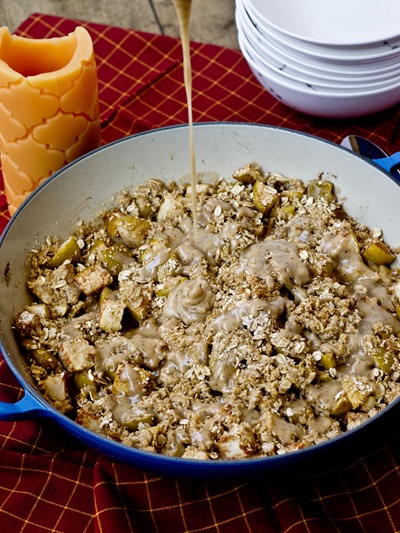
Served warm, this skillet apple crisp with brown butter sauce is just what you need to fill you up at the end of a cool Fall day!

This apple crisp is warm and hearty and perfect for the end of a chilly day (or in my case, mid-morning on a hot day in mid-August…).  You can make it in a skillet which I love, it gives the dessert a nice rustic feel and encourages everyone at the table to help themselves to a generous serving.  The brown butter sauce is the perfect addition because the crisp itself is almost light.  The sauce basically adds a richness that you might not be able to find in a fruit heavy dessert.

Skillet Apple Crisp with Brown Butter Sauce (naturally gluten-free!)

Of course you can still add some vanilla ice cream or fresh whipped cream, but I found that the addition of that brown butter topping really makes this a very satisfying dessert on its own.  I’m not kidding when I say I enjoyed this mid-morning.  It was impossible to resist fresh out of the oven once the photos were taken.  Besides, all of those fresh apple chunks and oats make this sort of kind of healthy.  Right???

Skillet Apple Crisp with Brown Butter Sauce (naturally gluten-free!)

Skillet Apple Crisp with Brown Butter Sauce {gluten-free}
 
Served warm, this skillet apple crisp is just what you need to fill you up at the end of a cool Fall day!
Author:
Recipe type: Dessert
Makes: 6-8 servings
Ingredients
  • Topping:
  • 55g (~1/2 cup) oat flour* (I pulsed my oatmeal in the food processor until it was the consistency of flour)
  • 40g (~1/2 cup) old fashioned oatmeal*
  • 70g (~1/3 cup, tightly packed) light brown sugar
  • 55g (1/4 cup) cold unsalted butter, cut into small cubes
  • Filling:
  • ~8 cups chopped apples, peeling optional (from 908 grams or about 7 medium whole apples) (preferably granny smith or honeycrisp)
  • 28g (~1/4 cup) granulated sugar
  • 15g (~2 tablespoons) oat flour* (I pulsed my oatmeal in the food processor until it was the consistency of flour)
  • 15 milliliters / 1 tablespoon fresh lemon juice (~1/2 lemon)
  • 14g (1 tablespoons) unsalted butter, chilled, cut into small pieces
  • 2g (1 teaspoon) ground cinnamon
Instructions
  1. Pre-heat oven to 350 degrees
  2. In a medium bowl, prepare topping; mix together oat flour, oatmeal and brown sugar
  3. Add butter and use fingers to combine until mixture is slightly lumpy; set aside
  4. Prepare filling; in 10 or 12-inch skillet, stir together apples, granulated sugar, oat flour, lemon juice, and cinnamon; sprinkle evenly with topping
  5. Bake for 30-35 minutes or until filling is bubbling and topping is lightly browned, if you see that topping has started to get to brown early, lightly cover with tin foil for remainder of baking time
  6. Remove crisp from oven and immediately prepare brown butter glaze
Notes
Adapted from my Summer Berry Skillet Crisp
*If serving to someone with a gluten allergy make sure your ingredients are labeled gluten-free
The apple crisp can be made ahead of time and kept in refrigerator until ready to bake; may require extra cooking time if cold

 
Brown Butter Sauce
 
Author:
Recipe type: Dessert
Ingredients
  • 57g (4 tablespoons) unsalted butter
  • 100g (~3/4 cup) powdered sugar, sifted
  • 15 milliliters / 1 tablespoon milk, any type
  • 5 milliliters / 1 teaspoon vanilla extract
Instructions
  1. Brown the butter; heat butter in a small heavy duty saucepan over medium heat, stirring constantly; when butter turns to an amber/light brown color, remove from heat immediately (you should be able to smell the deeper more caramel flavor of the butter)
  2. Pour butter into a medium heat-proof bowl (do NOT leave behind the sediment, it adds flavor); whisk in sugar, milk and vanilla
  3. Immediately pour glaze over hot apple crisp and serve
Notes
Recipe from Martha Stewart, originally seen on i am baker


Skillet Apple Crisp with Brown Butter Sauce (naturally gluten-free!) - so perfect for all of the apples in my kitchen


Make something from the blog? Be sure to share it on Instagram with the tag #KeepItSweetDesserts.

Giant Caramel Apple Cinnamon Bun with Cream Cheese Glaze

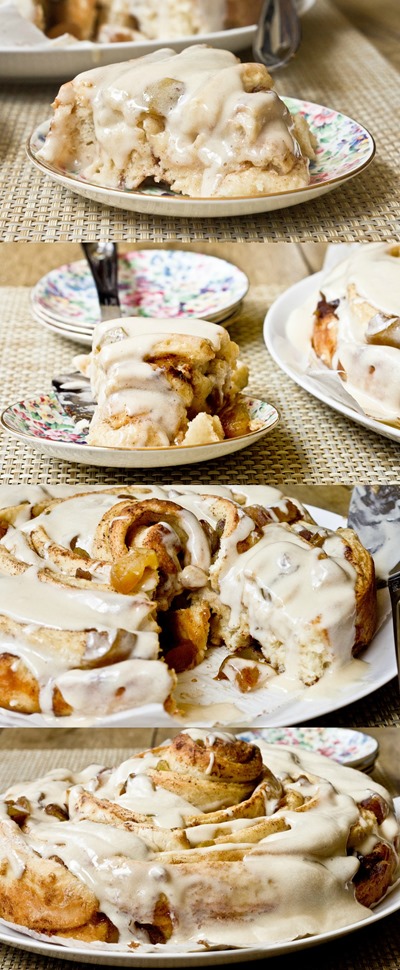
This giant cinnamon roll is oozing with a gooey caramel apple and topped with a perfect cream cheese glaze.

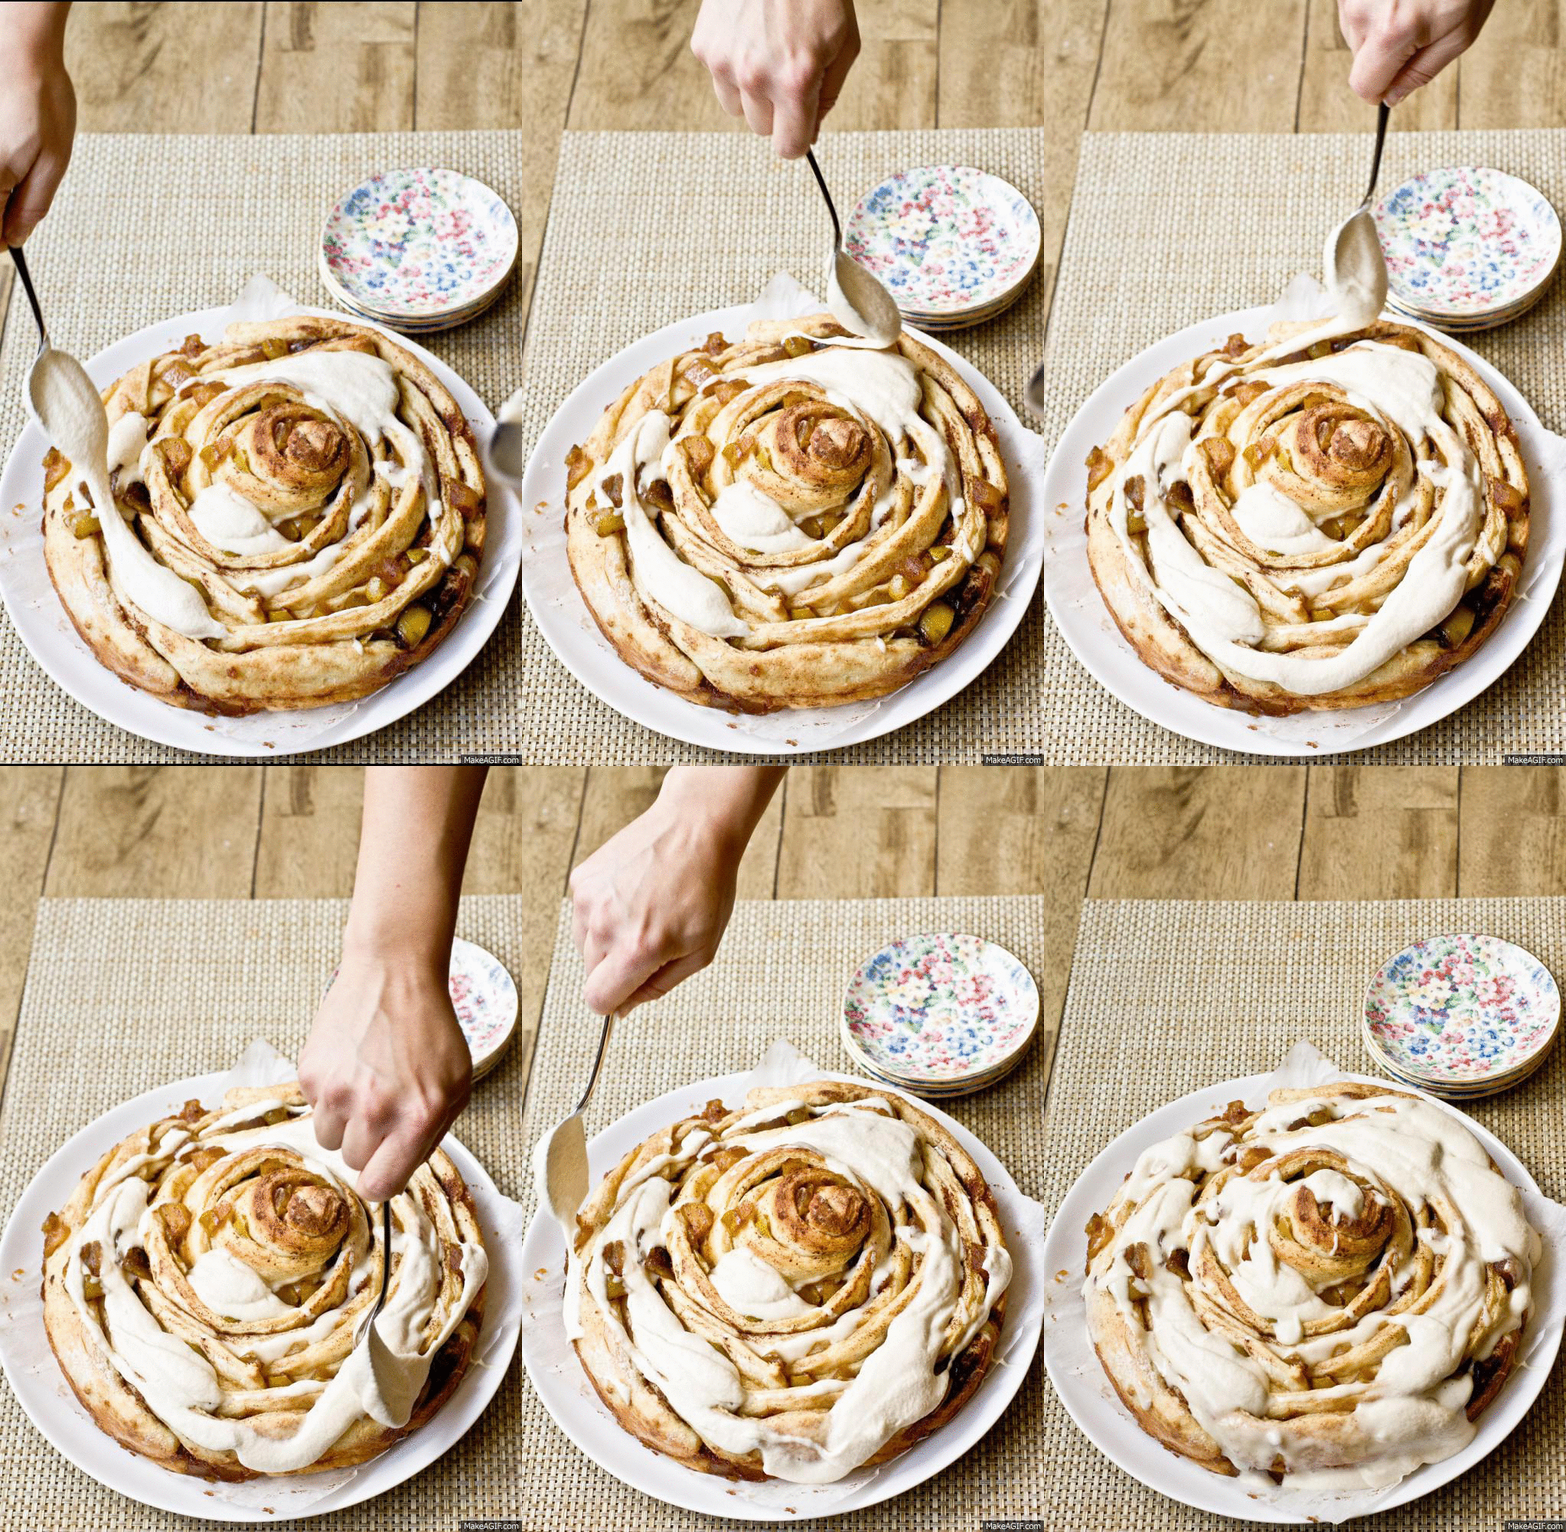
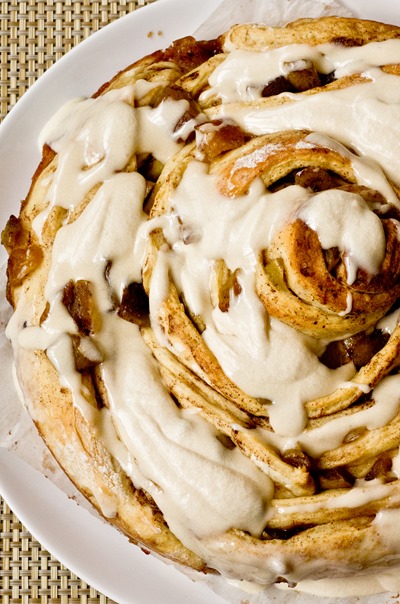
Giant Caramel Apple Cinnamon Bun with Cream Cheese Glaze

I think Matt put it perfectly when he said, “You know how when you eat a cinnamon roll and the middle is the best part?  This is like getting almost only the middle!”

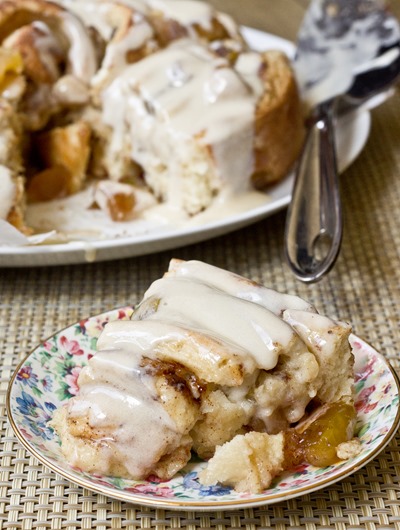
Seriously, though.  I’ve been drooling over Audra’s giant cinnamon roll for months.  I’m always a little leery of baking with yeast so I procrastinated making one of my own for a while.  Well, if I regret anything, it’s waiting so long to make this because it’s definitely one of the most delicious things to ever come out of my kitchen.  In fact, I had given a slice to someone in our building and an hour later he called me just to say it was the best cinnamon bun he has ever had.

Giant Caramel Apple Cinnamon Bun - TO DIE FOR

Since I so rarely bake something special like this, I wanted to make it extra special by loading it up with a caramel apple filling.  After cooking the chopped apples in a skillet with some butter and brown sugar they pretty much tasted like candy.  I was tempted to just start spooning them into my mouth but I wanted to make sure there were apples everywhere in this giant cinnamon bun.

While the process to make this is a bit on the messy side and there are a few different steps, it’s actually quite easy.  The hardest part is waiting for your cinnamon bun to finish baking (and photographing in my case).  Oh and maybe scrubbing the gooey dough off of the counter…

Giant Caramel Apple Cinnamon Bun - pretty much the best thing ever

Giant Caramel Apple Cinnamon Bun with Cream Cheese Glaze
 
This giant cinnamon roll is oozing with a gooey caramel apple and topped with a perfect cream cheese glaze.
Author:
Recipe type: Breakfast
Makes: 1 giant cinnamon roll; serves ~8
Ingredients
Filling:
  • 57g (4 tablespoons) unsalted butter, separated
  • 340g (~3 cups / 2 medium) chopped apples (I prefer to use a crisp apple like Granny Smith or Honeycrisp)
  • 235g (~1 cup tightly packed) light brown sugar
  • 15 milliliters (1 tablespoon) fresh lemon juice (from ~1/2 lemon)
  • 5g (1 tablespoon) ground cinnamon
  • 5 milliliters (1 teaspoon) vanilla extract
Dough:
  • 177 milliliters (3/4 cup) milk (any type is fine)
  • 57g (4 tablespoons) unsalted butter
  • 430g (~3¼ cups) all-purpose flour
  • 50g (~1/4 cup) granulated sugar
  • 7g (usually 1 package) instant yeast
  • 2 ½g (1/2 teaspoon) salt
  • 59 milliliters / 2 fluid ounces (1/4 cup) water
  • 50g (~1 whole) large egg at room temperature
Cream Cheese Glaze:
  • 57g (4 tablespoons) unsalted butter, softened at room temperature
  • 57g cream cheese, softened at room temperature (light or regular)
  • 190g (~1 cup) powdered sugar
  • 8 milliliters (½ tablespoon) vanilla extract
  • 15 milliliters (1 tablespoon) milk
Instructions
Filling
  1. In a large skillet over medium heat, melt ½ of the butter; stir in apples, brown sugar, lemon juice, cinnamon and vanilla; cook over medium-high heat, stirring occasionally, until apples are softened and liquid is syrupy, about 10 minutes; remove from heat and make dough
Dough
  1. In a large glass measuring cup, heat the milk and butter in the microwave for 60-90 seconds or until warm and the butter has melted (do not bring to a boil); set aside
  2. In a large bowl, whisk together ⅔ of the flour, yeast, sugar and salt; add the milk mixture, egg and water, and mix until combined (it will be very sticky); add the remaining flour and knead it into the dough with your hands until it comes together in a soft ball
  3. At this point, knead dough for a couple of minutes on a lightly-floured surface until it is smooth and elastic (if you press a finger into the dough it should bounce back); return dough to bowl and cover with a damp cloth; let rest in a warm place for 10 minutes.
Assembly
  1. Grease a round 10-inch cake pan or skillet; line bottom with parchment paper and grease top of that as well; set aside
  2. Roll the dough on a clean floured surface into a large rectangle about ⅓ of an inch thick; melt the remaining butter for filling and use a pastry brush to coat the dough; spread apple filling so that entire surface of dough is covered
  3. Using a pastry wheel, pizza cutter or knife cut the dough into strips that are ~2 inches wide; start with one strip and roll it from one end to the other forming a swirl; continue by attaching the end of a second strip and rolling so that the swirl is even bigger; repeat and then place in center of pan or skillet; cut remaining strips in half horizontally so that they are easier to handle and wrap them around the dough so that you are expanding the spiral towards the edges of the pan (it will not fill the entire pan) until no dough remains
  4. Cover the pan with a damp cloth, and leave in a warm place for 30-45 minutes or until it has doubled in size
  5. Once dough has finished growing, pre-heat oven to 350 degrees; when ready, bake cinnamon roll for 25 minutes or until edges are golden brown; make the glaze
Glaze
  1. With an electric mixer, beat the butter and cream cheese until light and creamy; add the powdered sugar and vanilla and mix on medium speed until smooth and creamy; add milk and mix on medium speed until smooth and creamy
  2. Spread on warm cinnamon bun and serve immediately
  3. Cover leftovers (if they actually exist) with seran wrap and gently reheat before eating (they should be good for up to two days)
Notes
Adapted from The Baker Chick
Note: Prepare for about an hour of proofing time in addition to the prep and baking time (total time from start to finish should be about 2 hours)

Need this Giant Caramel Apple Cinnamon Roll with Cream Cheese Glaze!!!

Since it’s one giant cinnamon bun, you don’t necessarily have to share…

Make something from the blog? Be sure to share it on Instagram with the tag #KeepItSweetDesserts.

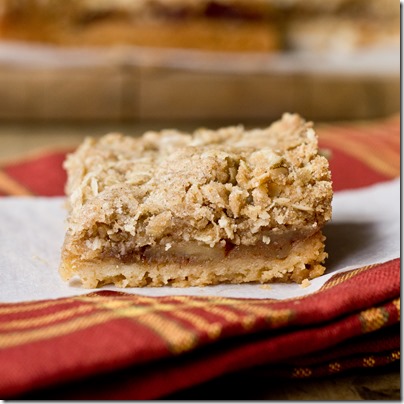
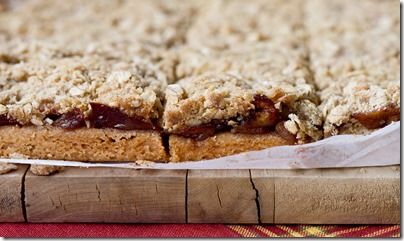
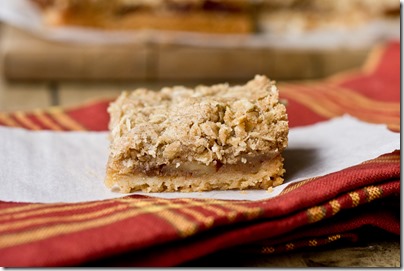
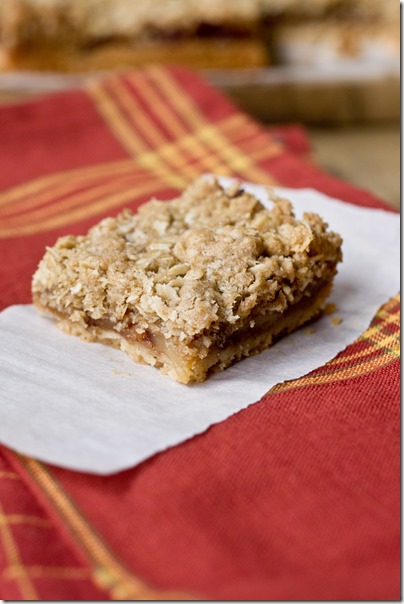
Apple Pie Crumble Bars

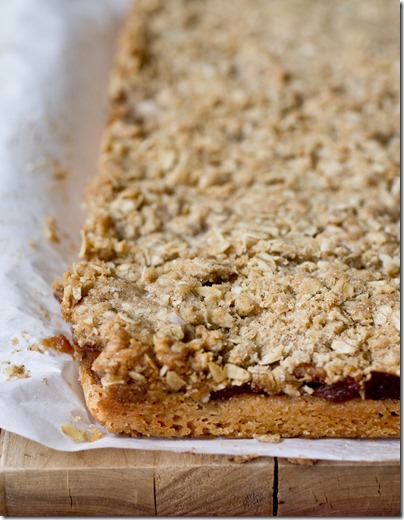
With a buttery crust, thick apple pie filling and crispy crumb topping these Apple Pie Crumble Bars are a fall dessert that is hard to resist.

Apple Pie Crumble Bars

I don’t know if you remember my Apple Cinnamon Blondies from last year, but they were one of my favorite fall treats.  They were a part of Rachel’s An Apple a Day series.  Well, this year she is hosting again and of course I had to bring my A-game!

So far over there you can find Apple and Salted Caramel Ice Cream (drool), Caramelized Apple & Cheddar Cheese Soft Pretzels (What?!), and Apple Cider Donuts (three ways!) among other things.

Apple Pie Crumble Bars

I actually baked these Apple Pie Crumble Bars a few weeks ago, before apple season had really even started.  I wanted an apple dessert that I could bake ahead of time for Rosh Hashanah and that would travel well.

These bars were the perfect solution.  They were a little bit of a baking project, but with Matt in the kitchen helping (he made the filling), they really weren’t too complicated.  If he hadn’t helped I probably would have just skipped the peeling of the apples:-)

Apple Pie Crumble Bars

They were a huge hit for the holiday, though I imagine they would have been an even bigger hit warmed up and smothered with ice cream… next time, next time.

Apple Pie Crumble Bars

Be sure to head over to Baked by Rachel for the Apple Pie Crumble Bar recipe!

Apple Pie Crumble Bars
An apple a day party at bakedbyrachel.com

Make something from the blog? Be sure to share it on Instagram with the tag #KeepItSweetDesserts.

You might also like:

Cranberry Apple Pie

Cranberry Apple Pie

Skillet Apple Crisp with Brown Butter Sauce

Skillet Apple Crisp with Brown Butter Sauce

Apple and Pear Crisp

Obsessed with this pear and apple crisp!

Winter Fruit Crisp {Gluten-free}

I made this fruit crisp so long ago, I had to hunt through piles and piles of notes and butter-stained papers to find it.  Well, I guess Thanksgiving wasn’t that long ago, but right now it feels like a lifetime.

Winter Fruit Crisp {Gluten-free}

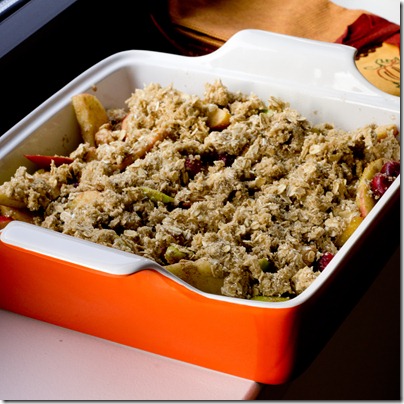
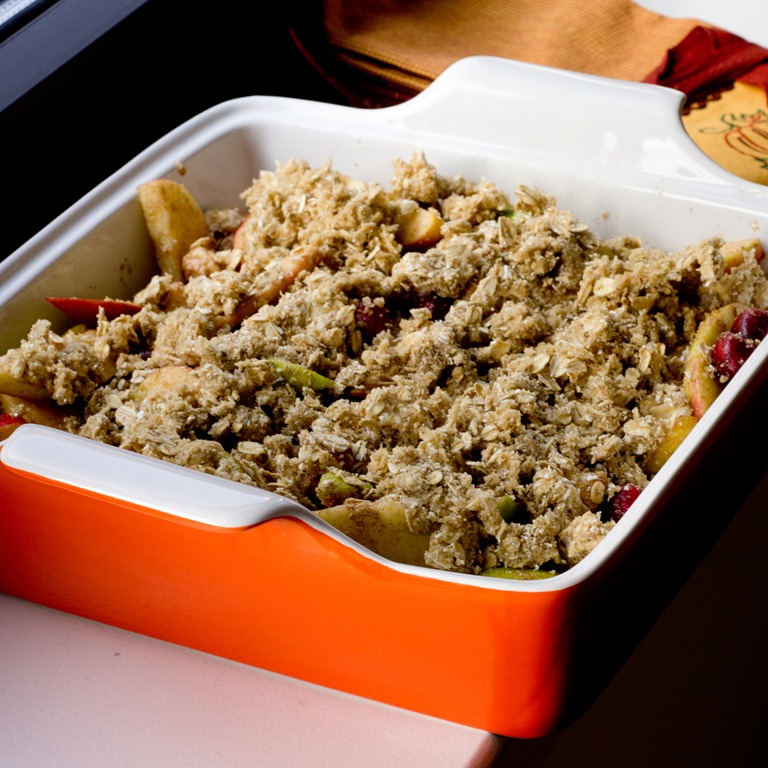
Fruit crisps are one of my favorite desserts.  I mean, anything that is served warm with ice cream is always good, but since there is fruit you can pretty much rationalize that it is healthy, too.  This version is a good compromise since it is made with oatmeal and oat flour.  Butter, sugar, what?  Just look at all that fruit!

Winter Fruit Crisp {Gluten-free}

I’ve actually been making a version of this for years but wanted to take out the gluten so that my sister could also enjoy it for the holiday.  Honestly, you don’t miss a thing.  I could not taste a difference and neither could any of our guests.

Winter Fruit Crisp {Gluten-free}

Winter Fruit Crisp {Gluten-free}
 
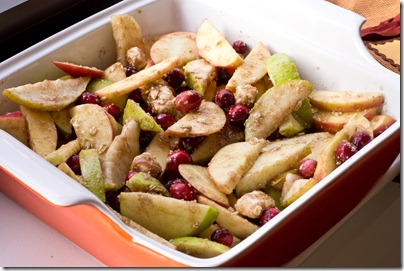
A warm and comforting winter dessert! This fruit crisp is full of apples, pears and cranberries.
Author:
Recipe type: Dessert
Makes: 12-18 servings
Ingredients
Topping:
  • 4 ounces (~1 cup) oat flour (I pulsed my oatmeal in the food processor until it was the consistency of flour)
  • 3⅜ ounces (~1 cup) old fashioned oatmeal
  • 5.5 ounces (~2/3 cup, tightly packed) light brown sugar
  • 4 ounces (1/2 cup /  1 stick) unsalted butter at room temperature, cut into small cubes
Filling:
  • 6 medium apples (preferably a combination of honey crisp and granny smith)
  • 3 large pears, any type (ripe but still firm)
  • 2 cups fresh or frozen cranberries
  • 5⅝ ounces (~3/4 cup) granulated sugar
  • 1⅜ ounces (~1/3 cup) oat flour (I pulsed my oatmeal in the food processor until it was the consistency of flour)
  • ½ tablespoon ground cinnamon
  • 1 tablespoon fresh lemon juice (~1/2 lemon)
  • 3 ounces (6 tablespoons / ¾ stick) unsalted butter, chilled, cut into small pieces
Instructions
  1. Pre-heat oven to 350 degrees; grease a 9x13 or two 8-inch square baking dishes and set aside
  2. In a medium bowl, prepare topping; mix together oat flour, oatmeal and brown sugar
  3. Add butter and use fingers to combine until mixture is slightly lumpy; set aside
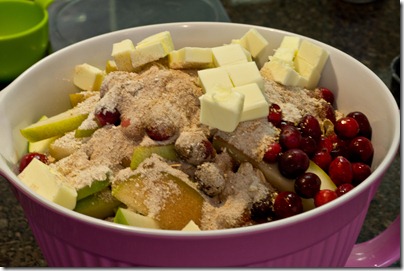
  4. Prepare filling; In a very large bowl, stir together fruit, granulated sugar, oat flour, cinnamon, lemon juice and butter
  5. Spread filling into prepared baking dish(es); sprinkle evenly with topping
  6. Bake for about 1 hour 20 minutes or until filling is bubbling, apples can be poked with a fork and topping is browned; if you see that topping has started to get to brown, lightly cover with tin foil for remainder of baking time
Notes
Adapted from Bon Appetit
*If serving to someone with a gluten allergy make sure your ingredients are labeled gluten-free
Best served warm with vanilla ice cream or frozen yogurt.
The entire dish can be made ahead of time and kept in refrigerator until ready to bake; may require extra cooking time if cold


Make something from the blog? Be sure to share it on Instagram with the tag #KeepItSweetDesserts.

You might also like:

Skillet Apple Crisp with Brown Butter Sauce

Skillet Apple Crisp with Brown Butter Sauce

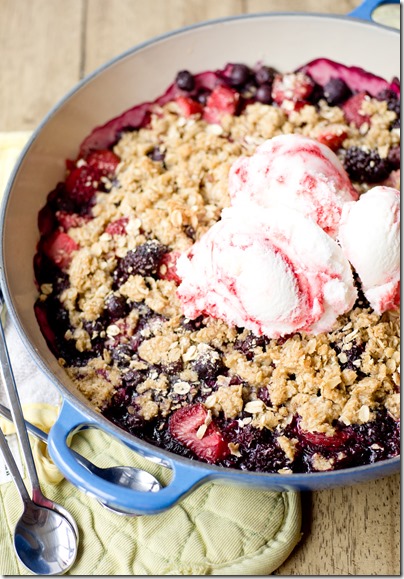
Summer Berry Skillet Crisp

Summer Berry Skillet Crisp

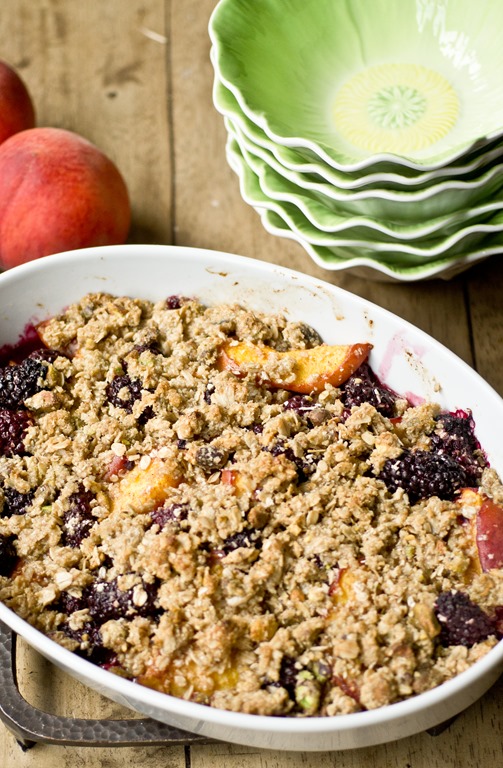
Blackberry, Peach & Pistachio Crisp

Blackberry, Peach & Pistachio Crisp


Amazing Winter Fruit Crisp