Tag Archives: pie

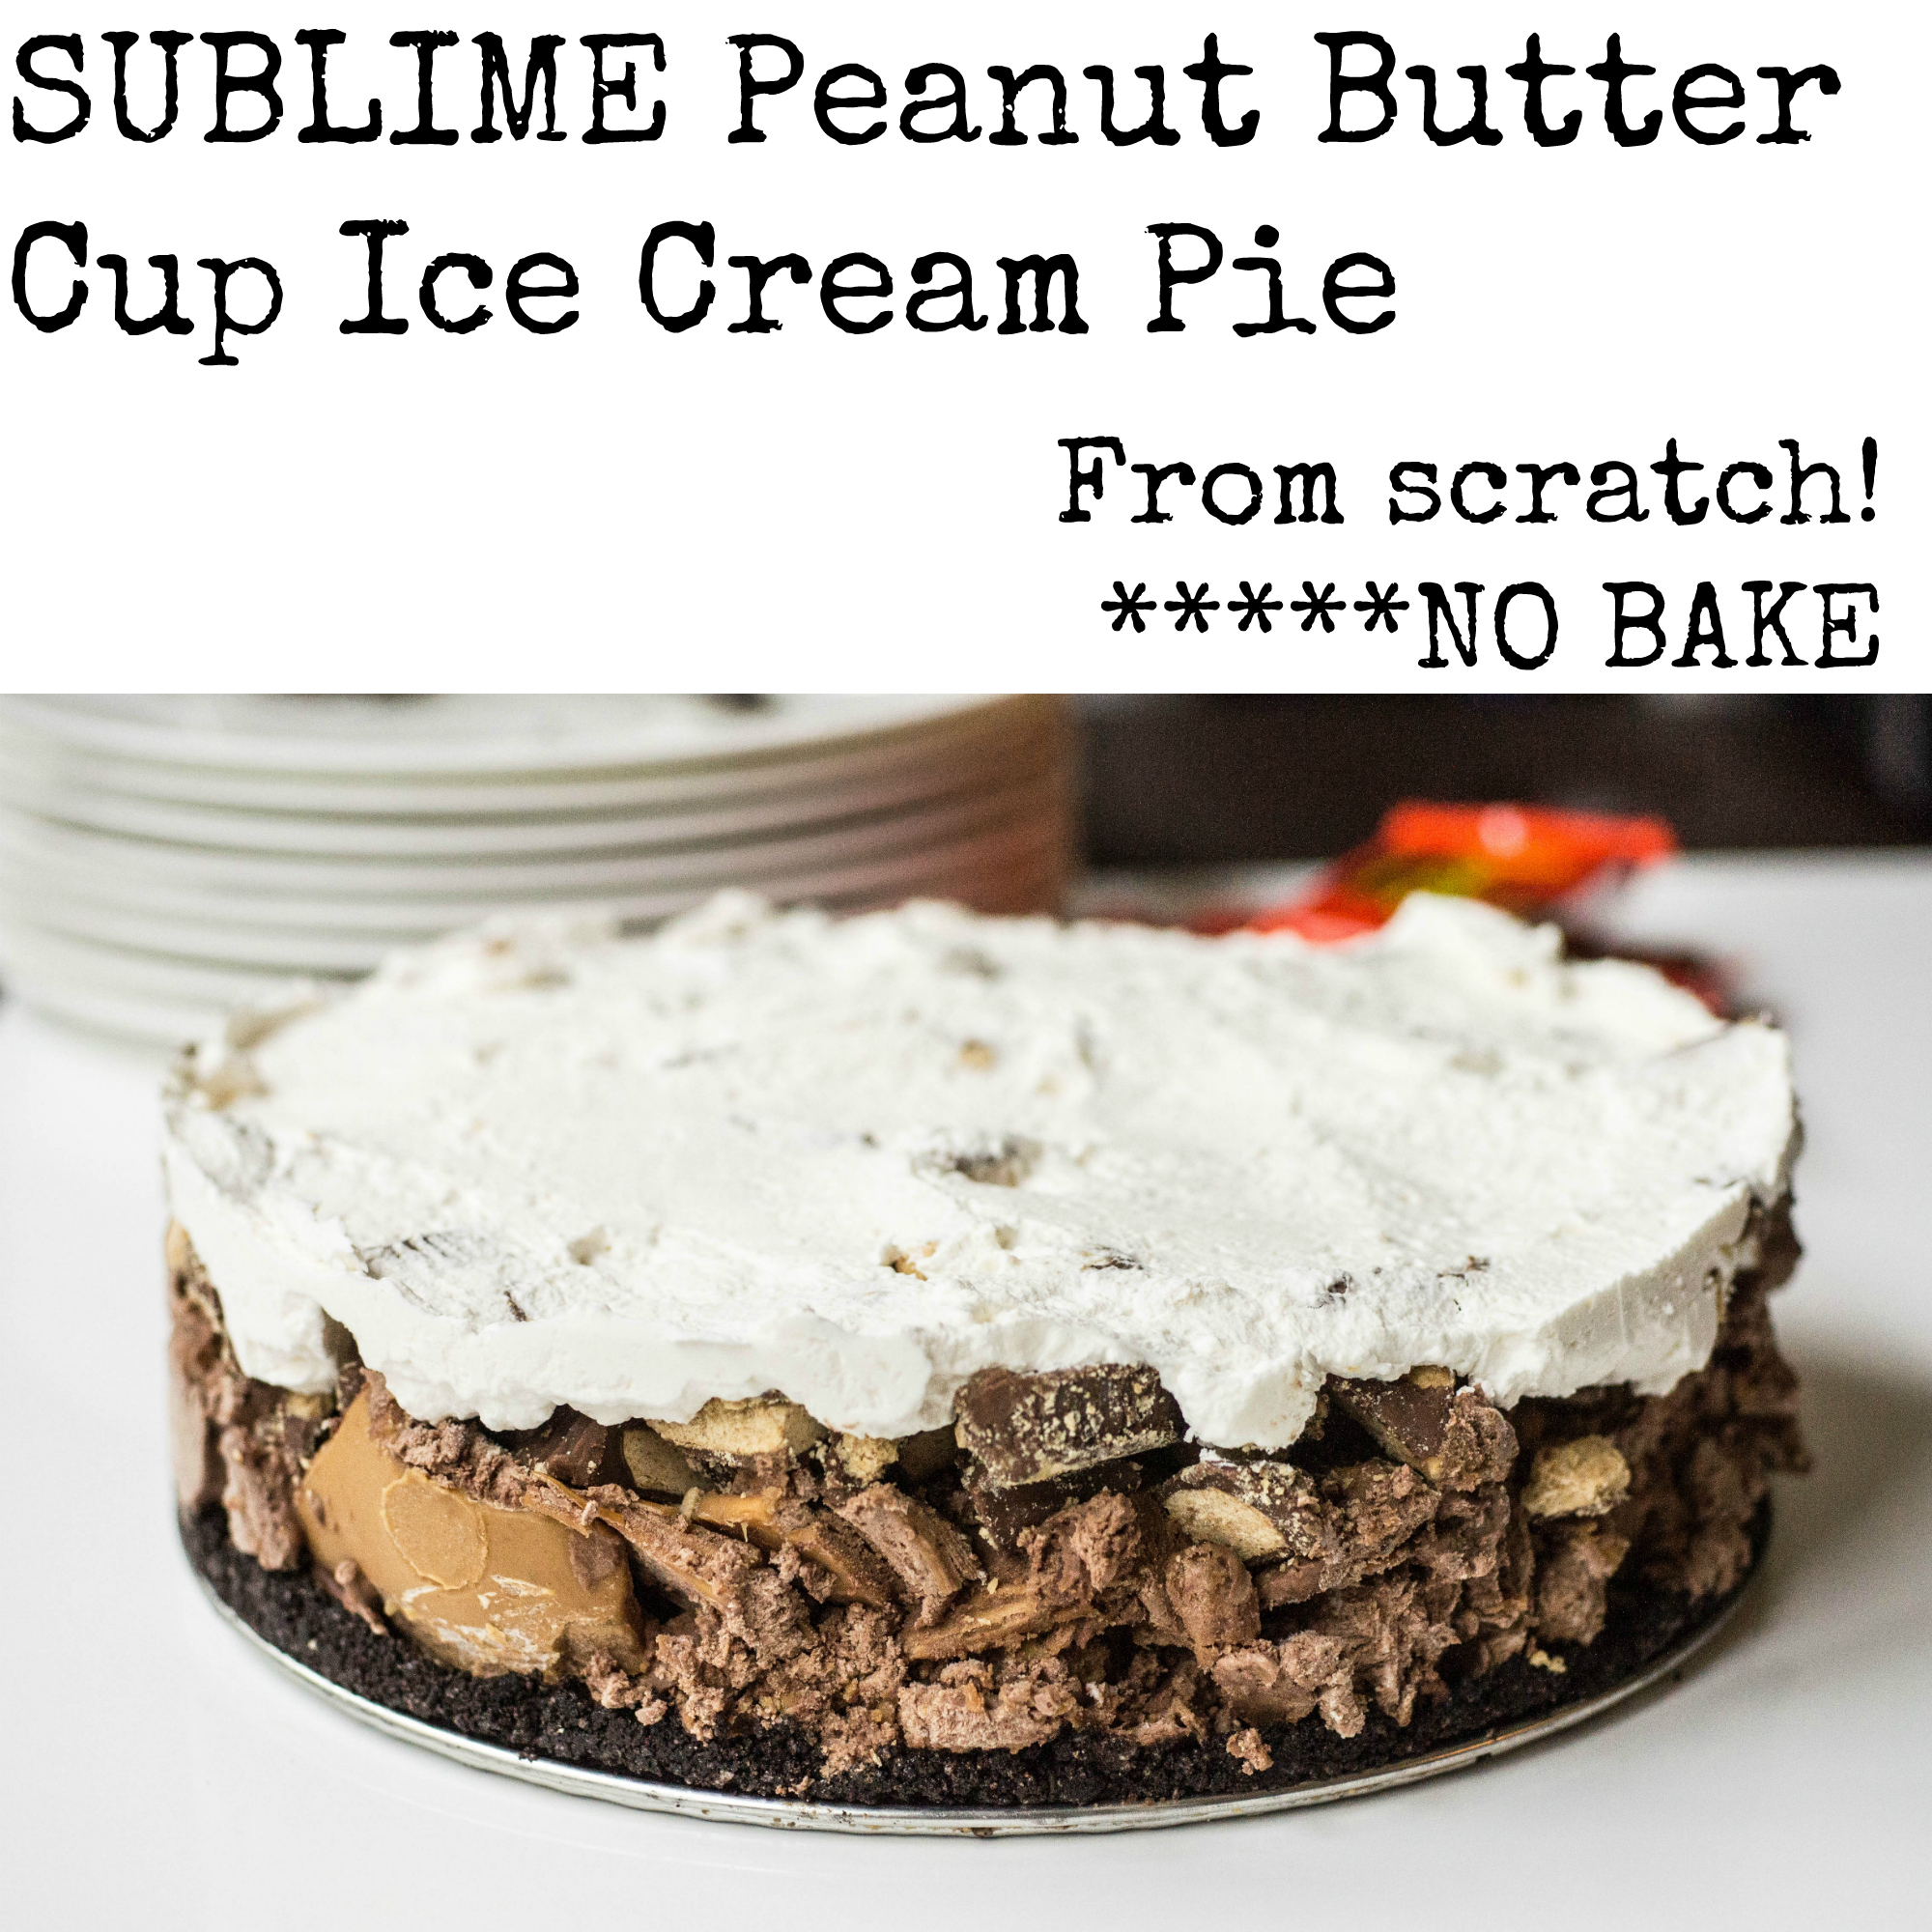
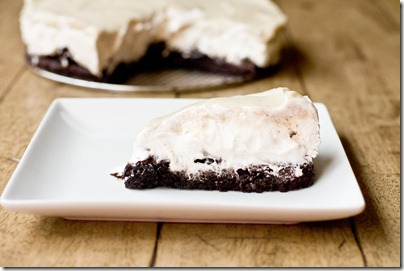
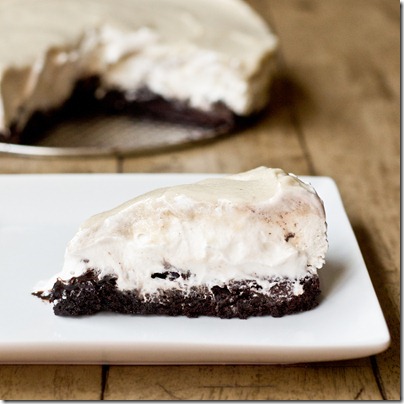
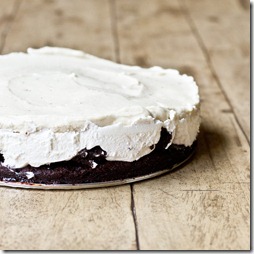
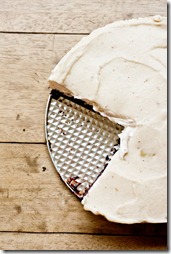
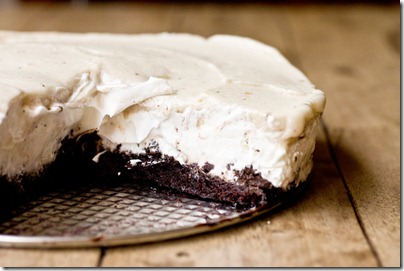
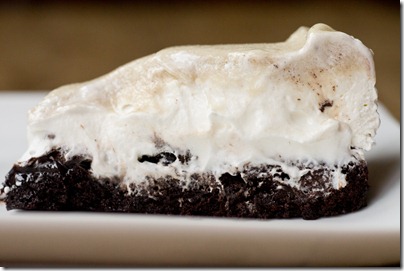
Sublime Peanut Butter Cup Ice Cream Pie

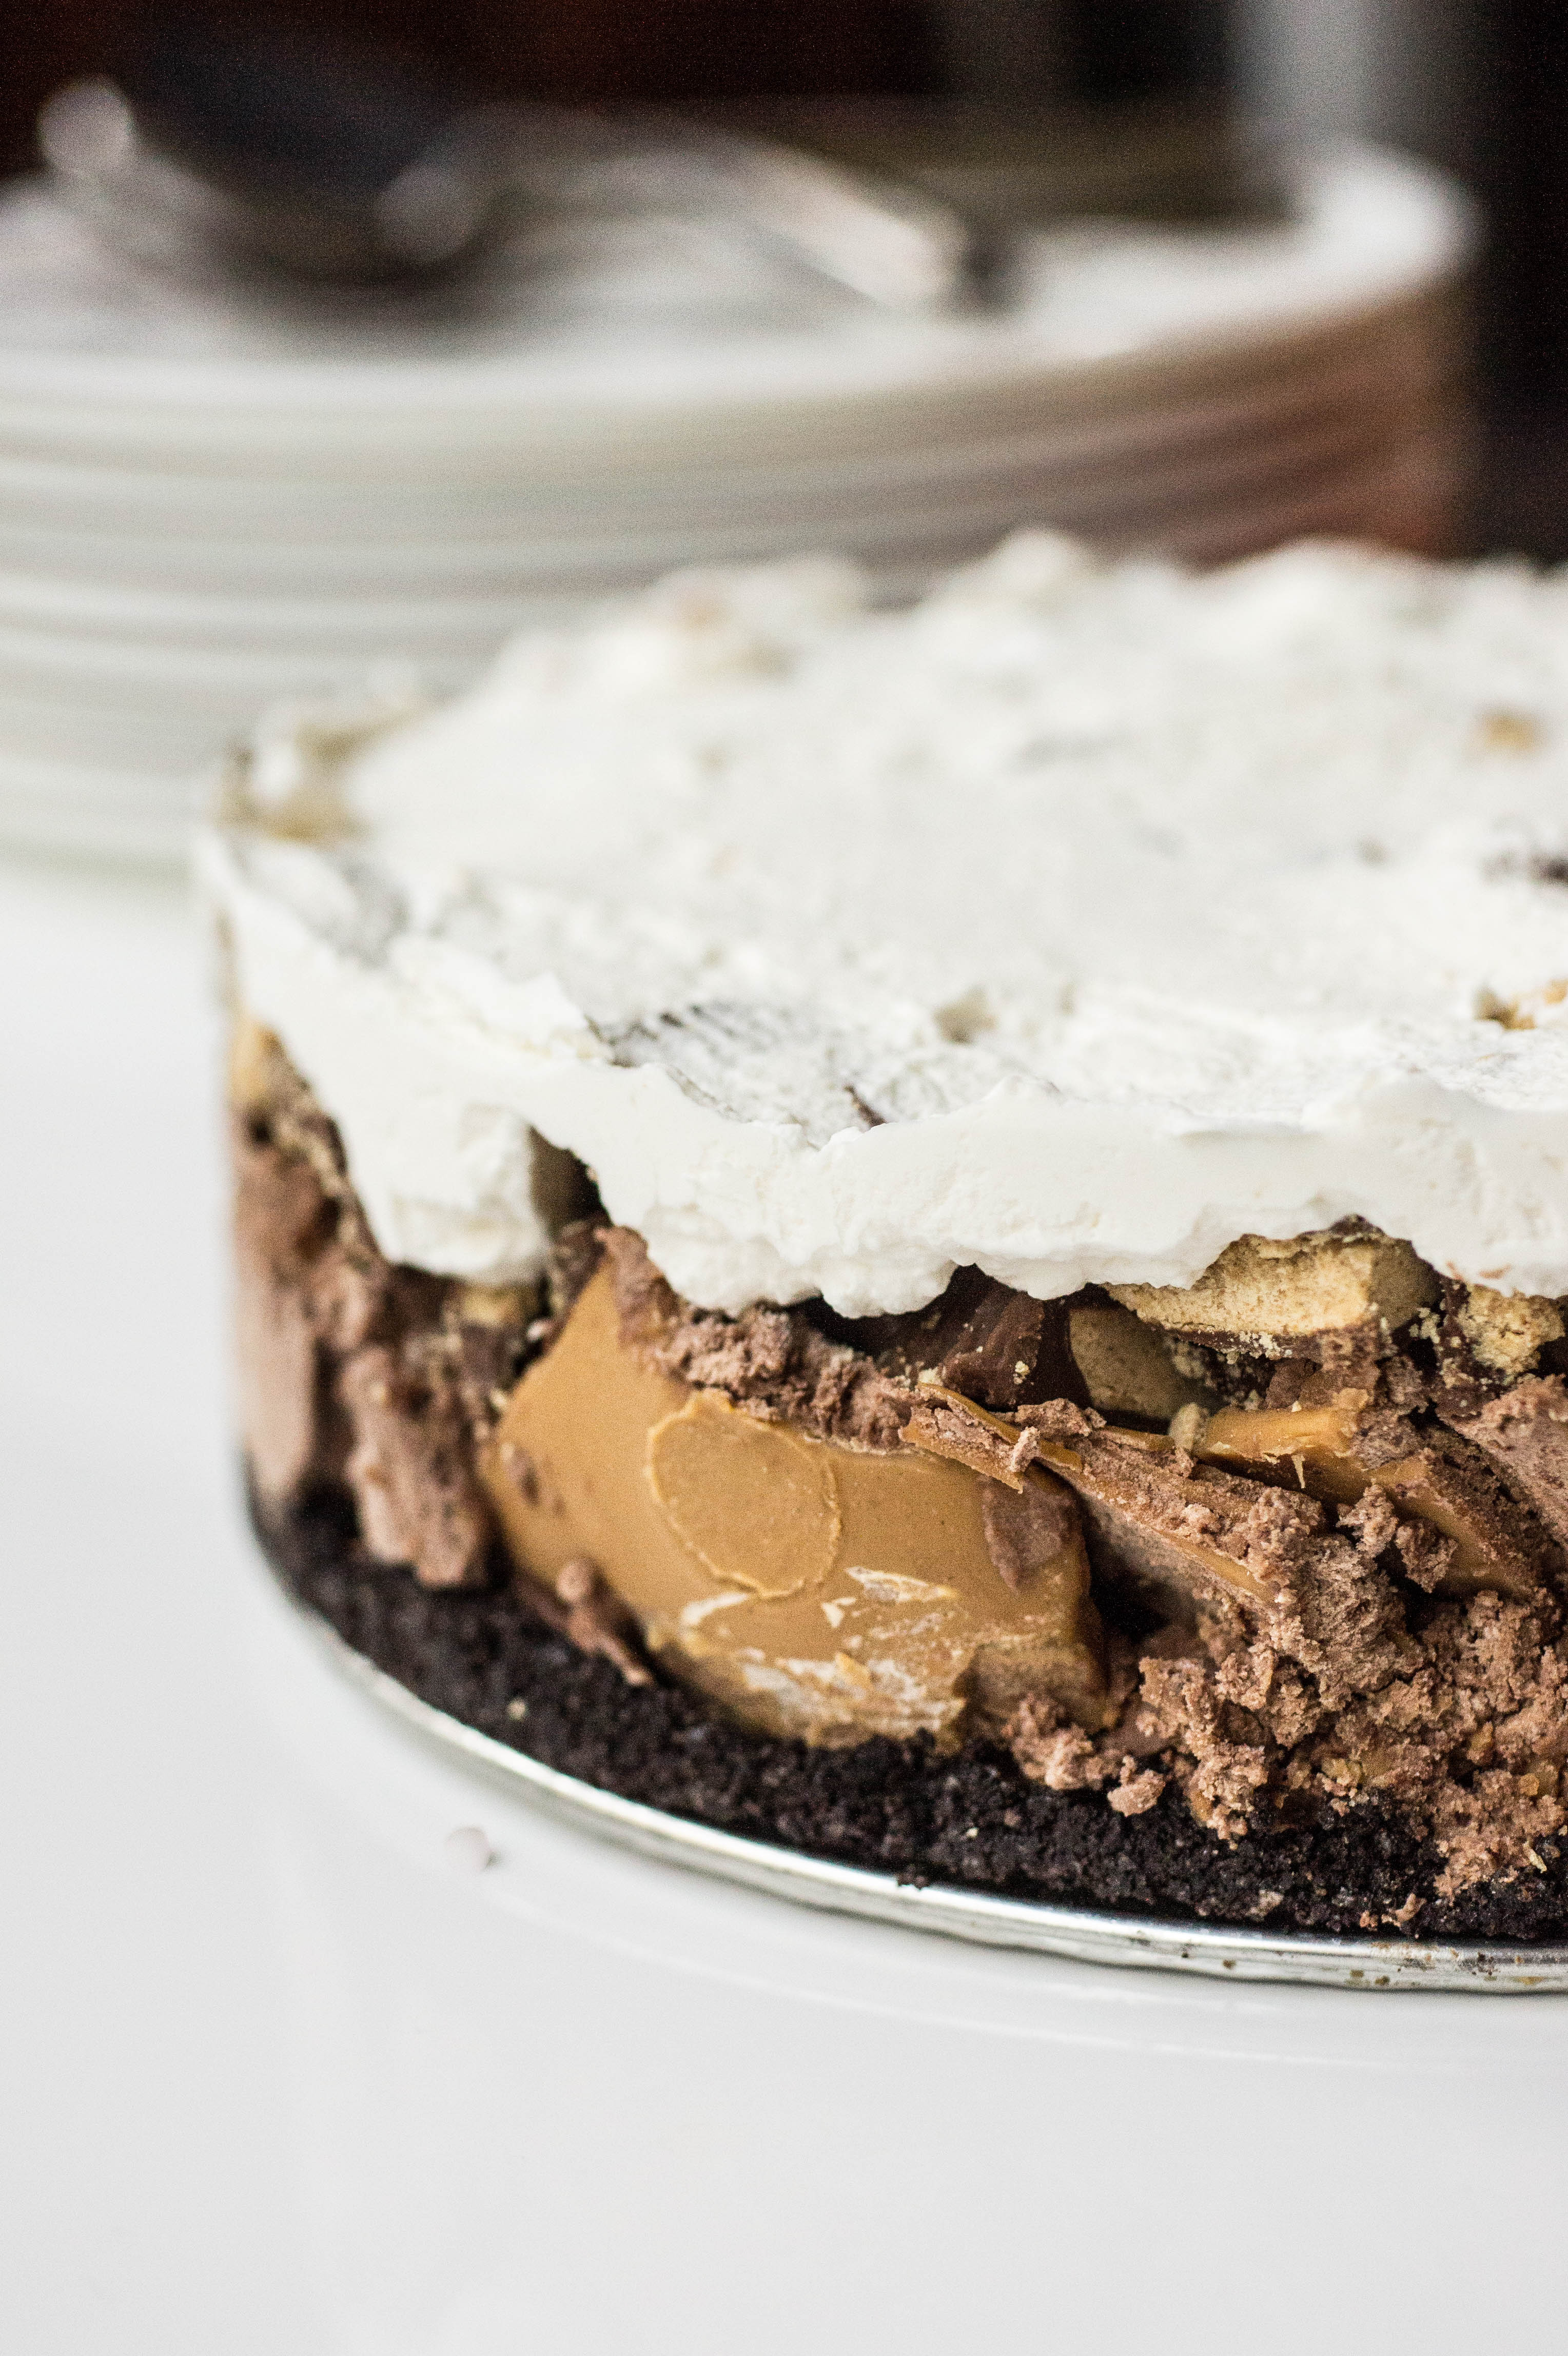
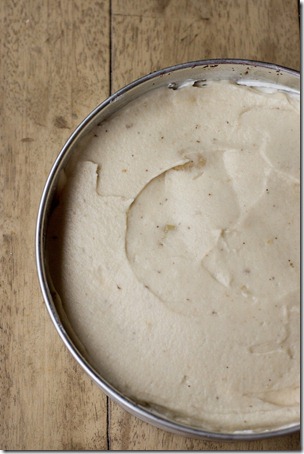
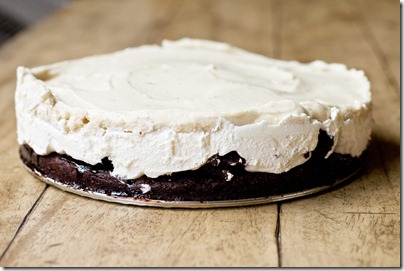
This no-bake ice cream pie is the ultimate summer dessert! Oreo crust, peanut butter ripple ice cream, tons of peanut butter cups and whipped cream!

SUBLIME Peanut Butter Cup Ice Cream Pie!!!
This dessert wavers back and forth between hot mess and best thing ever. I’m going with best thing ever.

This ice cream I shared with you? It was already pretty heavenly but I just had to take it even further. All my life I’ve been a pretty big ice cream pie fanatic (as a kid I used to get one every year for my birthday from Baskin Robbins). It makes sense. You usually start with an Oreo crust (always, always good) and then load it up with your favorite ice cream. Here I decided a full pound of peanut butter cups should be used as well, because why not? Make this dessert when you are having some friends over for a barbeque because it’s something worth sharing. Just know that it may be a little messy to cut. Call it “homey” if you will.

SUBLIME Peanut Butter Cup Ice Cream Pie!!!

Sublime Peanut Butter Cup Ice Cream Pie
 
This no-bake ice cream pie is the ultimate summer dessert! Oreo crust, peanut butter ripple ice cream, tons of peanut butter cups and whipped cream!
Author:
Recipe type: Dessert
Makes: 12 servings
Ingredients
  • 285g (~2¼ cups / 25 cookies) finely crushed Oreos
  • 71g (5 tablespoons) unsalted butter, melted
  • 1 Recipe for Peanut Butter Ripple Chocolate Ice Cream
  • 454g (~3 ½ cups) chopped peanut butter cups (from about 22 large)
  • 2 cups Stabilized Whipped Cream (recipe here)
Instructions
  1. In a medium bowl, combine Oreo crumbs and melted butter; press mixture down evenly into the bottom of a spring form pan; chill in refrigerator for thirty minutes
  2. A few minutes before crust is ready to fill, take ice cream out of freezer to soften slightly
  3. Carefully spread half of ice cream over crust; top with chopped peanut butter cups
  4. Cover pan with foil and freeze; make stabilized whipped cream
  5. Spread whipped cream over peanut butter cup layer and place pie back in freezer for at least one hour or until ready to serve

Make something from the blog? Be sure to share it on Instagram with the tag #KeepItSweetDesserts.

You might also like:

Chocolate Pound Cake with Peanut Butter Whipped Cream

Chocolate Pound Cake with Peanut Butter Whipped Cream

Peanut Butter Caramel Candy Cups

Peanut Butter Caramel Candy Cups

Peanut Butter Cup Heath Bar Brown Butter Cookies

Peanut Butter Cup Heath Bar Brown Butter Cookies

Fluffernutter Mini Pies {Guest Post}

Today’s guest post is from Madison, a blogger that I’ve been virtual friends with for years now. We even got to meet over dinner a few years ago!  She has her own little one due at the end of this winter (a wonderful miracle that you should read about). Visit her blog and take a look at some of my favorite recipes she has posted (Sweet Potato and Black Bean Enchiladas, Classic Apple Pie with an Ultra Flaky Crust, and Peanut Butter Toffee Cookies).

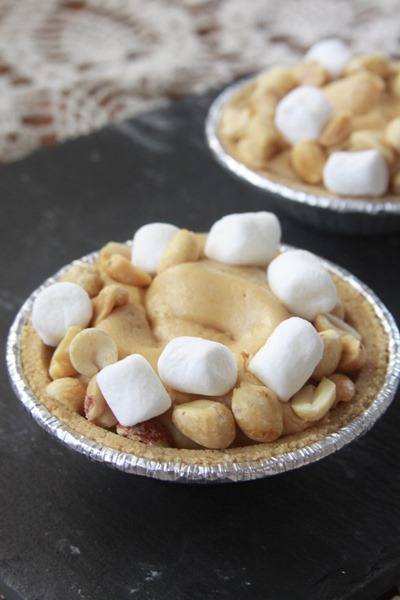
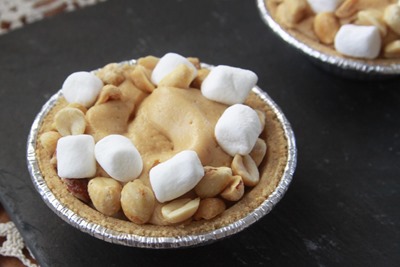
Fluffernutter Mini Pies!

Hi, Keep It Sweet readers! I’m so excited that Lauren asked me to share a recipe with you while she is enjoying some much-deserved time with her new little one! Lauren and I have been blog friends almost as long as our blogs have been around and I couldn’t be happier for Lauren and Matt as they journey into parenthood.

It’s a little intimidating to share a desert recipe on Lauren’s site. That girl can bake! I think her blondies are my husband’s all-time favorite dessert. But I’m going to give it a go anyway!

The recipe that I’m sharing with you today, Fluffernutter Mini Pies, is a scaled-down dessert that makes just four small pies and can be whipped together in no time. I find that having too many sweets in the house is a recipe for disaster since my willpower is just not that strong, so sometimes it’s nice to have something that makes just a few servings.

I didn’t grow up on the marshmallow crème and peanut butter combination known as fluffernutter, but I’ve come to love the combo as an adult. These pies combine cream cheese, peanut butter and marshmallow crème into an easy pie filling. Not into mini desserts? Just double the filling amount and use a regular pie shell and you’re good to go for larger groups. Enjoy!

Fluffernutter Mini Pies!


5.0 from 1 reviews
Fluffernutter Mini Pies {Guest Post}
 
Author:
Recipe type: Dessert
Makes: 4 mini pies
Ingredients
  • ⅓ cup heavy cream
  • ¼ teaspoon vanilla
  • 4 oz cream cheese, softened
  • ½ cup creamy peanut butter
  • ½ cup marshmallow crème
  • 3 tablespoons powdered sugar
  • 4 miniature graham cracker crust pie shells
  • Salted peanuts and miniature marshmallows for garnishing
Instructions
  1. In the bowl of an electric mixer fitted with a whisk attachment, whisk heavy cream and vanilla until firm peaks form. Transfer mixture to a mixing bowl and set aside.
  2. With your electric mixer, beat together the cream cheese, peanut butter, marshmallow crème and powdered sugar until smooth. Gently fold in the whipped cream until evenly combined.
  3. Spoon or pipe mixture into the prepared pie shells. Garnish mini pies with the peanuts and miniature marshmallows and refrigerate at least 1 hour or until mixture is firm and set.

Madison Mayberry Hofmeyer is a wife to Joe and food editor (yes, that’s a real job!) for The Betty Crocker Kitchens living in Edina. They are expecting their first baby in March who will join their two fur babies, dogs Nutmeg and Pippa. Madison blogs about all things food and life over at Espresso and Cream.

Make something from the blog? Be sure to share it on Instagram with the tag #KeepItSweetDesserts.

You might also like:

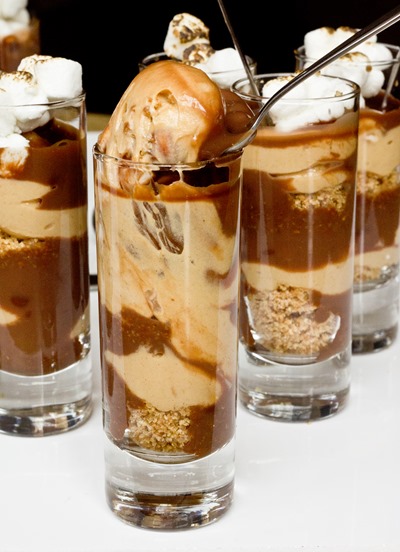
Peanut Butter S’mores Parfaits

Peanut Butter S'mores Parfaits

Peanut Butter Snack Cake

Peanut Butter Snack Cake

Peanut Butter Caramel Candy Cups

Peanut Butter Caramel Candy Cups

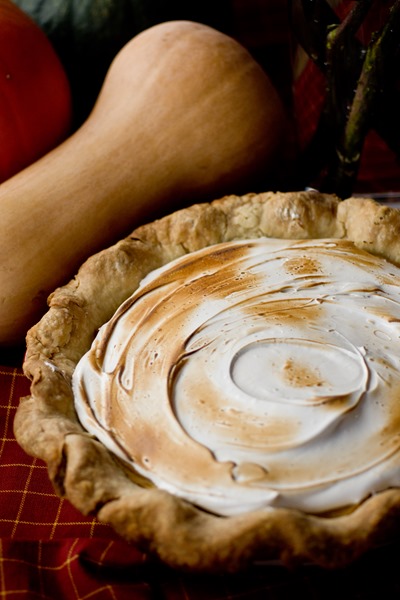
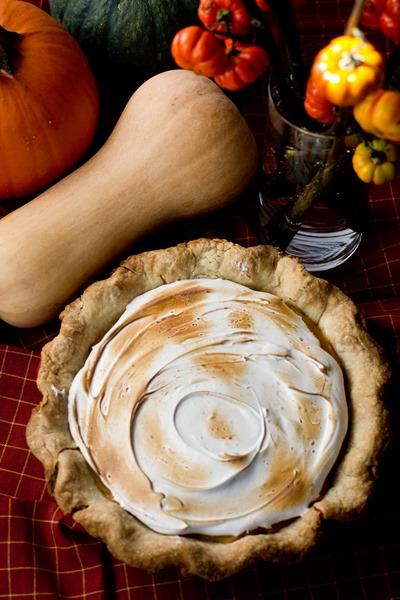
Roasted Butternut Squash Pie with Brown Sugar Marshmallow Topping

Flaky pie crust, flavorful roasted butternut squash filling and a sweet toasted brown sugar marshmallow topping make an amazing fall dessert. This is the perfect Thanksgiving pie!

Roasted Butternut Squash Pie with Brown Sugar Marshmallow Topping- so gorgeous for the holidays

Today we are celebrating with a virtual bridal shower for a very dear friend of mine! Joanne is getting married in just a few weeks and I’m so happy to be a part of the celebration. Not only am I partaking in this virtual shower, but I was also honored to be asked to be a bridesmaid in the wedding.

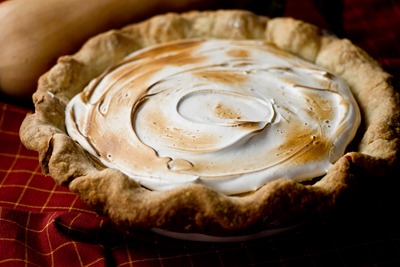
Roasted Butternut Squash Pie with Brown Sugar Marshmallow Topping- seriously good

I’ve known Joanne for four years now and she is truly such a wonderful person. We met over dinner and then quickly bonded later as we flew across the country without a moment of silence on the plane. Our friendship was instantaneous. In the past four years we’ve shared highs and lows and now we are celebrating a very wonderful high. Her happiness is contagious!

Flaky pie crust, flavorful roasted butternut squash filling and a sweet toasted brown sugar marshmallow topping make the perfect fall dessert.

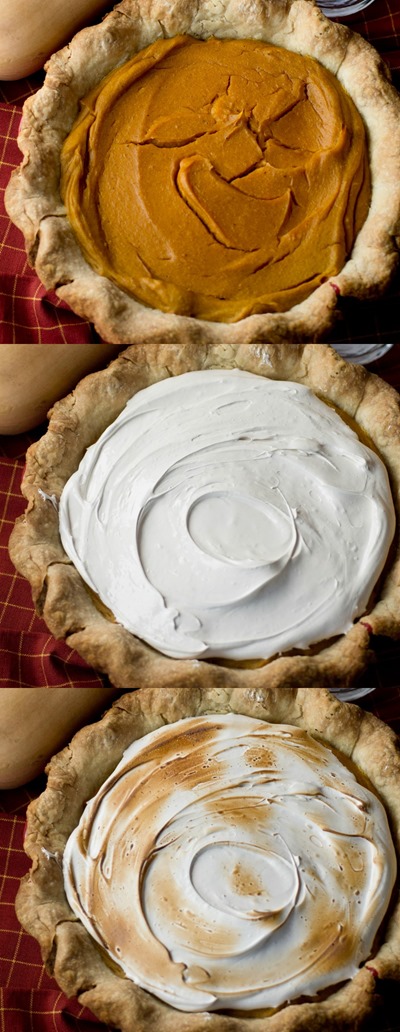
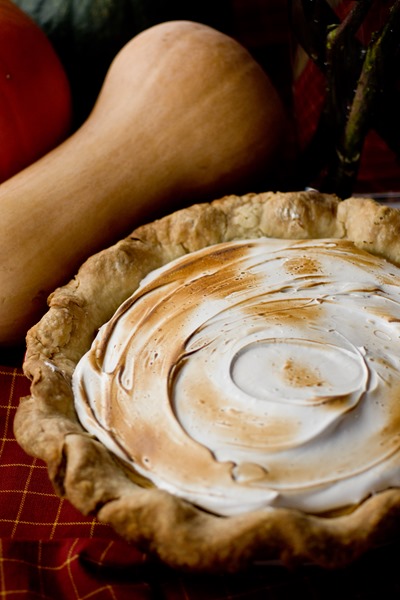
Among many other things, Joanne and I share a love of winter squash. For her fall-themed virtual shower, I thought it would be the perfect ingredient to focus on. I wanted to make a very special dessert and I have a feeling that this pie, packed with our favorite vegetable (seriously, look at that bright orange hue in the photo above) was the perfect choice. The marshmallow topping adds a wonderful sweetness and the flavor from the brown sugar really compliments the pie. Thinking about what to make in a few weeks for Thanksgiving? This pie will not let you down.

Scroll down to see what our other blogging friends are sharing!

Roasted Butternut Squash Pie with Brown Sugar Marshmallow Topping
 
Flaky pie crust, flavorful roasted butternut squash filling and a sweet toasted brown sugar marshmallow topping make an amazing fall dessert. This is the perfect Thanksgiving pie!
Author:
Recipe type: Dessert
Makes: 1 9-inch pie; 8-10 servubgs
Ingredients
  • 1 unbaked 9-inch (4-cup volume) deep-dish pie crust dough, cold* (I used Audra’s pie crust recipe – so flaky!)
  • Butternut Squash Filling
  • 900g (~4 cups) cubed butternut squash (from ~2 ½ pound squash)
  • 2g (1 teaspoon) ground cinnamon
  • 1g (1/2 teaspoon ground nutmeg)
  • ½g (1/2 teaspoon ground ginger)
  • 118g light brown sugar, tightly packed
  • 150g (3 large) whole eggs at room temperature
  • 148 milliliters (1/2 cup + 2 tablespoons) heavy cream
  • 30 milliliters (2 tablespoons) bourbon (optional, can replace with vanilla)
  • Toasted Brown Sugar Marshmallow Topping
  • 115g (1/2 cup tightly packed) light brown sugar
  • 50 g (¼ cup) granulated sugar
  • 60g (3 large) egg whites at room temperature
  • 1g (1/4 teaspoon) cream of tartar
Instructions
  1. Roast squash: pre-heat oven to 425 degrees Fahrenheit; Line a large baking sheet with foil and coat with non-stick cooking spray
  2. Place squash on baking sheet and toss with cinnamon, nutmeg and ginger; cook in oven for 30-35 minutes or until fork tender; set aside to cool
  3. Reduce oven temperature to 350 degrees Fahrenheit and prepare to par-bake pie crust
  4. Roll out pie crust and press into a 9-inch glass or ceramic pie plate (do not overwork the crust); neatly trim the edges and crimp crust as desired; refrigerate pie place with crust for ten minutes so that dough is once again chilled
  5. When ready, line pie shell with foil and fill with pie weights, change or dried beans
  6. Bake for 25 minutes and then remove pie crust from oven; remove foil and pie weights; return to oven for an additional 10 minutes or until crust appears to be a very light gold (remember, you will be baking the rest of the pie for additional time)
  7. While crust is baking, prepare pie filling (you can use a large bowl with an immersion blender or a high-speed blender); place all filling ingredients in bowl or blender and combine on high speed until smooth (if using a high-speed blender like a Vitamix, start blender on low and gradually increase speed to high; blending will only take a couple of minutes)
  8. Pour filling into pie shell and bake for about 40-50 minutes or until filling is set; if crust begins to brown too much during baking, cover lightly with foil
  9. Set pie aside on cooling rack and prepare topping
  10. Place sugars, egg whites and cream of tartar in a the large bowl of an electric mixer or another heatproof bowl set up with a candy thermometer
  11. Place bowl over a medium pot or saucepan of simmering water, being careful that the water does not reach the bowl
  12. Whisk the topping ingredients constantly for several minutes or until sugar has dissolved and temperature reaches 160 degrees Fahrenheit
  13. Remove bowl from heat and use the whisk attachment on electric mixer to finish topping; beat on high speed for about six minutes minutes or until stiff glossy peaks form
  14. Spread or pipe decoratively over pie and use a torch or broiler to (carefully without burning) brown the marshmallow topping
Notes
Adapted from Food and Wine
Pie can be made one day in advance and refrigerated (you can wait to torch or broil the topping until prior to serving if desired)

Roasted Butternut Squash Pie with Brown Sugar Marshmallow Topping - so making this for Thanksgiving!
My pie-loving (but super-picky-dessert-eating) sister said this was the best pie she has ever eaten!
And now for the rest of the shower!

Cocktails:

Pumpkin Spice White Russian – Nutmeg Nanny

Warm Apple Pie Cocktail – Miss In The Kitchen

Bourbon Apple Cider Cocktail– Cook Like A Champion

Snacks/Savory:

Baked Brie with Honey and Sliced Almonds – The Lemon Bowl

Butternut Squash and Apple Galette – Warm Vanilla Sugar

Roasted Pumpkin Crostini – Annie’s Eats

Kale Salad with Maple Butternut Squash and Pomegranate Dressing – Blahnik Baker

Lemony-Pasta Stuffed Zucchini – Very Culinary

Pumpkin Dip with Apple Chips– Meadows Cooks

Sweet:

Pumpkin Cinnamon Roll Cake – The Baker Chick

Peanut Butter Fudge Pie with Salted Peanut Butter Caramel– Taste and Tell

Caramel Apple Upside Down Cake – The Girl in the Little Red Kitchen

Snickerdoodle Bundt Cake – Chocolate and Carrots

Roasted Butternut Squash Pie with Brown Sugar Marshmallow Topping – Keep It Sweet

Caramel Corn Chocolate Chip Cookies – The Cooking Actress

Caramel Cranberry Apple Galette – Bakeaholic Mama

Coconut Pecan Tarts – Bake or Break

Cranberry Margarita Cupcakes – Baker by Nature

Gingerbread Truffles – Dinners Dishes and Desserts

Make something from the blog? Be sure to share it on Instagram with the tag #KeepItSweetDesserts.

Sweet and Salty Toll House Pie

This warm sweet and salty cookie pie is perfect with a scoop of vanilla ice cream!

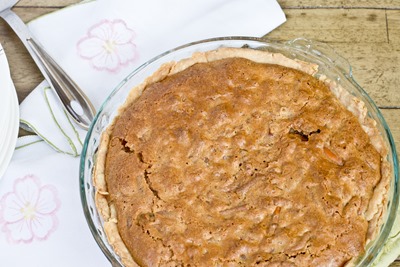
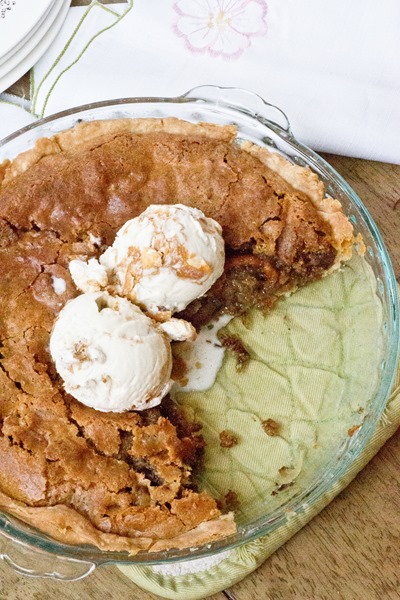
Sweet and Salty Toll House Pie -This warm sweet and salty cookie pie is perfect with a scoop of vanilla ice cream!

This is just one of those posts where I’m going to cringe looking at the pictures, but the recipe is too good not to share and frankly, sometimes the most UN-photogenic desserts are the tastiest.

Way back on our first Valentine’s Day together (2004!), Matt took me to dinner at Murphy’s in Atlanta.  Pretty much everyone who went to Emory has gone there at least once (likely during a parental visit where there was a rental car and someone else’s credit card involved).  This was actually my second date at the restaurant but I don’t think I told that fact to Matt that night…  Anyway, our meal involved some delicious food (to this day Matt still talks about the grouper he had) and ended on a sweet note with Toll House Pie.  I had no idea that this was a thing at the time, but apparently it was and anyone who went to Murphy’s had to have it (a sign that my first date there was definitely not meant to be).  When the server brought out the warm slice of pie oozing with melted chocolate and topped with creamy vanilla ice cream melting away, we were in dessert heaven.  Way back then I was a bit on the stricter side (ahem, very strict) when it came to indulging, but you better believe I ate my fair share of that pie.

Since then I’ve made the traditional version once (sans nuts), but this time around I wanted to make it sweet and salty.  Swapping out the chopped nuts for pretzel pieces and loading it with big milk chocolate chunks was a good move.  As was the sprinkling of smoked sea salt on top!

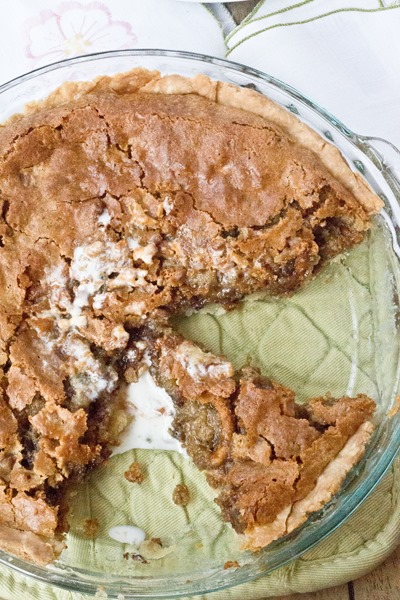
Sweet and Salty Toll House Pie -oozing and warm... perfect with ice cream!

Sweet and Salty Toll House Pie
 
This warm sweet and salty cookie pie is perfect with a scoop of vanilla ice cream!
Author:
Recipe type: Dessert
Makes: 8 servings
Ingredients
  • 1 unbaked 9-inch (4-cup volume) deep-dish pie crust dough, cold* (I used
  • Audra’s pie crust recipe– so flaky!)
  • 100g (~2 large) whole eggs
  • 10 milliliters / 2 teaspoons vanilla extract
  • 235g (~1 cup packed) light brown sugar
  • 170g (3/4 cup) unsalted butter, softened at room temperature
  • 64g (~1/2 cup) all-purpose flour
  • 2 ½g (½ teaspoon) salt
  • 150g (~1 cup) milk chocolate, roughly chopped
  • 40g (~1 cup) broken salted pretzel pieces
  • 2g (1 teaspoon) flaky sea salt, preferably smoked
Instructions
  1. Pre-heat oven to 325 degrees
  2. Roll out pie crust and press into a 9-inch glass or ceramic pie-plate; set aside
  3. In a medium bowl, combine flour and salt; set aside
  4. In the large bowl of an electric mixer, beat eggs and vanilla on medium-high speed for several minutes until light and foamy
  5. Beat in sugar and butter on medium-high speed until well-combined; use a rubber spatula to scrape the bottom and sides of the mixing bowl
  6. Put mixer on low and slowly add in flour mix
  7. Stir in chocolate and pretzels but do not overmix
  8. Carefully spread filling into pie shell; top with flaky sea salt
  9. Bake for 55-60 minutes or until a knife comes out clean from side of pie, center should still be moist
  10. Allow to cool for 10 minutes before serving warm with ice cream
Notes
Adapted from the original Nestle Toll House Pie

Sweet and Salty Toll House Pie -such an awesome dessert

Make something from the blog? Be sure to share it on Instagram with the tag #KeepItSweetDesserts.

No Bake Blueberry Pie

No need to turn on the oven for this pie!  The no-bake pie includes a thick graham cracker crust, luscious cream cheese layer and homemade blueberry pie filling.

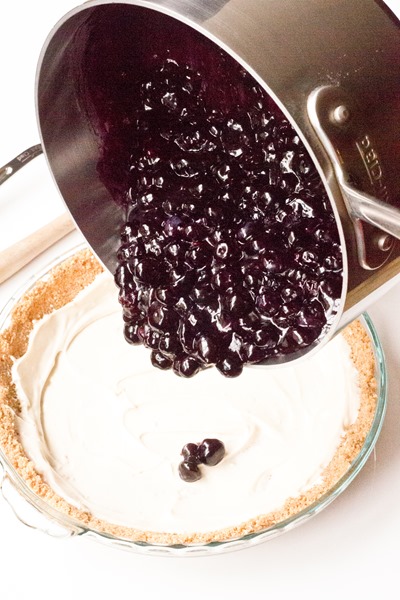
No-Bake Blueberry Pie - such a great way to enjoy pie in the summer!

I don’t really think of myself as a pie person.  My sister?  She loves pie.  My dad, too.  I like pies a lot, but don’t get all that excited about them too often.  However, I have a history with this blueberry pie (it pretty much blows every other pie out of the water).  This summer I decided to make a no-bake version.  It simplifies things and adds a nice item to the “don’t-have-to-turn-on-your-oven” repertoire.  Traditional pie crust fans, I’m sorry.  But to the rest of us who are all about the filling anyway, the graham cracker crust is still a great compliment to this perfect specimen of a fruit filling.

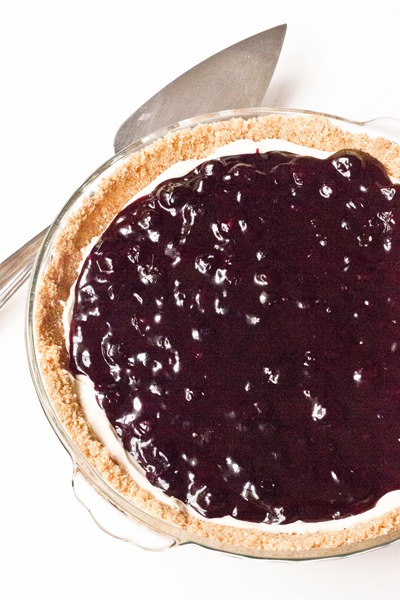
No-Bake Blueberry Pie - 3 delicious layers and the filling is perfection

No Bake Blueberry Pie
 
No need to turn on the oven for this pie! The no-bake pie includes a thick graham cracker crust, luscious cream cheese layer and homemade blueberry pie filling.
Author:
Recipe type: Dessert
Makes: 8 servings
Ingredients
Graham Cracker Crust
  • 180g (1 ½ cups) finely ground graham cracker crumbs (10-11 full sheets)
  • 55g (¼ cup) granulated sugar
  • 85g (6 tablespoons) unsalted butter, melted
Cream Cheese Layer
  • 113g light or regular cream cheese, at room temperature
  • 41g (3 tablespoons) granulated sugar
  • 15 milliliters (1 tablespoon) heavy cream
  • 2 milliliters (½ teaspoon) vanilla extract
Blueberry Pie Filling
  • 165g (3/4 cup) granulated sugar
  • 25g (3 tablespoons) cornstarch
  • 1g (1/4 teaspoon) salt
  • 570g (4 cups) blueberries, separated in half (if you can, group the best looking blueberries together, you will want to cook the blueberries that aren’t “perfect”)
  • 60 milliliters (¼ cup) water
  • 15 milliliters (1 tablespoon) fresh lemon juice (from ~1/2 lemon)
  • 14g (1 tablespoon) unsalted butter, softened at room temperature
Instructions
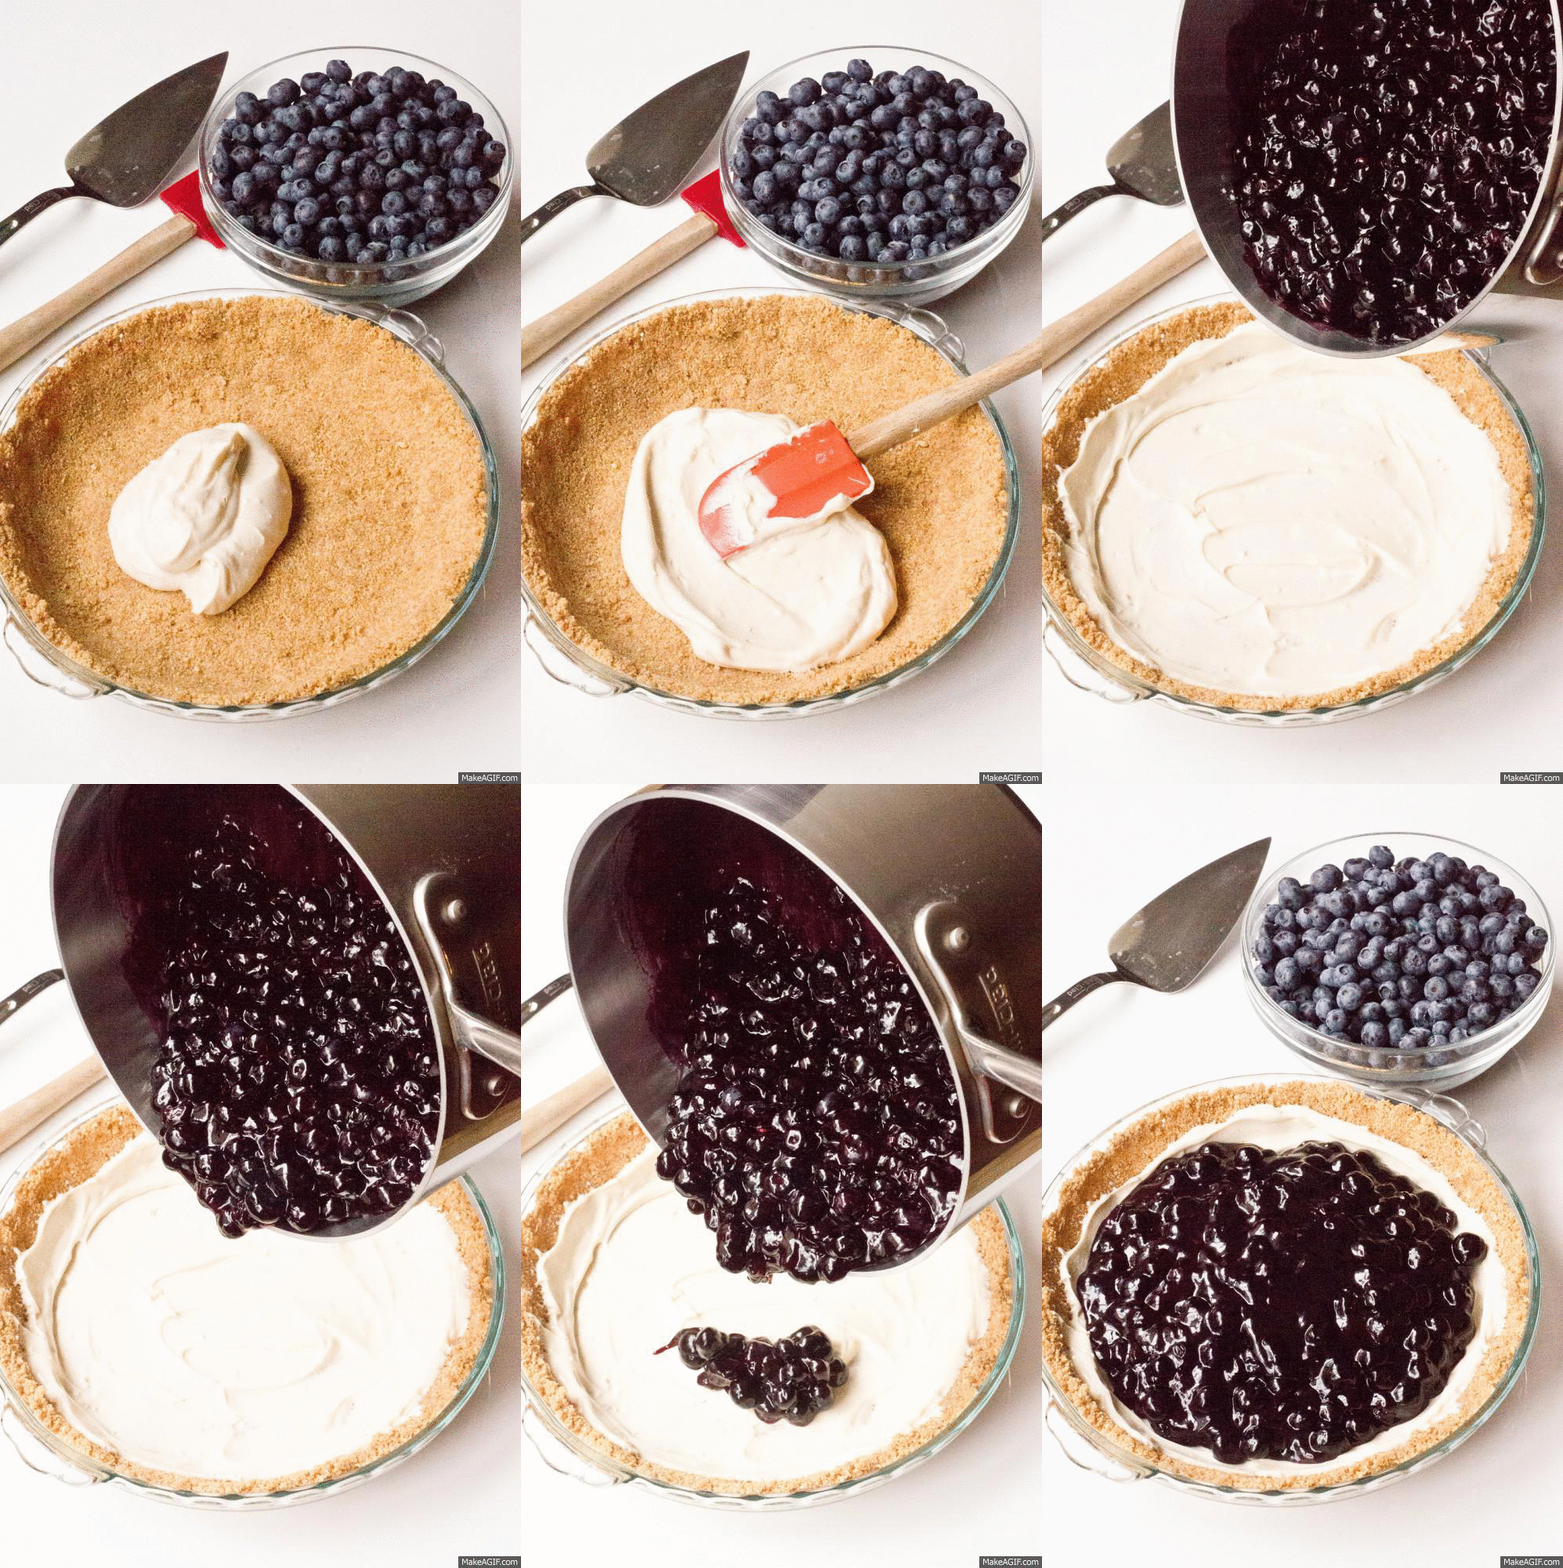
  1. Prepare pie crust; in a medium bowl, stir together graham cracker crumbs, sugar and melted butter
  2. Press crust ingredients down with your hands into a 9-inch pie plate
  3. Place crust in refrigerator and make cream cheese layer and filling
  4. In the bowl of a stand mixer use whisk attachment to combine ingredients until creamy, light and smooth; set aside and prepare blueberry pie filling
  5. In a medium heavy duty pot, combine the sugar, cornstarch and salt; add half of the blueberries and water
  6. Cook over medium heat, stirring constantly until blueberry mixture turns thickens and turns a very dark purple; this will take several minutes
  7. Remove from heat and stir in lemon juice and butter
  8. Fold in remaining blueberries
  9. Assemble the pie; remove crust from refrigerator and spread cream cheese layer evenly over top; gently spread blueberry filling into pie, making sure to keep cream cheese layer intact
  10. Chill in refrigerator at least one hour before serving and store leftovers in refrigerator; serve at room temperature
Notes
Slightly adapted from this pie which I blogged about here
Crust can be made up to 24 hours before filling, just cover it in seran and keep refrigerated
Pie should be enjoyed within three days of making

No-Bake Blueberry Pie - perfect for the amazing summer blueberries


Make something from the blog? Be sure to share it on Instagram with the tag #KeepItSweetDesserts.

Cranberry Apple Pie and Pie Week Giveaway

This double crusted cranberry apple pie is full of a melt-in-your-mouth fruit filling and covered in flaky pastry dough.  Wow your Thanksgiving guests with this holiday pie.

Cranberry Apple Pie

Scroll to end of post for giveaway details.

After making my Fancy Holiday Chocolate Pecan Pie, I couldn’t wait to use my new pan again.  And since I knew I wanted this pie to be another showstopper, I decided it was time to overcome my fear of top-layer pie crust.  I had to go big or go home.

Cranberry Apple Pie

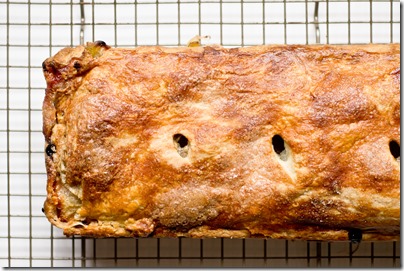
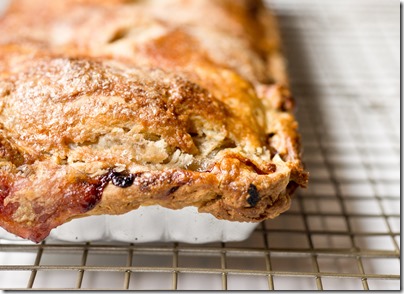
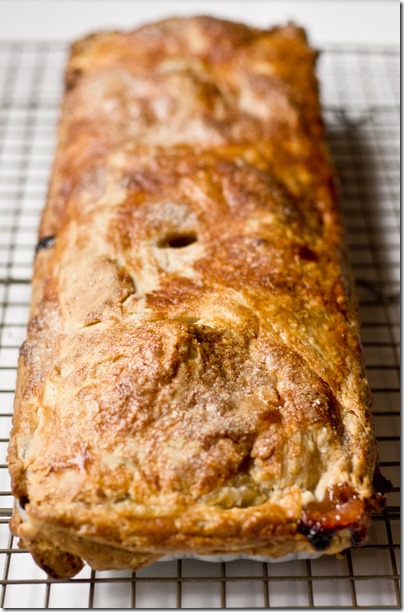
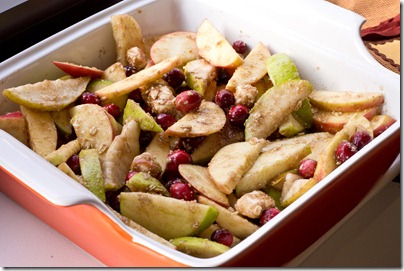
As I mentioned before, I am up to my ears in cranberries so it wasn’t hard to decide to use them in a pie.  I’ve had huge success with cranberries and apples before so I figured that  a cranberry apple pie would be perfect.   I used the same base dough as the pecan pie but went to Cooks Illustrated for the method of putting the pie together.  It gave me a lot more confidence in putting this dessert together to have very clearly laid out instructions.  And excuse me while I do pat myself on the back for a second because look at that gorgeous crust!

Cranberry Apple Pie

I’m almost sad that Pie Week is ending because I think I just got hooked on pies.

Cranberry Apple Pie
Have you checked out all of the amazing recipes?  Which ones will you be making for Thanksgiving?

Toasted Coconut Caramel Cream Pie – The Baker Chick

Chocolate Drizzled Pecan Pie Bites– Nutmeg Nanny

S’mores Hand Pies– Chocolate and Carrots

Pumpkin Coconut Pie– Dessert for Two

Chocolate Pudding Pie– Eats Well with Others

Cranberry Apple Pie– Keep it Sweet Desserts

Caramel Chess Tart- Bake or Break

Pumpkin Ice Cream Pie with Chocolate Almond Bark- Tracey’s Culinary Adventures

White Chocolate Peppermint Cream Pie– Dinners Dishes and Desserts

Smoked Salmon and Spinach Quiche– Country Cleaver

Apple Pie Ice Cream– Carla’s Confections

Triple Fruit Slab Pie– Foodie with Family

Cranberry Apple Pie and Pie Week Giveaway
 
This double crusted cranberry apple pie is full of a melt-in-your-mouth fruit filling and covered in flaky pastry dough. Wow your Thanksgiving guests with this holiday pie.
Author:
Recipe type: Dessert
Makes: 8 servings
Ingredients
Cranberry Filling:
  • 4 ounces (~1 cup fresh or frozen cranberries)
  • 2 ounces (~1/2 cup + 1 tablespoon) granulated sugar
  • 1 fluid ounce fresh lemon juice (~1/2 lemon)
  • ½ teaspoon ground cinnamon
  • ⅛ teaspoon salt
  • 1 fluid ounce water
Apple Filling:
  • 1¾ pound (~3 – 4) granny smith apples, peeled and sliced
  • 1¾ ounces (~1/2 cup) granulated sugar
  • ½ tablespoon cornstarch
  • ½ teaspoon ground cinnamon
  • ⅛ teaspoon salt
Finishing:
  • 1 egg white at room temperature, lightly whisked
  • 1 teaspoon granulated sugar
Instructions
  1. Prepare pie crust according to recipe directions and chill dough until ready to use
  2. When ready to bake, place a baking sheet on the lowest rack of oven and pre-heat to 425 degrees
  3. Prepare cranberry filling; cook cranberries, sugar, lemon juice, cinnamon and salt in a small heavy duty saucepan over medium heat, stirring occasionally; cook for several minutes or until all cranberries have burst and filling is thick; remove from heat, stir in water, and set aside to cool
  4. Prepare cranberry filling; combine apples, sugar, cornstarch, cinnamon and salt in a large microwaveable bowl; cover with seran wrap and microwave for 6 minutes, stopping occasionally to stir; apples should be slightly softened and limp when done; set aside to cool
  5. Roll half of dough out in a long rectangle (at least 16 inches long and 7 inches wide), dough should be ~1/8 inch thick
  6. Carefully press dough into tart pan, tightly into corners and edges; cut off any crust that hangs over more than ½ inch; wrap in seran wrap and chill in refrigerator for thirty minutes
  7. Roll other half of dough out in a long rectangle (at least 16 inches long and 7 inches wide), dough should be ~1/8 inch thick; place on a baking sheet lined with parchment paper and lightly cover with seran wrap; chill in refrigerator until ready for use
  8. Once fillings have cooled and pie crust has been chilled for allotted thirty minutes, put together pie; gently spread cranberry filling along bottom of crust; carefully top with apple filling
  9. Carefully top pie with remaining dough; use your fingers to pinch dough from both layers together around the edges
  10. Brush egg white over top layer of crust (you do not need to use all of it) and sprinkle with sugar; use a sharp knife to cut three or four openings into top layer of crust, about ½ inch each
  11. Place pie on baking sheet that has been in oven and bake on lowest rack for 30 minutes or until crust is a nice golden brown
  12. Reduce oven temperature to 375 degrees and bake for 25 minutes or until filling is bubbling
  13. Set aside to cool before serving
  14. Pie can be stored tightly wrapped in foil at room temperature up to two days
Notes
Requires 1 13.75 x 4.25 tart pan (this inexpensive pan from Amazon does the job)
Pie adapted from Cooks Illustrated


Cranberry Apple Pie
And let me just say, we are ending Pie Week on a high here because I have ANOTHER extra special giveaway, this time from Kitchen Aid!


Thank you so much to Kitchen Aid for sponsoring this giveaway!
And if you haven’t entered them yet, there is still a chance to win a $500 Amazon gift certificate and a Cabot Cheese / King Arthur Flour package!

Make something from the blog? Be sure to share it on Instagram with the tag #KeepItSweetDesserts.

This post contains affiliate links.

You might also like:

Cranberry Apple Shortbread Bars

Cranberry Apple Shortbread Bars

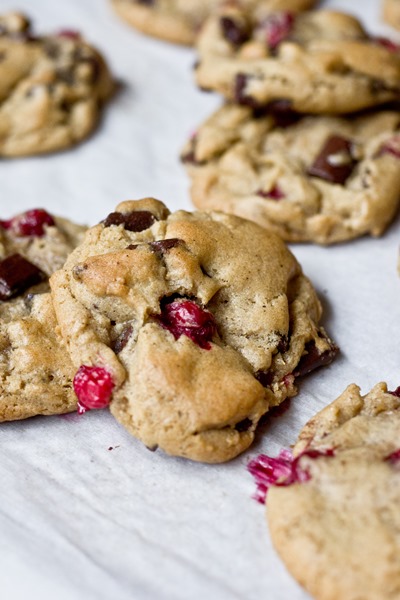
Cranberry Chocolate Chunk Brown Butter Cookies

Cranberry Chocolate Chunk Brown Butter Cookies

Winter Fruit Crisp

Winter Fruit Crisp

Cranberry Apple Pie

Fancy Holiday Chocolate Pecan Pie and Pie Week Giveaway

This chocolate pecan pie is the perfect addition to your fall holiday table!

Fancy Holiday Chocolate Pecan Pie

Get excited because in addition to yesterday’s awesome Amazon gift certificate giveaway, I have a few more giveaways coming your way this week (scroll down for details).  Oh right, and lot’s of pie!  A few other bloggers and I are sharing pie recipes all week long.  The perfect week before Thanksgiving treat, I’d say!

Fancy Holiday Chocolate Pecan Pie

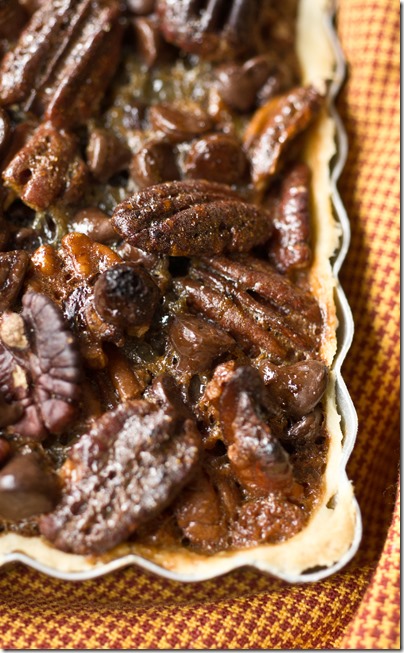
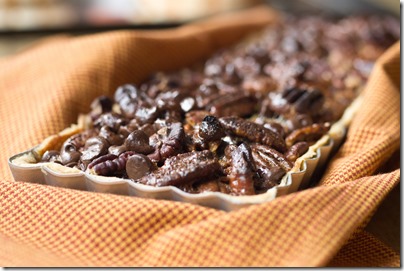
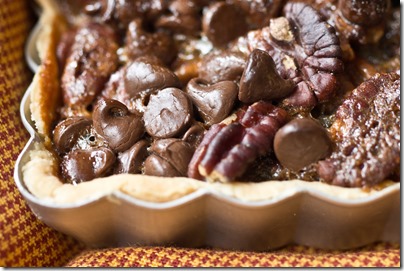
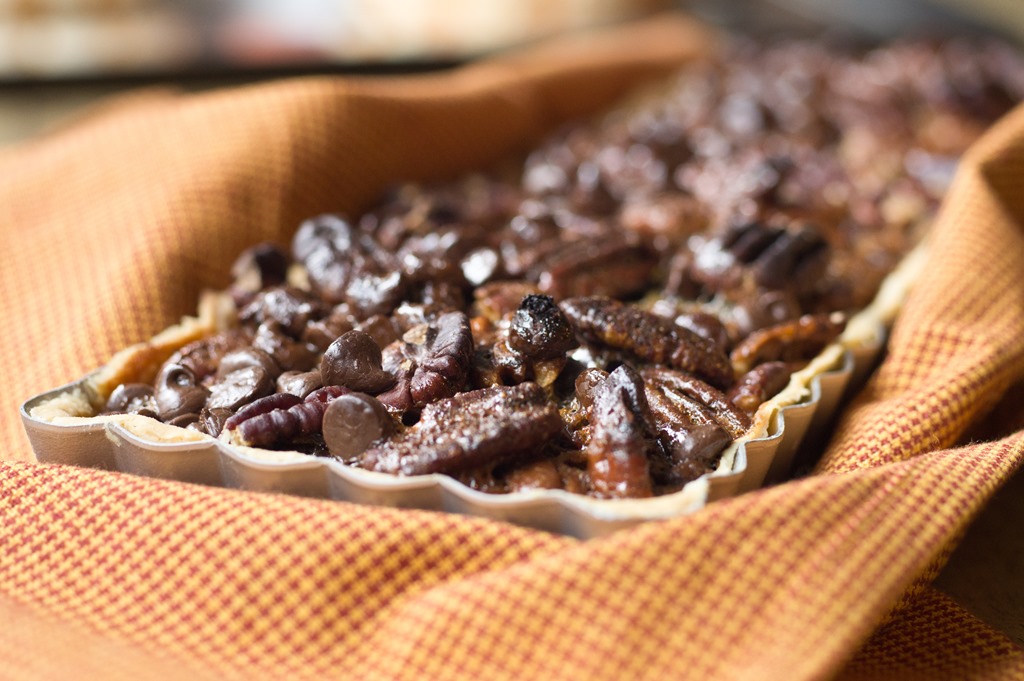
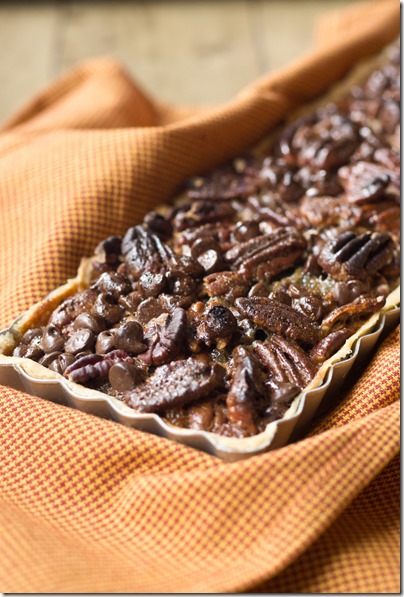
To start things off, I’ve got what I decided to call a “Fancy” Holiday Chocolate Pecan Pie.  I’m completely enamored with the shape of this pie and the pile of pecans above crust level.  This is the sort of thing that will look gorgeous on your Thanksgiving table.

Fancy Holiday Chocolate Pecan Pie

Fancy Holiday Chocolate Pecan Pie and Pie Week Giveaway
 
This chocolate pecan pie is the perfect addition to your fall holiday table!
Author:
Recipe type: Dessert
Makes: 8 servings
Ingredients
  • ⅓ recipe of 1 double crusted pie crust (I used this Martha Stewart recipe)
  • 2 eggs at room temperature
  • 2 ounces (~1/4 cup tightly packed) light brown sugar
  • 1⅝ ounces (~1/4 cup) granulated sugar
  • ¼ cup light corn syrup
  • ¼ teaspoon vanilla extract
  • ⅛ teaspoon salt
  • 2½ cups pecans
  • ½ cup semi-sweet chocolate chips
Instructions
  1. Prepare pie crust according to recipe directions and chill dough until ready to use
  2. When ready to bake, pre-heat oven to 375 degrees
  3. Roll dough out in a long rectangle (at least 16 inches long and 7 inches wide), dough should be ~1/8 inch thick
  4. Carefully press dough into tart pan, tightly into corners and edges; cut off any crust that hangs over
  5. Whisk together filling (eggs, sugars, corn syrup, vanilla and salt); set aside
  6. Mix pecans and chocolate chips together and pile evenly into pie crust
  7. Drizzle filling over pie being careful not to have any spill over
  8. Place pan in center of oven and bake for ~35 minutes or until filling is set; check occasionally and if pecans on top start to brown, lightly cover with foil for remainder of baking
  9. Notes:
  10. I suggest placing a large piece of foil on rack below pie in oven in case of any drips
  11. *If you do not have a pan this size, you can make the recipe into an 8 or 9-inch pie, just use one half of pie crust recipe, NOT one third and increase filling by fifty percent; increase baking time as needed
Notes
Requires 1 13.75 x 4.25 tart pan (this inexpensive pan from Amazon does the job)


Fancy Holiday Chocolate Pecan Pie

And now for the giveaway!  Today through November 25th you can enter to win a pretty awesome prize pack from King Arthur Flour (flour, spices, a pie plate AND a rolling pin) and Cabot (gift basket full of cheese and other fun products)!  There will be two winners which is really exciting. US entrants only.

A huge thank you to King Arthur Flour and Cabot for sponsoring this giveaway!

Looking for more Pie Week recipes?

Brown Butter Apple Custard Pie from The Baker Chick

Bourbon Apple Hand Pies from Nutmeg Nanny

Pumpkin Pie Croutons from Chocolate and Carrots

Mini Pumpkin Pies from Dessert for Two

Winter Squash Pot Pie with Chickpeas and Swiss Chard from Eats Well With Others

Fancy Holiday Chocolate Pecan Pie from Keep It Sweet Desserts

Chocolate Pecan Tart from Bake or Break

Apple Cherry Galette with Kettle Chip Crumble from Country Cleaver

This post contains affiliate links.

Make something from the blog? Be sure to share it on Instagram with the tag #KeepItSweetDesserts.

You might also like:

Roasted Butternut Squash Pie with Brown Sugar Marshmallow Topping

Roasted Butternut Squash Pie with Brown Sugar Marshmallow Topping

Sweet and Salty Toll House Pie

Sweet and Salty Toll House Pie

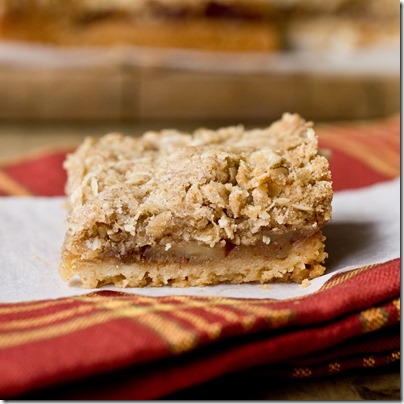
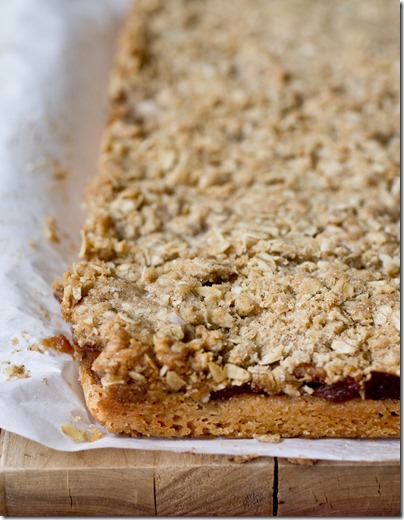
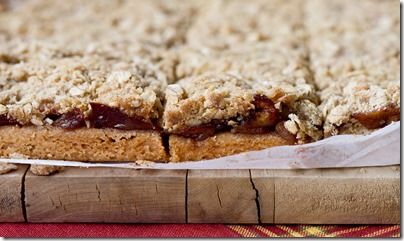
Apple Pie Crumble Bars

Apple Pie Crumble Bars

Apple Pie Crumble Bars

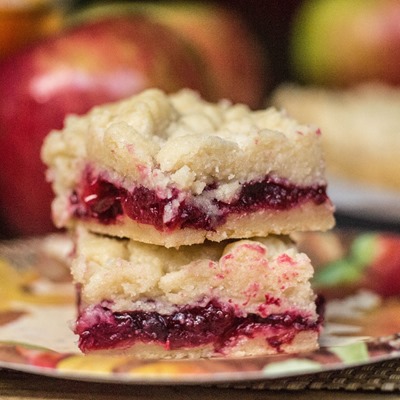
With a buttery crust, thick apple pie filling and crispy crumb topping these Apple Pie Crumble Bars are a fall dessert that is hard to resist.

Apple Pie Crumble Bars

I don’t know if you remember my Apple Cinnamon Blondies from last year, but they were one of my favorite fall treats.  They were a part of Rachel’s An Apple a Day series.  Well, this year she is hosting again and of course I had to bring my A-game!

So far over there you can find Apple and Salted Caramel Ice Cream (drool), Caramelized Apple & Cheddar Cheese Soft Pretzels (What?!), and Apple Cider Donuts (three ways!) among other things.

Apple Pie Crumble Bars

I actually baked these Apple Pie Crumble Bars a few weeks ago, before apple season had really even started.  I wanted an apple dessert that I could bake ahead of time for Rosh Hashanah and that would travel well.

These bars were the perfect solution.  They were a little bit of a baking project, but with Matt in the kitchen helping (he made the filling), they really weren’t too complicated.  If he hadn’t helped I probably would have just skipped the peeling of the apples:-)

Apple Pie Crumble Bars

They were a huge hit for the holiday, though I imagine they would have been an even bigger hit warmed up and smothered with ice cream… next time, next time.

Apple Pie Crumble Bars

Be sure to head over to Baked by Rachel for the Apple Pie Crumble Bar recipe!

Apple Pie Crumble Bars
An apple a day party at bakedbyrachel.com

Make something from the blog? Be sure to share it on Instagram with the tag #KeepItSweetDesserts.

You might also like:

Cranberry Apple Pie

Cranberry Apple Pie

Skillet Apple Crisp with Brown Butter Sauce

Skillet Apple Crisp with Brown Butter Sauce

Apple and Pear Crisp

Obsessed with this pear and apple crisp!

Lollie’s Blueberry Pie

Lollie's Blueberry Pie, the best blueberry pie I've ever had

Lollie's Blueberry Pie, the best blueberry pie I've ever had

There are so many reasons that I’ve been dying to make this pie for years.  One reason is that the original is truly the BEST blueberry pie I have ever had.

Mom, Jess, I think you can agree that it really is THE BEST!

Lollie's Blueberry Pie, the best blueberry pie I've ever had

But beyond that, there are memories.  Summers at the Jersey Shore.  4th of July spent with family at a time when everyone seemed to get along.  Hysterical laughter over the silliest things (namely my sister toasting to “having crabs” but I guess you had to be there).  The day Matt asked for permission to marry me (he was smart enough to include my dad, mom AND sister).  My complete oblivion to that while anxiously waiting for his proposal (we looked at rings together and then I proceeded to stare at an empty ring finger for two months wondering if he had changed his mind).  Hard shell crabs, corn on the cob, brownies, ice cream and of course the PIE.

Lollie's Blueberry Pie, the best blueberry pie I've ever had

I guess I should take a step back, huh?  Lollie is my grandfather’s neighbor at the Jersey Shore.  For my whole life, my family would spend summer weekends (sometimes a lot, sometimes just a few) visiting my grandfather there.  And if we were lucky, Lollie would invite our entire family to join in on her huge 4th of July feast.  She had children and grandchildren galore, but adding our entire family (cousins, aunts, uncles, and so on) was never too much.  There were always plenty of hard shells to go around.  And if you are like me, and get too impatient to eat enough crab to fill you, there was dessert.  Year after year she made the BEST blueberry pie.

Lollie's Blueberry Pie, the best blueberry pie I've ever had

Well, finally, a few years ago, we asked Lollie for the recipe.  She said she was happy to share it, but somehow, that little piece of paper that was supposed to be delivered to us on the beach never made it.  I think she must have known that by keeping the recipe to herself, she would keep everyone coming back to her.  While I don’t think I will ever turn down an invitation to come over and eat her pie, I have been determined to find something almost as good to make on my own.  So a few years ago I found this recipe online.  It seemed to fit the description of hers: Cook some of the blueberries but fold in the biggest, plumpest berries at the end.  Spread a little cream cheese filling over the super flaky crust.

Lollie's Blueberry Pie, the best blueberry pie I've ever had

This might not be the pie, but it doesn’t really matter.  It is symbolic of a moment in time, well, moments in time, that just make me smile.  Despite my discomfort at making pie crust (ahem, this blog is very light on pies), baking it just took me back to a time filled with joy.  And in case you were wondering, this pie is actually quite amazing.  I think Lollie would even approve.

Lollie's Blueberry Pie, the best blueberry pie I've ever had

For the recipe that seems to be pretty close to Lollie’s blueberry pie, click here!  I didn’t make any changes!

Make something from the blog? Be sure to share it on Instagram with the tag #KeepItSweetDesserts.

You might also like:

No Bake Blueberry Pie

No Bake Blueberry Pie

Blueberry White Chocolate Brown Butter Cookies

Blueberry White Chocolate Brown Butter Cookies

No Churn Blueberry Crisp Ice Cream

No Churn Blueberry Crisp Ice Cream

Fudgy Brownie Crunch Banana Ice Cream Pie

Fudgy Brownie Crunch Banana Ice Cream Pie

I was talking to some friends a few weeks ago about working out, eating healthy, etc.  For as long as I remember I’ve worked out hard most days of the week and watched what I ate 80% of the time.

Fudgy Brownie Crunch Banana Ice Cream Pie

But when I started running a bakery full-time, things changed.  My days got longer and I started spending most of them on my feet.  My legs ache when I wake up in the morning and sometimes I’m too busy to care if I eat an extra broken cookie or five.

Fudgy Brownie Crunch Banana Ice Cream Pie

They said to me, “but I’m sure you get sick of the desserts.”

Fudgy Brownie Crunch Banana Ice Cream PieFudgy Brownie Crunch Banana Ice Cream Pie

I wish.  Sure, every once and a while I’ll get sick of one item.  For instance, I always have extra brownie edges, so for a few days I got sick of the brownies.  But then there were the oatmeal cookies to go to… and then the triple chocolates.  There is no getting “sick” of sweets in my world.  It is either a curse or a blessing.

For the most part, I put those extra pieces on reserve in my freezer for friends and family, but every once and a while a few times a week I break into the stash.  Last week I even told Matt, “I accidentally ate a cookie.”

Is that even possible?

Fudgy Brownie Crunch Banana Ice Cream Pie

So now that I know giving up dessert is pretty much impossible for this sugaraholic, I’m trying to find some items that are a good middle ground.  Not so healthy and fake-tasting that I end up eating what I was avoiding to begin with, but almost good for you but really satisfying so you think you are eating something else.

This pie is the perfect example of that.  There is an indulgent crunchy chocolate filling on the inside, but the other layers are lower in fat, including an “ice cream” made with bananas.  Fruit on the ingredient list means I can have an extra slice, right?  I also used a No Pudge brownie mix as well as fat free cool whip but you can use whatever you prefer.

Fudgy Brownie Crunch Banana Ice Cream Pie

Fudgy Brownie Crunch Banana Ice Cream Pie
This pie is adapted and inspired by an ice cream pie my mom used to make for me us.  When she finally gave me the recipe for the addicting crunchy filling I couldn’t wait to make a batch!
Serves 12

Ingredients:
1 package brownie mix plus ingredients called for on box
1/3 cup hot fudge, homemade or store bought
1 1/2 cups Chocolate Pie Crunch (below)
3 cups cool whip (1 1/2 8-ounce containers)
3 ripe medium bananas, broken into chunks and frozen

Directions:
Pre-heat oven according to brownie mix instructions
Grease or spray a 9-inch spring-form pan and set aside (if you pan is prone to leaking, wrap tin foil tightly around the bottom half)
Prepare brownie batter as directed on box; spread into prepared pan
Bake brownie for 20-25 minutes or until a knife comes out clean
While brownie is baking, prepare Chocolate Pie Crunch
When brownie is done, allow to cool for several minutes and then gently spread hot fudge over brownie while it is still warm
Sprinkle with 1 1/2 cups Chocolate Pie Crunch
When brownie has completely cooled, spread cool whip over top; cover pan with foil and freeze for 30 minutes or until cool whip layer is firm
Once cool whip layer is firm, make the banana “ice cream’; place frozen bananas in a food processor and run on high for a few minutes until mixture is thick and creamy
Spread banana ice cream over cool whip
Cover pan with foil and place back in freezer 2 hours or until banana ice cream is firm

[print_this]

Chocolate Pie Crunch
Makes 5 1/2 cups

Ingredients:

1 9-ounce package chocolate wafers
6 ounces semi-sweet chocolate, chopped
1 1/2 tablespoons canola oil

Directions:

Line a baking sheet with wax paper and set aside
Crush chocolate wafers into small pieces and place in a large bowl
Heat chocolate and oil in a small saucepan over low-medium heat, stirring constantly until mixture is melted and smooth
Pour over crushed wafers immediately and stir until all cookie pieces are coated
Spread mixture out on baking sheet and freeze for 10 minutes or until firm
Break into pea-sized pieces and store in a ziplock bag in freezer until ready for use

Extra can be stored in a ziplock bag in the freezer up to one month

Recipe courtesy of my mom who got it from a friend…

[/print_this]

Fudgy Brownie Crunch Banana Ice Cream Pie

This post is for PIE DAY (tomorrow June 20th)!  How are you celebrating?

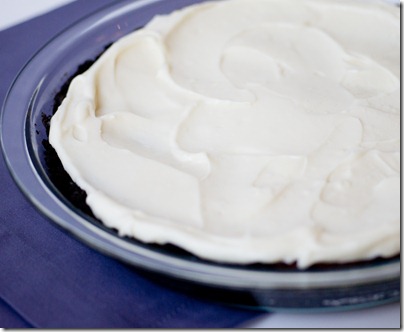
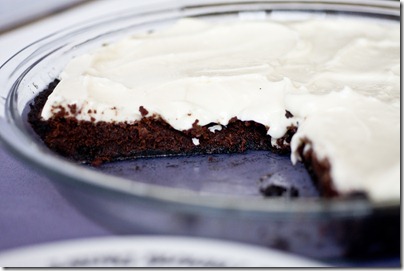
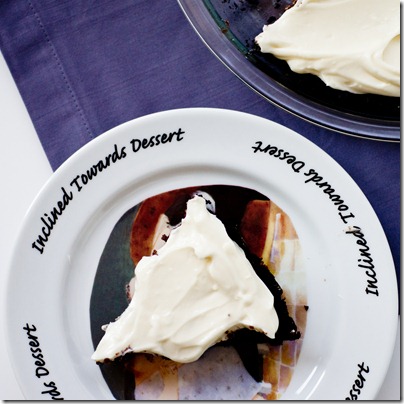
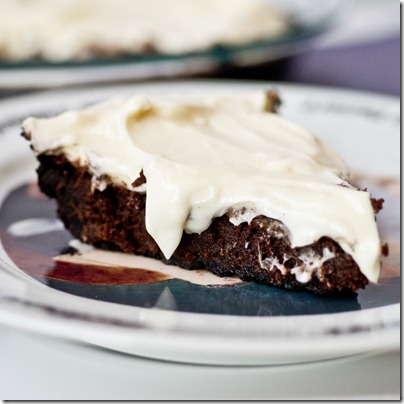
Oreo Crusted Brownie Pie with Cream Cheese Icing

First of all, thank you for the amazing notes of support regarding my news!  I am still overwhelmed by the feedback.  Now onto deliciousness:-)

Oreo Crusted Brownie Pie with Cream Cheese Icing

I dreamt up this dessert a few weeks before I finally had the chance to make it.  Really I just thought about a few things I really like: Oreo crust- always good; Fudgy brownie- one of my ultimate weaknesses; Cream cheese icing- a pretty regular craving.

Oreo Crusted Brownie Pie with Cream Cheese Icing

So why not put them all together but in a pie shape instead of a bar?  Pie = big slices = win.

Oreo Crusted Brownie Pie with Cream Cheese Icing

Oh, and I almost forgot to mention that Matt officially proclaimed this the “Best.Dessert.Ever.”  He actually told me not to make the chocolate soufflés I had planned for our belated Valentine’s dinner because he just wanted to eat more of this pie.  For a man who orders the chocolate soufflé every time he sees it on a menu, those are some bold instructions.

Oreo Crusted Brownie Pie with Cream Cheese Icing

So head over to Fox for the recipe and make it today.  You may or may not want to double the recipe- one pie for you, one to share.

Double Crumble Hot Apple Pie

Double Crumble Hot Apple Pie 2

As soon as we made plans to go apple picking, Matt asked if I would make an apple pie.  With all of those farm-fresh apples how could I say no?

Double Crumble Hot Apple Pie 23

The thing is, I don’t really love pie.  Scratch that, I love pie filling, I just don’t care much about the crust.  On the other hand, I love apple crisp.  I find any form of crumb toppings to be irresistible.  As a result, this apple pie topped with an extra thick layer of crumb topping was the perfect dessert for us.

Double Crumble Hot Apple Pie 30

The last time I made this pie, I use a store-bought crust (shh, don’t tell!).  This time around I went all out and made the crust from scratch.  I used a recipe from the The Art & Soul of Baking, a great resource for anything you could want to know about baking.

Double Crumble Hot Apple Pie 5

[print_this]Double Crumble Hot Apple Pie

Makes 2 pies; Serves ~16

For Crust

Ingredients

  • 1 sticks (1/2 cup) unsalted butter cut into 1/2 inch pieces and frozen
  • 2 1/2 cups all-purpose flour (plus additional for rolling the dough)
  • 3 tablespoons granulated sugar
  • 1/2 teaspoon salt
  • 1/2 cup cold water*

Cooking Directions

  1. Place all ingredients except for water in the large bowl of an electric mixer
  2. Using paddle attachment, put mixer on low and mix ingredients until they form a coarse mixture of large crumbs (about the size of a peanut)
  3. Add 1/4 cup water and put mixer on low for about a minute, add additional water (1 tablespoon at a time) just until dough is moist enough to hold together
  4. When dough is ready, form into two large disks and wrap each in seran wrap; refrigerate dough for at least one hour
  5. Once dough has been chilled, you can roll it into a thin layer; flour a large flat surface and place dough on top of that with an additional couple of tablespoons of flour on the dough; roll dough with a rolling pin into a large round layer about 1/4 inch thick**
  6. When ready, gently place the dough in a 9-inch pie dish and press down so that the dough is snug; trim any excess dough that comes over the edges

Note:

Make sure your butter and water are very cold to keep the dough from getting too warm while working

*Amount of water could vary depending on humidity levels

**I heard that you can skip the flour and roll the dough between two pieces of parchment paper

Source for pie crust: The Art & Soul of Baking

Crumb Topping:

Ingredients

  • 2 cups all-purpose flour
  • 1 1/2 cups rolled oats
  • 2 1/2 cups packed light brown sugar
  • 1/2 teaspoon ground cinnamon
  • 1/8 teaspoon nutmeg
  • 1/4 teaspoon salt
  • 3 sticks (1 1/2 cups) unsalted butter, melted

Cooking Directions

  1. While dough is chilling, prepare crumb topping
  2. In a large bowl, use a fork to stir together all dry ingredients; mix in butter until topping fills large clumps
  3. Place bowl in refrigerator to chill while preparing filling

Apple Filling:

Ingredients

  • 1 dozen medium baking apples (I used cortland)
  •  Juice of 1/2 a lemon
  • 1/4 cup all-purpose flour
  • 1/2 cup granulated sugar
  • 1/2 teaspoon cinnamon
  • 1/8 teaspoon nutmeg
  • 1/4 teaspoon salt

Cooking Directions

  1. When ready to bake your pies, pre-heat oven to 400 degrees
  2. To prepare filling, peel and thinly slice apples (~1/4 inch thick)
  3. Place apple slices in large bowl; add remaining ingredients and stir into apple mixture
  4. Pour half of apple mixture into each prepared pie crust
  5. With your hands, crumble topping over apples and press firmly to form a entirely cover pies
  6. Place pies in center of oven and bake for half hour; at this point, cover top of each pie lightly with tin foil to prevent topping from burning
  7. Continue baking pies for additional 45 minutes or until filling is bubbling and apples on the inside are tender
  8. Serve warm, preferably with vanilla ice cream

Source for filling and topping: Sticky, Chewy, Messy, Gooey

Note:

Dough for pie crust and mixture for crumb topping can be prepared up to 1 day in advance; store in refrigerator until ready to make pie

Since this recipe makes two pies, you can bake one now and save one for another time.  To freeze pie, prepare as directed without baking. Once put together, wrap tightly with tin foil and freeze for up to one month

[/print_this]

Double Crumble Hot Apple Pie 9

Do you prefer apple crisp or apple pie?

Chocolate Glazed Cookie Cheesecake Pie

Chocolate Glazed Cookie Cheesecake Pie

A couple of weeks ago, Jennie of In Jennie’s kitchen lost her husband, Mikey suddenly to a heart attack.  While I don’t know her personally, I’ve visited her blog a couple of times and my heart broke for her.  She invited us to celebrate Mikey’s life with his favorite peanut butter pie.

Chocolate Glazed Cookie Cheesecake Pie

Hearing about such a tragedy only reminded me of how lucky I am for each day I get to enjoy with my loved ones.  Whether it is via email, facebook, phone or in person, I’m thankful for each “touch” I get with them.  Too often I get wrapped up in the busy days, stressful moments and minute problems to appreciate all of the good things.

Chocolate Glazed Cookie Cheesecake Pie

When I finally got some time in the kitchen this week, I wanted to support Jennie, even if I was little late.  Since she was talking about her husband’s favorite pie, I thought I should make something with love for my husband (who, we all know, dislikes peanut butter).  I know that the combination of chocolate chip cookie and cheesecake is one of his favorite things, so I created a spin on that in pie form.  The chocolate chip cookie crust, creamy cheesecake filling and rich chocolate glaze were all made with love.

Chocolate Glazed Cookie Cheesecake Pie

In light of Jennie’s loss, the blogging community has come together in an incredible way.  As she is now left with two young children, she will need more than just emotional support.  A fund was started by Bloggers Without Borders to help raise money for Jennie and her family. Bloggers throughout the community are offering cookbooks, photos, baked goods, site redesigns… anything to auction and raise money towards the fund.  Some auctions that I have found:

Chocolate Glazed Cookie Cheesecake Pie

Chocolate Glazed Cookie Cheesecake Pie

Serves 8-10

Ingredients

1 1/2 cups chocolate chip cookie dough

Cheesecake filling:
1 8-ounce package reduced fat cream cheese, softened at room temperature
1/2 cup fat free sweetened condensed milk
1 large egg
1 teaspoon vanilla extract

Chocolate Glaze:
3/4 cup semi-sweet chocolate chips
3 tablespoons unsalted butter
1 tablespoon light corn syrup
1/4 teaspoon vanilla extract

Directions
Pre-heat oven to 325 degrees and spray a 9-inch pie plate with non-stick cooking spray
Press cookie dough into bottom and around sides of prepared pie plate; bake for 10 minutes
While crust is baking, beat cream cheese with whisk attachment of electric mixer for several minutes or until light and creamy
Add sweetened condensed milk, egg and vanilla and beat until well combined
When crust is ready, pour cheesecake mixture into pie crust
Bake 15-20 minutes or until filling is firm; set aside
Combine chocolate chips, butter and corn syrup in a small pot over low-medium heat and stir constantly until mixture is completely melted
Stir in vanilla and remove pot from heat; pour glaze over pie
Refrigerate 4 hours or overnight
Cheesecake from All Recipes
Glaze from All Recipes

Chocolate Glazed Cookie Cheesecake Pie

Are you hosting an auction? If so, leave your link in the comments below!

Peanut Butter Chocolate Chip Cookie Dough Mini S’mores Pies

This will be the first in a series of guest posts throughout the summer.  I have some great bloggers joining us to share some of their favorite desserts!  I’m excited to start with Erin from The Spiffy Cookie.  She has a wonderful blog with creative and delicious recipes and this one is amazing!  Some of my favorite sweets that she posted include these Blueberry Blondie Cheesecake Bars, Peanut Butter Cup S’mores Ice Cream, and this Cookies and Cream Peanut Butter Pie.  I want all of it!  She has some great savory dishes too, but you know me and desserts:-)

Why hello there! My name is Erin and I’m guest posting here today from The Spiffy Cookie. I had the pleasure of Lauren guest posting on my blog last month with her Cream Cheese & Jelly Pound Cake, and am just as excited to now guest post on Keep It Sweet. Especially since I have some killer mini s’mores pies to share.

The blogosphere is overflowing with all kinds of s’mores recipes this summer and I cannot get enough of it. But I wanted to enhance this traditional treat by either incorporating chocolate chip cookie dough, or peanut butter cupsinstead of plain old (boring) chocolate. Like Lauren, I am a huge peanut butter fan but cookie dough in a s’more is something I don’t think I have seen yet. But again, peanut butter is so good! Dilemma.

I’ve never been good at big decisions, and yes dessert is exactly that, so I put up a poll-tweet to help the decision process. Most followers said “both”, so what the heck, I decided to do both in combination! What could possibly go wrong? Oh no it’s too much I cannot bear it… not possible. Prepare yourself for deliciousness.

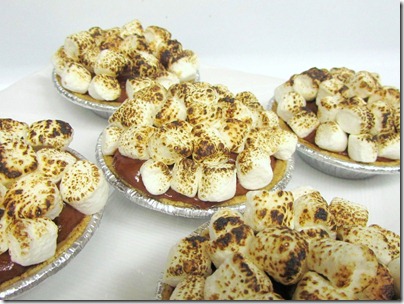
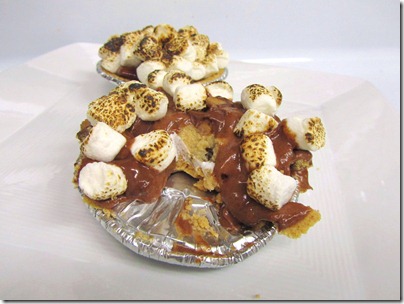
A chewy and soft nugget of cookie dough is hidden underneath a peanut butter-chocolate mousse mixed with little bits of peanut butter cups and topped by toasted marshmallows. Do you have your spoon ready yet? Because you’re going to need it.

[print_this]

Peanut Butter Chocolate Chip Cookie Dough Mini S’mores Pies

Yield: Makes 6 mini pies

Ingredients

  • 1 package Keebler “Ready Crust” Mini Graham Cracker Pie Crusts
  • 6 tablespoons marshmallow creme
  • 3 large chocolate chip cookie dough balls*, cut in half
  • 4 oz (1/2 cup) semi-sweet chocolate chips
  • 1 cup heavy cream
  • 3 oz (1/3 heaping cup) peanut butter
  • 2 oz reduced fat cream cheese, room temperature
  • 1/4 cup powdered sugar
  • 1/3 cup chopped miniature peanut butter cups
  • 2 cups mini marshmallows

Cooking Directions

  1. Begin by spreading 1 tablespoon of marshmallow creme in each of the mini crusts. Do this gently so the crusts don’t break. Then place 1 cookie dough half, cut side down, on the creme. Set aside.
  2. Melt chocolate over a double boiler. Set aside. Whip cream to soft peaks. Set aside.
  3. In a stand mixer, fitted with the paddle attachment, cream together the peanut butter, cream cheese and sugar. Slowly add melted chocolate and continue to cream until smooth and softened. Gently fold whipped cream into chocolate – peanut butter mixture by hand, followed by the chopped peanut butter cups.
  4. Evenly spread the mousse into the prepared graham cracker crusts (you will have leftover mousse) and refrigerate pie until ready to serve, or at least a couple of hours.
  5. Before serving, top the pies with a handful of mini marshmallows, about 1/3 cup each.
  6. Place them on a baking sheet and put under the preheated broiler for 30 seconds (watch closely because they will burn fast), or toast marshmallows with a kitchen torch.

[/print_this]

*chocolate chip cookie dough balls

Source: Adapted from Confessions of a Cookbook Queen and Serious Eats.

If you want more s’mores inspiration, check out my peanut butter s’mores ice cream.

clip_image002

Magic

Magic Pie - just like magic cookie bars but in a pie form!

Magic: Possessing distinctive qualities that produce unaccountable or baffling effects

source

The ability for a pie to exist one minute and be gone the next, that seems like magic to me.

The ability for a dessert to call your name and whisper sweet words into your ear, I’d call that magic.

The ability for a dessert to sit on your counter one day and your butt the next, yes magic.

Magic Pie - just like magic cookie bars but in a pie form!

All of those elements make this cookie bar turned pie magic.

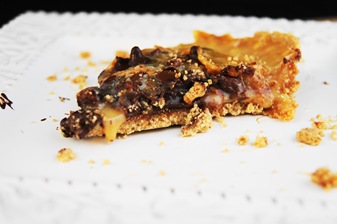
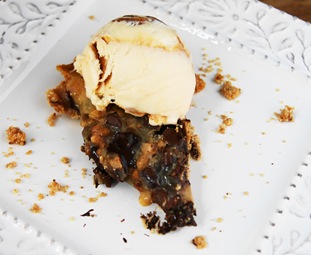
I’ll be honest, I only like my version of magic bars. No coconut, no nuts, just gooey, chocolaty, chewy and delicious.  And so in my Magic Pie, that is what you get: graham cracker crust and a sweet oozing filling made up of dark chocolate, milk chocolate and toffee.  Don’t tell me this doesn’t pull at your sweet tooth for an extra slice bite.  I made this pie at about 3pm one afternoon… by midnight it was gone.  And here is a little secret, Matt thought it was too sweet.

Magic Pie - just like magic cookie bars but in a pie form!

I’ll let you come to your own conclusions.

ingredients

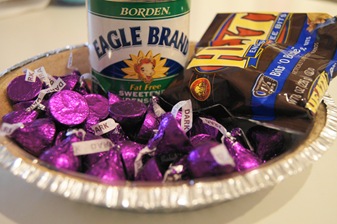
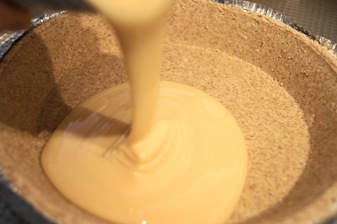
Start with a pre-made or baked graham cracker crust and pour sweetened condensed milk into the shell

pouring sweetened condensed milk

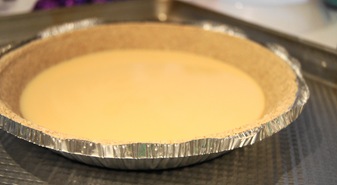
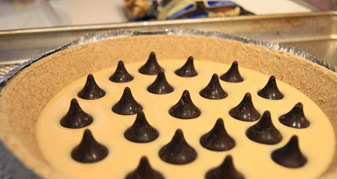
pie crust with sweetened condensed milk

Arrange dark chocolate kisses

pie with hershey kisses

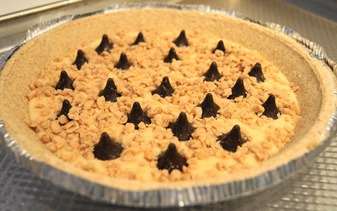
Sprinkle with toffee bits

Magic Pie - just like magic cookie bars but in a pie form!

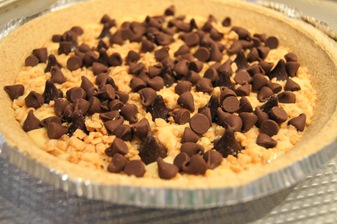
Sprinkle on the milk chocolate chips

Magic Pie - just like magic cookie bars but in a pie form!

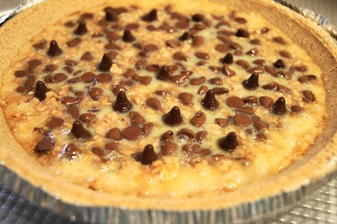
Bake for about 25 minutes or until filling appears set and has bubbled around the edges; allow to cool before slicing

Magic Pie - just like magic cookie bars but in a pie form!

[print_this]

Magic Pie

Next time I’m going to sprinkle pretzel pieces on top immediately after baking to add a salty crunch to the pie The Edy’s slow churned Caramel Delight ice cream was the perfect complement to this pie

Yield: 6-8 slices

Ingredients

  • 1 pre-made or baked 8-inch graham cracker pie crust
  • 1 cup sweetened condensed milk (I used fat free)
  • 21 dark chocolate Hershey kisses (~1 cup semi-sweet or dark chocolate chips would also work)
  • 1/3 cup toffee bits
  • 1/3 cup milk chocolate chips

Cooking Directions

  1. Pre-heat oven to 350 degrees
  2. Pour sweetened condensed milk into shell pie
  3. Arrange dark chocolate kisses along on top of the milk
  4. Sprinkle with toffee bits and milk chocolate chips
  5. Bake on a baking sheet for about 25 minutes or until filling appears set and has bubbled around the edges
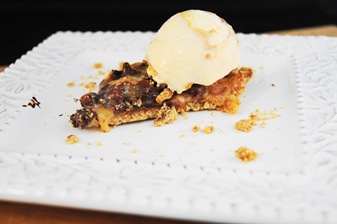
  6. Allow to cool before slicing and serve with a scoop of ice cream

[/print_this]

Adapted from Magic Cookie Bars

Magic Pie - just like magic cookie bars but in a pie form!

I’ll let you in on a secret- I didn’t like the crust (that’s what I get for using a healthier pre-made) so I left that behind and ate all some of the filling.  Have you ever picked out the parts of a dessert you like and gotten rid of the rest?

Ice Cream Pie with a New Year’s Eve Worthy Topping

A few months ago I received a few coupons for free Stonyfield’s ice cream or frozen yogurt.  I finally used the coupons just in time for their expiration date and was inspired to use my frozen yogurts to make a New Year’s Eve dessert.  I’ll leave a full review of the yogurt for a separate post, but I am very happy with the delicious dessert I came up with.
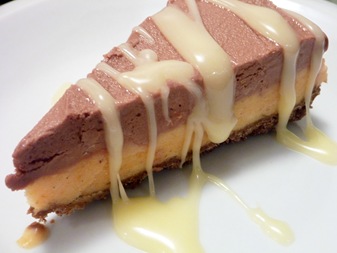
slice 1

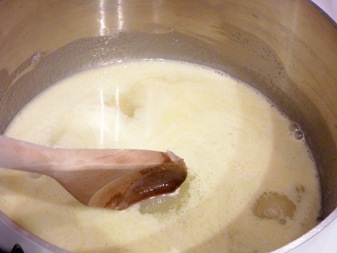
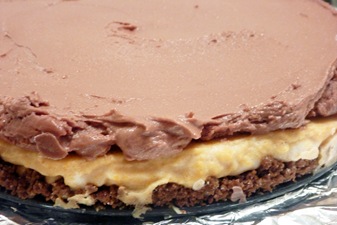
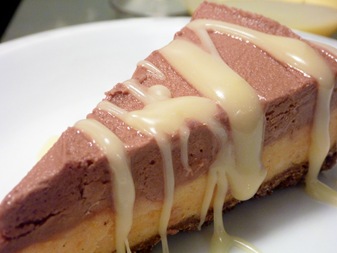
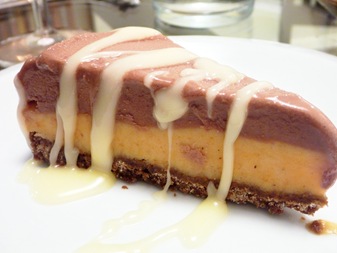
You are looking at layers of crunchy gingersnap crust, pumpkin frozen yogurt, and chocolate frozen yogurt topped with a salted caramel cream sauce.  I came up with the dessert because chocolate and pumpkin are some of my favorite flavors, but as soon as I created it I realized that this mimics my favorite cheesecake bar.  Ok, so it wasn’t the first time using these flavors, but I promise that it was worth the lack of creativity for an excuse to make the topping.  This Frozen Pumpkin and Chocolate Yogurt Pie with Salted Caramel Cream Sauce was a very worthy end to 2010.
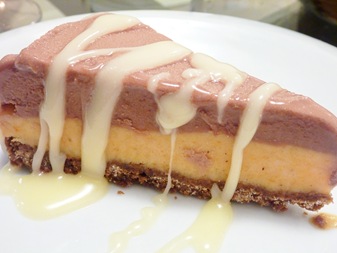
slice 3

I love that the filling to this pie is fat free frozen yogurt, because it makes you think you are being really healthy. Never mind that the crust has half a stick of butter in it and the sauce is based on sugar, butter and heavy whipping cream.  Details, details.  Moderation is key, or so they say.

The pie is really easy to make.  The sauce is a little more challenging.  I simplified it after my first attempt where I ended up with rock-hard chunks of sugar and butter.  It took a lot of soaking to clean that pot!
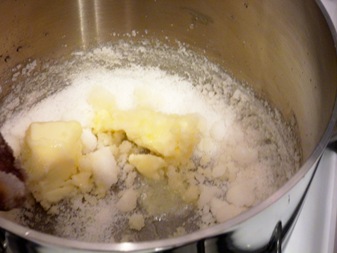
bad caramel

First thing to do is run your gingersnap crumbs through a food processor
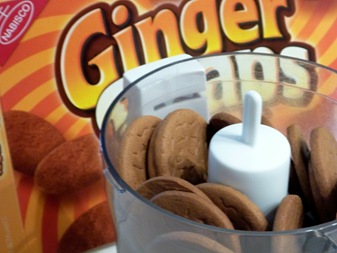
gingersnaps 1

Grind until the cookies are mostly fine crumbs
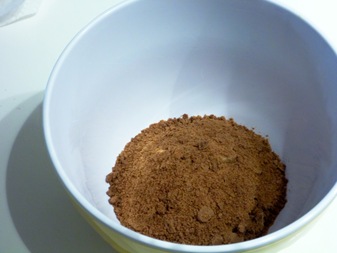
gingersnaps 2

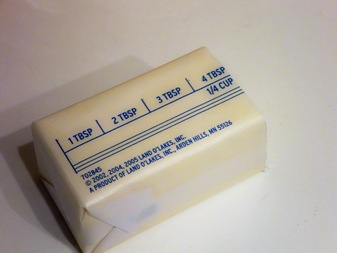
Melt the butter

butter 1

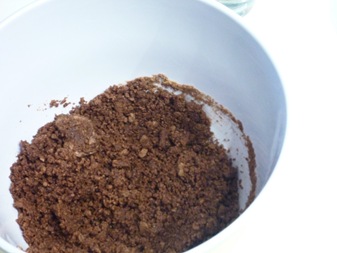
And mix it with the cookie crumbs

crumbs with butter

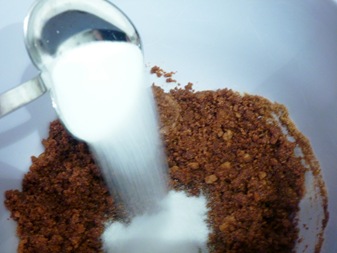
Next, add sugar

adding sugar

When the crust is fully mixed, press it down into a 9-inch spring-form pan sprayed with non-stick cooking spray
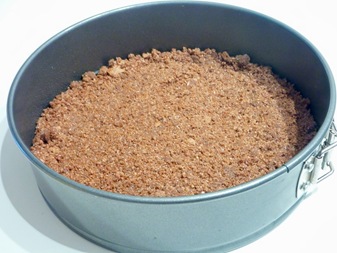
crust in pan 2

Bake for about 8 minutes or until firm
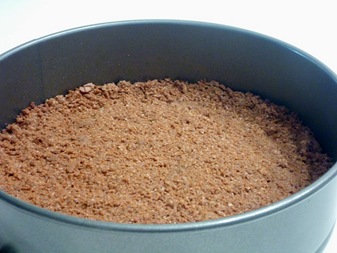
crust baked

Allow the crust to cool and put the vanilla frozen yogurt in a medium bowlvanilla in bowl
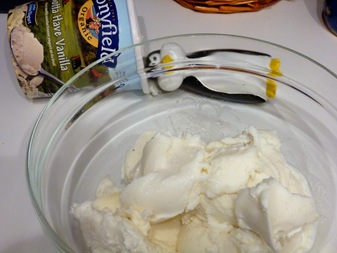
The vanilla is the base for your pumpkin layer
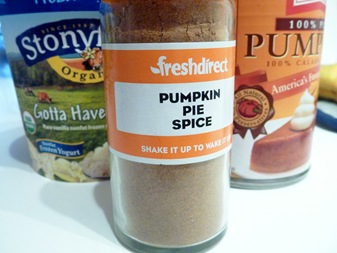
pumpkin ingredients

Fold in the pumpkin and pumpkin pie spice until well combined
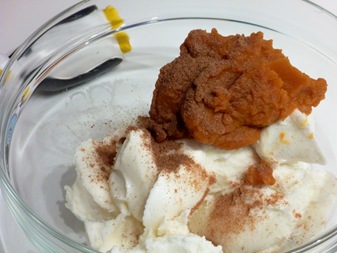
vanilla with pumpkin

Spread pumpkin layer over crust and freeze for about 10 minutes

pumpkin layer frozen

Meanwhile, remove the chocolate frozen yogurt from the freezer so that it is softened

chocolate fro yo 2

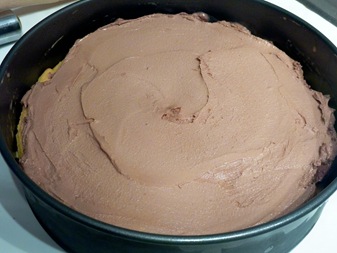
Spread chocolate yogurt over the pumpkin and freeze covered with foil until ready to serve

chocolate layer

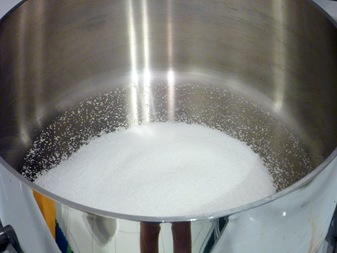
To make the caramel, begin by heating sugar over low to medium heat in a small sauce pan

sugar in pot

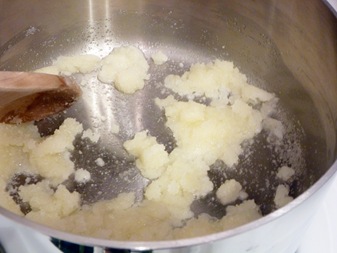
Add butter

add butter to pot

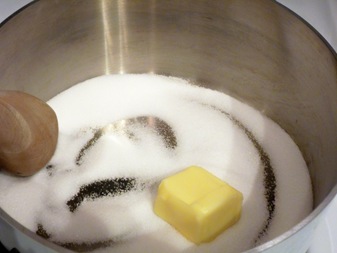
Stir butter and sugar until butter is melted and fully combined with sugar

melting butter and sugar

Reduce the heat to low and add cream

cream added

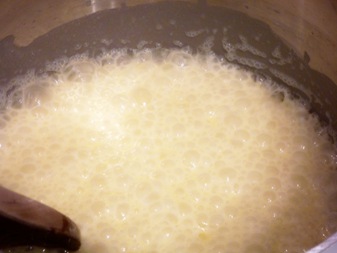
Stir continuously until mixture bubbles

sauce bubbling

Then remove pot from heat and stir in corn syrup

adding corn syrup

Add salt and stir

adding salt

The sauce will be a thick liquid that hardens as it cools; store it in the refrigerator and microwave on a low setting to re-heat

sauce done

When it is time to serve the dessert, carefully remove outside of springform pan

whole ice cream pie

Cut slices and drizzle with caramel cream sauce

slice 2

When no one is looking, steal some extra sauce for cookies, fruit, your finger…

[print_this]

Frozen Pumpkin and Chocolate Yogurt Pie with Salted Caramel Cream Sauce

Sauce adapted from the Serendipity Sundaes cookbook

Serves 8-12

Pie Ingredients:

1 1/4 cups of gingersnap cookie crumbs (about 25 cookies)

2 tablespoons granulated sugar

4 tablespoons (1/2 stick) unsalted butter

2 cups vanilla frozen yogurt (I used Stonyfield fat free vanilla)

1/2 cup canned pumpkin (not pumpkin pie filling)

1/2 teaspoon pumpkin pie seasoning

2 cups chocolate frozen yogurt (I used Stonyfield fat free chocolate)

Pie Directions:

Pre-heat oven to 350 degrees

Spray a 9-inch springform pan with cooking spray, set aside

To make the crust, grind up about 25 gingersnaps in a food processor until fine; set cookie crumbs aside

Melt 4 tablespoons of butter in the microwave and pour over cookie crumbs

Add 2 tablespoons of granulated sugar and mix until well combined

Pour mixture into springform pan

Bake for 8-10 minutes or until firm

Remove from oven and allow to cool

Remove vanilla frozen yogurt from freezer a few minutes before use

Place the yogurt into a bowl and fold in the pumpkin and pumpkin pie spice until well combined

Spread pumpkin layer over crust and freeze for about 10 minutes
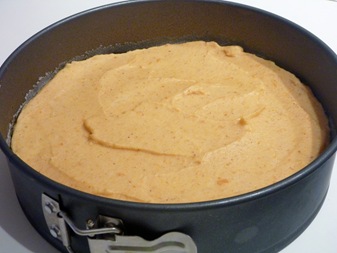
Meanwhile, remove the chocolate frozen yogurt from the freezer so that it is softened
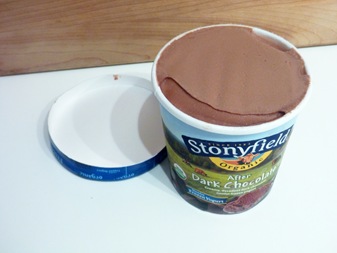
Spread chocolate yogurt over the pumpkin and freeze covered with foil until ready to serve
Sauce Ingredients:

1/2 cup granulated sugar

2 tablespoons unsalted butter

1/2 cup heavy whipping cream

2 tablespoons light corn syrup

1 teaspoon sea salt

Sauce Directions:

Heat sugar over low to medium heat in a small sauce pan
Add butter; stir until butter is melted and fully combined with sugar
Reduce the heat to low and add cream; stir continuously until mixture bubbles

Remove pot from heat and stir in corn syrup
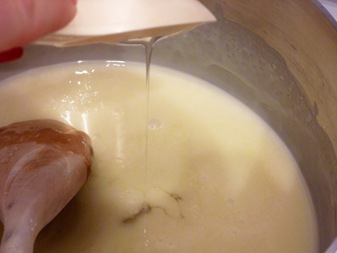
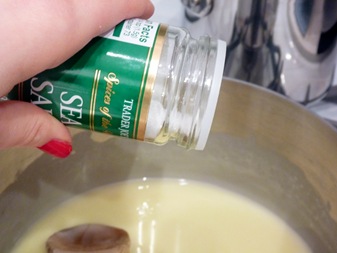
Add salt and stir
When it is time to serve the dessert, carefully remove outside of springform pan

Cut slices and drizzle with caramel cream sauce

Notes:

The sauce is best served immediately; if not, store it in the refrigerator and microwave on a low setting to re-heat at 15 second intervals stirring in-between
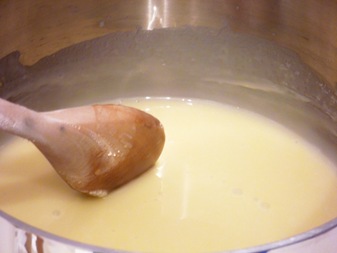
The sauce will firm up over the ice cream, don’t worry, that is supposed to happen!

[/print_this]
slice 4

I hope that everyone enjoys a happy and healthy New Year!

What dessert did you have for New Year’s Eve?