Category Archives: Blog

22 Easy Dessert Recipes that Make You Seem Like a Pro

FrozenMochaBrownieTorte33_thumb

I recently ran into a friend of mine that said she loved my blog but that she could never make any of the desserts I put together because 1) they are hard/time consuming and 2) she doesn’t have any of the “random” ingredients on hand.  As someone who works full time and bakes and blogs any chance I get, I know how valuable quick and easy dessert recipes can be.  I also know that living in a small apartment with a tiny kitchen makes it hard to keep things as simple as brown sugar on hand.  As a result, I’ve compiled a couple lists of recipes that would be helpful for those of you who don’t have all of the basics or even a lot of time to bake.

To start with, I’ve got a handful of “cake mix” recipes (i.e. recipes that start with pre-made cookie dough or cake mix but turn into something more special):

black bottom ice cream cupcake

RootBeerFloatIceCreamCake28_thumb

And if you have a few basic ingredients and tools on hand (I’ve listed some suggestions below), these recipes won’t require a massive shopping trip:

chewychocolatecoveredpretzelbars5_thumb

Individual-Smores-Brownies-7_thumb

peanut butter cup ice cream pie

And for those of you who are putting together a kitchen and want to be able to make a few basic desserts, here are a few things I’d recommend to start:

Ingredients

  • Unsalted butter
  • Canola oil
  • Large eggs
  • Semi-sweet chocolate chips
  • Granulated sugar
  • Light brown sugar
  • All-purpose flour

Baking Tools

  • Large mixing bowl
  • Long spoon for mixing batter
  • Spatula
  • Muffin tin
  • 13×9 baking pan
  • Cookie sheet
  • Parchment paper (or you could invest in a Slipat)

What is your favorite low-maintenance recipe? Share any links in the comment section!

[pinit]

Lighter Carrot Snack Cake with Cream Cheese Icing

Lighter Carrot Sheet Cake with Cream Cheese Icing 13

Ok, I’m going to be honest.  I’m posting a recipe for carrot cake and I don’t even like carrot cake.

Lighter Carrot Sheet Cake with Cream Cheese Icing 17

You see, I really thought I did.  Moist cake slathered in cream cheese icing, how could it be bad?  Well, of course my version that I thought I would like is void of raisins, walnuts and canned pineapple.  Those items in baked goods, especially the raisins, just don’t generally work for me.  I know there are a lot of carrot cake lovers out there getting very angry with me right about now.

Lighter Carrot Sheet Cake with Cream Cheese Icing 3

So I made this cake and was so excited that it was a little low in fat, full of a vegetable and in sheet cake form so that I could call it a snack cake (snack cake = anytime cake).  The flavor is great, the cake is nice and moist (not gummy or dry like some lighter baked goods) and of course the cream cheese icing calls for eating by the spoonful.  But still, I just can’t get behind it.  There is something about the carrots in the cake that bother me.  Sorry carrot cake, you are not for me.  Good thing there are other people around, like my husband, who feel differently!

Lighter Carrot Sheet Cake with Cream Cheese Icing 11

On a different note, let’s talk about this icing for a second.  I was contacted by Weight Watchers to try out their cream cheese in one of my recipes.  As someone who uses reduced fat cream cheese by default, I welcomed the chance to try a new (to me) brand.  The outcome was not disappointing at all.  The frosting on this cake was creamy and sweet with a little bit of that cream cheese tang.  I may or may not have scraped some off of the cake that I opted out of eating.  I’d definitely use their brand in future recipes.

[print_this]

Lighter Carrot Snack Cake with Cream Cheese Icing

Serves 16-20

Cake

2 cups all-purpose flour

2 teaspoons baking soda

1 teaspoon cinnamon

1/4 teaspoon salt

9 tablespoons unsalted butter, softened at room temperature

2/3 cup packed light brown sugar

1/2 cup granulated sugar

2 large eggs

2 large egg whites

2 teaspoons vanilla extract

3/4 cup low fat buttermilk

2 cups finely shredded carrots (about 5-6 large carrots)

Pre-heat oven to 350 degrees

Spray a 13×9 pan with cooking spray and set aside

In a medium bowl, whisk together flour, baking soda and salt; set aside

With an electric mixer, beat together butter and sugars on high speed until light and fluffy

Add eggs, one egg and egg white at a time, mixing between each

Mix in vanilla

Reduce mixer speed to low and gradually add flour mixture and buttermilk as follows: 1/3 of flour mixture, 1/2 of buttermilk, 1/3 of flour mixture, remaining 1/2 of buttermilk, remaining 1/3 flour mixture

Turn off mixture and fold in shredded carrots

Pour batter into prepared pan and bake for 25-30 minutes or until a knife or toothpick comes out clean

Set cake aside to cool

Cream Cheese Icing

1/2 of an 8-ounce block of Weight Watchers cream cheese, softened at room temperature

1/4 cup (1/2 stick) unsalted butter, softened at room temperature

1/2 tablespoon vanilla

1/8 teaspoon salt

2 cups confectioners sugar*

Using the whisk attachment to an electric mixer, beat cream cheese and butter on high speed until light and creamy

Add vanilla and salt and mix well

Add sugar, 1/2 of a cup at a time until at desired consistency(*2 cups was the perfect amount for me, but if you want a thicker texture and sweeter icing, you may want to add another 1/2 cup)

Once cake has cooled, evenly spread icing over top

Serve immediately or store in refrigerator up to a few days (best served within first 24 hours)

Adapted from Cooking Light

[/print_this]

Lighter Carrot Sheet Cake with Cream Cheese Icing 21

What do you refuse to put into your desserts?  Raisins and coconut are high on my list.

Disclaimer:  I received a free sample of Weight Watchers cream cheese, however all of the opinions in this post are my own.

[pinit]

Milk Chocolate Almond and Toffee Cookies for a Virtual Cookie Swap

Chewy cookies with bits of toffee and chunks of almond filled Hershey’s Kisses

Milk Chocolate Almond and Toffee Cookies

There are some cookies that I can eat just one of*, but there are others where I can’t stop going back for more.  Those are the cookies that are so addicting as soon as I come up for a breathe, they have disappeared**.

*Complete lie unless said cookie is the size of my head

**That is what happens when you stuff your face

Milk Chocolate Almond and Toffee Cookies

These cookies fall into the latter category. Well, obviously because the first category does not exist in my world.  The other reason is that these cookies are chewy, sweet (but not too sweet), and have a mix of melt in your mouth milk chocolate and toffee, almond crunch balance.  Does that even make any sense?  Probably not, but we shouldn’t get bogged down with details here.  These cookies are just good.  And so good, that I feel a little guilty using them for a virtual cookie swap.  It just isn’t right to tease someone through the computer screen.

Milk Chocolate Almond and Toffee Cookies

However, knowing that Rachel and others are doing the same thing to me, teasing me with sugary buttery deliciousness, I don’t feel too  bad.  You shouldn’t either.  Instead, pay a visit to the Virtual Cookie Swap at the Avid Appetite and schedule yourself some time in the kitchen.

[print_this]

Milk Chocolate Almond and Toffee Cookies

Makes 3 1/2 dozen cookies

Ingredients:

  • 2 1/2 cups all-purpose flour
  • 1 teaspoon baking soda
  • 2 teaspoons salt
  • 1 cup (2 sticks) unsalted butter, softened
  • 1 cup light brown sugar, tightly packed
  • 1/2 cup granulated sugar
  • 2 large eggs
  • 1 teaspoon vanilla extract
  • 1 cup toffee bits
  • 1 cup chopped Almond Hershey Kisses (~30 kisses)

Directions:

  • Lightly chop Hershey’s Kisses; set aside
  • Combine flour with the other dry ingredients and whisk together; set aside
  • In a large bowl with an electric mixer, beat the butter and sugars on high until light and fluffy
  • Add eggs and vanilla and beat at medium speed until combined
  • Reduce the mixer speed to low and gradually add in the dry ingredients
  • Stir in chocolate pieces and toffee into batter
  • Chill dough in the refrigerator for 2 hours or overnight
  • Once ready to bake, pre-heat oven to 350 degrees
  • Scoop heaping tablespoons of cookie dough onto cookie sheets lined with parchment paper
  • Bake in the oven for 9-10 minutes or until lightly golden around the edges
  • Allow to cool before serving

Adapted from these Doughy Chocolate Chunk Cookies [/print_this]

Milk Chocolate Almond and Toffee Cookies

And finally for the Duncan Hines cake mix winners! 

I used a random number generator to pick two winners:

#50 – Kelli who said “great trifle idea! always looking for different variations. can’t wait to try this!”

#77 – Chris M. who said “thanks. Love to try these products for my girlfriend”

Kelli and Chris- send me an email at keepitsweetlcl at gmail dot com and I’ll mail you the coupons!

[pinit]

Samplrs Review and Other NYC Foodie Gifts

Samplrs 1Samplrs 3

One of my favorite things about living in New York is the plethora of local businesses there are to try.  The thing is, though, it is hard to get to try them all out.  A few weeks ago, I had the opportunity to sample from Samplrs, a new company in New York City that offers packages of local products delivered to your door.  You can sign up for regular packages with a new mix of products each time or buy from a selection of local companies on their website.

Samplrs 11

Of course I was excited to coincidentally get a Hot Blondies sample in my package, but I loved that everything else was new to me.  Everything was high quality, especially the Fine & Raw chocolate, yum! The monthly delivery option would make such a fun gift for the holidays.

Samplrs 4Samplrs 9

A few other foodie gift options for OR from the New York City area:

Are you shopping for any foodie gifts this year?

Disclaimer: I received a free delivery from Samplrs but all opinions in this post are my own.

Pretzel and Chocolate Chip Loaded Peanut Butter Cookies

Pretzel and Chocolate Chip Loaded Peanut Butter Cookies 6

So we are basically a week into the holiday season and all I want to do is bake all day and eat cookies. Even more so than usual.  The good news is that in one week I’ll be on a much needed vacation from work that will allow me to focus most of my energy on just that.

The bad news? Well, there isn’t much.  I just have to find a home for all these cookies because at my current rate of consumption I’ll need an entirely new wardrobe a couple sizes bigger come January 1’st. Not in the budget and not quite so desirable.

Pretzel and Chocolate Chip Loaded Peanut Butter Cookies 11

So other than eating cookies 24/7 and exercising as much as I can to support that habit, I’ll be finding homes for these baked goods. Some will go towards the multitude of cookie swaps* I’m signed up for. Others will go to friends. These cookies, one of my favorites that I’ve had in a while, will show up on the doorstep of a few of my favorite people in the very near future.  I hope each of them has their sweet and salty tooth ready!

These peanut butter cookies are chewy on the inside and crispy on the outside but the best part about them is that each bite also comes with the perfect amount of pretzel and chocolate. You can make this huge batch to share with friends or easily cut it in half for your own stash, because who doesn’t need 3 dozen delicious cookies on hand?

*I’m pretty sure that eating cookies I receive in a cookie swap doesn’t count

Pretzel and Chocolate Chip Loaded Peanut Butter Cookies 3

[print_this]

Chocolate Chip and Pretzel Loaded Peanut Butter Cookies

Yield: Makes 6 dozen cookies

Ingredients

  • 2 cups all-purpose flour
  • 1 tablespoon baking soda
  • 3 cups salted creamy natural peanut butter
  • 1 cup granulated sugar
  • 1 1/2 cups packed light brown sugar
  • 4 large eggs
  • 2 teaspoons vanilla extract
  • 1 1/2 cups semi-sweet chocolate chips
  • 1 cup milk chocolate chips
  • 2 cups salted pretzel pieces

Cooking Directions

  1. Pre-heat the oven to 350 degrees
  2. In a medium bowl, whisk together flour and baking soda, set aside
  3. Using a mixer, in a large bowl beat peanut butter and sugars on high until light and fluffy
  4. Beat in the eggs and vanilla until combined
  5. Reduce speed to low and stir in flour mixture just until combined
  6. Stir in chocolate chips and pretzel pieces
  7. Use a cookie dough scoop or tablespoon to place cookie dough balls (about 2 tablespoons each) on a baking sheet lined with parchment paper (Note: the dough will be a little greasy, that is OK)
  8. Bake for 11-13 minutes until or cookies are brown around the edges

Adapted from my Chocolate Chip Blueberry Peanut Butter Cookies [/print_this]

Pretzel and Chocolate Chip Loaded Peanut Butter Cookies 9

Are you taking any time off around the holidays? If so, what will you be doing?

[pinit]

Cheesecake Party!

ChocolateGlazedCookieCheesecakePie33_thumb

I am a big fan of cheesecake, although not quite as much as my husband.  In fact, the first time we celebrated his birthday together, I cooked dinner and made a special trip to the Cheesecake Factory for a slice of their Oreo Cheesecake to surprise him.  It wasn’t long after that, though, when I realized I could make my own version.  Eight years later, (yes, our 8-year dating anniversary is tomorrow!), and I’m making cheesecake left and right without a second thought. Below find some delicious cheesecake inspiration from the blog world, you might never make plain cheesecake again!

Cheese Pie and White Chocolate Raspberry Cheesecake and from The Keenan Cookbook

Cheese Pie

White Chocolate Cheesecake from Sweet Peony

white chocolate cheesecake

Apple Cheesecake from Dainty Chef

apple cheesecake

Apple Pecan Cheesecake from Baked by Rachel

Apple Pecan Cheesecake

French Apple Cheesecake from The Keenan Cookbook

french apple cheesecake

Pumpkin Cheesecake from The Avid Appetite

avid appetite pumpkin cheesecake

Frosted Chocolate Chip Cheesecake from Everyday Desserts

Frosted Chocolate Chip Cheesecake

Goat Cheese Cheesecake with Basil Roasted Peaches from The Spiffy Cookie

Goat-Cheese-Cheesecake-with-Peaches-776x1024

Mini Raspberry Swirl Cheesecakes and Lemon Cheesecake with Raspberry Sauce from Baked by Rachel

Mini Raspberry Swirl Cheesecakes

Peanut Butter Snickers Mini Cheesecakes from Macaroni and Cheesecake

peanut butter snickers mini cheesecakes

Petite Pumpkin Swirl Cheesecakes from The Little Ferraro Kitchen

Petite Pumpkin Swirl Cheesecakes

Amaretto Chocolate Mascarpone Cheesecake Bars The Spiffy Cookie

Amaretto-Chocolate-cheesecake-1024x770

Chocolate Chip Cheesecake Bars-Two Ways from Dainty Chef

Chocolate Chip Cheesecake Bars-Two Ways

And there are quite a few cheesecake recipes on Keep It Sweet, but some of my favorites are the Salted Caramel and Brownie Cheesecake Bars, Margarita Cheesecake Bars and the Vanilla Bean and Chocolate Cheesecake Bars.

If you liked this, check out previous blog parties: Peanut Butter Party, Sweet & Salty Party, Pumpkin Party and the Gooey Chocolate Dessert Party

The next Blog Party them is “lighter” desserts and it will be on Tuesday, December 27th.  Email me keepitsweetlcl at gmail dot com with your posts!

*The cake mix giveaway is still open.*

[pinit]

Caramel Apple Cake Trifle and Giveaway!

Caramel Apple Cake Trifle

I don’t know about you, but I am swimming in leftovers.  The thing is, I can’t decide if it is a good or bad thing.  I have plenty of food to get us through the next few days.  But really, how much turkey can one person eat?  If only I could get sick of cookies the way I could get sick of turkey.  It just doesn’t seem to happen.

But even with half of a chocolate pecan pie left, a bowl of caramel sauce, dozens of cookies in my freezer, and a tight pants, I always am ready to bake something new.  After many Thanksgiving-related hours spent in the kitchen cooking, baking and cleaning, though, I welcome something easy.  Something where I don’t have to pull out my mixer, wait for butter to soften or open up a few cookbooks.  Something that only requires a few more minutes of active time on my feet.

Caramel Apple Cake Trifle

That is where this layered beauty comes into play.  While I don’t always advocate box mixes and canned fruit, there really is a time and a place.  And when you come up with something that incorporates those shortcuts, is creative, and looks impressive, no one has to know that a box mix was involved.  Usually your friends will be too busy asking for seconds to even think about it.

For this trifle, I used one of Dunkan Hines new decadent cake mixes.  I chose the Apple Caramel flavor because, how could a cake that is gooey and moist be bad?  It can’t.  Even by itself the cake tastes pretty good, but layered with Comstock apple pie filling, cinnamon flavored cool whip, cheesecake pudding and gingersnap crumbs it is even better.

And better news for you, I have some cake mixes to give away!  Two readers will win coupons for four free Dunkan Hines products (details below).
Caramel Apple Cake Trifle
Serves 8

Ingredients:
1/2 of a prepared Dunkan Hines Apple Caramel Cake
1 15.75-ounce can Comstock apple pie filling
1 8-ounce container of cinnamon flavored cool whip (if you can’t find that, fold cinnamon into regular cool whip to taste)
1 prepared 1-ounce container cheesecake pudding mix
1/2 cup gingersnap crumbs (about 8 cookies)

Directions:
Cut cake in to 1-inch cubes
Layer ingredients in a large trifle dish or bowl as follows: cake, pie filling, cool whip, cookie crumbs, pudding
Repeat layers again and top with extra cookie crumbs
Best served immediately; cover with saran wrap and store trifle in refrigerator up to 4 days

Caramel Apple Cake Trifle

Giveaway Details:

The giveaway is open through Wednesday, November 30 at midnight est.  The giveaway is open to anyone and there are three ways to enter (please leave a separate comment for each entry):

1) Mandatory Entry: Leave a comment below, anything you want!

2) Follow Keep It Sweet on Twitter

3) Like Keep It Sweet on Facebook

Disclaimer:  I received the coupons for Dunkin Hines cake mix and Comstock pie filling as a part of the Foodbuzz Tastemaker program.  All of the opinions expressed in this post are my own.

[pinit]

Gooey Pumpkin and Peanut Butter Oatmeal Bars {Gluten-Free}

These gooey and delicious oatmeal bars are made with just basic ingredients, they are gluten-free and guilt-free!

Gooey Pumpkin Peanut Butter Oatmeal Bars (gluten-free)

Ever since I made these bars a couple of months ago, my sister has been asking me to make a pumpkin version.  I’m sorry it took so long but glad I squeezed this recipe in before Thanksgiving.  These are so easy to make and as a welcome change to the other holiday desserts, these aren’t actually all that bad for you!

Gooey Pumpkin and Peanut Butter Oatmeal Bars {Gluten-Free}
Makes 24 bars

Ingredients:

3 cups gluten-free rolled oats (oatmeal is naturally gluten-free but may be processed with other gluten foods; check the package if serving anyone who has a gluten allergy)
1 teaspoon baking soda
1 1/2 teaspoons pumpkin pie seasoning
3/4 cup smooth natural salted peanut butter
1/2 cup canned pumpkin
3/4 cup granulated sugar
3/4 cup packed light brown sugar
1/2 cup egg whites
1 teaspoon vanilla

Directions:
Pre-heat oven to 350 degrees and spray a 9×13 pan with cooking spray
Whisk together oatmeal and baking soda; set aside
Beat peanut butter and pumpkin on high speed until light and creamy
Add sugars and beat until light and fluffy
Add egg whites and vanilla; beat on medium speed until combined
Stir in oatmeal mixture
Pour batter into prepared pan
Bake for 25-30 minutes or until knife comes out clean
Allow to cool before slicing
Store at room temperature in a covered container up to 2 days or
freeze up to 1 month
Adapted from the Gooey Peanut Butter Oatmeal Chocolate Chunk Bars

Gooey Pumpkin Peanut Butter Oatmeal Bars (gluten-free)

What are you most Thankful for this year? After a rough couple of years for some loved ones, I’m especially thankful for my family’s health.

[pinit]

Pumpkin Pie Cookie Dough Truffle Pops

Pumpkin Pie Cookie Dough Truffle Pops 2

We are just a few days away from Thanksgiving and although I’ve been putting pumpkin in my oatmeal since the end of August (I have no shame), I’m not even close to sick of it.  It is actually a miracle that my skin isn’t orange given the fact that I go through the cans of Libby’s (no other brand can compete) like it is going out of style.  I used to think the big cans were too much to open up, but now those puny 15-ounce cans are like a tease.

Pumpkin Pie Cookie Dough Truffle Pops 1

Hopefully you are also still on the pumpkin bandwagon, unlike my husband who seems to have missed the memo on winter squash (Which, lucky for me, means I get to eat an entire pan of roasted Costco butternut squash by myself.  Seriously, how am I not orange?).

Pumpkin Pie Cookie Dough Truffle Pops 7

Although Matt doesn’t hate pumpkin like he does peanut butter (nope, eight years together and I’m still not over that), he just isn’t a huge fan.  So when I gave him one of these Pumpkin Pie Cookie Dough Truffle Pops to taste and said, “just pretend it isn’t pumpkin,” he said, “these are amazing!”  Don’t worry, I did enough cookie dough sampling yesterday to tell you these are seriously good shit delicious.  The pumpkin flavor in the creamy cookie dough plus the hard chocolate shell and crunchy spicy gingersnap crumbs is an incredible combination.

Pumpkin Pie Cookie Dough Truffle Pops 17

Oh and worried that you can’t make these after Thanksgiving?  I, for one, will be consuming pumpkin desserts for the next few months.  But for the normal people out there, who don’t have to worry about their skin turning a strange color because they only eat pumpkin in the fall, these can completely pass for a special holiday dessert thanks to the gingersnaps.

So if you can make these and keep from eating them yourself, serve them at a party.  No utensils necessary.

Pumpkin Pie Cookie Dough Truffle Pops 15


[print_this]

Pumpkin Pie Cookie Dough Truffle Pops

Makes 30 pops

Ingredients:

  • 1 1/2 cups all-purpose flour
  • 1 teaspoon pumpkin pie spice
  • 1/2 teaspoon salt
  • 1 ½ sticks (3/4 cup) unsalted butter, softened at room temperature
  • 1 cup light brown sugar, firmly packed
  • ½ cup granulated sugar
  • 1/3 cup canned pumpkin
  • ¼ cup milk (any type)
  • 1 1/4 pound chocolate (I used white and dark chocolates)
  • 3/4 cup gingersnap crumbs (about 12 cookies)

Directions:

Prepare cookie dough filling
In a medium bowl, whisk together flour, pumpkin pie spice and salt; set aside
Beat butter and sugars on high speed until light and fluffy
Add pumpkin and milk and mix on medium speed until well combined
Stir in flour
Refrigerate dough for two hours or until cold enough to roll into balls
While chilling dough, line two jelly roll pans with wax paper
When ready, mold cookie dough balls by hand, about 1 1/2 tablespoons each (I used a cookie dough scoop to measure) and place one of the sheets of wax paper
Stick lollipop sticks into each ball so that the stick comes out of the top and goes almost all the way through the dough ball
Place prepared cookie dough in freezer and chill for two hours or until hardened
When dough is frozen, melt chocolate for dipping
Place chocolate of choice into a microwaveable bowl; melt by heating in 30-second increments and stirring in-between
Dip cookie dough pops one-at-a-time into chocolate and coat each entire dough ball; use a spoon to shape the chocolate around the cookie dough and form a thin layer
Place dough ball down onto unused sheet of wax paper and sprinkle pop with gingersnap crumbs; repeat for remaining dough balls
Once finished, chill pops in refrigerator until ready to serve
Store in refrigerator up to three days or freezer up to four weeks

Notes:

You will need to chill the dough between each step to make sure your pops keep a round form

When dipping pops in chocolate, I recommend keeping some dough balls in freezer and working with about 10 at a time; this will keep dough from getting too soft before dipping in chocolate

[/print_this]

Pumpkin Pie Cookie Dough Truffle Pops 19

Are you pumpkined out yet?

Salted Caramel and Brownie Cheesecake Bars

Salted Caramel and Brownie Cheesecake Bars 14

This dessert has been haunting me since it came out of the oven.  I took photos yesterday morning and it was all I could do not to devour the entire pan, sliver by sliver.  These cheesecake bars are not for me so unfortunately (or fortunately) I was forced to keep my mouth shut after a quality control taste.

Salted Caramel and Brownie Cheesecake Bars 8

A thin layer of brownie crust topped with creamy salted caramel and a silky cheesecake layer makes these bars impossible to resist.  The salted caramel layer also adds a depth of flavor that forces you to try another bite.  Need another dessert for Thanksgiving or really something delicious just because? Make these.

Salted Caramel and Brownie Cheesecake Bars 9

[print_this]

Salted Caramel & Brownie Cheesecake Bars

Brownie Layer:
2 ounces unsweetened chocolate
6 tablespoons unsalted butter
1 cup granulated sugar
2 eggs
1/2 teaspoon vanilla
1/2 cup all-purpose flour

Cheesecake Layer:
2 8-ounce blocks reduced fat cream cheese, softened at room temperature
1 1/2 cup granulated sugar
3 eggs
2 tablespoons all-purpose flour
1 teaspoon vanilla extract

Caramel Layer:
1 11-ounce bag of caramel bits
1/3 cup milk (any type)
1 teaspoon sea salt

Pre-heat oven to 350 degrees

Line a 13×9 pan with parchment paper; set aside

Melt chocolate and butter in a medium saucepan over low to heat, stirring constantly

Remove from heat

Stir in sugar

Stir in eggs and vanilla

Whisk in flour until smooth

Pour batter into prepared pan and bake for ~8 minutes or until center is glossy and edges start to look cooked

While brownie layer is cooling, prepare cheesecake filling

Reduce oven temperature to 325 degrees

Beat cream cheese with an electric mixer using the whisk attachment; beat on high until cream cheese is smooth and creamy

Beat in sugar

Mix in eggs

Stir in flour

Stir in vanilla and set aside

Place caramel bits and milk in a microwaveable bowl

Heat in microwave 30 seconds at a time, stirring between each, until completely melted and smooth

Pour caramel over brownie layer; sprinkle salt over that

Pour cheesecake batter over brownie and caramel

Bake for 35-40 minutes or until edges begin to come apart from sides of pan and cheesecake is set

 Brownie recipe adapted from Bakers

[/print_this]

Salted Caramel and Brownie Cheesecake Bars 7

A reminder that the cheesecake blog party is less than two weeks away.  Send me your favorite links!

Peanut Butter Cup Cookie Dough Brownie Bites

Fudgy brownie bites stuffed with a layer of peanut butter cup cookie dough

Peanut Butter Cup Cookie Dough Brownie Bites 2

The apartment is finally starting to feel like home.  It isn’t because I unpacked 99% of my things (the other 1% includes books and underwear that is still MIA).  It also is not because we finally have shelves in the closet so that my sweaters aren’t piled up in various places around our home.  And it certainly isn’t that all of the furniture we ordered has arrived and our dreaded IKEA trip is in the past.

Peanut Butter Cup Cookie Dough Brownie Bites 17_1

While all of those things make the stress of moving a little less acute, the real reason I feel like I am home is the kitchen.  Of course I unpacked all of my dishes and appliances before anything else and have been to the grocery store 17 or so times.  But Friday morning, while Matt was at work and I was waiting for our new night stands to arrive, I had the first opportunity to bake.  Just the thought of that makes my shoulders relax and my breathing slow down.  Working around our new kitchen where I actually had to walk more than one step from refrigerator to utensil drawer, I couldn’t stop smiling.  And the fact that the first thing to come out of my oven was a chocolate and peanut butter dessert certainly didn’t hurt.

Peanut Butter Cup Cookie Dough Brownie Bites 18

Oh, right, these little things.  Fudgy brownie bites stuffed with a layer of peanut butter cup cookie dough, I haven’t felt more at home in a very long time.

[print_this]

Peanut Butter Cup Cookie Dough Brownie Bites

Makes 2 dozen brownie bites

Ingredients:

  • 1 Box Brownie Mix (I used Trader Joe’s Chocolate Truffle) + ingredients the mix calls for
  • 1/4 cup (1/2 stick) unsalted butter, softened
  • 1/4 cup salted creamy peanut butter
  • 1/4 cup granulated sugar
  • 1/2 cup light brown sugar, firmly packed
  • 1 tablespoon milk (I used skim)
  • 1/2 teaspoon vanilla
  • 3/4 cup all purpose flour
  • 1/4 teaspoon salt
  • 1/2 cup chopped peanut butter cups (~7 peanut butter cups)

Directions:

  • Pre-heat oven to 350 degrees
  • Grease a 24-cup mini muffin pan
  • Prepare brownie mix as directed and full cups with brownie batter (about 2 tablespoons each)
  • Bake for 12-14 minutes or until a knife comes out clean; do not over bake
  • Set brownies aside to cool and prepare cookie dough
  • Whisk flour and salt in a small bowl; set aside
  • Beat together butter, peanut butter and sugars on high speed until light and fluffy
  • Mix in milk and vanilla on low speed
  • Stir in flour mixture just until combined
  • Stir in peanut butter cups
  • Once cookie dough is ready, take your brownies and slice each in half horizontally so that you have a top and a bottom
  • Place a rounded disk of cookie dough on each bottom half (about one tablespoon of cookie dough each)
  • Press tops of brownies lightly onto cookie dough layer so that you can still see the cookie dough from the sides
  • Serve immediately or freeze in an airtight container up to one month

[/print_this]

Cookie dough recipe adapted from here.

Peanut Butter Cup Cookie Dough Brownie Bites 21

What is making you smile lately?

What I Learned at Foodbuzz and the Food that Came With It

Foodbuzz Festival Bi Rite Creamery 8

Last weekend I had an amazing time in San Francisco for the third annual Foodbuzz Festival (my first time going).  Not only was it a long weekend full of delicious food and blogging tips, but it also was a weekend full of new friends and new blogs to read.  I have so much to share with you but I’ll limit this post to some of the food conference, blogging and social networking-related tips (in no particular order).

1)  There were a lot of tips for blogging, but by far the number one theme is to be yourself.  Find your voice, find what you love, and blog that way.

2)  Engage with readers.  Respond to comments and emails. Comment on their blogs, too.  When you do that, they will come back.

3)  Take good photos*.  Backdrops can be as simple as construction paper or crumpled parchment paper and as elaborate as fancy china and linen.  Use a DSLR or an iPhone.  Just make it appealing to the eyes.  *more on that in an upcoming post

Foodbuzz Festival Brunch

4)  Instead of being jealous or comparing yourself to other bloggers, focus on doing everything you can to get where you want to be.

5)  Use Twitter and Facebook to interact with others.  Twitter is an especially good way to connect with other bloggers and readers.  Don’t only use social media to promote your blog.

6)  Jessica is just as awesome in person as she is on her blog.  Unfortunately, we never got a chance to talk, but she was on a “taking your blog to the next level” discussion panel and her blog personality definitely came through in real life.  Oh, and same thing for Joy.

7)  Always charge your camera battery; no pictures for the first night of Foodbuzz #fail

8)  Take a camera break; no camera for the first night of Foodbuzz also meant I could focus on meeting new people and enjoying the food.

9) It is perfectly acceptable to drink your chocolate.

Foodbuzz Festival Tasting Pavillion 5

Foodbuzz Festival Tasting Pavillion 6

10)  String cheese can be eaten the next day without refrigeration.  You never know when you may need a snack.

Foodbuzz Festival Tasting Pavillion 16

11) Fresh fruit tastes so good in between indulgent samples.

Foodbuzz Festival Tasting Pavillion 20

12)  Keep packaged samples as a treat for later when you are going through foodie withdrawal.

Foodbuzz Festival Tasting Pavillion 11

Foodbuzz Festival Tasting Pavillion 13

13)  In a sea of amazing foods to try, a vat of guacamole is still exciting.

Foodbuzz Festival Tasting Pavillion 28

14) Godiva chocolate is always a win.  I was addicted to their pumpkin spice coffee but now I’m addicted by the truffles that inspired it.

Foodbuzz Festival Tasting Pavillion 17

15) Mini cupcakes are more fun because you can sample lots of flavors.

Foodbuzz Festival Tasting Pavillion 39

Foodbuzz Festival Tasting Pavillion 40

Foodbuzz Festival Tasting Pavillion 19

16) Burberry is even better in brownie form

Foodbuzz Festival Tasting Pavillion 35

Foodbuzz Festival Tasting Pavillion 34

17) Cinnamon caramel is heavenly

Foodbuzz Festival Tasting Pavillion 36

18) Don’t fill up on foods you don’t love, there are too many other foods to try.

Foodbuzz Festival Tasting Pavillion 31

Foodbuzz Festival Tasting Pavillion 26

Foodbuzz Festival Tasting Pavillion 41

19)  Take advantage of the opportunity to meet awesome people.  Some of the friends I made at Foodbuzz include Nicole, Audra, Krissy, Julie, Dennis, and Tina.

20) Find an awesome roommate who will spend as much time as possible eating their way through San Francisco with you.

Foodbuzz Festival Tasting Pavillion 38

Have you ever been to a food blogger conference?  Do you have any tips to add?

Cinnamon Sugar Swirl Chocolate Chip Pumpkin Bread {Guest Post}

Making Pumpkin Bread 1

Hi, friends!  I have so much to share with you from my Foodbuzz weekend but an apartment full of boxes is keeping me from the blog right now.  In fact, I still haven’t found my underwear (thank G-d for now having a washer and dryer in the apartment!).  On the upside, I don’t have to go to the gym yet since I can’t find my sneakers either. 

In the meantime, I have another guest post for you.  This one is from my amazing sister, Jessica.  She is the reason I started the blog so I owe all of my Keep It Sweet life to her.  The best part about this guest post? I get to eat this delicious pumpkin bread when she brings it for Thanksgiving.

Cinnamon Sugar Swirl Chocolate Chip Pumpkin Bread

Full disclosure: I do not bake. My sister and my mom – they bake. Me – I cook. I clean the dishes when they bake. But any time I try to bake, I am reminded of why I don’t bake.

Despite this fact, I offered to do a guest post for my sister while she takes care of the 8 million other things going on in her life. Ya’ know, like moving and preparing to host Thanksgiving dinner for our family.

So I decided to make one of my mom’s classic and easy recipes – pumpkin bread. Classic because everyone knows it and loves it. Easy because I was able to make it through the whole recipe without asking any questions. And to add my own little touch, I took one of my mom’s favorite touches – chocolate chips and cinnamon sugar – and put it in the center. And here’s what I got: Cinnamon Sugar Swirl, Chocolate Chip Pumpkin Bread

Cinnamon Sugar Swirl Chocolate Chip Pumpkin Bread 1

Of course, being the non-baker that I am, something still went wrong. When the top of the loaf started burning and spilling over the edges before the center was cooked, I realized that I filled the pan way too high. Note to self: When they say flour makes bread rise, they mean it. Take that into consideration before filling a pan to the top.

Making Pumpkin Bread 7

[print_this]

Cinnamon Sugar Swirl, Chocolate Chip Pumpkin Bread

Adapted from My Favorite Pumpkin Bread

Ingredients

Dry:

3 cups sugar

3 ½ cups flour

1 tsp nutmeg

2 tsp. cinnamon

2 tsp baking soda

1 ½ tsp salt

Wet:

1 cup oil

2 cups pumpkin

2/3 cup water

4 eggs

Filling:

2 ounces semi-sweet mini chocolate chips plus additional for sprinkling on top

2 tablespoons cinnamon sugar (I used a pre-mixed version but you can make your own to taste)

Directions

Pre-heat oven to 350 degrees

First mix the dry ingredients, then mix them in with the wet ingredients.

Spray two 2-pound loaf pans.

Fill pans about halfway and then sprinkle cinnamon sugar and chocolate chips.

Pour batter on top, filling the pan about ¾ of the way (take it from me, you don’t want to fill it all the way).  Sprinkle with additional chocolate chips.

Cook at 350 for about an hour.

Enjoy Smile

[/print_this]

Cinnamon Sugar Swirl Chocolate Chip Pumpkin Bread 3

The Ultimate Thanksgiving Recipe List

ChewyChocolateChipCookies26_thumbPumpkinSmoreMuffins11_thumbcinnamon roll cookiesCinnamon-Chocolate-Chip-Pumpkin-Cookies-19_thumbmix and match chocolate barsthe best homemade applesauceMy Favorite Pumpkin Bread (and muffins)fall triflepumpkin chocolate cheesecake bars

What a week this has been!  We moved yesterday and although we made good progress, my bedroom is stacked with boxes of clothes and no where to put them yet.  Luckily we prioritized and the kitchen is ready to go.  Both of us are loving our new place and with twice the amount of space as our last apartment, it is nice to be able to come home and breathe!  I’d love to finish everything here, but I’m off to San Francisco tomorrow morning for the Foodbuzz Festival, a weekend of blog networking and food., ie heaven.

And in other exciting news, this will be the first year that Matt and I will host Thanksgiving.  I’m so glad we had five years of practice because now I don’t have to be too nervous.  On the other hand, I have so many desserts much food that I want to make and I need to work on my menu editing skills!  Otherwise I’m going to need to spend the next three weeks in the kitchen.

So since I’m busy with menu planning, I figured I’d share some ideas from Keep It Sweet and other blogs for your holiday dinner!

Appetizers

Brussels Sprout and Pancetta Flatbread (We Are Not Martha)

Cheddar Bacon Ale Dip (Dinners, Dishes and Desserts)

Fall Bruschetta (eats well with others)

Fall Bruschetta (Eats Well With Others)

Pumpkin Soup with Chili Cran-Apple Relish (The Keenan Cookbook)

Side Dishes

Bacon Cheddar Cornbread (Slow Like Honey)

Baked Potato Soup (Dainty Chef)

Buttermilk Whipped Cauliflower Mashed Potatoes (Prevention RD)

Butternut Squash with Pepita Cilantro Vinaigrette (Eats Well With Others)

Butternut Squash Mac and Cheese with Caramelized Onions, Bacon and Apple (The Spiffy Cookie)

Cornbread Dressing with Tempeh Bacon, Cherries and Portabella Mushrooms (Peas and Thank You)

Maple Cayenne Roasted Brussels Sprouts (Not Rachael Ray)

My Favorite Pumpkin Bread (Keep It Sweet)

pan roasted brussels sprouts (how sweet)

Pan Roasted Brussels Sprouts with Brown Butter and Toasted Pecans (How Sweet it is)

Pumpkin Maple Baked Bean Cornbread Casserole (Oh She Glows)

Roasted Butternut Squash Risotto (La Casa de Sweets)

Roasted Butternut Squash Salad with Apple Cider Vinaigrette (In Good Taste)

slow cooker butternut squash and apples (what megans making)

Slow Cooker Butternut Squash with Apples (What Megan’s Making)

Spiced Maple Roasted Apples and Squash (My Kitchen Addiction)

Sweet Potato Casserole with Toasted Marshmallows (Keep It Sweet)

“Turkey”!

Crockpot Turkey White Bean Pumpkin Chili (Skinny Taste)

Mozzarella Stuffed Turkey Meatballs (Lauren’s Latest)

thanksgiving sandwiches (crepes of wrath)

Thanksgiving Sandwiches (Crepes of Wrath)

The Best Thanksgiving Turkey Breast (Heather’s Dish)

Turkey & Carrot Meatloaf (Weekly Bite)

Turkey Shepard’s Pie (Sweet Pea’s Kitchen)

Turkey Taco Pasta Skillet (All Day I Dream About Food)

Zesty Turkey Burgers (Yums and Loves)

Desserts

Apple & Pear Crisp (Keep It Sweet)

Apple Cider Spice Cake (Confessions of a Cookbook Queen)

Apple Pecan Cheesecake (Baked by Rachel)

Apple Spiced Brown Butter Blondies (London Bakes)

caramel apple cake (pass the suhi)

Caramel Apple Cake (Pass the Sushi)

Caramel Apple Cider Shake (The Avid Appetite)

Caramel Apple Cookies (Blog is the New Black)

Chewy Chocolate Chip Cookies (Keep It Sweet)

Cinnamon & Chocolate Chip Pumpkin Pie Cookies (Keep It Sweet)

Cinnamon Ice Cream (Chocolate & Carrots)

Cinnamon Roll Cookies (Keep It Sweet)

Cinnamon Roll Pumpkin Vanilla Sheet Cake (Picky Palate)

Dark Chocolate Fudge Brownies with Dulce De Leche (The Novice Chef)

Double Crumble Hot Apple Pie (Keep It Sweet)

Dark Chocolate Fudge Brownies with Dulce De Leche (the novice chef)

Double Decker Pumpkin Caramel Pie (Recipe Girl)

Fall Trifle (Keep It Sweet)

Frozen Pumpkin and Chocolate Yogurt Pie with Salted Caramel Cream Sauce (Keep It Sweet)

Overnight Pumpkin Pecan Croissant Bread Pudding (The Yummy Life)

Pear, Cranberry and Gingersnap Crumble (Smitten Kitchen)

Pumpkin Bars with Cream Cheese Frosting (Espresso and Cream)

Pumpkin Chai Cupcakes (Dessert for Two)

Pumpkin Cheesecake Stuffed Snickerdoodles (Willow Bird Baking)

Pumpkin Chocolate Cheesecake Bars (Keep It Sweet)

Pumpkin Gingersnap Cookies (Two Peas & Their Pod)

Pumpkin Pie Rice Krispy Treats (Baking Bites)

Pumpkin Shaped Orange Velvet Whoopie Pies (Cookies and Cups)

Caramel Apple Cider Shake (avid appetite)

Pumpkin S’more Muffins (Keep It Sweet)

Mix and Match Chocolate Bars (Keep It Sweet)

Skillet Apple Crisp (Brown Eyed Baker)

Southern Style Pecan Pie (Young Married Chic)

The Best Homemade Applesauce (Keep It Sweet)

Whole Wheat Maple Walnut Spice Cookies (Keep It Sweet)

What are your Thanksgiving plans? I hope they involve someone you love and delicious food!

Chocolate Caramel Apple Bars {Guest Post}

apple bars4 small

I am so excited to share another wonderful guest post with you today!  Rachel is a blog friend turned real-life friend and she is here to share her recipe for Chocolate Caramel Apple Bars (how good does that sound?!).  This is a huge help to me because I am in the process of moving apartments.  I’m so excited for our new place but wow is it a lot of work.  In the meantime, enjoy Rachel’s post and be sure to check out her blog for other delicious recipes like Pizza Dip, Layered Oreo Cake Bars, and her Banana Bread Smoothie.

Hi Keep it Sweet readers! I’m Rachel! I blog about all things food over at The Avid Appetite and all things life over at The Peach & The Pit. I am so excited to be guest posting here today. Lauren was one of my first real ‘blog’ friends and I am so happy that we found each other! She keeps my stomach rumbling with her amazing and super creative dessert recipes and I always look forward to her posts each week.

When I first thought about guesting over here on Keep it Sweet, I knew that I would have to come up with a delicious and decadent dessert recipe that would be worthy of standing next to Lauren’s delectable creations. And since I know she loves chocolate, that obviously had to be a key ingredient.

I have long had a love affair with appley things. For as long as I can remember, anything with apples was instantly my favorite dessert. Pies, tarts, coffee cakes, crumbles, you name it. When I started thinking about a recipe to share with you, I knew that combining my love of apple, cinnamon and caramel with Lauren’s love of chocolate would surely be a winner. Right?

Right?!

Well let me tell you about them and perhaps you’ll agree. Ooey gooey apple and caramel scattered atop a layer of semisweet chocolate, then sandwiched between crumbly oat goodness and topped with even more sticky caramel sauce is what these bars are all about. And if that’s wrong, I don’t want to be right. You won’t either; trust me on this one.

apple bars3 small

[print_this]Chocolate Caramel Apple Bars
*bar base adapted from Betty Crocker Cooky Book’s Date Bars
3/4 C shortening, such as Crisco
1 C brown sugar
1 3/4 C all-purpose flour
1/2 tsp baking soda
1 tsp salt
1 1/2 C old fashioned oats
1 C semisweet chocolate chips
2 tart baking apples (such as Granny Smith), peeled, cored and diced
1 Tbsp granulated sugar
½ tsp ground cinnamon
1 ½ C caramel topping or sauce (such as 1 jar Smucker’s caramel flavored ice cream topping)
Preheat oven to 400 degrees. Line a 13×9″ pan with foil (one strip lengthwise, one strip widthwise), letting the foil hang over the edges. Grease well. Mix the shortening and sugar together in a bowl. I used my stand mixer, but a hand mixer (or even by hand) would work too.
In a mixing bowl, mix together the flour, baking soda and salt. Beat into the shortening & sugar mixture. Stir in the oats. Press 2/3 of the mixture into the greased, foil-lined pan.
Next, peel, core and chop the apples. Mix with the sugar and cinnamon and set aside.
Then, melt the chocolate (I do it via microwave) and carefully spread over the oat dough. It won’t be perfect, and that’s ok! Pour the apples evenly over the chocolate. Drizzle 1 cup of the caramel sauce all over the apples. Gooeyness!
Sprinkle the remaining oat mixture over top and drizzle the remaining caramel sauce over that.
Bake for 25-30 minutes. Let cool and set. To cut up, remove from pan by using the foil as handles. Peel away and cut into bars. Gooey, decadent, stretchy pants-inducing bars.[/print_this]

I hope you enjoy these! I can’t wait to make them again and again!

News on the next blog party:  The theme is CHEESECAKE! and it will be posted on Tuesday, November 29th.  Send me your links by the 28th to keepitsweetlcl at gmail dot com.

Pumpkin Spice & Date Walnut Butter

Pumpkin Spice & Date Walnut Butter 11

So the good news is, my voice is almost back.  Did you know that when you communicate to someone that you have no voice, the first thing they do is ask you how you lost it?  Because clearly if I have about five minutes of voice time in this entire day, I want to use it explaining to you how I lost my voice in the first place.  I’d rather save those few minutes of real communication for something really important like “I’d like a large cup of split pea, please” or “Can I have the manicure before the pedicure today?” or even “How good is that girl on X-factor who did the Beyonce song from Dreamgirls?!”

Pumpkin Spice & Date Walnut Butter 5

Because otherwise I’m left sounding like the combination of a squeaky mouse, a 13-year old boy and a 27-year old 3-pack-a-day female smoker.  I’ve been compared to all of those things in the past few days.  And when I met Madison in real life for the first time at dinner with Kris, I was barely audible.  Didn’t my co-workers know I had to save my good voice time for dinner with blog friends? Priorities, people!

But I digress. On top of having my voice back, I have my other senses are back too.  I can finally really smell and taste what I eat again.  (Not that being under the weather affected my appetite in anyway.  I was still plenty hungry, if not hungrier.)  And this walnut butter, with the spice of pumpkin pie seasoning and the sweet addition of dates is a great treat that I can enjoy even more.

Pumpkin Spice & Date Walnut Butter 3

[print_this]

Pumpkin Spice & Date Walnut Butter

Yield: Makes 14 tablespoons of walnut butter

Ingredients

  • 1 1/2 cups walnut pieces (unsalted)
  • 1 teaspoon pumpkin pie spice
  • 1/4 teaspoon salt
  • 3 chopped dates

Cooking Directions

  1. Place walnuts into food processor and process for two minutes or until creamy
  2. Ad pumpkin pie spice and salt; grind for another minute
  3. Add dates and run through processor until distributed evenly (you can leave them in pieces or process until they are fine)
  4. Store in a jar or tupperware up to one month in the fridge

[/print_this]

Pumpkin Spice & Date Walnut Butter 17

What annoying questions have you been asked lately?

Gooey Chocolate Dessert Party

peanut butter caramel brownies

When it comes to desserts, I’ll flirt with vanilla, have a love affair with caramel and indulge myself in warm fruit crisps.  But in the end, it always comes back to chocolate.  This party is for all of my chocolate loving friends who can’t resist those desserts that are just oozing with rich, chocolaty deliciousness.  Click on the links to check out all of the wonderful posts from different bloggers.

Velvet Hot Fudge Sauce from The Yummy Life

Velvet Hot Fudge Sauce

Easy, Easy Chocolate Mousse from The District Chocoholic

chocolate mousse

Crock Pot Hot Fudge Peanut Butter Pudding Cake by Greens and Chocolate

crock pot hot fudge peanut butter pudding cake

Chocolate Rspberry Layer Cake from I Was Born to Cook

chocolate raspberry layer cake

Chocolate Peanut Butter Sand Pail Cupcakes from Chip Chip Hooray

chocolate pb sand pail cupcakes

Blue Ribbon Chocolate Sparkle Cookies (Gluten-free) by Veronica’s Cornucopia

chocolate-sparkle-cookies3-8-19-10

S’more Cookies from the Keenan Cookbook

smore cookies

Black Gold Cookies by Veronica’s Cornucopia

black-gold-cookies-3-7-10

Basler Burnsli from The District Chocoholic

brusnili chocolate almond cookies

Super Gooey Chocolate Drops by Eat.Drink.Love.

super-gooey-chocolate-cookies-1

Chocolate Revel Bars from Chip Chip Hooray

Chocolate Revel Bars

Fudgy Chocolate Chip Toffee Bars from the Dainty Chef

chocolate chip toffee bars

Cookies and Cream Oreo Fudge Brownies and Chocolate Fudge Brownies from the Keenan Cookbook

Cookies n cream oreo fudge brownies

Fudgy S’mores Brownies from The Baking Fairy

Fudgy Smore Brownies

Browned Butter Brownies with Walnuts, Peanut Butter and Fudge Brownies with Salted Peanuts, Mississippi Mud Brownies and Gooey Brownies by Greens and Chocolate

browned butter brownies with walnut

Cosmic Brownies by the Spiffy Cookie

Cosmic-Brownies-1024x768

And some favorites from Keep It Sweet:

Magic Pie

magic pie - even better than magic cookie bars!

Gooey Peanut Butter Oatmeal Chocolate Chunk Bars (Gluten-Free)

GooeyPeanutButterOatmealChocolateChunkBars8_thumb

If you liked this, check out previous blog parties: Peanut Butter Party, Sweet & Salty Party and Pumpkin Party

Kitchen Sink Cookies and Bars

Kitchen Sink Cookies 15

What a weekend.  Matt and I went to Philadelphia to celebrate the wedding of one of my best friends since 4th grade.  She was a gorgeous bride and I was so happy to be a bridesmaid and such a big part of the celebration.  Not going to lie, though, one of the highlights of the weekend may have been the wedding cake.  After a week of limiting my carbs to make sure the dress would fit, I was extra excited for dessert.  Matt and I shared so that we could try both options: vanilla bean cake with caramel buttercream and a chocolate chip pound cake with cookies ‘n cream filling topped with cream cheese icing.  They deserve a lot of credit for such an amazing cake selection.  Not to mention the fact that it was a stunning 6-tier wedding cake!

On the downside, after a bad cold all last week, a Friday night without sleep (long story) and full Saturday of wedding activities, I woke up feeling really lousy on Sunday and lost my voice.  Not being able to talk is extremely frustrating!  However, struggling to communicate with people for 24 hours reminded me how lucky I am to have all of my senses on a regular basis.  It is amazing how all the little things are so easy to take for granted!

Kitchen Sink Cookies 11

Now, as for these cookies (and bars), this is my latest post for The Secret Recipe Club.  This month I got to choose a recipe from Life’s Simple Measures.  The Kitchen Sink Cookies were actually perfect since you can put almost anything in them you want.  Given that we are moving and trying to use up food we have on hand, it was a great way to deplete a few of my baking ingredients.  [Sidenote:  It is a good thing we aren’t moving far because I still have an entire kitchen of baking ingredients to use.  I also told myself no more baking before we move next Tuesday but I already have my eye on the brown bananas just dying to get used for something delicious.  Any suggestions? ]

Jess’s blog has a lot of other great baked good recipes that I considered including these Cinnamon Bun Scones, Double-Apple Mini Bundt Cakes and Candied Bacon Chocolate Chip Cookies.  Be sure to check out her blog!

[print_this]

Kitchen Sink Cookies

Yield: 5 dozen cookies or 24 bars

Ingredients

  • 1 1/2 cups rolled oats
  • 1 3/4 cups Rice Krispies
  • 1 1/2 cups mini marshmallows
  • 3/4 cup milk chocolate chips
  • 1/2 cup semi-sweet chocolate chunks
  • 1/2 cup semi-sweet chocolate chips
  • 2 cups all-purpose flour
  • 1 teaspoon baking powder
  • 1/2 teaspoon baking soda
  • 1 teaspoon salt
  • 2 sticks (1 cup) unsalted butter, softened
  • 1 1/4 cup light brown sugar, packed
  • 1/2 cup granulated sugar
  • 2 large eggs
  • 1/2 tablespoon vanilla extract

Cooking Directions

  1. In a medium bowl, combine cereals, marshmallows and chocolate; set aside
  2. In another bowl, whisk together flour, baking powder, baking soda and salt; set aside
  3. In a large bowl, use an electric mixer to beat the butter and sugars on high speed until light and fluffy
  4. On medium speed, mix in eggs and vanilla
  5. Stir in flour mixture until well-combined
  6. Stir in cereal/marshmallow/chocolate mixture
  7. Refrigerate cookie dough for two hours or until chilled
  8. When ready to bake, pre-heat oven to 350 degrees
  9. If making cookies, line baking sheets with parchment paper and use a cookie dough scoop or tablespoon (1 1/2 tablespoons each) to place cookie dough balls on sheets 2 inches apart
  10. Bake cookies 10-12 minutes or until golden brown
  11. Transfer parchment paper to a wire rack with cookies still intact and allow to cool completely before serving (well, unless you like a gooey, delicious mess)
  12. If making bars, line a 13×9 pan with parchment paper and press cookie dough into pan
  13. Bake for ~40 minutes or until golden brown and knife comes out clean from the center
  14. Allow pan to cool on a wire rack

Adapted from Life’s Simple Measures [/print_this]

Kitchen Sink Cookies 9

What was the highlight of your weekend?


Cream Cheese Toffee Dip {Guest Post}

Today’s guest post is from Krissy at the Dainty Chef.  Her blog is full of delicious recipes and beautiful photos.  You must check out her Pumpkin Spice Trifle, Apple Pie Cupcakes, and Brownie Batter Ice Cream,  I’m so glad she was willing to share a delicious recipe with Keep It Sweet readers.  Be sure to check out her blog.

appledip

Hello there Keep it Sweet readers. My name is Krissy, the Dainty Chef, my blog is where I share recipes that are family favorites and ones that I stumble upon in magazines, cookbooks, and other blogs.  Lauren was looking for several guest bloggers, and since I love her blog I jumped at the opportunity.  I have to mention that Lauren and I also both used the same caterers for our weddings, we have the same taste in great food! Thank you Lauren for this opportunity to share with your readers.

On my blog I try to keep a balance of savory and sweet recipes, but sometimes I have a tendency to lean towards more sweet dishes. I love to bake and always have my eye on new and delicious treats. Hence why Lauren’s blog caught my eye in the first place. As much as I love the process behind baking, I can’t say that I don’t love quick & easy recipes too.  I have been loving making different types of dessert dips for various occasions, some I have already made are cookie dough dip & cannoli dip. If you clicked on those links, you can see my photography has improved just a tad ;). I love them because even though I tend to go back for ninths and tenths, they aren’t as heavy as other desserts. Plus doesn’t dipping count as exercise?! This particular dip recipe is actually a family favorite and was shared to me by one of my dear friend’s moms. She labels it as apple dip, but I don’t doubt that many other things would be deemed dunk-worthy for it. It has a caramel flavor from the brown sugar, and a nice crunch from the toffee bits. Since now is the time people are apple picking, you can eat an apple for dessert every night with some of this dip. Or you can find other delicious things to dip in it, and let me know about it.  I hope you enjoy it as much as I do!

[print_this]

Cream Cheese Toffee Dip or Apple Dip

Ingredients

  • 1 8 oz bar of cream cheese, softened
  • 1/2 cup of sugar
  • 3/4 cup of brown sugar
  • 1 tsp. of vanilla
  • 1/2 package of heath bar bits (4 oz. a little more than a 1/2 cup)
  • Apple Slices for serving or anything else dunk-worthy

Cooking Directions

  1. Blend cream cheese, sugars, and vanilla until combined, then add 1/2 of the package of heath bar bits.
  2. Serve with granny smith or gala apples. You can add some pineapple or lemon juice to the apple slices to prevent them from turning brown.

 [/print_this]

Mint Chocolate Chip Meringues

Mint Chocolate Chip Meringues 2

Sometimes you need a light and refreshing cookie to balance out desserts like this.  As the cooler weather is moving in, the comfort of indulgent cookies, cakes and pies is more and more appealing.  However, I’m determined not to gain weight as we get through the winter.  In fact, I’d like to get rid of the couple of pounds that have snuck up on me over the last several months.

But don’t expect things to get all diet-y around here.  I really believe in balance and balance includes indulging in real butter-filled desserts in moderation.  But usually sometimes, one cookie or one slice of cake just doesn’t do it.  It is a time like that when something a little lighter is best.  That way you can have 10 4 cookies instead of 2.

Mint Chocolate Chip Meringues 6

I find that meringue cookies are a little underrated.  It used to be a nice treat when we would come home to a fresh batch of chocolate chip meringue cookies waiting in the kitchen.  The light and crispy exterior complimented by a chewiness just in the center makes for a nice change of pace.  Adding in the mini chocolate chips is a bonus.

While my mom always went with the classic meringue, I decided to change things up with a mint chocolate chip version.  Just a little bit of crème de menthe adds a nice flavor touch to the cookies.

Mint Chocolate Chip Meringues 15

The thing that made baking these cookies a little more fun than usual was a new toy in the kitchen.  OXO sent me some kitchen supplies including this OXO Egg Beater.  It is so much easier than trying to beat the eggs by hand but you get to feel more active than using an electric mixer.  Plus, it is great for making a small batch when a regular electric mixer can’t reach the bottom of the bowl.  I even used the egg beater when making breakfast today.  The fact that it is dishwasher-safe makes it an every day tool!

[print_this]

Mint Chocolate Chip Meringues

Yield: Makes 28 meringues

Ingredients

  • 2 egg whites at room temperature (not from the carton)
  • 1/2 teaspoon cream of tartar
  • 3/4 cup granulated sugar
  • 1 teaspoon creme de menthe
  • 2/3 cup semi-sweet mini chocolate chips

Cooking Directions

  1. Pre-heat oven to 350 degrees
  2. Line two baking sheets with parchment paper and set aside
  3. In a large bowl, beat egg whites with OXO egg beater using high speed (or an electric mixer with the whisk attachment) until lightly foamy
  4. Add cream of tartar and continue to beat until mixture is very foamy
  5. Add in half granulated sugar and beat until mixture is a creamy white
  6. Add crème de menthe and remaining sugar
  7. Beat at high speed until meringue has formed a thick better that is a glossy white and stiff peaks form from beaters or whisk
  8. Lightly fold in chocolate chips
  9. Use a teaspoon to drop spoonfuls of meringue on to baking sheets
  10. Place baking sheets in center of oven and turn oven off; leave meringues in oven for two hours or until firm and crisp

Adapted from Emeril [/print_this]

Mint Chocolate Chip Meringues 9

Disclaimer:  I received the OXO Egg Beater and other kitchen accessories as a part of the Foodbuzz Tastemaker program.  All of the opinions expressed in this post are my own.

Any tips on eating desserts in moderation? I would love to learn how to do that!

Thick and Chewy Peanut Butter, Chocolate and Toffee Bars

Peanut Butter & Chocolate Toffee Bars

Do you read Cookies & Cups?  If not, you need to.

Peanut Butter & Chocolate Toffee Bars

Not only is Shelly hilarious, but she also makes the most delicious and fun desserts in every.single.post.  I can not stop drooling over her Chubby Hubby Bars or Pumpkin Dump Cake.  Really, I should have an email folder dedicated to the recipes from her blog that I send myself.  Either that or I should move in with her.

Peanut Butter & Chocolate Toffee Bars

That wouldn’t be creepy.

Peanut Butter & Chocolate Toffee Bars

So when I saw her Chocolate Toffee Bars I immediately added them to my must make list.  I put a bit more emphasis on the peanut butter in the recipe and was thrilled with how they came out.

Peanut Butter & Chocolate Toffee Bars

The only problem was, they are too good.  I’m not kidding.  I couldn’t keep myself from eating these as soon as they came out of the oven.  The only thing that saved me was knowing I had to donate some to a LCC Foundation raffle.

Peanut Butter & Chocolate Toffee Bars

I think from now on, I need someone to come and remove desserts from my apartment immediately after photographing them for the blog.  Any takers?

Peanut Butter & Chocolate Toffee Bars

Thick and Chewy Peanut Butter, Chocolate and Toffee Bars
Makes 24 bars

Peanut Butter Toffee Crust
Ingredients:
5 tablespoons unsalted butter, melted
1 1/2 cup Nutter Butter crumbs (~10 cookies)
1/2 cup toffee bits

Directions:
Pre-heat oven to 350 degrees and grease a 13X9 pan with butter or cooking spray; set aside
Combine melted butter, cookie crumbs and toffee bits
Press crust mixture into pan; crust will be very thin
Bake for about 10 minutes or until crust is a nice medium shade of gold

Chocolate Peanut Butter Filling

Ingredients:
1 1/2 cup peanut butter chips
1 cup semi-sweet chocolate chips
1 14-ounce can sweetened condensed milk (any fat content will do)
1 tablespoon unsalted butter

Directions:
While crust is baking, combine chocolate and peanut butter chips, sweetened condensed milk and butter in a medium saucepan over low heat
Stir ingredients together until melted and remove from heat
Pour evenly over prepared crust; set aside

Cookie Topping

Ingredients:
2 1/2 cups all-purpose flour
1 teaspoon salt
1 teaspoon baking soda
2 sticks (1 cup) unsalted butter, softened at room temperature
1/2 cup granulated sugar
1 cup light brown sugar, packed
2 large eggs
1 teaspoon vanilla
1 cup toffee bits
3/4 cup semi-sweet chocolate chips

Directions:
Whisk together flour, baking soda and salt; set aside
With an electric mixer, beat together butter and sugars at high speed
Mix in eggs and vanilla until well combined
Reduce speed to low and stir in flour mixture
Stir in toffee bits and chocolate chips
Once combined, drop dough by large spoonfuls over the filling
Bake for 25-30 minutes or until topping is lightly browned
Allow to cool before serving

Adapted from Cookies and Cups who originally adapted the recipe from Making Memories

Peanut Butter & Chocolate Toffee Bars

Any other blogs you are loving right now?

Peanut Butter Surprise Cookies {Guest Post}

PB1

In the midst of my crazy life, I am so thankful for other food bloggers!  It never ceases to amaze me how many of you there are that are willing to lend a hand when things get crazy.  A couple of weeks ago, a few wonderful bloggers volunteered to guest post on Keep It Sweet and I can’t wait to share their delicious recipes with you.  The first post is from Samantha at The Little Ferraro Kitchen.  Her blog is pretty new, but she already has some delicious looking recipes like her recent Fresh Raspberry & Apple Crumble and Chicken Pot Pie!  These cookies are no different.

Hello everyone! I am Samantha from The Little Ferraro Kitchen and I am soo excited to guest post for the beautiful Lauren from Keep It Sweet!

When she asked for fellow guest-posters recently, I jumped at the chance! See…I am a pretty “new” blogger and have only been blogging for a few months now. Keep It Sweetwas one of the first blogs I started to enjoy and I just knew this was the perfect start!

So because this is officially my first guest post ever! (wow!)…I present to you…Peanut Butter Surprise Cookies!

PB2

This is the best batter I have ever worked with. The combination of the creamy peanut-butter and butter creates the softest cookie. Mini peanut-butter-cups (need I say more?) snuggle their little cute sweet selves into their peanut butter pillows of perfection. If you have the patience to wait the few minutes until these cuties are done, take a messy bite and allow all that melting chocolate to ooze out of the center from it’s cozy home and just enjoy. I promise you, this will be your absolute favorite cookie.

[print_this]

Peanut Butter Surprise Cookies

Makes about 3 dozen

Adapted from Martha Stewart

Ingredients:

1/2 C creamy peanut-butter

4 TB unsalted butter, room temperature

1 C brown sugar

2 large eggs

1 tsp pure vanilla extract

1 1/2 c all-purpose flour

1 tsp baking powder

1/4 tsp salt

1/3 c granulated sugar (for rolling dough)

Method:

1. Pre-heat oven to 350 degrees Fahrenheit.

2. Cream peanut butter and butter until well combined.

PB3

3. Add brown sugar and beat until well combined, scraping down bowl as needed.

4. Add eggs (one at a time), vanilla and beat until well incorporated.

5. In another bowl, whisk together the flour, baking powder and salt. I’ve gotten in the habit of using a sifter to get any “lumps” out.

6. With mixer on low, add flour mixture in 2 batches.

* At this point I’ll use my spatula and do one last “mix” with the spatula and make sure everything is incorporated, but not to over mix.

7. Take the mixture out of bowl and wrap in plastic wrap and chill in refrigerator for 30min.

* I do this for all my cookie dough.

8. When dough is ready, unwrap from plastic wrap and scoop dough by the tablespoon, rolling into balls. A melon-baller is perfect for this!

9. Roll balls in granulated sugar and place on non-stick baking sheet.

PB4

10. Bake cookies until just about to puff up, about 5-7 minutes. (My oven is pretty fickle and is done at 5 min.)

11. When times up, take trays out of oven and work quickly! Place each peanut-butter cup in the center of each cookie and return to oven.

12. Bake for about 6 minutes more (again, my oven is no more than 5min), until cookies are golden brown and chocolate has begun to melt.

13. When done, let cool on baking sheet for at least 10 minutes before transferring to wire wrack to cool.

[/print_this]

PB5

PB6

Thanks for having me, Lauren! I had so much fun making these fabulous cookies and I hope all of you do too!

Enjoy!

Cinnamon & Chocolate Chip Pumpkin Pie Cookies

Cinnamon & Chocolate Chip Pumpkin Cookies 13

Things have been crazy around here lately.  I know I say this a lot, but after the busy summer, things never really slowed down.

Cinnamon & Chocolate Chip Pumpkin Cookies 5

There has been a ton of weekend travelling, apartment hunting, working, baking, blogging, and I’ve even been interning with Hot Blondies a few times a week as well.  My days have been so packed that I rarely know what day of the week it is.

Cinnamon & Chocolate Chip Pumpkin Cookies 11

I can see the light at the end of the tunnel, though.  As much as I love being busy and doing so many things that make me happy, it is hard to take time and just breathe.  The HB work ends in two weeks, my weekend travel is slowing down (trips only every other week), and we found an apartment.  Moving in a few weeks is just a minor detail.

Cinnamon & Chocolate Chip Pumpkin Cookies 3

In the meantime, this is the kind of cookie that forces me to slow down.  When I grabbed a cookie off the cooling rack, I found myself savoring each bite.  A welcome change to my speed-demon eating that usually has me downing oatmeal/salads/yogurt/sandwiches or whatever else is in front of me in about three seconds flat.  I understand if you no longer want to eat a meal with me.

Cinnamon & Chocolate Chip Pumpkin Cookies 7

The cookie is moist but light; kind of like chocolate chip cookie meets my favorite pumpkin muffin.  Thanks to a hefty serving of cinnamon and chocolate chips, each bite has three complimenting flavors at once.  All of that is a combination that my mouth isn’t used to.  I think I may have to sit down and eat about nine more.

[print_this]

Cinnamon & Chocolate Chip Pumpkin Pie Cookies

Yield: Makes 5 dozen cookies

Ingredients

  • 1 cup (2 sticks) unsalted butter, softened at room temperature
  • 1 cup granulated sugar
  • 3/4 cup packed light brown sugar
  • 2 eggs
  • 1 tablespoon vanilla extract
  • 1 cup canned pumpkin (not pumpkin pie filling)
  • 3 1/4 cups all-purpose flour
  • 1 teaspoon salt
  • 1 teaspoon baking soda
  • 1 teaspoon pumpkin pie seasoning
  • 2 cups semi-sweet chocolate chips
  • 1 cup cinnamon chips

Cooking Directions

  1. Pre-heat oven to 350 degrees
  2. In a medium bowl, whisk together flour, salt, baking soda and pumpkin pie seasoning; set aside
  3. Using an electric mixer, beat together butter and sugars until light and fluffy
  4. Beat in eggs and vanilla; beat in pumpkin until well-combined
  5. Stir in dry ingredients just until combined
  6. Stir in chocolate and cinnamon chips
  7. Use a cookie dough scoop or tablespoon to place cookie dough mounds (about 1 1/2 tablespoons each) onto a baking sheet lined with parchment paper about 1 inch apart
  8. Bake 9-11 minutes or until cookies are puffed up and no longer wet
  9. Allow cookies to cool on cooling rack before serving

Source: Picky Palate[/print_this]

Cinnamon & Chocolate Chip Pumpkin Cookies 19

What’s got you slowing down lately?

Grown Up S’mores Cookies

Grown Up Smores Cookies 9

I blame these cookies on Matt.

Grown Up Smores Cookies 19

And really, you should too.  So if when you make them, and if when you eat a couple12, it’s his fault, not mine.

Grown Up Smores Cookies 27

Sorry, Matt, I still love you.

Grown Up Smores Cookies 17

You see, I got this wonderful assortment of chocolate in the mail from GHIRARDELLI and didn’t know what to do with it.  But then Matt suggested s’mores and I remembered this recipe from Tracey’s blog.  She said they were the best s’mores cookies of every recipe she had tried.  And if you read her blog, you know to trust her.  Just look at this post, the girl knows what she’s doing!

Grown Up Smores Cookies 23

So I decided to kick the cookies up a notch with the Intense Dark Sea Salt Soiree chocolate in place of your typical milk chocolate.  The hint of bitterness from the higher cocoa percentage and salty bite makes the cookies a little more mature in flavor.  The crunch from the almonds then adds a nice texture balance to the chewy cookie.

Go try it for yourself, and when you lose count of how many cookies you’ve inhaled, just remember that it’s not my fault.

[print_this]

Grown-up S’mores Cookies

Makes ~3 dozen cookies

Ingredients:

1 cup honey graham cracker crumbs (about 8 sheets)

1 1/4 cup all-purpose flour
1/2 teaspoon baking soda
1/2 teaspoon salt
3/4 cup (1 1/2 sticks) unsalted butter, softened at room temperature

1/2 cup granulated sugar
1/2 cup packed light brown sugar
1 large egg at room temperature
1 teaspoon vanilla extract
7 ounces separated GHIRARDELLI Intense Dark Sea Salt Soiree chocolate, chopped
1 cup mini marshmallows
Directions:
Pre-heat oven to 350
Whisk graham cracker crumbs, flour, baking soda and salt in a medium bowl and set aside
In the large bowl of an electric mixer, beat butter and sugars on high speed until light and fluffy
Beat in egg and vanilla
Stir in half of chocolate (about 3 1/2 ounces)
Use a cookie dough scoop or tablespoon to make cookie dough balls on a baking sheet lined with parchment paper (about 1 1/2 tablespoons each)
Bake cookies for 9 minutes and remove from oven
Quickly press a couple of pieces of chocolate and 3-4 marshmallows into each cookie
Return cookies to oven immediately and bake for 2-3 minutes or until cookies are browned around the edges; allow cookies to cool on a cooling rack before serving

Source: Tracey’s Culinary Adventures, adapted from Cookie Madness[/print_this]

Grown Up Smores Cookies 3

Disclaimer: I received free samples of GHIRARDELLI chocolate in the mail through the Foodbuzz Tastemaker program.  All of the opinions expressed in this post are my own.

What are you blaming on someone else right now?

Skinny Pumpkin Spice Mocha Iced Latte

skinny mocha pumpkin spice iced coffee 11

I’m going to let you in on a little secret.

skinny mocha pumpkin spice iced coffee 9

Sometimes I don’t drink my coffee until I get to work so that I have incentive to get to the office.  After waking up by 6am, going to the gym, showering, getting dressed, making lunch and eating breakfast, it is a long way to go to that first sip of coffee around 9am9:30.  But it is something to look forward to and sometimes we all need a little motivation to go to work.

skinny mocha pumpkin spice iced coffee 7

But over the last few months, I’ve been cheating on my routine.  The humid summer made hot coffee unappealing so I switched to iced coffee.  And at $2+ a pop, I started making my own.  That means coffee is enjoyed on my way to work and that walk up Park Avenue is a little slower than it used to be.

When I received samples of the new Godiva Coffee flavors in the mail, I couldn’t wait to incorporate them into my morning.  The Pumpkin Spice coffee in iced form is the perfect way to ease into fall and I can’t wait to try the Caramel Pecan Bark.  I have a feeling my walk to the office is going to get slower and slower.

skinny mocha pumpkin spice iced coffee 19

[print_this]

Skinny Pumpkin Spice Mocha Iced Latte

Yield: Serves 1

Ingredients

  • 1/2 cup strong brewed Godiva Pumpkin Spice coffee
  • 1/2 tablespoon good quality unsweetened cocoa powder
  • 1 packet splenda, stevia or other sweetener of choice*
  • 1/3 cup unsweetened vanilla almond milk (skim milk, soy milk, etc. can be used as replacement)
  • 1 1/2 cups ice cubes

Cooking Directions

  1. Fill a tall glass with ice cubes
  2. Spoon cocoa and sweetener over ice
  3. Pour coffee and milk over ice; stir to combine


Notes:

Use sweetener to taste.  I like a little less than 1 packet, but I don’t like my drinks too sweet.

Notes:

Use sweetener to taste.  I like a little less than 1 packet, but I don’t like my drinks too sweet.[/print_this]

skinny mocha pumpkin spice iced coffee 12

Disclaimer: I received free samples of Godiva Coffee in the mail through the Foodbuzz Tastemaker program.  All of the opinions expressed in this post are my own.

P.S. That pretty glass straw was courtesy of Wifestyle.

Interested in participating in the next blog party?  Courtesy of Chris‘s suggestion, the next blog party will be gooey chocolate desserts!  The party will be on October 25th so send me your posts by Monday, October 24th!

When do you have your first cup of coffee?

Pumpkin Party

Pumpkin S'more Muffins 11a_2

It’s time for the next blog party!  What could be better than celebrating the beginning of fall with pumpkin recipes from around the blogosphere?

Pumpkin & Sausage Baked Pasta from I Was Born to Cook pumpkin sausage pasta

Slow Cooker Maple Pumpkin Spice Lattes from The Yummy Lifeslow cooker maple pumpkin spice lattes

Pumpkin Spice Pancakes from Julie’s Eats & Treats

pumpkin spice pancakes

Pumpkin Pancakes  from the Spiffy Cookie

pumpkin pancakes from the spiffy cookie

Cinnamon Pumpkin Waffles from Chocolate & Carrots

cinnamon pumpkin waffles

Pumpkin French Toast from Fashion Fitness Foodie

pumpkin french toast

Maple Pumpkin Pie Yogurt Breakfast Parfait from The Yummy Lifemaple pumpkin yogurt parfait

Pumpkin Cranberry Parfait from bran appetit!

pumpkin cranberry parfait

Individual Pumpkin Trifles from the Avid Appetite

individual pumpkin trifles

Eggnog Pumpkin Bread from Veronica’s Cornucopia

eggnog-pumpkin-bread

Whole Wheat Nutella Pumpkin Bread from Chocolate & Carrotswhole wheat nutella pumpkin bread

Pumpkin Oatmeal Cookies from Greens and Chocolate

pumpkin oatmeal cookies

Pumpkin Pizzelle Cookies from Eat. Drink. Love

pumpkin-pizzelle cookies

Molasses Cream Pie Cookies from bran appetit!

molasses cream pie cookies

Pumpkin Snickerdoodles from Julie’s Eats & Treats

pumpkin snickerdoodles

Pumpkin Chocolate Chip Cookies from K&K Test Kitchenpumpkin chocolate chip cookies

Pumpkin Cookie Ice Cream Sandwiches from Biking Before Bedpumpkin cookie ice cream sandwiches

Pumpkin Cheesecake Swirl Brownies from Pass the Sushipumpkin cheesecake swirl brownie

Pumpkin Spice Brownies from The District Chocoholic

pumpkin spice brownies

Quick & Easy Pumpkin Cupcakes from Veronica’s Cornucopiaquick and easy pumpkin-spice-cupcakes

Pumpkin Spice Cake with Honey Frosting from the Avid Appetitepumpkin spice cake

Pumpkin Nutella Mini Cheesecake Bites from the Spiffy CookiePumpkin-Nutella-Mini-Cheesecakes-2-1024x767

Gingersnap Pumpkin Pie from Chocolate & Carrots

Gingersnap pumpkin pie

Pumpkin Bread Pudding with Salted Caramel Sauce from Greens and Chocolatepumpkin bread pudding with salted caramel sauce

Vegan Pumpkin Truffles, Two Ways from The District Chocoholicvegan pumpkin truffles

And some favorites from Keep It Sweet:

Frozen Pumpkin and Chocolate Yogurt Pie with Salted Caramel Cream Sauce

Pumpkin Chocolate Cheesecake Bars

bars on plate 1

My Favorite Pumpkin Bread

Fall Trifle

top of trifle

If you liked this, check out previous blog parties: Peanut Butter Party and the Sweet & Salty Party

Double Crumble Hot Apple Pie

Double Crumble Hot Apple Pie 2

As soon as we made plans to go apple picking, Matt asked if I would make an apple pie.  With all of those farm-fresh apples how could I say no?

Double Crumble Hot Apple Pie 23

The thing is, I don’t really love pie.  Scratch that, I love pie filling, I just don’t care much about the crust.  On the other hand, I love apple crisp.  I find any form of crumb toppings to be irresistible.  As a result, this apple pie topped with an extra thick layer of crumb topping was the perfect dessert for us.

Double Crumble Hot Apple Pie 30

The last time I made this pie, I use a store-bought crust (shh, don’t tell!).  This time around I went all out and made the crust from scratch.  I used a recipe from the The Art & Soul of Baking, a great resource for anything you could want to know about baking.

Double Crumble Hot Apple Pie 5

[print_this]Double Crumble Hot Apple Pie

Makes 2 pies; Serves ~16

For Crust

Ingredients

  • 1 sticks (1/2 cup) unsalted butter cut into 1/2 inch pieces and frozen
  • 2 1/2 cups all-purpose flour (plus additional for rolling the dough)
  • 3 tablespoons granulated sugar
  • 1/2 teaspoon salt
  • 1/2 cup cold water*

Cooking Directions

  1. Place all ingredients except for water in the large bowl of an electric mixer
  2. Using paddle attachment, put mixer on low and mix ingredients until they form a coarse mixture of large crumbs (about the size of a peanut)
  3. Add 1/4 cup water and put mixer on low for about a minute, add additional water (1 tablespoon at a time) just until dough is moist enough to hold together
  4. When dough is ready, form into two large disks and wrap each in seran wrap; refrigerate dough for at least one hour
  5. Once dough has been chilled, you can roll it into a thin layer; flour a large flat surface and place dough on top of that with an additional couple of tablespoons of flour on the dough; roll dough with a rolling pin into a large round layer about 1/4 inch thick**
  6. When ready, gently place the dough in a 9-inch pie dish and press down so that the dough is snug; trim any excess dough that comes over the edges

Note:

Make sure your butter and water are very cold to keep the dough from getting too warm while working

*Amount of water could vary depending on humidity levels

**I heard that you can skip the flour and roll the dough between two pieces of parchment paper

Source for pie crust: The Art & Soul of Baking

Crumb Topping:

Ingredients

  • 2 cups all-purpose flour
  • 1 1/2 cups rolled oats
  • 2 1/2 cups packed light brown sugar
  • 1/2 teaspoon ground cinnamon
  • 1/8 teaspoon nutmeg
  • 1/4 teaspoon salt
  • 3 sticks (1 1/2 cups) unsalted butter, melted

Cooking Directions

  1. While dough is chilling, prepare crumb topping
  2. In a large bowl, use a fork to stir together all dry ingredients; mix in butter until topping fills large clumps
  3. Place bowl in refrigerator to chill while preparing filling

Apple Filling:

Ingredients

  • 1 dozen medium baking apples (I used cortland)
  •  Juice of 1/2 a lemon
  • 1/4 cup all-purpose flour
  • 1/2 cup granulated sugar
  • 1/2 teaspoon cinnamon
  • 1/8 teaspoon nutmeg
  • 1/4 teaspoon salt

Cooking Directions

  1. When ready to bake your pies, pre-heat oven to 400 degrees
  2. To prepare filling, peel and thinly slice apples (~1/4 inch thick)
  3. Place apple slices in large bowl; add remaining ingredients and stir into apple mixture
  4. Pour half of apple mixture into each prepared pie crust
  5. With your hands, crumble topping over apples and press firmly to form a entirely cover pies
  6. Place pies in center of oven and bake for half hour; at this point, cover top of each pie lightly with tin foil to prevent topping from burning
  7. Continue baking pies for additional 45 minutes or until filling is bubbling and apples on the inside are tender
  8. Serve warm, preferably with vanilla ice cream

Source for filling and topping: Sticky, Chewy, Messy, Gooey

Note:

Dough for pie crust and mixture for crumb topping can be prepared up to 1 day in advance; store in refrigerator until ready to make pie

Since this recipe makes two pies, you can bake one now and save one for another time.  To freeze pie, prepare as directed without baking. Once put together, wrap tightly with tin foil and freeze for up to one month

[/print_this]

Double Crumble Hot Apple Pie 9

Do you prefer apple crisp or apple pie?

Gooey Peanut Butter Oatmeal Chocolate Chunk Bars (Gluten-Free)

Gooey Peanut Butter Oatmeal Chocolate Chunk Bars 6

My busy schedule these days has been keeping me from as much time in the kitchen as I would like.  There are so many recipes that I’ve been dying to try, but they keep getting put on the back-burner.  Luckily, I found a really easy but tasty dessert to make this past weekend.

These bars actually are derived from the back of my gluten-free oatmeal package.  They are on the bag as cookies, but baking them in bar form just seemed so much easier at the time.  I’m glad I did because they baked up to be the perfect chewy, gooey bars!  You would never know that there is no butter or flour in these babies!

Gooey Peanut Butter Oatmeal Chocolate Chunk Bars 8

[print_this]

Gooey Peanut Butter Oatmeal Chocolate Chunk Bars (Gluten-Free)

Yield: Serves 24

Ingredients

  • 3 cups gluten-free rolled oats (oatmeal is naturally gluten-free but may be processed with other gluten foods; check the package if serving anyone who has a gluten allergy)
  • 1 teaspoon baking soda
  • 1 cup smooth natural salted peanut butter
  • 1/4 cup unsweetened applesauce
  • 3/4 cup granulated sugar
  • 3/4 cup packed light brown sugar
  • 1/2 cup egg whites
  • 1 teaspoon vanilla
  • 1 cup dark chocolate chunks

Cooking Directions

  1. Pre-heat oven to 350 degrees and spray a 9×13 pan with cooking spray
  2. Whisk together oatmeal and baking soda; set aside
  3. Beat peanut butter on high speed until light and creamy
  4. Beat in applesauce
  5. Add sugars and beat until light and fluffy
  6. Add egg whites and vanilla; beat on medium speed until combined
  7. Stir in oatmeal mixture
  8. Stir in chocolate
  9. Pour batter into prepared pan
  10. Bake for 25-30 minutes or until knife comes out clean
  11. Allow to cool before slicing
  12. Store at room temperature in a covered container up to 2 days or freeze up to 1 month

Note:  Adapted from Trader Joe’s oatmeal package.[/print_this]

Do you have any good gluten-free recipes?

The Best Homemade Applesauce

Apple Picking 28

Before coming back from our weekend away, I had to take advantage of the apple picking available!

Apple Picking 5Apple Picking 4

We went to Windy Hill Farm which had a decent selection of apples to choose from.  I was really excited to see they had my favorite variety ready to go.

Apple Picking 19

Apple Picking 11

Besides the beloved Honey Crisp, we got a selection of Cortlands, Paula Reds and Macintosh.  Macintosh apples remind me of being a kid.  My family used to go to Lambertville and New Hope every fall to pick pumpkins, buy apples and run around the scarecrow maze.  We always loaded up on the Macintosh apples.

Apple Picking 14

This was my first time actually picking the apples from trees.  They gave us a map and had very clear signs that made it easy to navigate through all the apple trees.  Other than the bug bites all over my feet (note to self: don’t wear flip flops to go apple picking on a warm day), it was so much fun.  I would have taken home bushels and bushels of apples if I could have.

Apple Picking 15

Apple Picking 21

We went with 1/2 bushel, maybe 7 pounds of apples?

Apple Picking 33

Check out this slideshow to to see Matt’s favorite part of the apple picking!

I’ve never had a Paula Red before, but when the woman at the farm said they make great sauce our ears perked up.  I like jarred applesauce in small doses, but there really is nothing like homemade applesauce.

Monday night as soon as we got home, Matt got to cooking!  With a little bit of my input, he basically made the applesauce himself.  Let me tell you, it was amazing!  I tried to save some to take photos in daylight but the applesauce was too good.  We finished the whole batch for dessert.  Oh and yes, this happened to be Matt’s birthday dessert… what kind of baking blogger am I?

The Best Homemade Applesauce 3

Seriously, homemade applesauce with vanilla frozen yogurt was the perfect end to the weekend!  You know, since I hadn’t had quite enough dessert yet.

[print_this]

The Best Homemade Applesauce

Yield: Makes ~2 cups of applesauce, serves 2-4

Ingredients

  • 7 medium apples, peeled and chopped (we used a combination of Paula Reds and Macintosh)
  • 3 tablespoons packed light brown sugar
  • 1 tablespoon ground cinnamon
  •  the juice of 1 lemon
  • 1/4 teaspoon salt
  • 1/4 cup water

Cooking Directions

  1. Combine all ingredients in a large pot
  2. Cover pot and let cook over low heat for 10 minutes
  3. Remove cover and stir
  4. Allow mixture to simmer over low heat for additional 10-15 minutes stirring on occasion
  5. Remove from heat when sauce has reached desired consistency (for a more chunky sauce cook for less time)

[/print_this]

Adapted from Heather’s Dish

The Best Homemade Applesauce 2

What apples would you pick?  Monica at the Yummy Life has a great list of apples that tells you what kinds are best for eating, cooking and baking.

Tate’s Chocolate Chip Cookies and More Birthday Desserts

cutting cake 1chocolate banana mocha cake 3

On gushing about the Peanut Butter Cheesecake Brownie Surprise (otherwise know as the “Best Dessert Ever”), I forgot to tell you about all the other birthday desserts!  You know my mom couldn’t stop at just one;-)

We had:

  • Chocolate and Banana Three Layer Cake with Mocha Buttercream
  • Red Velvet Cupcakes with Cream Cheese Icing
  • Ice Cream “Pie” with a Chocolate Krispie Treat Crust

I was so excited to go back to the shore this weekend and eat leftovers (we froze the desserts for the week), but thanks to a little thing called Irene, we stayed home.

Lauren Matt 1dessert table 1chocolate banana mocha cake 2red velvet cupcakes 1Jessica Nikki Yvette cutting cake 5rice crispy ice cream pie 2

Now, onto the cookies!  For my second month of the Secret Recipe Club, I got Wives with Knives.  Cathy has a great variety of recipes on her blog, but the Tate’s Chocolate Chip Cookies caught my eye.

Tate's Chocolate Chip Cookies 7

Tate’s cookies are famous for the crispness.  Originally I thought this would be the perfect cookie for my dad, a lover of crispy cookies.

Tate's Chocolate Chip Cookies 18_1

However, like Cathy, the cookies didn’t come out very crisp.  They did get a nice crunch on the outside, though, and had great flavor.  I actually think these are the perfect cookies to dip in milk, but I’ll have to find another perfect cookie for my dad!  Definitely try the recipe if you are a crunchy cookie fan.

Tate's Chocolate Chip Cookies 17

I hope everyone stayed safe from the storm this weekend!

Chocolate Glazed Cookie Cheesecake Pie

Chocolate Glazed Cookie Cheesecake Pie

A couple of weeks ago, Jennie of In Jennie’s kitchen lost her husband, Mikey suddenly to a heart attack.  While I don’t know her personally, I’ve visited her blog a couple of times and my heart broke for her.  She invited us to celebrate Mikey’s life with his favorite peanut butter pie.

Chocolate Glazed Cookie Cheesecake Pie

Hearing about such a tragedy only reminded me of how lucky I am for each day I get to enjoy with my loved ones.  Whether it is via email, facebook, phone or in person, I’m thankful for each “touch” I get with them.  Too often I get wrapped up in the busy days, stressful moments and minute problems to appreciate all of the good things.

Chocolate Glazed Cookie Cheesecake Pie

When I finally got some time in the kitchen this week, I wanted to support Jennie, even if I was little late.  Since she was talking about her husband’s favorite pie, I thought I should make something with love for my husband (who, we all know, dislikes peanut butter).  I know that the combination of chocolate chip cookie and cheesecake is one of his favorite things, so I created a spin on that in pie form.  The chocolate chip cookie crust, creamy cheesecake filling and rich chocolate glaze were all made with love.

Chocolate Glazed Cookie Cheesecake Pie

In light of Jennie’s loss, the blogging community has come together in an incredible way.  As she is now left with two young children, she will need more than just emotional support.  A fund was started by Bloggers Without Borders to help raise money for Jennie and her family. Bloggers throughout the community are offering cookbooks, photos, baked goods, site redesigns… anything to auction and raise money towards the fund.  Some auctions that I have found:

Chocolate Glazed Cookie Cheesecake Pie

Chocolate Glazed Cookie Cheesecake Pie

Serves 8-10

Ingredients

1 1/2 cups chocolate chip cookie dough

Cheesecake filling:
1 8-ounce package reduced fat cream cheese, softened at room temperature
1/2 cup fat free sweetened condensed milk
1 large egg
1 teaspoon vanilla extract

Chocolate Glaze:
3/4 cup semi-sweet chocolate chips
3 tablespoons unsalted butter
1 tablespoon light corn syrup
1/4 teaspoon vanilla extract

Directions
Pre-heat oven to 325 degrees and spray a 9-inch pie plate with non-stick cooking spray
Press cookie dough into bottom and around sides of prepared pie plate; bake for 10 minutes
While crust is baking, beat cream cheese with whisk attachment of electric mixer for several minutes or until light and creamy
Add sweetened condensed milk, egg and vanilla and beat until well combined
When crust is ready, pour cheesecake mixture into pie crust
Bake 15-20 minutes or until filling is firm; set aside
Combine chocolate chips, butter and corn syrup in a small pot over low-medium heat and stir constantly until mixture is completely melted
Stir in vanilla and remove pot from heat; pour glaze over pie
Refrigerate 4 hours or overnight
Cheesecake from All Recipes
Glaze from All Recipes

Chocolate Glazed Cookie Cheesecake Pie

Are you hosting an auction? If so, leave your link in the comments below!

Peanut Butter Cheesecake Brownie Surprise

Since my birthday dessert (ie the Best Dessert Ever) was such a hit and there were so many requests, I got my mom to share a little bit more about her creation and tell us how to make it!

It appears that my love-inspired dessert, has sent quite a buzz through the world of creative sweet lovers! This cake was a process. And I couldn’t have gotten “to the top” without my other daughter Jessica. To say we went back and forth 1,000 times, with 1,000 or more ideas, would be putting it mildly. For those of you who know my Lauren, you know that she has more than one true love, of desserts, that is!

My objective was to incorporate as many of her favorite desserts into one flowing masterpiece. The ones that I couldn’t actually incorporate, well, I simply made as separate desserts as well!  This is how the Peanut Butter Cheesecake Brownie Surprise was created…
I already knew I was making one three layer cake. But when I saw a 10″ pan and a 6″ pan, (and knowing that I already had an 8″ pan), I thought how fun it would be to make a 3-layer cake, this one of varying sizes. Along with varying sizes, I decided on different layer components too.

I think I knew from the start that the bottom layer would be brownie. That’s the strongest of the bunch and capable of holding up the other two layers very well. My brownie recipe comes from a well-used Taste of Home’s Chocolate Lover’s Cookbook Magazine. (I used a brownie recipe I, of course, was already familiar with that calls for a 13 x 9 pan.) I knew it would fit the 10″ perfectly. When it had already been baked and cooled, I spread chocolate cool whip over it, and put that in the freezer. I like putting a little something in between my layers to help distinguish the different tastes and textures.

I decided not to do anything crunchy in between these three layers because I felt it would somehow be too much or overwhelm the creamy textures of the top two layers especially.

The next layer was the cheesecake. I have SO many cheesecake recipes!!! No doubt you do as well! But in one of Lauren’s latest blogs, she had a Peanut Butter Party, and that is where I found my latest cheesecake recipe! That came from Erin’s Food Files! So thank you, Erin! baked the cheesecake as directed, wrapped it in seran wrap, and placed into the freezer.

My chocolate ganache recipe came from All Recipes. The choice of chocolate ganache was Jessica’s; she thought of it while we walked together on the beach, wondering how in the world we would complete this dessert!

Next was the peanut butter mousse. This very old recipe comes from my very dear friend Gayle, who incidentally, could not remember this recipe at all! I lined the pan with seran wrap, poured in the peanut butter mousse, and placed it in the freezer to mold.

Finally, my peanut butter ganache. I don’t know how I thought of doing that. I really don’t. But I can tell you that the recipe itself, comes from Gourmet.LovetoKnow. I thought about shaving a bit of chocolate on top to finish the look. Clearly, we decided against that in the end.

The entire thing was put together once it was good and frozen. I knew it would be much easier to assemble. Finally, while Jessica held the cake for me, I sprinkled it with chopped dark chocolate peanut butter cups and peanut butter chips. I think the next time I make this……… I would use less ganache. It’s not that it seemed too much while eating, but appearance wise, maybe it’s a bit much? In the end though, it has as much to do with whom you share your eating experiences, as with the food itself. Sharing with my girls, for me, is always the “icing on the cake”!

[print_this]Peanut Butter Cheesecake Brownie Surprise

You will need:

1 of each: 10-inch round cake pan, 8-inch round spring-form pan, 6-inch round cake pan

1 batch brownies prepared in a 10-inch round cake pan (any 9×13 brownie recipe or box-mix would do) Note from Lauren: Baker’s brownies would work

1 8-ounce container chocolate cool whip

1 cheesecake prepared in an 8-inch spring-form pan as directed

1 cup chocolate ganache

1 batch of peanut butter mousse (any of these recipes would work)

1 batch peanut butter ganache

optional: chopped peanut butter cups and peanut butter chips for garnish

Construction:

Prepare each layer the day before serving (layers can be frozen up to one week); you can build your dessert a couple of hours prior to serving and store in refrigerator

Prepare brownie in 10-inch round pan; once cooled, wrap brownie layer tightly in foil and freeze

Bake cheesecake as directed and allow to cool and set in refrigerator as directed; remove from spring-form pan; wrap tightly in seran wrap and foil and freeze

For the peanut butter mousse layer, line a 6-inch pan with seran wrap; pour prepared mousse into pan; cover with additional seran wrap and freeze

Once each layer is frozen, unwrap them and you can build the dessert

Place brownie layer on large plate; spread layer of chocolate cool whip over top

Place cheesecake on top of that layer

Spread chocolate ganache over cheesecake (may not need entire batch of ganache)

Top with peanut butter mouse

Drizzle peanut butter ganache over top layer and sides as desired

Store in refrigerator and sprinkle with peanut butter cups and peanut butter chips prior to serving

[/print_this]

What layers would you put in your fantasy birthday cake?

Cookies ‘n Cream Almond Butter Spread

Cookies n Cream Almond Butter Spread 13

I like to have a variety of nut butters available to eat at any given time.  As of last night, there were six open jars in my kitchen.  I’m not going  to tell you how many unopened jars are in the cabinets.  Let’s just say that I invest in peanut butter like some people invest in the stock market.  At the rate the market is going these days, I think I’m the smart one.

Cookies n Cream Almond Butter Spread 14

Some time between last night and this morning, I decided that six jars of nut butter just weren’t going to cut it.  Time to make a new one!  And of course a dessert-y nut butter would be appropriate.

Cookies n Cream Almond Butter Spread 16

Have you ever dipped an Oreo into peanut butter?  No?  Okay, go try it, now.  And then buy bigger pants.  Have you ever dipped an Oreo into almond butter? I hadn’t either, but it seemed like a good idea.  It seemed like an even better idea to merge the two foods though.  Oreo cookies in my almond butter? That’s right.

Cookies n Cream Almond Butter Spread 5

[print_this]

Cookies ‘n Cream Almond Butter Spread

Yield: Makes ~1 cup or 16 tablespoons

Ingredients

  • 1 1/2 cups roasted salted almonds
  • 1 teaspoons vanilla extract
  • 2 tablespoons almond milk
  • 2 Oreos (can use gluten-free)

Cooking Directions

  1. Grind almonds in food processor until creamy, stopping to scrape the sides every minute or so
  2. Once creamy and wet, add vanilla and almond milk
  3. Blend until completely combined
  4. Add Oreos and blend for another minute
  5. Store in a jar or tupperware in refrigerator up to 10 days

[/print_this]

Cookies n Cream Almond Butter Spread 18

A couple off topic items:

Jackie from La Casa de Sweets organized a way for all of us to help raise money in Africa to help with the food crisis.  Click here to help.

Steve’s race is this weekend!  Help him get to his new goal of $10,000 and raise money for cancer research!!

We are getting closer to the sweet and salty blog party.  Email me to include your recipes (up to two per person)!  keepitsweetlcl at gmail dot com.

How many jars of nut butter do you have on hand?

Jackie’s Chocolate-Peanut Butter Cup Cookies {Guest Post}

Chocolate-Peanut_Butter_Cup_Cookies_2

While I’m taking a few days off, Jackie from La Casa de Sweets was kind enough to offer to guest post!  Since she made a delicious chocolate and peanut butter dessert for her post, I wanted to point out some other amazing looking chocolate and peanut butter recipes on her blog: Chocolate Peanut Butter Cupcakes, Crunchy Peanut Butter Brownies and Mini Peanut Butter Cup Ice Cream.  I think I need to get back to the kitchen!

Hello, Keep It Sweet readers! I am very excited to be sharing a recipe with you today while sweet Lauren is away having a fun time on vacation.

When I asked Lauren what some of her favorite foods are, one of the things she mentioned was peanut butter cups. I’ve been raving about the new Mini Reese’s Peanut Butter Cups for a while now, and even made some ice cream with them, so I knew I had to use them for Lauren! I decided to make a chocolate pudding cookie with chunks of mini Peanut Butter cups in every bite. Never had a pudding cookie? Believe me, they’re delicious. Every bite of this cookie is moist (that’s what the pudding is for!), and bursting with chocolate and peanut butter flavor. Reese’s fans, beware, these cookies will have you buying mini Peanut Butter Cups every week. Enjoy!

[print_this]

Jackie’s Chocolate-Peanut Butter Cup Cookies

Ingredients

  • 2 sticks unsalted butter, at room temperature
  • 3/4 cup brown sugar 1/4 cup sugar
  • 1 small (3.4 oz.) package of Jello Chocolate Instant Pudding Mix 2 eggs
  • 2 teaspoons vanilla extract 2-1/4 cups flour
  • 1 teaspoon baking soda
  • Pinch of salt
  • 8-oz. package Mini Reeses Peanut Butter Cups (whole or cut in half)
  • 1 cup white chocolate chips (optional)

Cooking Directions

  1. Preheat the oven to 350 degrees, and line your baking sheets with parchment paper. Set aside.
  2. In the bowl of your mixer, combine the butter and both sugars until light and fluffy.
  3. On medium speed, beat in the pudding mix, eggs, and vanilla extract.
  4. On low speed, mix in the flour, baking soda, and salt. Be careful to mix only until combined (do not over-mix!).
  5. Stir in the mini peanut butter cups (or pieces, if you cut them in half).
  6. Use a measuring tablespoon to scoop out the cookie dough onto the lined baking sheets. Bake for 10-12 minutes, or until the centers of the cookies are just set.
  7. Let cool on the baking sheets for 5 minutes, before cooling completely on cooling racks.
  8. After the cookies have cooled, microwave the white chocolate chips at 30 second intervals until melted. Use a fork to drizzle the white chocolate onto the cookies. Let cool slightly.
  9. Makes about 3 dozen cookies.

[/print_this]

Enjoy!

For more of my recipes, head on over to La Casa de Sweets, and you can also follow me on twitter and facebook!

Don’t forget to enter the Keep It Sweet birthday giveaway!

Blog Birthday Giveaway

SONY DSC

I can’t believe that I’ve been blogging for a year.  That time flew by, but at the same time, I can not imagine my life without Keep It Sweet.  I’ve found so many wonderful people (readers and other bloggers), established my own creative outlet and found a deeper passion for creating desserts than I ever had before.  Looking back, it is amazing to see how far I’ve come in just this one year:

My first real post

Dreaming about the future

I bought a real camera

Chewy Chocolate Chip Cookies 16a

Since my blog turned 1 today, and since I’m in a generous week-off-from-work mood, I’m doing a giveaway!  One reader will win a package one of my favorite desserts and these classic chewy chocolate chip cookies.  There are 5 ways to win:

1. Leave a comment telling me what you want to see on the blog in the next year OR what your favorite post was.

2.  Follow me on Twitter

3.  Share this post on Twitter

4.  Like me on Facebook

5. Share this post on StumbleUpon

Rules:  This is open top US and Canada readers only.  Please leave a comment for each of the above entries.  Giveaway is open until Sunday August 14th at midnight est.

Peanut Butter Cookie Dough Pretzel Pops

Peanut Butter Cookie Dough Pretzel Pops 19

I told you I’d come back with these cookie dough balls.  Actually, the only thing that kept me from eating the entire batch at once was all of the ideas brewing in my head.  Some of the ideas that you all suggested were kabobs, frozen yogurt/ice cream topping and mix-in, cheesecake, and cupcakes.  I can’t wait to try them!  This week, I wanted to keep it simple.  Between apartment hunting, preparing for a week away from the office, and just the normal summer craziness I didn’t have a ton of time in the kitchen.

Peanut Butter Cookie Dough Pretzel Pops 24

Hence, Peanut Butter Cookie Dough Pretzel Pops were formed!  So easy, but so delicious.  The hard chocolate shell on the outside and chewy cookie dough on the inside compliment a salty crunchy pretzel stick.  How fun would these be at a party?

Peanut Butter Cookie Dough Pretzel Pops 29

Speaking of party, I’m going to start a monthly blog party!  The next one will be on  Tuesday, August 30th with sweet and salty desserts.  Send your favorite links to me by Sunday, August 28th (keepitsweetlcl at gmail dot com).

Peanut Butter Cookie Dough Pretzel Pops 23

[print_this]

Peanut Butter Cookie Dough Pretzel Pops

Ingredients (Makes 16 pops)

  • 1 batch Peanut Butter Oatmeal Cookie Dough Balls
  • 2 cups semi-sweet or dark chocolate chips
  • 16 salted pretzel sticks
  • Peanut Butter Oatmeal Cookie Dough Balls:
  • 3/4 cup whole wheat pastry flour
  • 1 cup rolled oats
  • 1/2 cup salted natural creamy peanut butter
  • 1/3 cup maple syrup
  • 1/4 cup unsweetened applesauce
  • 1 teaspoon vanilla extract
  • 1/4 cup mini semi-sweet chocolate chips

Instructions

  • Prepare cookie dough balls as directed without freezing
  • Push each pretzel halfway into a cookie dough ball
  • Freeze pops for about thirty minutes or until cookie dough is firm
  • Once pops are frozen, melt chocolate in the microwave in 30 second increments
  • Dip cookie dough pops into chocolate and place on a jelly roll pan covered with wax paper
  • Chill pops in freezer until ready to serve
  • Peanut Butter Oatmeal Cookie Dough Balls:
  • Line a jelly roll pan with wax paper and set aside
  • Whisk together flour and oats in a medium bowl and set aside
  • Use an electric mixer to beat together all of the wet ingredients until well-combined
  • Stir in flour mixture until just combined
  • Stir in chocolate chips
  • Use a cookie dough scoop or spoon to scoop about two tablespoons of dough; roll dough into a ball with hands; repeat
  • Freeze or refrigerate until balls are firm

[/print_this]

Peanut Butter Oatmeal Cookie Dough Balls can be found here.

Peanut Butter Cookie Dough Pretzel Pops 10

Any exciting weekend plans?

Peanut Butter Party

Chocolate & Blueberry Peanut Butter Cookies 22c

I hope you are well-stocked in peanut butter because this is quite the collection of recipes.  From Peanut Butter Cup Pancakes to a Chocolate Peanut Butter Cheesecake it’s hard not to run to the kitchen.  I wish we all lived in the same city because this would be quite the potluck!

Asian Peanut Noodles from The Yummy Life

Pasta and peanut butter can do no wrong.

Asian Peanut Noodles

Chicken Meatballs with Peanut Sauce from Dinners, Dishes and Desserts

These are so creative and different but just so right.

Chicken Meatballs and Peanut Sauce

Chocolate and Peanut Butter Whoopie Pies from Hayley Oat Couture

Plain old whoopie pies are overrated.

Peanut Butter Whoopie Pies

Chocolate Cake with Peanut Butter Frosting from Yums and Loves

Alex, my birthday is just a few weeks away, hint, hint.

Chocolate and Peanut Butter Cake

Chocolate Peanut Butter Cake from Veronica’s Cornucopia

There is no way I’d be patient enough to slice this cake. I just want to go at it with a fork.

chocolate-pb-cake-2-18-10

Chocolate Peanut Butter Cheesecake Cake from Erin’s Food Files

I have no words. 

Chocolate Peanut Butter Cheesecake

Chocolate Peanut Butter Mousse Cups from Chocolate and Carrots

How gorgeous are these mousse cups?  Almost too pretty to eat, almost.

Chocolate-Peanut-Butter-Mousse-Cups-4274

Chocolate Peanut Butter Pinwheel Cookies from The District Chocoholic

I’m pretty sure I’d eat these cookies right out of the oven.

Chocolate Peanut Butter Pinwheel Cookies

Cookies and Cream Peanut Butter Pie from The Spiffy Cookie

My friend growing up used to order a blizzard with oreos and peanut butter cups and it was so good.  Even better in pie form!

Peanut Butter Kandy Kakes from The Dainty Chef

Tastykake better watch out!

Peanut Butter Kandy Kakes

Chocolate Peanut Butter Cupcakes from The Dainty Chef

Everything is better stuffed with peanut butter.

Chocolate Peanut Butter Cupcakes

Mini Chocolate Peanut Butter Tarts from My Fiance Likes it So it Must be Good

When it comes to peanut butter, individual desserts are better.  I do so much better when I don’t have to share.

Mini Chocolate Peanut Butter Tarts

Monster Cookie Bars from Julie’s Eats and Treats

A peanut butter based cookie bar is always delicious.

Monster Cookie Bars

Paula Deen’s Peanut Butter Cheesecake Minis from My Kitchen Apron

I’d like to start putting peanut butter cups into cheesecake going forward.

Peanut Butter Cheesecake

Peanut Butter Cup Pancakes from Espresso and Cream

Seriously, chocolate and peanut butter for breakfast? Heaven.

Reeses_Peanut_Butter_Cup_Pancakes

Peanut Butter Cup S’mores Ice Cream from The Spiffy Cookie

In my world, peanut butter and ice cream are each a food group so this ice cream is perfect!

Peanut Butter Hot Fudge from Not Rachael Ray

Rachel held hot fudge week, how can you not love her?

Peanut Butter Hot Fudge

Peanut Butter Ice Cream Topping from In Katrina’s Kitchen

I used to love the peanut butter cup sundae at Friendly’s, this topping looks so much better than theirs.

Peanut Butter Ice Cream Topping

Peanut Butter Maple Cookies from Erin’s Food Files

I’m pretty sure that the handful of oatmeal in these cookies makes them healthy;-)

Peanut Butter Maple Cookies

Peanut Butter Mouse Truffle Cheesecake from In Katrina’s Kitchen

Katrina’ made this for her anniversary, that is one lucky husband!

PB Truffle Mousse Cheesecake

Peanut Butter Parfait from Blog is the New Black

I have a weakness for parfaits and trifles, I wouldn’t stand a chance around these!

Peanut Butter Parfait

Peanut Butter Pretzel Bites from Blog is the New Black

Sweet, salty and covered in chocolate, love it!

Peanut Butter Pretzel Bites

Salted Nut Roll from Julie’s Eats and Treats

Such an interesting way to make a cake mix into something super delicious.

Salted Nut Roll

Chunky Chocolate Peanut Butter Bars link sent from Manhattan Foodie Reviews

Ashley sent this link to me.  Check out these bars and then check out her blog for where to eat in NYC.

And some favorites from Keep It Sweet: Chocolate Chip Blueberry Peanut Butter Cookies, Individual Peanut Butter Cheesecakes, Lightened Up, Chocolate Chip Toffee Oatmeal Cookies with Peanut Butter Frosting, and Peanut Butter Cup Ice Cream Pie

Do you have any peanut butter recipes you want to share? Leave a link in the comments!

Peanut Butter Oatmeal Cookie Dough Balls

Peanut Butter Oatmeal Cookie Dough Balls 5

I had a couple options for tonight’s post, but it seems my Facebook fans and Twitter followers are huge peanut butter lovers like I am. For all the years before my blog, I thought I was alone in my peanut butter addiction.  What a relief to know there is a support group! So, in honor of peanut butter lovers and addicts around the world, I’ll be holding a peanut butter party on the blog Sunday night. Email me (KeepItSweetLCL at gmail dot com) your links and I’ll include them in the post. And for those of you who don’t love peanut butter, who are you? I have a delicious frozen mocha dessert coming soon.

Peanut Butter Oatmeal Cookie Dough Balls 12

Now onto tonight’s recipe: A recipe that brings my love of peanut butter, cookie dough and chocolate all into one dessert. A recipe that is easy to make and relatively healthy enough to sub in for a mid-day snack (don’t you love sweets like that?). A recipe that I almost shouldn’t have because I’m officially addicted.

Peanut Butter Oatmeal Cookie Dough Balls 18

These may just become your favorite food.  I’ve been eating dough balls individually straight out of the freezer but I can’t stop thinking about ways to incorporate them into other desserts. This could get dangerous.

Peanut Butter Oatmeal Cookie Dough Balls 10

[print_this]

Peanut Butter Oatmeal Cookie Dough Balls

Makes 16 dough balls

Ingredients:

  • 3/4 cup whole wheat pastry flour
  • 1 cup rolled oats
  • 1/2 cup salted natural creamy peanut butter
  • 1/3 cup maple syrup
  • 1/4 cup unsweetened applesauce
  • 1 teaspoon vanilla extract
  • 1/4 cup mini semi-sweet chocolate chips

Directions:

Line a jelly roll pan with wax paper and set aside
Whisk together flour and oats in a medium bowl and set aside
Use an electric mixer to beat together all of the wet ingredients until well-combined
Stir in flour mixture until just combined
Stir in chocolate chips
Use a cookie dough scoop or spoon to scoop about two tablespoons of dough; roll dough into a ball with hands; repeat
Freeze or refrigerate until balls are firm

[/print_this]

Adapted from Never Home Maker 

Peanut Butter Oatmeal Cookie Dough Balls 17

What kind of dessert should I make with these cookie dough balls?

Chocolate Chip Oatmeal Scones {Guest Post}

chocolate chip oatmeal scones 1

One of the best things about this blog is all of you.  Thanks for letting me vent on Thursday and thank you for all of the stomach tips.  It sounds like I was not alone with stomach pains and A/C problems.  Hopefully all of you are keeping cool and pain-free now!

Since last week was full of whining, I thought I’d switch things up with some fantastic news and what I’m thankful for:

  • Last night was the second night in a row that I was stomach-ache freeand the source of my pains doesn’t seem to be anything serious!
  • Last night was the first night we slept in an air conditioned bedroom!
  • The rain yesterday brought us a couple humidity-freedays.
  • I have a delicious guest post for you today and an exciting new recipe for ThursdaySmile

Can you tell I am a different person?  I knew that my stomach aches were getting to me, but I didn’t realize how much they were affecting my mentality on a daily basis.  As it turns out, it was my breakfast that was the culprit.  Ever since summer started, I’ve switched my daily hot oatmeal to a yogurt/oatmeal mix.  The thing is, I just mix the oatmeal and yogurt (kind of like muesli) without cooking the oats.  Apparently my stomach does NOT like that.  And evidently, I’m not alone. The fact that I am not allergic to gluten, dairy or anything else is a huge relief.  I also feel very lucky that there is nothing seriously wrong with me.

Now, onto today’s post!  Brandi from BranAppetit offered to share a delicious recipe with all of you.  I only found Brandi’s blog a couple of months ago, but I am so glad I did.  She is a fabulous self-taught cook and baker that posts various delicious recipes and peaks into her life.  She focuses mostly on healthier dishes but also shares my love of indulgent desserts.  A few recipes I need to make are her Vanilla Confetti Pound Cake, Peanut Butter and Chocolate Chip Oat Muffins, S’mores Dip (!!!), and Vegan Frozen Chocolate Dipped Cookie Dough.  Of course I chose the indulgent sweets.chocolate chip oatmeal scones 3

Hi everyone! My name is Brandi and I’m the recipe maker, tester, and eater over at BranAppetit! I’m so happy to be guest posting for Lauren – her recipes are so fun and I’m excited to be sharing one of my own.

After years of thinking I didn’t like scones, I’ve completely changed my mind. My husband and I found these incredible chocolate chip scones at a local bakery, so I made it my mission to make scones at home that were just as good and a tad healthier.

In the past couple of years, Nick’s dad has been teaching me how to make biscuits from scratch (without using a recipe) and all the biscuit baking has definitely paid off!

Making scones isn’t very different from biscuits, except that you should definitely (and always) add in chocolate chips.

The basic process is really similar – cutting the butter into the flour, adding the liquid, and mixing just until the dough comes together and no more.

I definitely could have patted the dough out and cut into wedges, but I’m lazy and didn’t want to clean off my kitchen counter. I just divided the dough into 6 equal sections, formed them into rounds with my hands and plopped them on the parchment lined baking sheet.

Easy, less clean up, and – bonus – they look a little like chocolate chip-filled biscuits.

No wonder we like them so much.

chocolate chip oatmeal scones 2

[print_this]

Chocolate Chip Oatmeal Scones

Yield: Makes 6 scones

Ingredients

  • 1.5 cups whole wheat pastry flour (or all purpose if you don’t have this)
  • 3/4 cup quick cooking oats
  • 2 teaspoons baking powder
  • 1/2 teaspoon salt
  • 4 tablespoons sugar
  • 6 tablespoons butter, chilled and diced
  • 1/2 cup chocolate chips
  • 1/2 cup fat free buttermilk (plus 2 tablespoon for brushing)

Cooking Directions

  1. Preheat oven to 425 degrees.
  2. In a large bowl, whisk together the flour, oats, baking powder, salt, and 3 tablespoons of sugar.
  3. Cut the butter into the dough (with pastry blender, forks, or hands) until mixture feels like (and looks like) cornmeal.
  4. Stir in chocolate chips.
  5. Pour in buttermilk and mix, just until dough comes together.
  6. Form into 6 rounds and place on baking sheet.
  7. Brush the top of each scone with a little buttermilk and sprinkle with the remaining sugar.
  8. Bake 17-20 minutes until golden.

[/print_this]

You can also find Brandi’s original post here.

Strawberry Lemonade Cupcakes and a Special Guest Post

strawberry lemonade cupcakes 1

A few weeks ago, my mom made these delicious cupcakes for us to enjoy down the shore.  They are the perfect combination of tart and sweet, but even better than that, the perfect representation of summer in color and flavor.  It was a recipe I wanted to include on the blog, but what better way than to have my mom, the one who brought me up licking the cookie dough off the spatula, share the recipe with you.

strawberry lemonade cupcakes 11

One of my new challenges I have encountered recently, is trying to keep up with my daughter’s baking creativity and energy. Well, let’s forget the energy. That’s LONG gone! But the creativity? There must be SOMETHING that’s left for me to come up with that she hasn’t mentioned! Lucky for me, it’s summer! My happiest time of year! With that, things connected with this season of warmth, are constantly coming to mind. For instance, lemonade. Who doesn’t savor the taste of cool refreshing lemonade during the warm sticky days of summer? I was recently discussing all of these things with a close friend of mine, Nina, when she offered the perfect solution! Lemonade cupcakes! And to top them off with the perfect match of strawberry frosting! I was so excited! And in our family, it’s the little things that get us excited:).

strawberry lemonade cupcakes 15

Lauren has asked me to share this recipe with you.  Here it is:

[print_this]

Strawberry Lemonade Cupcakes

Lemonade Cupcakes

Yield: Makes 24 cupcakes

Ingredients

  • 1 can frozen lemonade
  • 1 package white cake mix
  • 1- 8 oz container sour cream
  • 1- 3 oz block cream cheese
  • 3 eggs

Cooking Directions

  1. Pre-heat oven to 350 degrees
  2. Combine all ingredients with an electric mixer until well blended
  3. Pour batter into cupcake tins lined with cupcake liners or sprayed with non-stick cooking spray
  4. Bake for about 20 minutes or until a toothpick/knife comes out clean

Strawberry Frosting

Ingredients

  • 1/2 pint strawberries, pureed
  • 1 stick unsalted butter at room temperature.
  • 1/2 teaspoon vanilla extract
  • 3-4 cups confectionary sugar
  • 1-2 tablespoons milk or cream

Cooking Directions

  1. Beat the butter until smooth and add the vanilla and pureed strawberries. Add two cups of sugar. Mix until combined. Add the milk or cream, followed by the rest of the sugar in small amounts, until frosting reaches desired consistency. It should be smooth and still hold it’s shape. When the cupcakes are cooled, frost and enjoy!

[/print_this]

Cupcake recipe from Southern Living

Frosting recipe from sophistimom

strawberry lemonade cupcakes 18

What is your favorite summer food or flavor?

Chewy Chocolate Covered Pretzel Bars

chewy chocolate covered pretzel bars 16

This has been one of those weeks so far:

  • Our bedroom A/C has been broken since last Monday but won’t be fixed until next Monday, never mind the 100 degree weather
  • I thought I figured out the source of my daily stomach pains but was proved wrong, the mystery continues
  • As a result of the two items listed above, I’ve barely been sleeping and my stress-relieving gym trips are suffering/barely happening

Okay, is my whining enough already?

chewy chocolate covered pretzel bars 5

On the other hand, I found a delicious and easy no-bake (ie no hot oven) treat to make!  These Chewy Chocolate Covered Pretzel Bars are kind of perfect for drowning my summer sorrows.  They are chewy and crunchy at the same time with more of that salty and sweet combo that we all seem to know and love.  The bars are actually quite addicting if you ask me!

chewy chocolate covered pretzel bars 10

[print_this]

Chewy Chocolate Covered Pretzel Bars

Yield: Serves 24

Ingredients

  • 3 tablespoons unsalted butter
  • 1 10.5-ounce bag mini marshmallows
  • 1 1/4 cup dark chocolate chips or chunks
  • 6 cups salted pretzel pieces

Cooking Directions

  1. Melting butter over low-medium heat in a large pot
  2. Add the marshmallows and stir until they are completely melted
  3. Remove pot from heat, and stir in chocolate
  4. Add pretzels to the mixture and stir
  5. Once everything is combined, press the ingredients into a 13X9 pan lined with foil and allow to cool
  6. Once cool, remove bars from the pan; the easiest way to do this is to flip the pan upside down and peel off the foil
  7. Cut the bars in to large pieces (I made slices in a 6X4 matrix) and serve or store in an air-tight container for up to 3 days

[/print_this]

chewy chocolate covered pretzel bars 19

What are you whining about this week? Vent in the comments!

Cajun Brownies with Potato Chips

I’m so excited to share a guest post from Lynn at The Actor’s Diet.  I like to think of her as a celebrity blog friend:-)  Lynn documents her daily eats and her life in LA so well that readers feel like they know her.  Although she enjoys dessert, she doesn’t normally do a ton of baking.  However, these brownies looked so interesting and delicious that I wanted her to share them with you.

Hello “Keep it Sweet” Readers!  My name is Lynn Chen, and I’m an actress.  My blog, “The Actor’s Diet,” follows my life in Hollywood, meal by meal.  For years, I struggled with binge eating and anorexia, and took time off to come to terms with my body image and eating disorders.  The blog has really helped me forge a new relationship with food that I never imagined was possible.

These days, I often get asked how I stay looking camera ready, and the truth is – I don’t diet.  I don’t exercise.  I don’t count calories.  And I eat dessert, every single day.  So of course, I love Lauren’s blog and her sweet creations.

Unfortunately, I’m not much of a baker.  I don’t like measuring, mixing, waiting, or cleaning up.  But recently I did come up with a recipe for Cajun Brownies with Potato Chips that I’m pretty proud of.  It combines a lot of my favorite flavors – sweet, salty, and spicy – with a unique texture.  You can read more about my thought process behind the creation on my blog, but here’s the recipe!

[print_this]

Cajun Brownies with Potato Chips

Ingredients

  • 10 tablespoons butter
  • 1 1/4 cups sugar
  • 3/4 cup plus 2 tablespoons unsweetened cocoa powder
  • 1/4 teaspoon salt
  • 1/2 teaspoon vanilla extract
  • 1/3 cup egg whites
  • 1/2 cup white flour
  • 1 cup Cajun-flavored Potato Chips, crushed

Cooking Directions

  1. Preheat oven to 325 degrees
  2. In a bowl, combine the cocoa powder, salt, and flour
  3. Melt the butter, and add it to the dry ingredients, along with the vanilla and egg whites; stir until combined (40-ish strokes, I’m only guessing, Alice!) then fold in the potato chips
  4. Pour into a greased 8×8 Pyrex and bake for 20-25 minutes, until a toothpick inserted in the center emerges slightly moist (20 was all I needed)

[/print_this]

(adapted from Alice Medrich’s Best Cocoa Brownies)

Strawberry Banana Bread and Childhood Friends

strawberry banana bread 25

Another summer weekend has come and gone and I feel like time is really flying.  I spent this past weekend in Philly for a bachelorette party and bridal shower for one of my best friends since fourth grade.  One of my favorite things about weddings is the series of events where you get to be with a group of friends who wouldn’t normally be in one place.  Seeing a half dozen girls that I’ve known since elementary school and catching up on life was so nice.  The most amazing part is that we can all do such different things with our lives but still come back to the same place and connect.  The group of girls (or women I guess I should say now!) included a lawyer, a doctor, two teachers, a marketing coordinator and an assignment editor at a local news station.  We live in different cities along the east coast and are a range of single, engaged and married but still we have that same place in our hearts for where we grew up.

strawberry banana bread 16

This Strawberry Banana Bread is a post for the Secret Recipe Club.  If you haven’t heard about it before, the Secret Recipe Club is a community of bloggers that, once a month, picks a recipe from a selected blog to make and share on his or her blog.  It is a great way to find new blogs to read and see what different types of things people are making.  For this month, I was able to choose a recipe from Katherine Martinelli.  She has a wonderful blog with a ton of delicious looking recipes.  There are a lot of savory dishes I want to try, but for Keep It Sweet, I obviously went with a baked good.

strawberry banana bread 29

Thanks to several overripe bananas, I chose to make Katherine’s Banana-Walnut Bread.  The changes I made were to replace the butter with fat free plain greek yogurt, reduce the sugar to 1/2 cup, use all whole wheat flour, skip the walnuts and add about a cup of chopped strawberries as she suggested.  The bread was moist and flavorful.  It was a great way to use up some produce on the end of its life!  Check out Katherine’s blog and go here for the original recipe.

strawberry banana bread 12

Do you keep in touch with any childhood friends? How often do you see them?


Peanut Butter Chocolate Chip Cookie Dough Mini S’mores Pies

This will be the first in a series of guest posts throughout the summer.  I have some great bloggers joining us to share some of their favorite desserts!  I’m excited to start with Erin from The Spiffy Cookie.  She has a wonderful blog with creative and delicious recipes and this one is amazing!  Some of my favorite sweets that she posted include these Blueberry Blondie Cheesecake Bars, Peanut Butter Cup S’mores Ice Cream, and this Cookies and Cream Peanut Butter Pie.  I want all of it!  She has some great savory dishes too, but you know me and desserts:-)

Why hello there! My name is Erin and I’m guest posting here today from The Spiffy Cookie. I had the pleasure of Lauren guest posting on my blog last month with her Cream Cheese & Jelly Pound Cake, and am just as excited to now guest post on Keep It Sweet. Especially since I have some killer mini s’mores pies to share.

The blogosphere is overflowing with all kinds of s’mores recipes this summer and I cannot get enough of it. But I wanted to enhance this traditional treat by either incorporating chocolate chip cookie dough, or peanut butter cupsinstead of plain old (boring) chocolate. Like Lauren, I am a huge peanut butter fan but cookie dough in a s’more is something I don’t think I have seen yet. But again, peanut butter is so good! Dilemma.

I’ve never been good at big decisions, and yes dessert is exactly that, so I put up a poll-tweet to help the decision process. Most followers said “both”, so what the heck, I decided to do both in combination! What could possibly go wrong? Oh no it’s too much I cannot bear it… not possible. Prepare yourself for deliciousness.

A chewy and soft nugget of cookie dough is hidden underneath a peanut butter-chocolate mousse mixed with little bits of peanut butter cups and topped by toasted marshmallows. Do you have your spoon ready yet? Because you’re going to need it.

[print_this]

Peanut Butter Chocolate Chip Cookie Dough Mini S’mores Pies

Yield: Makes 6 mini pies

Ingredients

  • 1 package Keebler “Ready Crust” Mini Graham Cracker Pie Crusts
  • 6 tablespoons marshmallow creme
  • 3 large chocolate chip cookie dough balls*, cut in half
  • 4 oz (1/2 cup) semi-sweet chocolate chips
  • 1 cup heavy cream
  • 3 oz (1/3 heaping cup) peanut butter
  • 2 oz reduced fat cream cheese, room temperature
  • 1/4 cup powdered sugar
  • 1/3 cup chopped miniature peanut butter cups
  • 2 cups mini marshmallows

Cooking Directions

  1. Begin by spreading 1 tablespoon of marshmallow creme in each of the mini crusts. Do this gently so the crusts don’t break. Then place 1 cookie dough half, cut side down, on the creme. Set aside.
  2. Melt chocolate over a double boiler. Set aside. Whip cream to soft peaks. Set aside.
  3. In a stand mixer, fitted with the paddle attachment, cream together the peanut butter, cream cheese and sugar. Slowly add melted chocolate and continue to cream until smooth and softened. Gently fold whipped cream into chocolate – peanut butter mixture by hand, followed by the chopped peanut butter cups.
  4. Evenly spread the mousse into the prepared graham cracker crusts (you will have leftover mousse) and refrigerate pie until ready to serve, or at least a couple of hours.
  5. Before serving, top the pies with a handful of mini marshmallows, about 1/3 cup each.
  6. Place them on a baking sheet and put under the preheated broiler for 30 seconds (watch closely because they will burn fast), or toast marshmallows with a kitchen torch.

[/print_this]

*chocolate chip cookie dough balls

Source: Adapted from Confessions of a Cookbook Queen and Serious Eats.

If you want more s’mores inspiration, check out my peanut butter s’mores ice cream.

clip_image002

Chewy Chocolate Chip Cookies

Everyone's favorite - Chewy Chocolate Chip Cookies

Sometimes you just want a chocolate chip cookie.  There are very few things that smell as good warm out of the oven and even fewer things that will illicit a memory as wonderful as dunking a homemade chocolate chip cookie into a cold glass of cold milk.

When all you want is a Chewy Chocolate Chip Cookie...

My fond memories of eating the cookies standing up in the kitchen with my mom, before they even made it to the cooling rack, are some of my favorites.  I think memories like that are the reason that after a long day at work or a rainy day on the couch, all I want is a batch of couple chocolate chip cookies.

Chewy Chocolate Chip Cookies - what else could you need?!
These cookies are chewy (sorry, Dad), melt in your mouth and have that slight caramel flavor resulting from a higher portion of brown sugar to white.  Just a warning: they are dangerously addictive if you are trying to show some sign of portion control.

Chewy Chocolate Chip Cookies

[print_this]

Chewy Chocolate Chip Cookies

Yield: Makes ~2 ½ dozen cookies

Ingredients

  • 2 cups plus 2 tablespoons all-purpose flour
  • 1/2 teaspoon baking soda
  • 1/2 teaspoon salt
  • 3/4 cup (1 1/2 sticks) unsalted butter, melted and cooled until warm
  • 1 cup packed light brown sugar
  • 1/2 cup granulated sugar
  • 1 large egg
  • 1 egg yolk
  • 2 teaspoons vanilla extract
  • 1 1/3 cups semi-sweet chocolate chips

Cooking Directions

  1. Pre-heat oven to 325 degrees
  2. In a medium bowl. whisk the flour, baking soda, and salt; set aside
  3. Using an electric mixer, beat the butter and sugars until thoroughly combined. Mix in the egg, egg yolk, and vanilla
  4. Slowly stir in the dry ingredients and beat at low speed just until combined
  5. Stir in the chocolate chips
  6. Refrigerate dough for 2 hours (or up to 24 hours)
  7. Use a cookie dough scoop (about 2 tablespoons) to lay out dough on a cookie sheet lined with parchment paper about 2 inches apart
  8. Bake cookies until golden brown, 12-14 minutes
  9. Cool cookies on cooling rack and enjoy

[/print_this]

Source: The Brown Eyed Baker and Serious Eats, originally from Baking Illustrated

Chewy Chocolate Chip Cookies

What is your favorite way to enjoy a chocolate chip cookie?

Chocolate Covered Strawberry Cupcakes

Chocolate Covered Strawberry Cupcakes - fresh strawberry cupcakes with chocolate buttercream!

Who doesn’t like chocolate covered strawberries?

Chocolate Covered Strawberry Cupcakes - fresh strawberry cupcakes with chocolate buttercream!

And what is good in fruit form, has to be better in cupcake form.  Am I right?

Chocolate Covered Strawberry Cupcakes - fresh strawberry cupcakes with chocolate buttercream!

Chocolate Covered Strawberry Cupcakes? Yes please!

These dense little cupcakes have a lovely hint of strawberry that pairs so well with a generous spread of chocolate frosting!  If you are looking for a stronger strawberry flavor and pinker cake, I’d go with this strawberry cake recipe instead.  This cake recipe would alternatively lend itself well to a strawberry frosting.

Chocolate Covered Strawberry Cupcakes - fresh strawberry cupcakes with chocolate buttercream!

[print_this]

Strawberry Cupcakes

Yield: Makes 12 cupcakes

Ingredients

  • 1 1/2 cups all-purpose flour, sifted
  • 1 teaspoon baking powder
  • 1/4 teaspoon salt
  • 1/3 cup strawberry puree (made from ~2/3 cup fresh or frozen strawberries)
  • 1/4 cup whole milk at room temperature
  • 1 teaspoon vanilla extract
  • 1/2 cup (1 stick) unsalted butter, softened at room temperature
  • 1 cup granulated sugar
  • 1 large egg at room temperature
  • 2 large egg whites at room temperature

Cooking Directions

  1. Pre-heat oven to 350 degrees
  2. Prepare a 12-cup cupcake tin, spray with non-stick cooking spray or fill with cupcake liners
  3. Whisk together flour, baking powder and salt, set aside
  4. In a separate bowl, whisk together strawberry puree, milk and vanilla extract and set aside
  5. Using an electric mixer, beat butter in a large bowl on high speed until light and creamy
  6. Gradually add sugar and continue to beat until light and fluffy
  7. Reduce the speed to medium and add eggs until combined
  8. Reduce speed to low and slowly add half of flour mixture
  9. Add strawberry mixture and then remaining flour mixture mixing just until combined, do not overbeat
  10. Pour cupcake batter into cupcake tin, filling each cup about 2/3 of the way
  11. Bake in oven for 16-20 minutes or until a toothpick or knife comes out clean

Chocolate Cream Cheese Icing

Ingredients

  • 4 ounces light cream cheese, softened
  • 1/4 cup (1/2 stick) unsalted butter, softened
  • 1/3 cup unsweetened cocoa
  • 1 tablespoon milk
  • 1/8 teaspoon salt
  • 2 1/4 cups confectioners’ sugar

Cooking Directions

  1. Set cupcakes aside and prepare chocolate frosting
  2. In a large bowl beat cream cheese with an the whisk attachment on an electric mixer until creamy
  3. Beat in butter until mixture is light and creamy
  4. Stir in cocoa, milk and salt
  5. Stir in 1 cup of sugar and then the other
  6. Beat mixture on high until well combined and creamy
  7. Once icing is ready and cupcakes are cool, remove cupcakes from pan and ice each cupcake with desired amount of frosting

[/print_this]

Cupcake recipe source: Martha Steward

Icing adapted from Cooking Light

Chocolate Covered Strawberry Cupcakes - fresh strawberry cupcakes with chocolate buttercream!

What is your favorite cupcake flavor? I love red velvet with cream cheese icing!

Can’t Get Enough

Chocolate Chip Blueberry Peanut Butter Cookies

How was everyone’s weekend? Mine was good, especially since a 3-day weekend means a 4-day work-week. I love how that happens:-)

Matt and I went out to the Hamptons to visit his Parents for a couple days and then went to a college friend’s wedding on Sunday night. It was a lot of fun being with friends we haven’t seen in a while and seeing how happy the newlyweds were was wonderful.

Yesterday was a baking marathon at our apartment with cupcakes, ice cream cake and two types of cookies. I can’t wait to share everything with you. The summer has been so busy so far and I’ve barely had any quality kitchen time so it felt good to have a day devoted to something I love. I wish that could happen more often!

Chocolate Chip Blueberry Peanut Butter Cookies

One of the batches of cookies I made yesterday was a spin-off of these amazing bars I baked a few weeks ago. Given that the original recipe was supposed to be a cookie, I’ve had in my head to make a cookie variation ever since. By reducing the flour and baking soda, I was able to make a dough that stuck together well when shaping cookie dough balls. The dough was actually a little greasy, but the finished product was the perfect balance of chewy and crispy. You don’t want to know how many cookies I ate within hours of baking them. The scent of peanut butter, the warm bursting blueberries and the melted chocolate just called my name. It was like the blueberry pie filling climbed into a perfect peanut butter chocolate chip cookie. This surprising combination of flavors is just so good.

[print_this]

Chocolate Chip Blueberry Peanut Butter Cookies

Ingredients (Makes 3 dozen cookies)

  • 1 cup all-purpose flour
  • 1 ½ teaspoons baking soda
  • 1 ½ cups salted creamy natural peanut butter
  • ½ cup granulated sugar
  • 3/4 cup packed light brown sugar
  • 2 eggs
  • 1 teaspoon vanilla extract
  • 1 cup semi-sweet chocolate chips
  • 1 ¼ cup blueberries

Instructions

  • Pre-heat the oven to 350 degrees
  • In a medium bowl, whisk together flour and baking soda, set aside
  • Using a mixer, in a large bowl beat peanut butter and sugars on high until light and fluffy
  • Beat in the eggs and vanilla until combined
  • Reduce speed to low and stir in flour mixture just until combined
  • Stir in blueberries and chocolate chunks
  • Use a cookie dough scoop or tablespoon to place cookie dough balls (about 2 TB each) on a baking sheet lined with parchment paper (Note: the dough will be greasy, that is OK)
  • Bake for 11-13 minutes until cookies are brown around the edges

[/print_this]

Chocolate Chip Blueberry Peanut Butter Cookies

What do you do when you have a free day to spend however you want?

Amazing

Amazing.  We raised ~$850 for cancer research through yesterday’s bake sale!!!  Thank you so much to everyone who participated in bidding and donated delicious treats!  My family and I are so thankful.  If you did not have the opportunity to take part in the bake sale but are interested in helping Steve meet his goal of raising $5,000, you can go to his blog for details.  There you can also follow his timberman training.

Have a fun and safe 4th of July weekend!  I’ll be back next week with the usual deliciousness.

Oh, and if you need a last minute tasty ice cream treat for the holiday weekend I recommend Black Bottom Ice Cream Cupcakes, Chocolate Chip Cookie Dough Ice Cream Bars, or a Peanut Butter Cup Ice Cream Pie.

Bake Sale to Beat Cancer

Welcome to my bake sale to raise money for cancer research.  This bake sale is my way of supporting my cousin as he competes in the Timberman Ironman in honor of his dad who passed away last summer.  For more about that story , you can check this post.  Below are 29 items donated by bloggers, friends, family and myself.  I’m so thankful to everyone who has participated so far!

In order to bid, send an email to keepitsweetlcl at gmail dot com with your baked good in the subject line and tell me the dollar amount you are bidding.  The bake sale is open through midnight est on Wednesday, June 29th. I’ll continuously update the bids on this page throughout the day so don’t forget to check back in case you are outbid.  Please see the end of the post for rules.

Joanne’s Carrot Cake Cookies

Current Bid: $25

Carrot Cake Cookies

Victoria’s Lime Sea Salt Chocolate Chunk Cookies

Current Bid: $30

Lime Sea Salt Chocolate Chunk Cookies

Victoria’s Chocolate Peanut Butter Pinwheel Cookies

Current Bid: $20

Chocolate Peanut Butter Pinweel Cookies

Victoria’s Cherry Chocolate Shortbread

Current Bid: $20

Chocolate Cherry Shortbread

Madison’s Strawberry Cream Cheese Cookies (will ship anywhere)

Current Bid: $35

Strawberry Cream Cheese Cookies

Kristen’s Chocolate Chip, Toasted Pecan & Dried Cranberry Cookies (Made by Jen)

Current Bid: $20

Chocolate Chip, Toasted Pecan & Dried Cranberry Cookies

Carol’s Spelt Raisin Cookies {Vegan} (with choice of add-ins) (will ship anywhere)

Current Bid: $20

Spelt Raisin Cookies

My Mom’s Brownie Stuffed Chocolate Chip Cookies

Current Bid: $40

Brownie Stuffed Cookies 1

My Mom’s Peanut Butter Filled Chocolate Chocolate Chip Cookies

Current Bid: $25

Peanut Butter Filled Chocolate Cookies

Sharon’s Chocolate Chip Pretzel Cookies

Current Bid: $50

DSC00797

Becca’s White Chocolate Macadamia Cookies

Current Bid: $25

white chocolate macadamia cookies

Lauren & Chrissy’s Lemon Lavender Shortbread Cookies

Current Bid: $40

Lemon Lavender Shortbread Cookies

Jessica’s Coconut Walnut Cookies

Current Bid: $20

Coconut Walnut Cookie 003

Peggy’s Perfect Chocolate Chip Cookies

Current Bid: $20

Peggy's Perfect Chocolate Chip Cookies

Christina’s Multigrain Biscotti

Current Bid: $30

MultigrainBiscotti2finalforsitesmall

Veronica’s Snickerdoodle Blondies

Current Bid: $40

snickerdoodle blondies

Rachel’s Butterscotch Blondies with Salted Chocolate Glaze

Current Bid: $53

avid appetite butterscotch blondie

Erin’s Peanut Butter, Banana & Nutella Bars

Current Bid: $25

PB Banana Nutella Bars

Monica’s Whole Grain Oatmeal Carmelitas

Current Bid: $35

Whole Grain Oatmeal Carmelitas

Nina’s Mint Chocolate Brownies

Current Bid: $17

mint chocolate brownies

My Salted Gooey Caramel Butter Bars

Current Bid: $35

Becca’s Black Bottom Cupcakes

Current Bid: $20

blackbottomcupcake

Jessica’s Peanut Butter Banana Oat Muffins

Current Bid: $20

Peanut Butter Banana Oat Muffins

Nina’s Sugar-Topped Blueberry Muffins

Current Bid: $20

sugar-topped blueberry muffins

My Low Fat Vegan Chocolate Cupcakes

Current bid: $29

cupcake 7

Jessica’s Pistachio Chocolate Chip Bundt Cake

Current Bid: $20

Green Cake 004

Kristen’s Toasted Coconut Pecan Granola

Current Bid: $20

Toasted Coconut Pecan Granola

Erin’s Homemade Granola

Current Bid: $20

Erin's Granola Healthy Apron

Caroline’s Homemade Granola

Current Bid: $20

Chocolate&CarrotsGranola-5956

Bake Sale and Bidding Rules:

  • Each item has a minimum bid of $15 and minimum bids of $3.
  • All baked goods are open to US residents.  It is noted next to the item if the baker will ship outside of the US.
  • The funds must be donated per the instructions here within 24 hours of the bake sale.
  • The products will be shipped by Friday July 8th

Leave any questions regarding the bake sale in the comment section of this post.  Thank you in advance for participating in a cause close to my heart.

Brownies for Breakfast?

Peanut Butter Caramel "Baked Brownies"

Do these brownies look gooey enough to you?

Peanut Butter Caramel "Baked Brownies"

They did to me too…

Peanut Butter Caramel "Baked Brownies"

…at 8:30 this morning.

What, you don’t eat brownies for breakfast?  Yeah, me neither.  I actually eat a wonderfully healthy breakfast every morning; think yogurt, oatmeal, fruit and peanut butter in some combination or another.  It is actually my favorite meal and I’m always a little sad when it’s over.

But back to the brownies.  I made this evil baked good last night (sorry, I’m not usually that mean to my desserts).  I woke up this morning ready to cut and photograph them to find out that about 75% of my work was underbaked….. uhoh.

Peanut Butter Caramel "Baked Brownies"

I started cutting the brownies and found that the fudgey inside was getting stuck on the side of the knife.  So I did what any normal person would do, I tasted them.

Peanut Butter Caramel "Baked Brownies"

And then I tasted them again.

And then a taste turned into a slice and into another slice…. and before you know it more brownies than I care to admit had disappeared.  Not my finest moment.  But hey, at least I can vouch for the recipe!

[print_this]

Peanut Butter Caramel “Baked Brownies”

Serving Size: 36

Ingredients

  •  1 1/4 cups all-purpose flour
  •  2 tablespoons dark unsweetened cocoa powder (use a good one like Valhrona)
  •  1 teaspoon salt
  •  11 ounces bittersweet chocolate chips or dark chocolate coarsly chopped (I used 60% cocoa)
  •  1 cup, 2 sticks, unsalted butter cut into slices
  •  1 teaspoon instant espresso powder
  •  1 1/2 cups granulated sugar
  •  1/2 cup packed light brown sugar
  •  5 large eggs at room temperature
  •  2 1/2 teaspoons vanilla, separated
  •  1 7-ounce bag caramel candies
  •  3 tablespoons creamy salted peanut butter

Cooking Directions

Pre-heat oven to 350 degrees
Grease a 13×9 pan lined with foil; set aside
Whisk together flour, cocoa and salt in a medium bowl; set aside
Place large heat-proof bowl over a pot of simmering water; in that bowl combine chocolate, butter and espresso powder
Stir mixture until completely melted and turn off burner
Leaving the bowl over the pot of water, whisk in sugars
Move bowl to counter and once at room temperature, whisk in 3 eggs
Whisk in remaining eggs and 2 treaspoons of vanilla, do not overbeat
Gently fold in flour mixture until just combined
Pour brownie batter into prepared pan and set aside
In a microwave-proof bowl, combine caramels, peanut butter and 1/2 teaspoon vanilla
Microwave for 1 minute and stir; microwave for additional 30-second increments until melted, stirring in-between
Drop spoonfulls of caramel mixture over brownie batter
Use a knife to swirl caramel through brownies; Don’t worry about it looking pretty, the caramel will sink into the brownie and that is ok
Bake for 30-35 minutes or until a knife comes out clean being careful not to overbake

Notes:

I found the brownie recipe on Apples and Twinkies; it is originally from Baked: New Frontiers in Baking by Matt Lewis and Renato Poliafito

Caramel filling from Sticky, Chewy, Messy, Gooey cookbook

I baked the brownies for 25 minutes but I think 30-35 minutes would result in a perfectly baked brownie

[/print_this]

Peanut Butter Caramel "Baked Brownies"

Have you ever eaten dessert early in the morning?

Chocolate Chip Cookie Dough Ice Cream Bars

Chocolate Chip Cookie Dough Ice Cream Bars

What a whirlwind couple of weeks it has been!

Chocolate Chip Cookie Dough Ice Cream Bars

I skipped my Sunday post this week and haven’t done a real recipe post in almost 2 weeks! Since then, we spent a weekend celebrating our anniversary (think lots of delicious food, including top tier of our cake!) and this past weekend we celebrated Adam and Sara’s wedding. It has been a fun year from their engagement, to the bachelorette party, and then the shower. The weekend was perfect night for the two of them and it was wonderful to see how in love they are.

Sara Adam 1

Keeping up with baking has been a little tough given everything going on, but I managed to squeeze in this delicious no-bake dessert. Plus, I have baking to do almost every night this week. I’m especially excited about something I made last night, but you will have to wait a few days for that one;-)

Chocolate Chip Cookie Dough Ice Cream Bars

But I digress… tonight’s dessert is the perfect way to honor the official start of summer! These bars are a play on cookie dough ice cream. I’ve always loved cookie dough ice cream, but there is just never enough cookie dough to go around. I may be known to pick all the cookie dough out of the carton only to be left with a melted mess of vanilla ice cream. The beauty of these bars is that you get all the good stuff in every bite, chocolate chip cookie dough, vanilla bean ice cream and chocolate.Chocolate Chip Cookie Dough Ice Cream Bars

[print_this]

Chocolate Chip Cookie Dough Ice Cream Bars

Yield: 12-16

Ingredients

  • 1 batch prepared chocolate chip cookie dough (recipe below)
  • 3 cups vanilla bean ice cream
  • 2 cups semi-sweet chocolate chips

Cooking Directions

  1. Cover prepared cookie dough layer with vanilla ice cream; cover and freeze for an hour
  2. Once ice cream is frozen, place chocolate chips in a microwave-safe bowl
  3. Melt chocolate in microwave in 30-second increments, stirring in-between
  4. When chocolate is melted, spread evenly over ice cream layer, cover and re-freeze for an hour or until ready to serve
  5. Cut into bars and enjoy!

Chocolate Chip Cookie Dough

Ingredients

  • 1/2 cup (1 stick) unsalted butter, softened
  • 1/4 cup granulated sugar
  • 1/2 cup light brown sugar, firmly packed
  • 2 tablespoons milk (I use skim)
  • 1 cup all purpose flour
  • 1/4 tsp salt
  • 1/2 cup chocolate chips

Cooking Directions

  1. To Make the Cookie Dough:
  2. Beat butter and sugar until fluffy
  3. Mix in milk
  4. Gradually mix in flour and salt
  5. Stir in chocolate chips
  6. Press into a 9×9 pan lined with wax paper

 [/print_this]

Cookie Dough recipe adapted from these brownies

Chocolate Chip Cookie Dough Ice Cream Bars

I have to admit, these busy summer days away from the computer are refreshing. What’s keeping you busy this summer?

*There is still time to donate baked goods for next week’s online bake sale*

Let’s Help Beat Cancer

Almost two years ago, my Uncle Bob, my Dad’s big brother, was diagnosed with a rare form of non-Hodgkin’s Lymphoma. The news came from across the country in California with surprise and sadness.  However, at the time, we knew my uncle was strong and a fighter, and although he had to go through months of various treatments including chemo, we always thought he would pull through.  I felt for my cousins that had to go through this, but also admired their strength as a family and lack of self-pity that any of them had.


As my dad put it, “My brother Bob was my protector and teacher for as long as I can remember … then, the unimaginable [happened], Bob was diagnosed with lymphoma. He faced that with incredible courage. He always seemed optimistic about the treatments. He tried to make it more comforting for his family and friends by talking about the lives and needs of others, rather than dwelling on his own  health.”
Uncle Bob seemed to be responding to treatment well enough for the first 6 months, but he couldn’t quite beat the cancer. In March, just two days before my wedding shower, I received a call from my Dad.  What he said shocked me; it wasn’t the news that I had expected.  My Aunt Linda, my Dad’s big sister, had passed away from complications related to a seizure. This was completely unexpected and heartbreaking.
The day after my shower, we went down to Baltimore to say goodbye to my aunt.  Uncle Bob was luckily able to make the trip from California to be with his family.  My uncle, who I hadn’t seen since before he was diagnosed, came with the same personality I remembered.  Funny, smart (my dad and his siblings all seem to be geniuses), and energetic.  The chemo had taken away his hair and aged him a decade, but the minute he opened his mouth he was the same Uncle Bob I remembered.  The same big brother my dad grew up with.
That day, we talked about my upcoming wedding.  We talked about some treatments he had scheduled and that if his tests worked out from a timing standpoint, he’d be dancing at my wedding with the rest of us.  His sister had just died and he was in-between bouts of chemo, and all he wanted to talk about was how much he looked forward to making the trip to Philadelphia in June.
Unfortunately, my uncle couldn’t make it to the wedding as he was undergoing more treatment at the time.  I felt so sad for my dad that both his brother and sister were missing from that day.  Some of my cousins did come, though, and shared in the celebration.
As the summer wore on, the cancer seemed to grow with a vengeance. My Uncle fought hard and probably stole a few more weeks of life than anyone could have imagined. On August 20th, coincidentally the night before my birthday, I got the call that Uncle Bob had passed away.
Because of the distance, I had never been very close to my Uncle, but every time he visited I was reminded of what a wonderful person he was.  I loved seeing my dad joke around and get teased by the man who was his big brother.  I know that the loss of his siblings took something from him, and the very thought of that breaks my heart.
It has been almost a year since Uncle Bob passed away, and I still don’t believe it is real.  I can’t believe that someone with so much life just isn’t around anymore.  Now, to honor my uncle and help others who may face their own struggles with Lymphoma, my cousin, Steve, is competing in the Timberman Ironman. In conjunction with this, his goal is to raise $5,000 for research and grants related to blood cancers.
To support Steve, and honor my Uncle Bob, my dad’s big brother, I’ll be hosting a bake sale on the blog Wednesday, June 29th. It would mean the world to me if you would donate a baked good.  If you are interested in participating, please email me at keepitsweetlcl at gmail dot com by Thursday, June 23rd. Please send the name of the baked good you’d like to donate, a photo of the dessert and a link to your blog post if you have one. Also, let me know where you can send your baked good to (ie US only, etc.).

1 Year Ago

One year ago…

…a few friends met us in Philadelphia

P1000022a

…my best friends came in from different cities and states

P1000024a

…I got a new brother and sister-in-law

P1000027a

….I was reminded of how amazing my parents and sister are

…we posed for pictures everywhere

P1000041a

Matt’s best friends came in from different cities and states

31756_1515837816934_1264135839_31455747_3736582_n

….my family celebrated and partied with us

P1000038a

….my sister and best friend since childhood gave speeches that made me cry

P1000133

…..I felt beautiful

34378_645371233737_2600612_36888050_1480773_n

…best friends from high school and college became friends

….the room of my dreams was created

37382_645370734737_2600612_36888007_1966888_n

matt wore his grandfather’s talis

….another room of my dreams was created

wedding

…I got to wear a pretty dress

….we entered a room with sparklers

….I celebrated not falling down the steps

28469_644598761777_2600852_36856821_1168978_n

….my gorgeous best friends shared our happiness

28469_644599540217_2600852_36856841_915843_n

….we danced to Cruisin

….my dad showed off his moves

matt twirled his mom

….we ate cake

….I couldn’t stop smiling

37387_645374222747_2600612_36888252_1625729_n

…Matt posed with the ladies

35428_644272251107_2607678_36844255_1702313_n

…I was reunited with my sorority family

13453_645373104987_2600612_36888207_7726825_n

…I danced with my mom

35187_620569282185_16402142_35426383_7742127_n

…Matt’s former band played

28256_643716360117_2605219_36823859_6383835_n

….he crushed the guitar solo

….I had a moment with my sister

34079_620563793185_16402142_35426111_6204675_n

…oh yes, and I  married my best friend.

And in case there was any doubt that Matt wasn’t the one for me, here are a couple of quotes I’d like to share:

“I don’t go to a casino to lose cupcakes!” – Matt running back to the casino to retrieve his cupcakes from my cousin’s wedding

“Maybe we should eat something light like salad for dinner so we can eat a lot of cake” – Matt referring to the top tier of our wedding cake

Chocolate Chip Mandelbread

Chocolate Chip Mandelbread

Matt’s grandma is turning 90 years old on Monday!  A few months ago we were talking and she told me that all she wanted for her big birthday this year was Mandelbread.   Lucky for her, I don’t forget any food-related requests.

Chocolate Chip Mandelbread

And even luckier for her, I have the most amazing mandelbread recipe that my mom’s been making for as long as I can remember.  She doesn’t remember the source but it was someone who had a good taste in desserts.

Chocolate Chip Mandelbread

Mandelbread, otherwise known as Mandelbrodt or kamishbrot, is not so far off from biscotti.  Baking this type of cookie requires a few more steps than usual as the dough is baked in loaf form and then cut up and baked again.  These extra steps are worth it because you end up with a wonderful crunch, although I do like the middle-of-the-loaf pieces that are a little thicker and usually have a little chewiness to them.

Chocolate Chip Mandelbread

While many variations include some sort of nuts, I like to stick with the chocolate chips only.  The semi-sweet chips along with a light cinnamon-sugar coating is a perfect flavor combination for me.  Plus, given that these are crunchy to begin with, nuts don’t add much value from a texture standpoint.

Chocolate Chip Mandelbread

Chocolate Chip Mandelbread
Yield: Makes ~2 dozen slices

Ingredients:
3 cups all-purpose flour
3 teaspoons baking powder
1/4 teaspoon salt
1 cup + 2 tablespoons granulated sugar, separated
3 large eggs
½ cup canola oil
1 teaspoon vanilla extract
2 tablespoons orange juice
1 cup mini semi-sweet chocolate chips
1/2 teaspoon ground cinnamon

Directions:
Preheat oven to 325 degrees
Whisk together flour, baking powder and salt, set aside
Beat 1 cup of sugar with all wet ingredients (eggs through orange juice)
Stir in dry ingredients until combined
Stir in chocolate chips
Form dough into two separate loaves on baking sheets lined with parchment paper
Bake in oven for 25 minutes or until light brown
While loaves begin to bake, combine remaining 2 tablespoons of sugar with cinnamon
Remove baked loaves from oven and immediately cut into slices while hot
Turn each slice onto a side and sprinkle with cinnamon sugar mixture
Re-bake for 12 minutes
Remove from oven, immediately turn each slice onto opposite side and sprinkle them with remaining cinnamon sugar
Continue to bake for another 12 minutes or until edges are golden brown

Chocolate Chip Mandelbread

Do you have any baking requests for the blog?

It’s Margarita Time

Margarita Cheesecake Bars with a Pretzel and Cookie Crust

This is one of those recipes that I came up with accidentally.  Sometimes I have bakers block and can’t think of anything new or interesting to make.  I was inspired by Victoria’s cookies and wanted to do something with lime and salt.  Then I remembered the cream cheese in my refrigerator and eventually these Margarita Cheesecake Bars were born.Margarita Cheesecake Bars with a Pretzel and Cookie Crust

Thanks to a combination of Vienna fingers and pretzels, they have a wonderfully balanced sweet and salty crust.  Topped with a layer of light but creamy lime cheesecake they become a perfect summer treat.  The lime and the salt reminiscent of a margarita and who doesn’t like that?

Margarita Cheesecake Bars with a Pretzel and Cookie Crust

Ok, I’ll be honest- I’m not the biggest margarita fan.  I prefer to save my sugar calories for more important things like dessert.  Cheesecake and a Vodka Soda with lime juice for me, please.

Margarita Cheesecake Bars with a Pretzel and Cookie Crust

[print_this]

Margarita Cheesecake Bars

Yield: Serves 16

Ingredients

  • 3/4 cup Vienna Finger (or vanilla sandwich cookie of choice) crumbs (about 6 cookies)
  • 3/4 cup salted pretzel crumbs (about 1 1/2 cups of small pretzels)
  • 2 tablespoons granulated sugar
  • 1/4 teaspoon salt
  • 4 tablespoons (1/2 stick) unsalted butter, melted
  • 2 8-ounce blocks light cream cheese, softened
  • 3/4 cup sweetened condensed milk (I used fat free)
  • 2 eggs
  • 1/4 cup fresh lime juice (~2 limes)
  • 1/2 teaspoon vanilla extract
  • 1 tablespoon all-purpose flour

Cooking Directions

  1. Pre-heat oven to 350 degrees
  2. Grease a 9×9 baking pan and set aside
  3. In a medium bowl, combine cookies, pretzel crumbs, butter, sugar and salt
  4. Press crust mixture into prepared baking pan and bake for ~7 minutes or until lightly browned; set aside
  5. Using an electric mixer and the whisk attachment, beat cream cheese on high for a few minutes until creamy
  6. Add sweetened condensed milk and beat into cream cheese
  7. Beat in eggs, lime juice and vanilla
  8. Stir in flour
  9. Pour cheesecake mixture over crust and bake for 25 minutes or until firm and edges are separating from pan

[/print_this]

Adapted from Eagle Brand

Margarita Cheesecake Bars with a Pretzel and Cookie Crust

Do you drink margaritas? If not, do you have a go-to drink?

PB&J Meets PB & Chocolate

Blueberry Chocolate Chunk Peanut Butter Bars

I love peanut butter.  I love peanut butter with chocolate, I love peanut butter and jelly, I love peanut butter by the spoonful.  You already know this, but I just had to get it off my chest.

Blueberry Chocolate Chunk Peanut Butter Bars

I expressed my love of blueberries and peanut butter before, and then I combined chocolate and blueberries.  And of course there were all the times I put together peanut butter and chocolate.  It was only a matter of time before the three collided.

Blueberry Chocolate Chunk Peanut Butter Bars

Over the weekend I put three of my favorite flavors into one and made Blueberry Chocolate Chunk Peanut Butter Bars.  These aren’t the prettiest bars I’ve ever made, but oh boy are they delicious!  This was one of those times where I could have eaten the whole batch out of the oven!  They smelled amazing and the melted dark chocolate, juicy blueberries and flavorful peanut butter cookie base had an amazing balance.  It was a good thing I had a birthday barbecue to bring these to because otherwise my waistline would have been in big trouble!

Blueberry Chocolate Chunk Peanut Butter Bars

[print_this]

Blueberry Chocolate Chunk Peanut Butter Bars

Note: The dough may be very crumbly. Press it down tightly into pan before baking to prevent the bars from being too crumbly once they are done.

Yield: Makes 24 bars

Ingredients

  • 1 cup + 2 tablespoons all-purpose flour
  • 2 1/4 teaspoons baking soda
  • 1 1/2 cups salted natural creamy peanut butter
  • 3/4 cup granulated sugar
  • 3/4 cup packed light brown sugar
  • 2 eggs
  • 1 teaspoon vanilla extract
  • 1 cup dark chocolate chunks
  • 1 1/2 cup blueberries

Cooking Directions

  1. Pre-heat the oven to 350 degrees
  2. In a medium bowl, whisk together flour and baking soda, set aside
  3. Using a mixer, in a large bowl beat peanut butter and sugars on high until light and fluffy
  4. Beat in the eggs and vanilla until combined
  5. Reduce speed to low and stir in flour mixture just until combined
  6. Stir in blueberries and chocolate chunks
  7. Press dough into a 13×9 baking pan lined with ungreased parchment paper
  8. Bake for 20 or until firm and a knife comes out clean

[/print_this]

Blueberry Chocolate Chunk Peanut Butter Bars

Have you ever eaten a dessert by yourself that you were supposed to share with friends?

Dark Chocolate Kissed Almond Butter

Dark Chocolate Kissed Almond Butter

I had big baking plans for last night, but with the temperature around 90 degrees, turning on the oven just seemed wrong.  A no-bake dessert probably would have been a good solution, but Matt has been asking me to make chocolate almond butter for a few weeks now.  It shouldn’t have taken so long to get to it because homemade nut butter is so easy to make, but I get lazy sometimes!

Dark Chocolate Kissed Almond Butter

Not sure if I mentioned this on the blog, but we have a never-ending stock of Hershey’s Kisses in the apartment.  Dark chocolate kisses and milk chocolate kisses with almonds to be exact.  I use them every chance I get and probably will continue to do so until they are gone.

Hershey Kisses

By the way, do you know how good a 10-pound bag of Hershey Kisses smells?  I wish we had a hiding place for the chocolate because it is haunting my senses!

Dark Chocolate Kissed Almond Butter

Anyway, I put a handful of Kisses to good use in this Dark Chocolate Kissed Almond Butter.  It worked out well because the nut butter is creamy and chocolaty, but not overly sweet. I love using it on sliced banana, over ice cream or even by the spoonful.  Now that I think about it, Matt better act fast or I may eat the jar before he gets a chance!

Dark Chocolate Kissed Almond Butter

To make the nut butter, grind almonds in food processor until creamy, stopping to scrape the sides every minute or so

almonds 1 almonds 2

Once creamy and wet, add vanilla and melted chocolate

melted chocolateadd chocolate and vanilla

Blend until completely combined

done

Store in an old nut butter jar or tupperwear

Dark Chocolate Kissed Almond Butter[print_this]

Dark Chocolate Kissed Almond Butter

Yield: Makes ~1 cup or 16 tablespoons of almond butter

Ingredients

  • 2 cups salted roasted almonds
  • 12 dark chocolate Hershey Kisses, melted
  • 1 teaspoon vanilla extract

Cooking Directions

  1. Grind almonds in food processor until creamy, stopping to scrape the sides every minute or so
  2. Once creamy and wet, add vanilla and melted chocolate
  3. Blend until completely combined
  4. Store in a jar or tupperware at room temperature for up to a month

[/print_this]

Inspired by Oh She Glows

Dark Chocolate Kissed Almond Butter

What do you think I should do with all these Hershey’s Kisses?

Hello Summer

beach 6

Well hello, Summer.  We are so happy to have you here.

Farmstand 11

I’m pretty sure I was wearing a winter coat a couple of weeks ago, but when Mother Nature sends sun and temperatures in the 80s you won’t see me complaining

Farmstand 2

No complaining when we make trips to the New Jersey farmstands

Farmstand 5

Not complaining about huge Jersey tomatoes

Farmstand 6

And especially not complaining about big juicy strawberries

Farmstand 7

Memorial Day weekend kicked off my summer in full gear with a trip to the Jersey shore.  We had the most amazing weekend that included walks on the beach, walks around town, walks to CVS (do you see a pattern?), a family barbecue, and of course my favorite chocolates.  All that was missing was my husband!

Jegelkys

But, luckily, we had whipped cream vodka to entertain me in his absence!  Whipped cream vodka + diet root beer = amazing.  Try it!

jessica 3

And we were very excited that my earrings matched the glassware

lauren 2

My sister also brought her friend Jen to join the fun

jess jen 3a

Of course we had to take advantage of the gorgeous weather for a few backyard shots:

Dad and me

lauren dad 3

Sisterly love

lauren jess 6

Mom and her girls

mom jess lauren 2b

And my favorite Uncle!  Hi Marty!!!

lauren marty 1

How was your Memorial Day weekend?  Has summer arrived where you are?

beach 3

Peanut Butter Cup Ice Cream Pie

Peanut Butter Cup Ice Cream Pie

I have to tell you, the pictures don’t do this dessert justice.  Whoever has tips for taking pictures of ice cream please send them my way!

Peanut Butter Cup Ice Cream Pie

So lately I haven’t been showing enough love to my two favorite food groups: peanut butter and ice cream

What, those aren’t food groups? Could have fooled me!

Does peanut butter combined with chocolate make up a food group?peanut butter cups

Protein, healthy fats, antioxidants?  Am I close?

Oh well, because you know what, when it comes to dessert you just have to enjoy what you love.  Personally, I’m good at that…

Peanut Butter Cup Ice Cream Pie

…just need to work on eating one slice, one scoop or one cookie and being satisfied.  I’ll get there one day.

nutter butters

But in the meantime, send over some self-restraint so that I don’t eat this entire Peanut Butter Ice Cream Pie in one sitting

To make the crust, grind up about 8 Nutter Butters in a food processor until fine

nutter butters in food processor

nutter butter crumbs

Add melted butter and stir to combine

add butter to crumbs crust mixture

Press crust mixture into a prepared 9-inch springform pan

making crust 1 making crust 2

Bake for 8-10 minutes or until crust darkens around the edges and allow crust to cool

making crust 3

When ready, layer half of chocolate ice cream over crust

ice cream layer 1

Next cover the entire layer with large peanut butter cups

layer peanut butter cups

Then, cover peanut butter cup layer completely with chocolate ice cream (shh I ran out of peanut butter cups); Freeze until ready to serve

ice cream layer 2

[print_this]

Peanut Butter Cup Ice Cream Pie

Yield: Serves 12

Ingredients

  • 1 1/4 cups Nutter Butter crumbs (about 8 cookies)
  • 4 tablespoons (1/2 stick) unsalted butter, melted
  • 2 quarts your favorite chocolate ice cream or frozen yogurt (I used Edy’s slow churned)
  • 24 large peanut butter cups

Cooking Directions

  1. Pre-heat oven to 350 degrees
  2. Spray a 9-inch springform pan with cooking spray, set aside
  3. To make the crust, grind up about 8 Nutter Butters in a food processor until fine; add melted butter and stir to combine
  4. Press mixture into prepared pan
  5. Bake for 8-10 minutes or until crust darkens around the edges and allow crust to cool
  6. When ready, layer half of chocolate ice cream over crust
  7. Layer peanut butter cups over ice cream and then cover them with remaining ice cream

[/print_this]

Peanut Butter Cup Ice Cream Pie

If you could create a new food group, what would it be?

24 Hours

rachel and lauren 1

The other day I had 24 hours with my best friend/college roommate, Rachel

We brunched, we window-shopped, we walked, we pedicured… it was fabulous

And since she was in town from Florida we made a couple of very important stops…. Pinkberry

pinkberry 3

…and forty carats

40 carats 1

Best friends don’t let best friends go without fro yo.

And then after a day of running around the city and catching up on months of conversation (I hadn’t seen her since my wedding!) we changed our out-on-the-town evening plans and crashed the husband’s dinner

Littletown 2

We went to this restaurant near my apartment

Littletown 4

Beer sampler anyone?

Littletown 5

Of course the rest of the night was spent catching up some more on life like only best friends do

We were so happy to be reunited, I almost didn’t let her leave!

rachel and lauren 2

What would you do if you had a best friend visit for 24 hours?

Magic

Magic Pie - just like magic cookie bars but in a pie form!

Magic: Possessing distinctive qualities that produce unaccountable or baffling effects

source

The ability for a pie to exist one minute and be gone the next, that seems like magic to me.

The ability for a dessert to call your name and whisper sweet words into your ear, I’d call that magic.

The ability for a dessert to sit on your counter one day and your butt the next, yes magic.

Magic Pie - just like magic cookie bars but in a pie form!

All of those elements make this cookie bar turned pie magic.

I’ll be honest, I only like my version of magic bars. No coconut, no nuts, just gooey, chocolaty, chewy and delicious.  And so in my Magic Pie, that is what you get: graham cracker crust and a sweet oozing filling made up of dark chocolate, milk chocolate and toffee.  Don’t tell me this doesn’t pull at your sweet tooth for an extra slice bite.  I made this pie at about 3pm one afternoon… by midnight it was gone.  And here is a little secret, Matt thought it was too sweet.

Magic Pie - just like magic cookie bars but in a pie form!

I’ll let you come to your own conclusions.

ingredients

Start with a pre-made or baked graham cracker crust and pour sweetened condensed milk into the shell

pouring sweetened condensed milk

pie crust with sweetened condensed milk

Arrange dark chocolate kisses

pie with hershey kisses

Sprinkle with toffee bits

Magic Pie - just like magic cookie bars but in a pie form!

Sprinkle on the milk chocolate chips

Magic Pie - just like magic cookie bars but in a pie form!

Bake for about 25 minutes or until filling appears set and has bubbled around the edges; allow to cool before slicing

Magic Pie - just like magic cookie bars but in a pie form!

[print_this]

Magic Pie

Next time I’m going to sprinkle pretzel pieces on top immediately after baking to add a salty crunch to the pie The Edy’s slow churned Caramel Delight ice cream was the perfect complement to this pie

Yield: 6-8 slices

Ingredients

  • 1 pre-made or baked 8-inch graham cracker pie crust
  • 1 cup sweetened condensed milk (I used fat free)
  • 21 dark chocolate Hershey kisses (~1 cup semi-sweet or dark chocolate chips would also work)
  • 1/3 cup toffee bits
  • 1/3 cup milk chocolate chips

Cooking Directions

  1. Pre-heat oven to 350 degrees
  2. Pour sweetened condensed milk into shell pie
  3. Arrange dark chocolate kisses along on top of the milk
  4. Sprinkle with toffee bits and milk chocolate chips
  5. Bake on a baking sheet for about 25 minutes or until filling appears set and has bubbled around the edges
  6. Allow to cool before slicing and serve with a scoop of ice cream

[/print_this]

Adapted from Magic Cookie Bars

Magic Pie - just like magic cookie bars but in a pie form!

I’ll let you in on a secret- I didn’t like the crust (that’s what I get for using a healthier pre-made) so I left that behind and ate all some of the filling.  Have you ever picked out the parts of a dessert you like and gotten rid of the rest?

The Cake

Strawberry Cake with White Chocolate Buttercream

Not only was Saturday Sara’s bridal shower, but it was also just a couple of days after a big birthday for her mom. So, in addition to fun pick-up desserts, I wanted to make a birthday cake.

Strawberry Cake with White Chocolate Buttercream

Usually I’d stay safe with a vanilla or chocolate cake for a crowd, but I wanted to make something more special. Given that the bride loves pink and it was a girly event, strawberry cake with a bright pink hue sounded perfect. I used this strawberry cake recipe. To keep it simple, I filled and iced the cake with a rich and creamy white chocolate buttercream. The cake itself had a strong enough strawberry flavor that strawberry icing would have been over the top, and a plain buttercream just didn’t seem as exciting. The white chocolate recipe I use is just so silky that it made a wonderful addition to the cake. Plus, I’ve made that frosting before and knew that it would hold up well, even if the room got warm.

Strawberry Cake with White Chocolate Buttercream

The cake recipe looks like a lot of work, but once you get past pureeing the frozen strawberries it is a pretty standard cake recipe. (Warning: I almost broke my mini blender with the super frozen whole strawberries.) Get the cake recipe here and see the photos below as a reference.

frozen strawberries 1adding sugar to strawberries dry ingredients for cake 1 dry ingredients for cake 2 jellow sugar and butter

jellow sugar and butter mixedalternating dry and milk 1

alternating dry and milk 2

alternating dry and milk 3

alternating dry and milk 4

alternating dry and milk 5

add puree to batter 2 add puree to batter 3 add puree to batter 4

batter in cake pan

cake baked

This buttercream recipe is very easy; combine the white chocolate and whipping cream in a medium saucepan on low-medium heat, stirring continuously

white chocolate and cream 1

Remove mixture from heat and stir in milk

adding milk to white chocolate 1

Refrigerate for a half hour

buttercream mix in fridge

When white chocolate mixture is cool, finish making the buttercream

butter for buttercream

Using the whisk attachment of a mixer, beat the butter until creamy

butter for buttercream 2

Beat in confectioners’ sugar until butter and sugar are light and fluffy

adding confectioners' sugarconfectioners' sugar mixed in

Now beat in the cooled white chocolate mixture until buttercream is creamy and light

add white chocolate mixture 1

The buttercream may get lumpy at first, just keep beating it at high speed

add white chocolate mixture 2add white chocolate mixture 3

buttercream 1

Once cake has cooled and buttercream is ready, ice the bottom cake layer with about 1 cup of frosting

ice cake layer

Place top layer over top of that and press down lightly

ready to ice cake 1

Cover top and outside of the cake with remaining buttercream smoothing it out around the edges and on top

icing cake 1

I forgot to use the trick of putting a piece of paper or cardboard under the edges of the cake to keep it clean!

icing cake 2

Serve cake with a couple of strawberries for decoration

Strawberry Cake with White Chocolate Buttercream

[print_this]

Strawberry Cake with White Chocolate Buttercream

Yield: Serves 12 generous slices

Ingredients

Cooking Directions

  1. Once cake has cooled and buttercream is ready, ice the bottom cake layer with about 1 cup of frosting
  2. Place top layer over the frosted layer and press down lightly
  3. Cover top and outside of the cake with remaining buttercream smoothing it out around the edges and on top
  4. Store cake in refrigerator for up to 3 days; remove from fridge a half hour before serving

White Chocolate Buttercream

Ingredients

  • 6 ounces baking white chocolate
  • 3/4 cup heavy whipping cream
  • 1/2 cup milk (any type is fine)
  • 1 1/2 cups (3 sticks) unsalted butter, softened
  • 2 1/2 cups confectioners’ sugar

Cooking Directions

  1. Combine the white chocolate and whipping cream in a medium saucepan on low-medium heat, stirring continuously
  2. Remove mixture from heat and stir in milk
  3. Refrigerate for a half hour
  4. When white chocolate mixture is cool, finish making the buttercream
  5. Using the whisk attachment of a mixer, beat the butter until creamy
  6. Beat in confectioners’ sugar until butter and sugar are light and fluffy
  7. Now beat in the cooled white chocolate mixture until buttercream is creamy and light

Note: Cake can be frozen up to 3 weeks if wrapped tightly[/print_this]

*I recommend this recipe from Sweetapolita

Strawberry Cake with White Chocolate Buttercream

What flavor would you pick for your birthday cake?

Double Chocolate Mint Krispie Treats

Double Chocolate Mint Crispy Treats 9

First of all, a huge thank you for all of your inspiring comments on Sunday’s post!  I was actually a little nervous to hit publish but I’m so glad I did.  I love this community:-)

Now, let’s get back to the desserts!  For the shower, I made some of my old favorites and a couple of new recipes.  Additionally, I made cookie brownie layer bars, a strawberry birthday cake (recipe to come!) and these Double Chocolate Minty Treats.

Double Chocolate Mint Crispy Treats 3

Coming up with the menu for an event like this is so much fun.  Just like with my Thanksgiving dinner party, I wanted to have a variety of delicious and fun pick-up desserts.  After accounting for chocolate, caramel, peanut butter and sweet and salty, I knew I needed to fill the hole for Sara’s love of chocolate with mint.  Madison’s rice krispie treat pops immediately caught my eye, but I knew I didn’t have time to make individual pops for a big crowd.  Instead, I made the rice krispie treats in their regular form and dipped them in chocolate to keep them special, fun and delicious.  It turns out these were the favorite for quite a few people so I think the recipe was definitely a success!

Double Chocolate Mint Crispy Treats 10

Start by melting butter in a large pot

Butter in pot 1 Butter in pot 2 Butter in pot 3

Add the marshmallows and stir until they are completely meltedmarshmallows melting marshmallows 2 melting marshmallows 3melting marshmallows 5

Remove pot from heat, and stir in Andes

adding andes 1adding andes 3 adding andes 4

Add rice krispies to the mixture and stir

adding rice crispieseverything mixed

Once everything is combined, press the ingredients into a 13X9 pan lined with foil and allow to cool

put in pan 1 in pan

Once cool, remove the rice krispie treats from the pan; the easiest way to do this is to flip the pan upside down and peel off the foil

on cutting board 1

Cut the treats in to small cubes (I made slices in a 9X7 matrix)

on cutting board 4

Now set up a space to dip your treats in chocolate; I suggest lining 2 jelly roll pans with wax paper for the chocolate to harden

chocolate 2

Melt chocolate in a microwave-safe bowl in 30 second increments, stirring in-between each until chocolate is smooth

chocolate 3

One at a time, dip rice krispie treats in the chocolate to cover half of each bar

dipped in chocolate 1 dipped in chocolate 2

Allow to cool for 1-2 hours[print_this]

Double Chocolate Mint Krispie Treats 

Adapted from Espresso and Cream


Makes ~60 rice krispie bites

Ingredients:

  • ½ stick (1/4 cup) unsalted butter
  • 1 10.5-ounce bag mini marshmallows
  • 1 heaping cup Andes (or mint chocolate candy of choice)
  • 7 cups rice krispies
  • 12 ounces semi-sweet chocolate for melting

Directions:

  • Melting butter over low-medium heat in a large pot
  • Add the marshmallows and stir until they are completely melted
  • Remove pot from heat, and stir in Andes
  • Add rice krispies to the mixture and stir
  • Once everything is combined, press the ingredients into a 13X9 pan lined with foil and allow to cool
  • Once cool, remove the rice krispie treats from the pan; the easiest way to do this is to flip the pan upside down and peel off the foil
  • Cut the treats in to small cubes (I made slices in a 9X7 matrix)
  • Now set up a space to dip your treats in chocolate; I suggest lining 2 jelly roll pans with wax paper for the chocolate to harden
  • Melt chocolate in a microwave-safe bowl in 30 second increments, stirring in-between each until chocolate is smooth
  • One at a time, dip rice krispie treats in the chocolate to cover half of each bar
  • Allow to cool for 1-2 hours

[/print_this]

Double Chocolate Mint Crispy Treats 6

Have you taken any big risks in your career? Are there risks you wish you had taken?

Dreams

menu

First came the engagement celebration, then we had the bachelorette party, and yesterday was the bridal shower!  We are just about a month away from Adam’ and Sara’s big day!

bar 1 jelly beans

Yesterday’s shower was a wonderful afternoon with almost 60 people excited to celebrate such a perfect couple.

tomatoes and mozzerella

And because I am crazy love them both, I offered to bake for the event.  Of course the restaurant has dessert, but there is something about homemade desserts that make people feel happy and loved.

favor

Yes, that’s right, I baked for 60 people.  It was a lot of time, a lot of work, and a lot of butter, but it was worth it.  Seeing people’s eyes widen as I brought out plate after plate of assorted bite-sized treats was really something.

table 5

This actually gave me the confidence I needed to start thinking about my pipe dream future in the world of baking.

jess lauren

It’s not something I bring up on the blog because, well, I’ve never considered it a real option.  But why not?  People take risks and figure out a way to combine passion and work all the time.  Why should I be any different?

people 8

Up until now I was afraid.

people 11

Afraid I would fail.  Afraid that my friends have only been kind to complement my baking in the past.  Afraid that the one talent I believe I have isn’t really that special.  Afraid of turning something I love into work and then hate.  Afraid of not making enough money.  Afraid I don’t have it in me to succeed in something that is really hard.

lauren sara marcia 3

Up until now, I’ve followed a safe road.  The biggest risk I took was leaving investment banking for a finance job at a start-up company.  Ironically, my former employer crumbled a few months later.

presents 1

But the start-up has done well and I’ve been there almost four years.

desserts 4

So maybe it’s time I reach a little further.  Explore an unfamiliar world where cookies are a dime a dozen.  Where it takes something pretty special to stand out.

desserts 5

And maybe I can be that special.

desserts 2

And maybe my talent is real.

birthday cake 2

And maybe a little fear never hurt anyone.

birthday cake 9

Because that is what will push me, what will motivate me to succeed.

Healthy Muffins and a DSLR

These cute little banana corn muffins are low fat, easy to make,  and the perfect healthy breakfast treat.

Healthy Banana Corn Muffin Bites

Earlier this week I had an agenda:

1.  Start experimenting with my NEW camera (!!!)

2.  Bake something healthy enough to eat on a daily basis

3.  Use up the extremely brown bananas on my counter

Based on the above list, I decided to make Banana Corn Muffin Bites.

1.  New camera experimenting, check

2.  Low fat whole grain baked good, check*

3.  Brown bananas in muffin form, check

Healthy Banana Corn Muffin Bites

These mini muffins are moist and grainy with a wonderful sweetness from the ripe bananas.   I snacked on them alone, topped with peanut butter (obviously) and mixed into ice cream.  Matt cut his in half and topped them with jelly.

The best part?  Muffins like these are easy to make and don’t require a mixer.  Plus, mini muffins bake so quickly that it shouldn’t take you an hour from start to finish.

*Don’t worry, I’ll be back with something decadent and extra delicious shortly.

Start by combining the dry ingredients in a medium bowl and set aside

dry ingredients

In a large bowl, whisk together all remaining ingredients except for sliced banana

wet ingredients wet ingredients mixed

Whisk the dry ingredients into wet until just combined

adding dry ingredients ingredients mixed

Spoon batter into prepared mini-muffin pan; top each muffin with a slice of banana

Healthy Banana Corn Muffin Bites

Bake for 12-14 minutes or until a toothpick or knife comes out clean

Healthy Banana Corn Muffin Bites

[print_this]

Banana Corn Muffin Bites

Yield: Makes 24 mini muffins

Ingredients

  • 1 cup corn meal
  • 1 cup whole wheat flour
  • 1/4 cup granulated sugar
  • 2 teaspoons baking powder
  • 2 tablespoons cinnamon
  • 1/2 teaspoon salt
  • 1 egg, beaten
  • 1/4 cup unsweetened applesauce
  • 1 cup mashed ripe banana (~2 large bananas)
  • 3/4 cup skim milk (or any light milk of choice)
  • 1 teaspoon vanilla
  • 1/2 large banana, sliced

Cooking Directions

  1. Pre-heat oven to 400 degrees
  2. Spray a mini muffin pan with cooking spray or fill with cupcake liners
  3. Combine dry ingredients in a medium bowl and set aside
  4. Whisk all remaining ingredients, excluding sliced banana, in a large bowl
  5. Whisk dry ingredients into wet ingredients just until combined
  6. Spoon batter into prepared muffin tin
  7. Top each muffin with a slice of banana
  8. Bake for 12-14 minutes or until a toothpick or knife comes out clean

Adapted from All Recipes

 [/print_this]

[Note: I recommend serving these soon after baking because the bananas on top brown by the next day.  They are still edible but not all that pretty for company]

Healthy Banana Corn Muffin Bites

On another note, Mila at Lofty Appetite has some great tips for beginner DSLR usersWhat is the most useful photography tip you use?

Brownie Cheesecake Insanity

Let’s talk about this dessert.

Let’s talk about how many emails my mom and I exchanged regarding the details of this dessert.

Ok, let’s not, because it is a little embarrassing.  Let’s just say I started craving cheesecake around 7am every day over the course of a week or so.  No big deal.

We can’t help ourselves.  What is more fun to talk about than how you are about to gain 10 pounds your next dessert creation?

Cheesecake. Caramel. Brownie. Ganache.  Cashews. This is my life.  Sorry I’m not sorry.

After salivating over seeing this masterpiece on Sprinkle Bakes, I couldn’t stop thinking about it.  So many delicious components in one place, her recipe is genius!

But I do want my pants to fit, and trust me that isn’t easy these days.  So we brainstormed and we emailed and we emailed some more until we found our perfect balance of insane decadence and self-control.  I’m talking self-control with ingredients, not eating.  One step at a time.

What my mom ended up creating was almost perfection.  I may have to recreate it soon because I don’t have step-by-step photos or even a full photo for you.  Ok, or I just want to eat it again.

[print_this]Brownie Cheesecake Insanity

Inspired by Sprinkle Bakes

Ingredients:

1 batch of brownies baked in an 9-inch cake pan (we used No Pudge)

½ batch of Low Fat Banana Cheesecake without the crust prepared in an 9-inch cake pan

1/3 cup caramel sauce of choice

½ cup chopped cashews or cashew clusters

1 batch Chocolate Ganache & Gananche Frosting

Directions:

Remove cooled cheesecake from pan and freeze for 1-2 hours

When cheesecake is ready, remove cooled prepared brownie from pan and place on a serving plate

Drizzle caramel sauce over brownie and top with chopped cashews

Top that layer with cheesecake and put dessert in freezer

While dessert is freezing, prepare Ganache as directed.

Remove dessert from freezer and top the cheesecake with ganache; ice entire dessert with the Ganache Frosting

Store dessert in refrigerator before serving

Notes:

The Cheesecake Brownie may be easier to slice if frozen

I recommend lining your cake tins with wax paper for easy removal of brownie and cheesecake[/print_this]

Is there a dessert that you can’t stop thinking about?

Oreo Mallow Clusters

Oreo Mallow Clusters

Happy Mother’s Day to all of my mom and soon-to-be mom friends! I hope that all of you had a great weekend.  I spent a lot of time in the kitchen but also a lot of time outside.  The sunny and  warm weather makes me so happy.  Yesterday I got to take a long walk along the water with a good friend.  We caught up on life and it was wonderful.  Today we celebrated Mother’s Day by grilling and eating outside with family.  The fresh air is like free therapy.

Oreo Mallow Clusters

After the last chocolate cluster recipe I made, I knew I wanted to make another version.  They are so easy to whip up and so delicious.  Who doesn’t love homemade candy filled with delicious mix-ins?  So in the midst of a baking marathon, I made some Oreo Mallow Clusters in a matter of minutes.  They are milk chocolate clusters filled with Oreos and marshmallows (or in my case Peeps).  And you know what? Huge success.  It figures that this 10-minute recipe turned out so much better than an overly complicated dessert I also made.

Oreo Mallow Clusters

To make these, you will need some broken up Oreos

oreos

And chopped up Peeps (sorry bunnies)

peeps 2

And of course milk chocolate

milk chocolate 1

Just melt your chocolate

milk chocolate 2

Stir in the mix-ins

all ingredientsall ingredients 2

And drop clusters onto wax paper

clusters 1

Chill in the refrigerator

Recipe for Oreo Mallow Clusters

[print_this]

Oreo Mallow Clusters

Ingredients (Makes 15 clusters)

  • 12 ounces high-quality milk chocolate
  • 1 1/3 cups Oreo chunks (~8 Oreos)
  • 2 cups chopped Peeps (~8 Peeps) or marshmallows

Instructions

  • Gently melt the chocolate in 30 second increments in a microwave-safe bowl, stirring in-between
  • Once chocolate is completely melted, add Oreos and Peeps and stir until completely coated
  • Use a tablespoon to drop large clusters of the mix on a baking sheet lined with wax paper
  • Chill chocolates in the refrigerator for 30 minutes or until candy is completely firm
  • Store chocolates in a cool place for up to 7 days

[/print_this]

Recipe for Oreo Mallow Clusters

P.S. The above picture was taken with my Dad’s DSLR, what an amazing quality difference!  I am FINALLY getting one and hopefully my blog will be prettier very soon.

How was your weekend?  Is the weather getting better where you live?

Sweet & Salty White Chocolate Blondies

blondies 11

Can you believe it is May now?!  Memorial Day is only a few weeks away and summer is so close I can taste it!  This winter was pretty brutal in the Northeast and I am just now feeling like myself again.  The cold and the snow tends to put me in complete hermit mode.  Good for my baking blog, not so good for my real life.  Now I am ready for longer days, dates with friends, flip-flops and spending all of my money on frozen yogurt.  I’m also ready to plan my summer calendar and travel schedule.

blondies 27

Living in New York, I’ve found that we spend most of our summer weekends out of the city and as a result away from my kitchen.  This is pretty normal for Manhattanites.  Come to the city for the 4th of July and you should be able to get almost any dinner reservation you could imagine.  You also will sweat your way from place to place and especially waiting for a subway.  While I’m a homebody at heart, I have a definite preference for the beach or a pool during those days.

blondies 29

All of this means that most of my cooking and baking from May through the end of August takes place at night after work.  On a good day, I’ll be home by 7.  Given that I am 8626 years old and get into bed before 10pm, that means only three real hours of kitchen time.  I’ve gotten pretty good at coming up with quick dinners for these nights (when in doubt, make eggs), but baking in that time span as well can be a bit more challenging.  Baking is like therapy for me, not something I like to rush.  This means planning ahead, making desserts that aren’t overly complicated, and making desserts that don’t require an insane amount of oven time (air conditioning isn’t NYC’s best quality).  Think cookies, brownies, and ice cream desserts.

These Sweet and Salty White Chocolate Blondies are the perfect dessert for baking under a time constraint. They are pretty easy to make and take only 30 minutes to bake.  Plus, they are easy to wrap up and bring to a summer barbeque or gathering.  The texture has a wonderful chew to it and there is a lovely sweetness and caramel-like flavor from the white chocolate melted in the batter.  Some chocolate chips and pretzel pieces add crunch and my favorite salty sweet taste combo.

Start by melting butter and some of your white chocolate chips over low-medium heat

white chocolate and butter 1

Stir occasionally; Don’t worry if your butter and chocolate separate, you can fold them together to combine

white chocolate and butter 2

Once completely melted, set white chocolate mixture aside

white chocolate and butter 3

Whisk together flour, baking powder and salt; set aside

dry ingredients

In a large bowl, beat together sugars, eggs and vanilla until well-combined

sugar and eggs sugar and eggs 2

Reduce speed of mixer to medium and add white chocolate mixture

white chocolate added

Stir in the dry ingredients until well-combined

add dry ingredients

Stir in white and semi-sweet chocolate chips and pretzels

add chocolates and pretzlebatter mixed

Pour batter into pan lined with wax paper and greased

batter in pan 1 batter in pan 2

Bake for 25-30 minutes or until golden brown and a knife comes out clean; allow to cool before slicing

baked 1


[print_this]

Sweet & Salty White Chocolate Blondies

Yield: Serves 24-36 depending on size

Ingredients

  • 6 ounces white chocolate (any form, to melt)
  • 1/2 cup (1 stick) unsalted butter
  • 1 1/4 cup all-purpose flour
  • 3/4 teaspoon baking powder
  • 1/4 teaspoon salt
  • 1 cup granulated sugar
  • 1 cup packed light brown sugar
  • 4 large eggs
  • 1 tablespoon vanilla extract
  • 1 cup salted pretzel pieces
  • 1/2 cup milk chocolate chips
  • 1/4 cup white chocolate chips (for mix-in)

Cooking Directions

  1. Pre-heat oven to 350 degrees
  2. Line a 9×13 pan with wax paper and grease; set aside
  3. Melting butter and white chocolate over low-medium heat
  4. Stir occasionally; don’t worry if your butter and chocolate separate, you can fold them together to combine
  5. Once completely melted, set white chocolate mixture aside
  6. Whisk together flour, baking powder and salt; set aside
  7. In a large bowl, beat together sugars, eggs and vanilla until well-combined
  8. Reduce mixer speed to medium and add melted white chocolate mixture
  9. Stir in the dry ingredients until well-combined
  10. Stir in white and semi-sweet chocolate chips and pretzels
  11. Pour batter into prepared baking pan
  12. Bake for 25-30 minutes or until golden brown and a knife comes out clean; allow to cool before slicing

[/print_this]

blondies 30

Are you taking any weekend trips this summer?

Making Your Mother’s Day

Mother’s Day is only one week away!  Our day will revolve around food family.  I’m heading home to see my Parents and some of my mom’s family for a casual lunch at my house near Philly.  There may be some grilling, but more importantly there will be lots of dessert.  For those of you spending time with loved one’s here are 75 recipes that might help make your day:

Brunch:

Asparagus Tart by Young Married Chic

Baked Vanilla Donuts by Fake Ginger

Bananas Fosters Topped Overnight French Toast by Gina’s Skinny Recipes

Blueberry Blintz Bake

Blueberry Buckwheat Pancakes by All Day I Dream About Food

Blueberry Ricotta Pancakes with Chunky Blueberry Sauce by Liv Life

Chocolate Chip Muffins by Two Peas and Their Pod

Chocolate Peanut Butter Banana Muffins by Healthy Food for Living

Cinnamon Apple Chunk Scuffins

Cinnamon Bubble Buns by Sprinkled with Flour

Cinnamon Roll Waffles by Recipe Girl

Fruity Baked Oatmeal with Crunchy Cinnamon Almond Topping by Oh She Glows

Funfetti Waffles by Lauren’s Kitchen

Homemade Muffin Tops by Keep it Simple Foods

Jelly Donuts by We Are Not Martha

Lemon Blueberry Granola by Chocolate and Carrots

Mango-Lime Muffins by Wilde in the Kitchen

Multigrain Pancakes with Vanilla and Cinnamon by Three Many Cooks

Strawberry Crumb Cake by Gingerbread Bagels

Strawberry-Stuffed French Toast by The Girl Who Ate Everything

The Sunday Morning Sammie by Crepes of Wrath

Lunch or Dinner:

Asparagus Mozzarella Tart from Delightful Bitefuls

Baked Lemon Spaghetti by Recipe Girl

Braised Short Ribs in a Spicy Tomato Sauce by Foodies @ Home

Buffalo Chicken Calzones by Baked by Rachel

Chicken Pot Pie with Cream Cheese and Chive Biscuits by Joy the Baker

Cornbread BLTs and Creamy Blue Cheese by Can You Stay for Dinner?

Crispy Potato Roast by Smitten Kitchen

Crispy Shrimp Pizza by How Sweet It Is

Greek Pasta Bake by Weekly Bite

Homemade Ginger Pasta with Sweet Potato-Wasabi Sauce by Eats Well With Others

Individual Cheese Souffles by A Thought for Food

Lasagna Cups by Lauren’s Latest

Lasgana Fritta by Pass the Sushi

Leek & Asparagus Soup by RhodeyGirl Tests

Low-Fat Blue Cheese Salad Dressing & Dip by The Yummy Life

Parmesan Crusted Goat Cheese with basil Oil by Annie’s Eats

Shaved Asparagus Salad by How Sweet It Is

Slow Cooker Sweet & Sour Beans by 52 Kitchen Adventures

Southwest Ground Beef Casserole by Amanda’s Cookin’

Spinach Pesto Penne by The Novice Chef

Strawberry and Leek Quesadillas by Sprouted Kitchen

Vegetarian Chili with a Cashew Pistachio Sauce by Eats Well With Others

Dessert:

Banana Cake with Mocha Ganache

Birthday Cake Cheesecake by Willow Bird Baking

Black Bottom Ice Cream Cupcakes

Blueberry Pretzel Clusters

Butterfinger Blondies by Sweet Pea’s Kitchen

Cereal Layer Bars by Espresso and Cream

Chocolate Chip Cookie Bark by Cookies and Cups

Chocolate Chip Cookie Dough Rice Krispie Treats by Culinary Concoctions by Peabody

Chocolate Lover’s Bites

Cinnamon Roll Cheesecake by Baking Junkie

Cinnamon Roll Cookies

Creamy Peanut Butter Chocolate Chip Tart by Picky Palate

Gluten-Free Strawberry Cupcakes by Joy the Baker

Ice Cream Brownie

Lemon Blackberry Cheesecake Squares

Lemonade Cake with Lemon Cream Cheese Frosting by Cookies and Cups

Lighter Lemon Pound Cake

Low Fat Banana Cheesecake with Mixed Berry Sauce

Mascarpone Meringue Cake by Sweetapolita

Peanut Butter Cup Chocolate Cake Cheesecake by Sprinkle Bakes

Ooey Gooey Filled Chocolate Chip Cookies with a Crunch

Raspberry and Lemon Torta by Cake Duchess

Rice Krispie Treat Pops by Espresso and Cream

S’mores Cupcakes by Dessert for Two

Strawberry and Cream Cake by La Mia Vita Dolce

Strawberry Pistachio Tart by Val So Cal

White Chocolate Lemon Truffles by What Megan’s Making

Cocktail Time:

Blood Orange Margaritas by Confections of a Foodie Bride

Cucumber Mint Cocktail by Leslie Sarna

Fresh Strawberry Mojito by The Culinary Chronicles

Ginger Lemon Martini by All Day I Dream About Food

Royal Champagne Cocktail by Young Married Chic

I think that Mother’s Day is a great day to show appreciation for your mother, grandmother, or even yourself if you are a mom! I’m lucky to have a mom who is also my best friend and a mother-in-law who has welcomed me into her life like a daughter. How are you spending the day?

*If you haven’t already seen it, check out my guest post on The Healthy Apron.*

Flourless Chocolate Cookies

Easy Flourless Chocolate Cookies

You know I can’t go anywhere with only one dessert.  That just isn’t my style.

So, once I made cheesecake with berry sauce for Jessica’s Passover dinner, I had to make something else.  Originally I planned to make Passover brownies.  They weren’t a ton of work, but the idea of separating eggs and whipping them separately just wasn’t in the cards that day. I wanted something easy.

Easy Flourless Chocolate Cookies

I went through my gmail recipe folders to see what else I could make.  As soon as I found this recipe I knew it was the one.  A few months ago, I made these Flourless Chocolate Cookies with my mom and my family ate most of them that day.  There isn’t any butter, so they are healthy, right?

Easy Flourless Chocolate Cookies

These cookies are easy to make and are really delicious.  The inside is chewy and fudgey, but the outside is light and crisp like a meringue.

Easy Flourless Chocolate Cookies

Start with some good quality cocoa powder, confectioners’ sugar and salt

Easy Flourless Chocolate Cookies

Whisk these dry ingredients together

Easy Flourless Chocolate Cookies

Add in 2 egg whites

Easy Flourless Chocolate Cookies

Whisk the egg whites into the dry ingredients; if the batter does not get thick and glossy like below, add one or two more egg whites as needed

Easy Flourless Chocolate Cookies

Stir in semi-sweet chocolate chips

Easy Flourless Chocolate Cookies

Bake the cookies on parchment paper until the top of the cookie is glossy and the outside forms cracks

Easy Flourless Chocolate Cookies

Recipe from Recipe Girl

Happy almost weekend! What are your plans?

Mixed Berry Sauce

berry sauce 3

I’ve been wanting to make a variation of this sauce for a while now:  something that would take a scoop of vanilla ice cream to the next level (because let’s face it, vanilla will never be chocolate), add texture and flavor to a slice of basic angel food cake, or be so pretty you want to put it on top of everything.

berry sauce 2

This Mixed Berry Sauce is made with blackberries, raspberries and blueberries.  It has a wonderful balance of sweet and tart as well as a lovely texture from the slightly decomposed berries.  Last weekend I served the sauce alongside my banana cheesecake and it was a huge hit.

slice of cheesecake 8a


It was so easy to make that I will definitely make it again.  Whip it up and take it with you to a barbeque  to serve with store-bought pound cake (I won’t tell) and vanilla ice cream.  Make it Saturday morning and pour it over fluffy pancakes or even greek yogurt.

berry sauce 4

Start by combining mixed berries, sugar and lemon juice on medium heat over the stove

berries with sugar and lemon juice

Stir occasionally and break down some of the larger berries with a spoon

cooking sauce 2

Continue until all berries are slightly soft and a juice begins to form

cooking sauce 4

Add cornstarch and stir in quickly

cooking sauce 5

Turn the heat up to high and stir constantly until sauce reaches desired thickness

cooking sauce 6

5.0 from 2 reviews
Mixed Berry Sauce
 
Easy Mixed Berry Sauce made with blackberries, raspberries and blueberries.
Author:
Recipe type: Dessert
Makes: ~2 cups of sauce
Ingredients
  • 2 cups mixed berries (frozen or fresh)
  • ⅓ cup granulated sugar
  • 1 tablespoon lemon juice (or up to half a lemon to taste)
  • 1 tablespoon cornstarch
Instructions
  1. Start by combining berries, sugar and lemon juice on medium heat over the stove
  2. Stir occasionally and break down some of the larger berries with a spoon
  3. Continue until all berries are slightly soft and a juice begins to form
  4. Add cornstarch and stir in quickly
  5. Turn the heat up to high and stir constantly until sauce reaches desired thickness
  6. Store in refrigerator up to 1 week
Notes
Adapted from Serndipity Sundaes

berry sauce 12

What would you do with this sauce? Drinking it IS an option;-)

Make something from the blog? Be sure to share it on Instagram with the tag #KeepItSweetDesserts.

You might also like:

No-Bake Blueberry Pie

No-Bake Blueberry Pie

Summer Berry Skillet Crisp

Summer Berry Skillet Crisp

Speculoos Sundaes with Warm Blueberry Sauce

Speculoos Sundaes with Warm Blueberry Sauce

Light-as-Air Banana Cheesecake

Light-as-Air Banana Cheesecake (low fat and gluten-free)

When I saw these sitting on my counter the yesterday, I knew something needed to be done.

P1040544

You know how I feel about wasting precious ingredients.

Light-as-Air Banana Cheesecake (low fat and gluten-free)

Since I had plans last night to go to a Passover dinner at my sister’s, I wanted to make something that would be kosher-friendly.  Then I realized cheesecake is almost entirely flour-free.  The only real issue is the typical cookie crust.

Light-as-Air Banana Cheesecake (low fat and gluten-free)

My mom made a non-fat banana cheesecake a few years ago that was really delicious.  I remember being so impressed by the creaminess despite using fat-free cream cheese.  This time around, I used light cream cheese for half to prevent the cheesecake from being too dense.

Light-as-Air Banana Cheesecake (low fat and gluten-free)

Instead of using graham crackers, I made an almond crust.  So not only is this cheesecake Passover friendly, but it is also gluten-free.

Start by making your crust; grind almonds in a food processor until nuts are in very small pieces with some crumbs

almonds in food processor 1

almonds in food processor 2

Mix almonds with granulated sugar and then add melted butter

almonds and sugar add butter to crust ingredients

When crust ingredients are combined, press them down in a spring-form pan sprayed with cooking spray and wrapped tightly with tin foil

making crust 1 making crust 2

Bake crust for ~7 minutes or until nuts are lightly browned

making crust 3

While crust is cooling, make cheesecake batter; beat cream cheese at high speed with the mixer whisk attachment for several minutes or until it is light and creamy

cream cheese 1 cream cheese 2

Add non-fat greek yogurt and mix well

greek yogurt

Mix in the banana, sugar and vanilla at medium-high speed

mashed bananas banana sugar vanilla mixed in

Then, add your eggs, one at a time, mixing at medium speed

add eggs

When batter is creamy and all ingredients are combined, pour into prepared pan; place uncooked cheesecake in a roasting pan and fill the pan with water to ~1/3 the height of the cheesecake

cheesecake batter ready to bake 2

Bake in center of oven for about 1 hour and 20 minutes or until top is firm

done 1

Chill cheesecake in refrigerator for 12 hours or until set; when ready to serve, carefully use a knife to skim the edge of the cheesecake and separate from the pan

Light-as-Air Banana Cheesecake (low fat and gluten-free)[print_this]

Almond Crust

Ingredients

  • 3/4 cup whole almonds (if using unsalted, add a dash of salt to crust ingredients)
  • 2 tablespoons granulated sugar
  • 2 tablespoons unsalted butter, melted

Cooking Directions

  1. Pre-heat oven to 350 degrees
  2. Grind almonds in a food processor until nuts are in very small pieces with some fine crumbs
  3. Mix almonds with granulated sugar and salt (if needed); stir in melted butter
  4. When crust ingredients are combined, press them down in a 9-inch spring-form pan sprayed with cooking spray and wrapped tightly with tin foil
  5. Bake crust for ~7 minutes or until nuts are lightly browned

Low Fat Banana Cheesecake

Ingredients

  • 2 8-ounce blocks fat free cream cheese, softened at room temperature
  • 2 8-ounce blocks light cream cheese, softened at room temperature
  • 1 cup fat free greek yogurt, plain
  • 1 1/2 cups sugar
  • 1 1/2 cups mashed ripe bananas (~3 medium)
  • 2 teaspoons vanilla extract
  • 4 large eggs

Cooking Directions

  1. Reduce oven temperature to 325 degrees once crust is finished baking
  2. While crust is cooling, make cheesecake batter; beat cream cheese at high speed with the mixer whisk attachment for several minutes or until it is light and creamy
  3. Add non-fat greek yogurt and mix well
  4. Mix in the banana, sugar and vanilla at medium-high speed
  5. Then, add your eggs, one at a time, mixing at medium speed
  6. When batter is creamy and all ingredients are combined, pour into prepared pan; place uncooked cheesecake in a roasting pan and fill the pan with water to ~1/3 the height of the cheesecake
  7. Bake in center of oven for about 1 hour and 20 minutes or until top is firm
  8. Chill cheesecake in refrigerator for 12 hours or until set; when ready to serve, carefully use a knife to skim the edge of the cheesecake and separate from the pan
  9. Serve topped with mixed berry sauce (recipe coming) or fresh whipped cream

[/print_this]

Adapted from Cooking Light

Light-as-Air Banana Cheesecake (low fat and gluten-free)

What is your favorite light dessert?

Blueberry Peanut Butter

blueberry peanut butter 7

Recently I discovered my love for blueberries and peanut butter.  Really, I love anything with peanut butter, especially chocolate, but the combination of blueberries and peanut butter is taking a new place in my heart.

One of my favorite snacks is a cup of fresh juicy blueberries topped with a spoonful of peanut butter.  Sometimes I warm it up so the blueberries burst and the peanut butter melts all over them.  Think it sounds weird? Try it.  The other thing I like to do is top toast with peanut butter and blueberries.  This is so much better than peanut butter and jelly!

Unfortunately, until summer starts, it is hard to find good fresh blueberries that don’t cost a gazillion dollars.  To satisfy my cravings, I made a batch of Blueberry Peanut Butter.

This peanut butter is healthy but creamy and delicious with a wonderful blueberry flavor.  You could put it on a sandwich but I have to admit I’ve been eating it by the spoonful straight out of the jar.

Making your own peanut butter could not be easier.  All you have to do is run the ingredients through a food processor.ingredients 1

mix peanut butter 1

[print_this]

Blueberry Peanut Butter

Yield: Makes 1 1/3 cup peanut butter or ~21 tablespoons

Ingredients

  • 2 cups honey roasted peanuts
  • 2/3 cup dried blueberries (unsweetened)
  • 2 tablespoons chia seeds
  • 2 teaspoons cinnamon
  • 2 teaspoons vanilla extract
  • up to 1/2 teaspoon salt

Cooking Directions

  1. Combine all ingredients in a food processor for about 5 minutes; scrape the sides every minute or two, until mixture is smooth and creamy
  2. Taste and add salt if needed; run food processor for another 30 seconds
  3. Store in a leftover nut butter jar or tupperware container at room temperature for up to a month

[/print_this]

blueberry peanut butter 16

What do you like to combine with peanut butter?

3 Reasons to Make Truffles

Chocolate Truffles - 3 ways!  a rich chocolate treat that happens to be gluten-free

I had a huge problem on Saturday.

Chocolate Truffles - 3 ways!  a rich chocolate treat that happens to be gluten-free

There was almost an entire pint of organic heavy whipping cream in my fridge and it was about to expire.

chopped white chocolate 1

The horror!

Chocolate Truffles - 3 ways!  a rich chocolate treat that happens to be gluten-free

But I prevailed.  I went through cookbooks and blogs searching for the perfect recipe to experiment with.  Whipped cream, ganache, caramel… for some reason I just wasn’t moved.

chopped chocolate 1

But then I saw some truffles and realized a few things:

1) Truffles might be one of the easiest desserts to make

2) Truffles are fun to make

3) Truffles are kosher for Passover!!!!!

Chocolate, cream and butter.  No flour, no baking powder, nothing like that.  I actually see truffles as an un-Passover Passover dessert.

chopped chocolate 3

I’ve experimented in the past with ingredients like potato flour and matzo meal, but those desserts often have an “off” flavor.  The problem with trying to replicate a normal dessert and make it work for the holiday is that it will never come close.  Desserts that are kosher to begin with, those are the ones to go with.  Flourless chocolate cake- yes.  Kosher-for-Passover chocolate chip cookies- not so much.

chopped white chocolate 2

Granted, some of the toppings I used aren’t actually acceptable for those who follow Passover strictly (for example, peanuts aren’t kosher for Passover), but they can easily be modified to be so.

Start by putting your heavy whipping cream in a small saucepan over low-medium heat

cream 1

Bring the cream to a light boil and add chocolate

boiling cream

melting chocolate 1

Remove  saucepan from heat and whisk in chocolate until completely melted

melting chocolate 2

When well-combined, whisk in butter until smooth

add butter

Then, chill mixture in refrigerator for two hours or until it is firm

ganache done

Use a small teaspoon or small ice cream scoop to form small ball-shaped truffles approximately the size of thumb-tip

toppings2

Dip each truffle into topping of choice

making truffles 2

Store finished truffles in refrigerator for up to a week

Chocolate Truffles - 3 ways!  a rich chocolate treat that happens to be gluten-free

Chocolate Truffles - 3 ways!  a rich chocolate treat that happens to be gluten-free Chocolate Truffles - 3 ways!  a rich chocolate treat that happens to be gluten-free

Chocolate Truffles
Yield: Makes ~20 truffles

Ingredients
1/3 cup heavy whipping cream
5 ounces chopped chocolate, any type*
2 ounces unsalted butter, softened at room temperature*
1/2 cup topping of choice

Cooking Directions
Start by putting your heavy whipping cream in a small saucepan over low-medium heat
Bring the cream to a light boil and add chocolate
Remove saucepan from heat and whisk in chocolate until completely melted
When well-combined, whisk in butter until smooth
Then, chill mixture in refrigerator for two hours or until it is firm
Once firm, use a small teaspoon or small ice cream scoop to form small ball-shaped truffles (approximately the size of thumb-tip)
Dip each truffle into topping of choice
Store finished truffles in refrigerator for up to a week

Notes:
Source: Lindt Chocolate Passion Recipe Book
*When using white chocolate, do not add butter
My flavor/topping combinations were dark chocolate + chopped peanuts, milk chocolate + unsweetened cocoa powder, and white chocolate + non pereils

Chocolate Truffles - 3 ways!  a rich chocolate treat that happens to be gluten-free

What would you use to coat your truffles?

Chocolate Chip Toffee Oatmeal Cookies with Peanut Butter Frosting

Chocolate Chip Toffee Oatmeal Cookies with Peanut Butter Frosting

Yes, I’m still making cookies.  I just can’t help myself, though!  And believe me, you should be happy about this.

A few months ago I made some oatmeal cookies with toffee and chocolate that were delicious.  The cookie wasn’t exciting enough, though so I stepped them up.

This time I made Chocolate Chip Toffee Oatmeal Cookie Sandwiches with Peanut Butter Frosting.  Chocolate. Toffee. Peanut Butter. Love it.

Chocolate Chip Toffee Oatmeal Cookies with Peanut Butter Frosting

These mini cookie sandwiches are perfect for a plate sampler.  If your name was Matt, I’d say these were 2-bite cookies.  For the rest of us, however, it is more like 3 or 4 bites.

The cookies are soft and chewy and the peanut butter frosting is sweet, salty, and thick.  It is the perfect consistency for holding the the sandwiches together.

Each component is easy to make, it is just a matter of taking the time for both recipes as well as making them into sandwiches.  Matt actually helped with that part so it didn’t take long at all.  Peanut butter recipes are the best ones for my husband to help with since I won’t have to worry about him eating most of the work!

Chocolate Chip Toffee Oatmeal Cookies with Peanut Butter Frosting

I recommend making your cookies the day before the frosting so that you can freeze them before icing them.  Otherwise, the soft cookies can be a little too fragile and might break during the sandwich making.  I didn’t include cookie-making photos, but for sizing the dough balls refer to this post

Beat butter and peanut butter on high until creamy

peanut butter and butter 1 peanut butter and butter 2

Reduce speed to low and gradually add in Half & Half and then vanilla

pour half and half

Gradually add sugar until completely combined

add sugar peanut butter frosting

When frosting is done, gently spread on bottom half of cookie and cover with another cookie to make sandwich

spread peanut butter

[print_this]

Chocolate Chip Toffee Oatmeal Cookies

Yield: Makes 120 mini cookies or 60 cookie sandwiches

Ingredients

  • 1/2 lb (2 sticks) unsalted butter, softened
  • 1 cup firmly packed brown sugar
  • 1/2 cup granulated sugar
  • 2 eggs
  • 1 teaspoon vanilla
  • 1 1/2 cup all purpose flour
  • 1 teaspoon baking soda
  • 1 teaspoon cinnamon
  • pinch salt
  • 3 cups quick or old-fashioned dry oatmeal
  • 1 cup milk chocolate chips
  • 3/4 cup toffee bits

Cooking Directions

  1. Whisk together flour, cinnamon, and baking soda; set aside
  2. Beat butter and sugars in an electric mixer on high until light and fluffy
  3. Mix in eggs and vanilla
  4. Reduce speed to low and gradually add the flour mixture
  5. Once combined, stir in the oatmeal; then stir in chips and toffee bits
  6. Chill dough in refrigerator for 2 hours (or up to 24 hours)
  7. Pre-heat oven to 350 degrees
  8. Place dough balls of about ½ tablespoon 1 inch apart from one another on a baking sheet lined with parchment paper
  9. Bake 9-10 minutes or until cookies are golden brown

Peanut Butter Frosting

Yield: Makes ~3 cups of frosting

Ingredients

  • 1 cup smooth salted peanut butter (I used natural)
  • ¼ cup (4 tablespoons) unsalted butter, softened
  • 10 tablespoons Half & Half (can substitute cream) (plus more as needed)
  • 1 teaspoon vanilla
  • 3 ½ cups confectioners’ sugar (plus more as needed)

Cooking Directions

  1. Beat butter and peanut butter on high until creamy
  2. Reduce speed to low and gradually add in Half & Half
  3. Mix in vanilla
  4. Gradually add sugar until completely combined

To make the sandwiches:


Spread a layer of frosting onto the bottom of a cookie

Top with a second cookie and lightly press down

Repeat until all of your cookie sandwiches are complete

Notes:

Cookie recipe adapted from here this recipe, originally adapted from Quaker

Frosting recipe adapted from Cooks.com

I recommend making your cookies the day before the frosting so that you can freeze them before icing; this will keep them from breaking while putting sandwiches together

If frosting is too thick, add half & half, 1 tablespoon at a time until frosting reaches desired consistency

If frosting is not thick enough, add confectioners’ sugar, ¼ cup at a time until frosting reaches desired consistency

[/print_this]

Chocolate Chip Toffee Oatmeal Cookies with Peanut Butter Frosting

Are you sick of my cookie baking? What would you like to see more of on the blog?

Party Time

It feels like we were just celebrating my brother-in-law’s engagement!  Well, almost five month’s later and it was time for Sara’s bachelorette party!

Bachelorette Party 1

Saturday night, all of the bridesmaids and the bride got together to go out and celebrate.  We started at an apartment with food, drinks and fun games.  Then we headed downtown to Stanton Social for dinner.  From the website: “This modern New York bistro serves multi-ethnic share plates designed to offer guests a chance to experience multiple dishes and flavors throughout their meal.” The atmosphere is young, loud, and trendy, perfect for our occasion.

I started out with a fun drink which is very unlike me.  Normally I stick with a boring vodka soda or glass of wine (I’m not a fan of anything too sweet), but when I saw this on the menu I couldn’t resist:  “Strawberry Fields- Grey Goose Citron, muddled fresh strawberries, lemon syrup, fresh lemon & a Riesling floater”

Bachelorette Party 8

I ordered the drink minus the lemon syrup. It was perfect with a great sour bite and just a hint of sweetness from the strawberries.  Plus, I couldn’t taste the vodka so I easily made my way through two of them;-)

The menu has a huge selection that could be overwhelming, but we were able to get a fixed menu for the party in advance.

P1040196

To start us off they brought us Herb dusted Frites and Wok charred Edamame with a spicy miso glaze to munch on throughout the meal

The fries were good- nice and crispy on the outside.


fries

The edamame were just okay, I didn’t love the glaze on the outside. It was a little too thick and sweet in my opinion.

edamame

For our first “course”, we got Nori Spiced Tuna Tartare Roll and the Grilled Ovendried Tomato Pizzetta- fresh mozzarella & grana, roasted garlic & chile oil

I don’t eat tuna so I didn’t have any, but I think everyone else enjoyed these rolls.

tuna tar tar rolls

The pizza was okay, not bad but not memorable at all.

pizza

More importantly, with that course we had these French Onion Soup Dumplings

french onion soup wontons 2

The dumplings were my favorite savory dish! They were amazing, French onion soup on the inside, loaded with delicious caramelized onions, and lovely melted cheese on top.  I had to go for seconds!

french onion soup wontons 3

Next was the Baby Spinach Salad with roasted corn, smoked goat cheese & spiced cashews

The salad was a good way to get some veggies into this meal.  The smoked goat cheese had half of us convinced there was bacon in the salad.  I really liked the different textures from all of the toppings and was happy to find that it wasn’t overdressed.

salad

For our final savory dishes, we got Rhode Island Style Lobster Rolls, Kobe Beef Burger Sliders, and Wasabi Pea Crusted Salmon with asian pesto & soba noodle-beet salad

lobster rolls 2

I loved the presentation of the lobster rolls.  They were loaded with lobster meat which was great, but they were also covered in a bit more mayo than I’d like.  It didn’t stop me from eating all of the filling, though.

lobster rolls 1

I was really excited about the burgers because I have had the biggest burger craving for weeks now!  Unfortunately, these left something to be desired.  I found the meat unevenly cooked and less juicy than they appear in the picture.

sliders

This burger would not be Matt-approved!

sliders 2

I was much too stuffed to try the salmon, but the other girls enjoyed it.  It definitely looked cool.

wasabi salmon

Finally, as stuffed as I was, I couldn’t miss out on tasting dessert.

These were warm donuts (actually, they came out super hot) served with three dipping sauces: chocolate, raspberry and caramel.  The chocolate sauce was good but not mind-blowing.  If you like raspberry flavored sweets, then you’d love that sauce.  I was disappointed in the caramel because I didn’t think it had much flavor.  The donuts themselves were good and perfect for donut lovers.

donuts 2

While the warm donuts didn’t leave me in awe, I did become mildly obsessed with these cookies.  The menu labeled them “Jaime’s Cookies”  and I don’t know why, but it doesn’t matter.

cookies 1

The cookies came out warm and melted in your mouth.  I actually have no idea what was in them, I just remember comparing them to a warm flourless chocolate cake.

cookies 3

Overall, I’d give Stanton Social a B.  The atmosphere was fun, they played good music, and had fantastic drinks.  The food is served in a creative way but some dishes missed the mark.

Even if the food at dinner wasn’t perfect, it didn’t matter.  Everyone seemed happy to be out for the party in a big group of girls.  Afterwards, we spent the rest of the night dancing at Rivington Hotel, just a couple of blocks away.  It was a ton of fun and I think the bride enjoyed her night!

Bachelorette Party 13

Have you been to any fun bachelorette parties lately?

Blueberry Pretzel Clusters

There is a place at the Jersey Shore (not that Jersey Shore) that sells the most amazing chocolates.  Every summer I look forward to a few trips for chocolate clusters filled with high quality fillings like caramel, nuts and marshmallows.  On a good day, my grandfather will leave a box of them out in the kitchen with a knife.  (Calories don’t count when you cut off a little piece each time you walk by)  Without a doubt, by the end of the day, the box would be empty.

Blueberry Pretzel Clusters

Jagielky’s has an incredible variety of chocolates with unique items like Double Dip Mints, essentially peppermint patties dipped in ANOTHER layer of chocolate – milk on dark or dark on milk.  A couple of summers ago they started selling chocolate covered blueberries.  These were large clusters of blueberries coated with a wonderful rich dark chocolate.  It is heaven biting into the creamy dark chocolate and then having a huge blueberry burst in your mouth.  Unfortunately, the chocolate covered blueberries are so popular that they are often sold out by the afternoon.

Blueberry Pretzel Clusters

A few times I considered making my own but didn’t get around to it until now.  And rather than stick with just the basic chocolate and blueberry mix, I added pretzel pieces to mine.  These Blueberry Pretzel Clusters have a wonderful balance of sweet and salty flavors in addition to the contrast in textures from the crunchy pretzels, the juicy berries and the creamy chocolate.  With the right dark chocolate, you can create a rich high quality candy.

Blueberry Pretzel Clusters

Put these clusters out for your friends but make a secret stash for yourself because you will crave them once they disappear.  Just be sure to refrigerate the chocolates so that the berries don’t spoil.

Start with some of your favorite dark chocolate in a microwave-safe bowl (I used Trader Joe’s 72%)

dark chocolate

Gently melt the chocolate in 30 second increments, stirring in-between; once chocolate is completely melted, add blueberries and pretzel pieces

add blueberries and pretzels

Stir to coat berries and pretzels completely

blueberries and pretzels mixed in 1

Use a tablespoon to drop large clusters of the mix on a baking sheet lined with wax paper

Blueberry Pretzel Clusters

Chill chocolates in the refrigerator for 30 minutes or until candy is completely firm

Blueberry Pretzel Clusters

[print_this]

Blueberry Pretzel Clusters

Makes 14 clusters

Ingredients:

  • 9 ounces high-quality dark chocolate
  • 3/4 cup salted pretzel pieces
  • 1 1/4 cup fresh blueberries, rinsed and dried

Instructions

  • Gently melt the chocolate in 30 second increments in a microwave-safe bowl, stirring in-between
  • Once chocolate is completely melted, add blueberries and pretzel pieces and stir until completely coated
  • Use a tablespoon to drop large clusters of the mix on a baking sheet lined with wax paper
  • Chill chocolates in the refrigerator for 30 minutes or until candy is completely firm

Notes:
Store chocolates in refrigerator for up to 3 days[/print_this]

Blueberry Pretzel Clusters

What is your favorite chocolate candy?

Spiked Cookies and a Winner

Last weekend I had lots of plans for vegetables.

cookies 26

Vegetables and chocolate cake (random, I know).

But then I got caught up on Recipe Girl’s collection of chocolate chip recipes.

And got busy with the Brown Eyed Baker’s Salted Double Chocolate Peanut Butter Cookies.

Oh yes, and I went a little crazy with Peeps.

So vegetables took a backseat, chocolate cake didn’t seem as exciting, and cookies became the new black.

And then I decided to make a third variation of cookies for the weekend.

Thank you, Recipe Girl for inspiration.  I adapted her cookie recipe for my own version of Spiked Mocha Chip Cookies.

coffee liqueur

These cookies are light but chewy and have a strong mocha flavor with a hint of liqueur in the background.  They were very easy to make and I can see making them for a party to add something unique to the cookie platters.

To make the cookies, whisk together dry ingredients and set asidedry inigredients 1 dry inigredients 2

Combine butter and sugars in a mixer on high speed until light and fluffybutter and sugar 1 butter and sugar 2

Add eggs, vanilla and coffee liqueur and mix until well-combinedadding egg, vanilla liqueur batter before dry ingred

Stir in dry ingredients

add dry ingredients

Stir in chocolate chips and then chill dough in refrigerator for two hours

cookie batter

Meanwhile, pre-heat oven to 350 degrees

Place dough on baking sheets lined with parchment paper with a cookie dough scoop or by the tablespoon

Bake for 9-11 minutes or until cookies are lightly firm to the touch

cookies 21

[print_this]

Spiked Mocha Chip Cookies

Adapted from Recipe Girl

Yield: ~4 dozen cookies

Ingredients

  • 2 1/3 cup all-purpose flour
  • 3 tablespoons unsweetened cocoa powder
  • 1 teaspoon baking powder
  • 1/2 teaspoon salt
  • 1 cup (2 sticks) unsalted butter, softened
  • 3/4 cup light brown sugar, tightly packed
  • 3/4 cup granulated sugar
  • 2 eggs
  • 1 teaspoon vanilla extract
  • 3 tablespoons coffee liqueur
  • 2 cups semi-sweet chocolate chips

Cooking Directions

  1. Whisk together dry ingredients and set aside
  2. Combine butter and sugars in a mixer on high speed until light and fluffy
  3. Add eggs, vanilla and coffee liqueur and mix until well-combined
  4. Stir in dry ingredients
  5. Stir in chocolate chips
  6. Chill dough in refrigerator for two hours
  7. Meanwhile, pre-heat oven to 350 degrees
  8. Place dough on baking sheets lined with parchment paper with a cookie dough scoop or by the tablespoon
  9. Bake for 9-11 minutes or until cookies are lightly firm to the touch

[/print_this]

cookies 23

*Congratulations to Katie (comment 6) who said “I am a fan on Facebook!” for winning the Hot Blondies giveaway! Look for an email from me with details.*

Did you ever get caught up in an accidental cookie baking marathon?

Ooey Gooey Filled Chocolate Chip Cookies with a Crunch

You know I have a weakness for holiday candy.

peeps

These weren’t even on sale but I had to buy them.  My sister pointed out how pretty the color was and I agreed.  Plus, when was the last time I had a Peep? Trust me, it’s been too long.  Never mind the fact that I don’t celebrate Easter.  Details.  Candy is candy and when it comes in pretty colors it doesn’t matter what religion you are.

making cookie 8

So after picking up a few packages of Peeps, I realized I didn’t actually want to eat them.  I wanted to take advantage of the innocent marshmallow candies and use them in something so gooey and delicious you would forget that you were deprived of baskets full of chocolates, jelly beans and stuffed animals every spring as a child.

Ooey Gooey Filled Chocolate Chip Cookies with a Crunch

But I digress.  After buying these lovely little Peeps, I decided I wanted to put them inside of a cookie.  Jenny has already showed us that there are no limits when it comes to stuffing cookies, so why not?  And what would go well with warm chocolate chip cookies filled with gooey melty marshmallows?  A crunchy salty pretzel of course.  That is how I came up with these Ooey Gooey Filled Chocolate Chip Cookies with a Crunch.

Ooey Gooey Filled Chocolate Chip Cookies with a Crunch

I was so excited about this cookie idea that I didn’t even bother to make my own cookie dough.  There is a time and a place for Nestle pre-made cookie dough and this is one of those times.  Using the pre-made dough makes these so easy that within 25 minutes you will find yourself licking melted chocolate and sticky melted Peeps off of your fingers.  When was the last time you ate a chocolate chip cookie fresh out of the oven?  If you can’t remember, do it now.  And stuff it with a Peep and a pretzel.

Ooey Gooey Filled Chocolate Chip Cookies with a Crunch

To make these cookies, start with a layer of cookie dough (about an ice cream scoop’s worth)

making cookie 1

Top that dough with a mini salted pretzel and push it into the dough

making cookie 2

Top the pretzel with a Peep

making cookie 3

Take a heaping scoop of cookie dough and top the Peep

Ooey Gooey Filled Chocolate Chip Cookies with a Crunch

Use your hands to mold the dough around the Peep and pretzel, making sure the filling is completely covered with dough; It will look like a large egg-shaped cookie

Ooey Gooey Filled Chocolate Chip Cookies with a CrunchOoey Gooey Filled Chocolate Chip Cookies with a Crunch

Place cookies at about 3 inches apart (further than as seen here!) on a cookie sheet lined with parchment paper and bake for 13-15 minutes or until cookies are lightly browned around the edges

Ooey Gooey Filled Chocolate Chip Cookies with a CrunchOoey Gooey Filled Chocolate Chip Cookies with a Crunch

Allow to cool for a couple minutes and dig in

Ooey Gooey Filled Chocolate Chip Cookies with a Crunch

[print_this]

Ooey Gooey Filled Chocolate Chip Cookies with a Crunch

Ingredients (Makes 1 dozen X-large cookies)

  • 2 packages chocolate chip cookie dough (16.5 ounces each)
  • 1 package Peeps (should have 12 peeps)
  • 1 dozen mini salted pretzels

Instructions

  • Start with a layer of cookie dough (about an ice cream scoop’s worth)
  • Top that dough with a mini salted pretzel and push it into the dough
  • Top the pretzel with a Peep
  • Take a heaping scoop of cookie dough and top the Peep
  • Use your hands to mold the dough around the peep and pretzel, making sure the filling is completely covered with dough; It will look like a large egg-shaped cookie
  • Place cookies at about 3 inches apart on a cookie sheet lined with parchment paper and bake for 13-15 minutes or until cookies are lightly browned around the edges
  • Allow to cool for a couple minutes and dig in

Notes:

Make sure the dough is very cold; it will be easier to handle this way

These would be amazing topped with ice cream when they are straight out of the oven

Don’t be afraid to make a mess; it is SO worth it

I ate 2 cookies when they were still melting and barely ready to come off of the pan. They may be the size of my head, but hey, 2 cookies is still 2 cookies;-)[/print_this]

Ooey Gooey Filled Chocolate Chip Cookies with a Crunch Ooey Gooey Filled Chocolate Chip Cookies with a Crunch Ooey Gooey Filled Chocolate Chip Cookies with a Crunch Ooey Gooey Filled Chocolate Chip Cookies with a Crunch Ooey Gooey Filled Chocolate Chip Cookies with a Crunch Ooey Gooey Filled Chocolate Chip Cookies with a Crunch disappearing cookie 8

What is your favorite Easter candy? I love the big milk chocolate Hershey’s eggs with the candy shell.

*The Hot Blondies Giveaway is open through Wednesday (4/6)  at midnight (est)*

Hot Blondies Giveaway & Review

Hot Blondies Bakery: A+

Classic Brunette: “That brownie could bring world peace”

I am very excited about this!

Hot Blondies 13

Maybe it is because I got to eat a variety of delicious brownies and blondies that were delivered to my apartment.

Hot Blondies 1

And maybe it’s because the baked goods came after being tortured in a bathing suit during Puerto Rico withdrawal.

Hot Blondies 3

Or maybe it’s because nothing makes you feel better on a cold day of rain and snow in April than a box full of chocolate desserts.

Hot Blondies 4

I think it is all of the above.  But now for the part that will make you excited! One reader will get the chance to win their own box of fresh-baked deliciousness.

Hot Blondies 5

When Lorin at Hot Blondies Bakery contacted me, I was happy to accept a sample to review.  I was anxious that the baked goods wouldn’t be as tasty as they claim  since I am often let down by dry blondies or too-sweet brownies.  Fortunately, this was not the case.

From the website:

“How many blondies does it take to start a totally awesome online bakery? Thanks to fabulous colorists and boring desk jobs, only two super hot ones.

When we first met, it was girl crush at first site. We quickly realized we were way too foxy for any lackluster office job. We needed to share our impeccable taste, superb sense of style and sensational creative skills with the world. We needed to spread the hotness.

So, our mutually stunning golden locks combined with Laura’s mad marketing skills and Lorin’s blondie baking prowess, led us to bring you Hot Blondies Bakery.”

I received a box of regular-sized blondies and brunettes (brownies) as well as this box of adorable “babes.”  They are the perfect size for tasting if you want to eat a variety.  At least that is how I justified eating half a box several of them as I sampled these babes “for the blog.”

Hot Blondies 8

Matt and I both tasted each flavor.  He even tried the peanut butter blondie!  I have to admit, although I enjoyed almost every kind, the classics were my favorite of each.

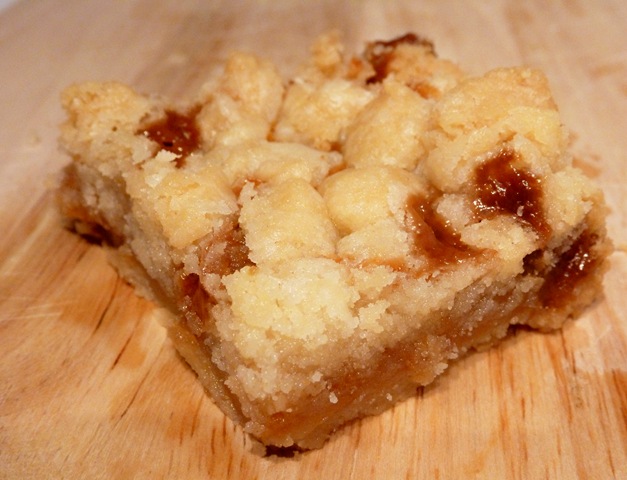
The Classic Blondie was soft, chewy and moist.  It tasted like the perfect chocolate chip cookie in bar form.  I enjoyed the other flavors also, just not quite as much.

Oatmeal Raisin had a really nice cinnamon flavor.  It wasn’t dry at all but wasn’t as soft and moist as the Classic.  I think the oats gave it a nice crisp edge.

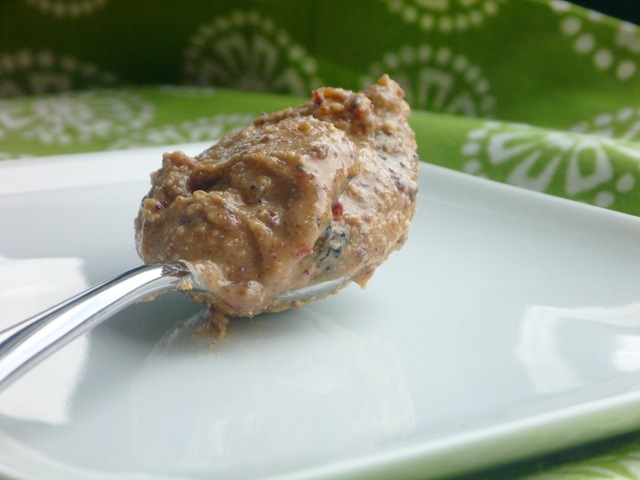
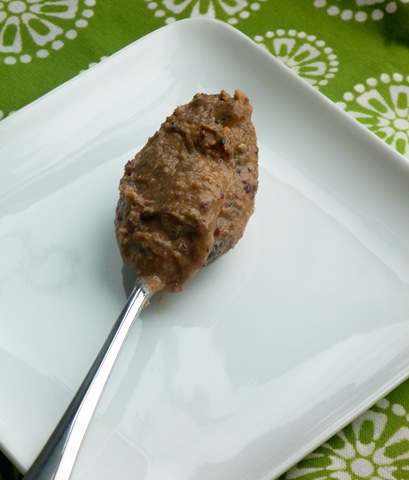
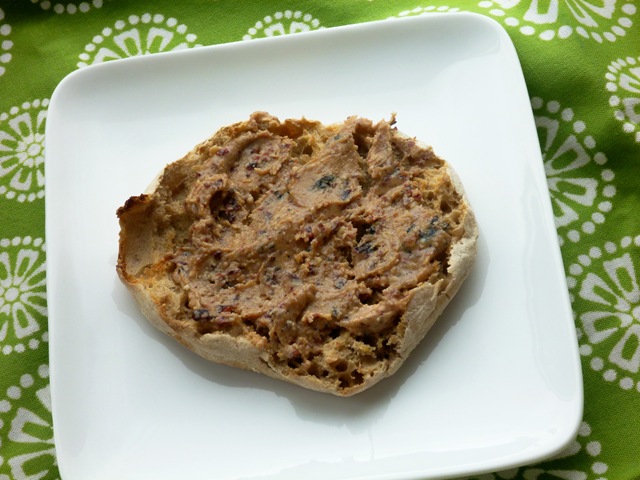
Obviously I enjoyed the Peanut Butter Chocolate Chunk.  The peanut butter flavor was just right- nice and flavorful but not too strong.  There were a few peanut pieces in there and chocolate chunks (though, I would have liked a few more of those).

Butterscotch White Chocolate Chip was Matt’s second favorite blondie.  The texture was perfect like the classic but I am bias against butterscotch and white chocolate.  However, if you like those flavors you would love this.

Hot Blondies 12

When we moved onto the Brunettes, Matt had to get up for a glass of milk (in a good way).

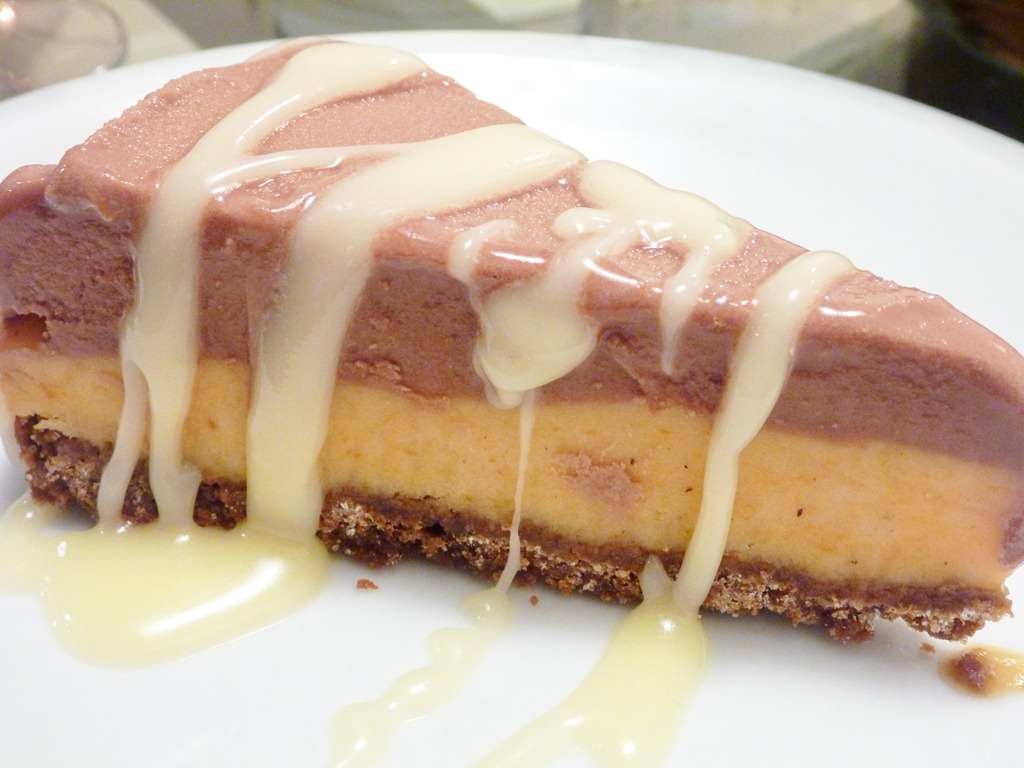
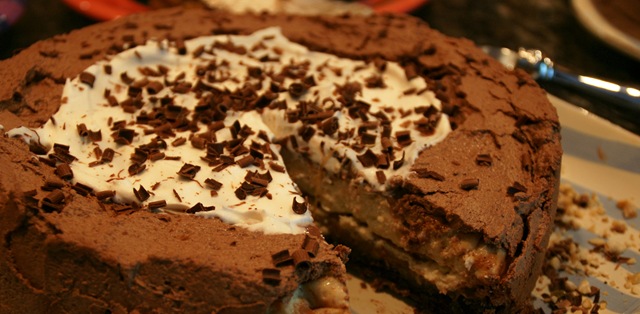
Oh my, the Classic Brunette was unbelievable.  It was fudgey but light, almost like a souffle, with a wonderful rich chocolate flavor.  It blew every other blondie and brownie out of the water with its deliciousness.  That brownie could bring world peace.

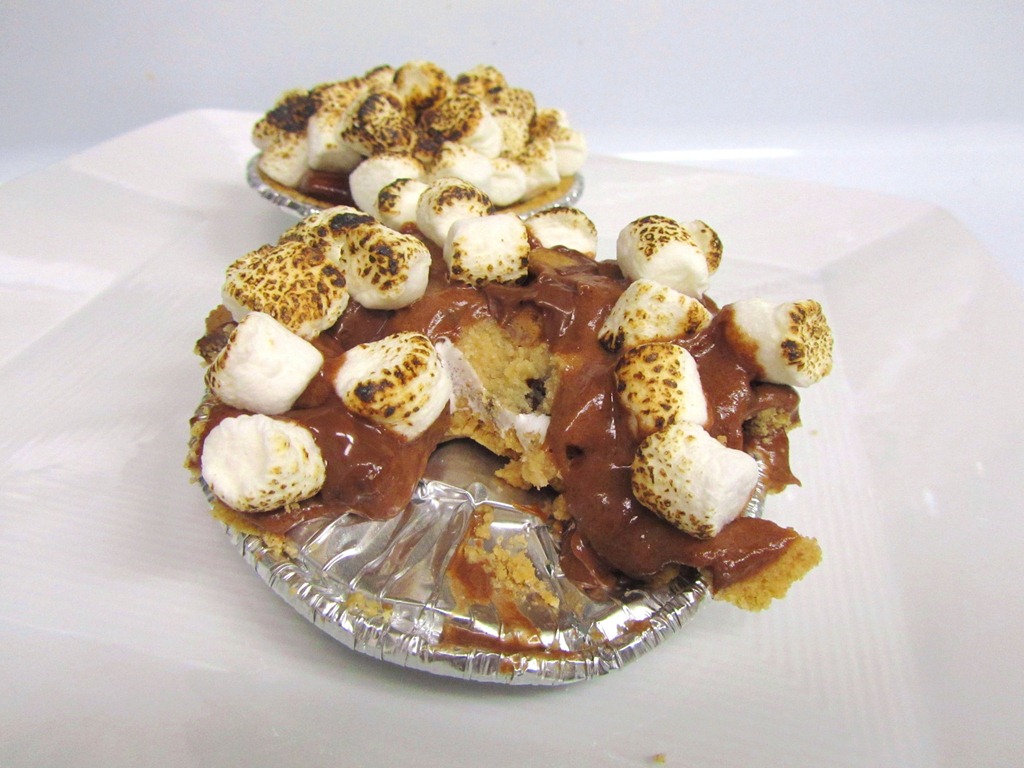
The S’mores Brownie was good, but after tasting the Classic, it was hard to eat anything else.  I did enjoy the texture from the graham cracker crust and the bit of saltiness that came with it, but as Matt put it, “once you have the Classic, why would you eat anything else?”

I have a confession.  I don’t love Nutella.  I don’t not like it, I just wouldn’t cheat on peanut butter with it.  However, for the Nutella addicts out there, you would love the Nutella Hazelnut Brunette.  It has a strong Nutella flavor with a nice crunch from the hazelnuts.  And hey, if this flavor means others will swoon over it and more Classics for me, I won’t complain.

The last brownie we tasted was the Espresso White Chocolate Chip.  Maybe it’s because we were 7 flavors in (who am I kidding, I have no limit), but this was my least favorite of the bunch.  While it had a nice texture like a corner piece, the flavor wasn’t distinct enough for me.  I actually only knew it was espresso by process of elimination.

Hot Blondies 9

After enjoying our samples, I am so happy I get to share the baked good love.  See below for giveaway details.

Not only did the girls from Hot Blondies offer a sample to giveaway on the blog, but they also sent me some great baking tips to share.  I want to be friends with these girls.

Hot Blondies Bakery Blondie and Brownie Fun Tips

Think outside the pan. We often hear the saying “Baking is a science, cooking is an art.” But without a multitude of scientific errors, many important discoveries would have never been made. Therefore, Rule #1 at Hot Blondies Bakery is to never be chained down by a recipe. We like to play with ingredient amounts and switch out add ins to try new flavors. It takes time, patience, trial and error, but you can come up with some really fabulous results.

We are the first to admit, blondies and brownie making is a simple (yet delicious) form of baking. Which is why it can be the most fun. A good blondie recipe can be the basis for a whole variety of tasty and unique bars and desserts. Here are some tips, from the Hot Blondies, on how to take your blondie and brownie baking to the next level.
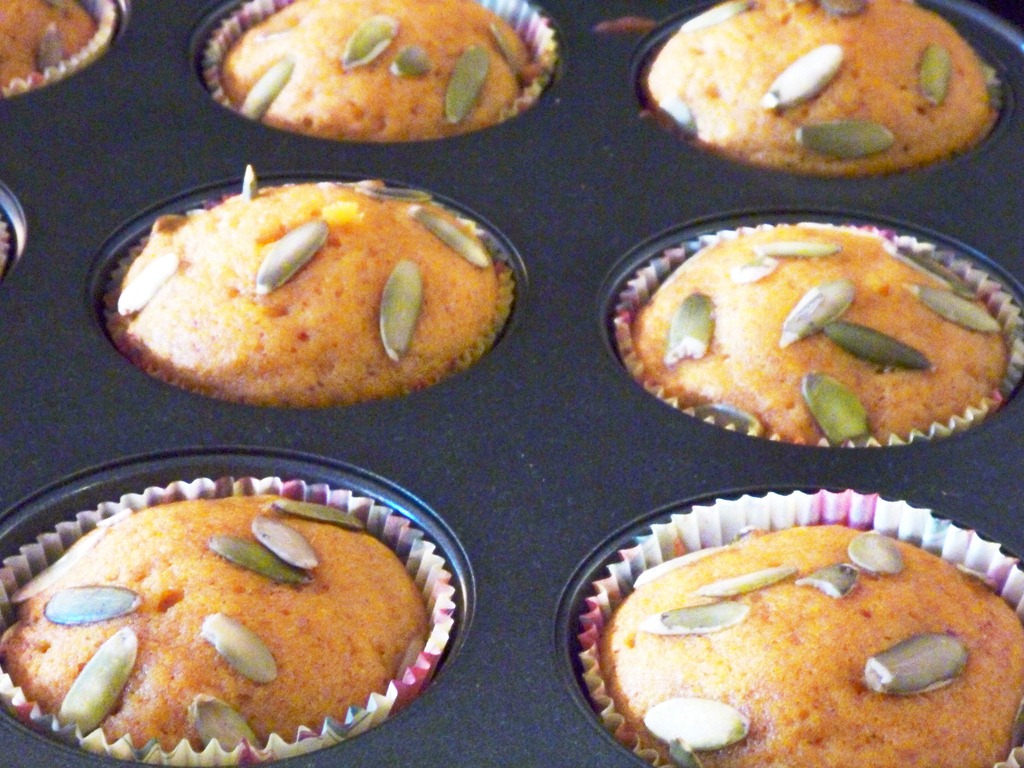
Hot Blondies 10

Fruity fun. Swap out the chocolate chips in your fave blondie recipe with some dried fruit and some fun flavoring. Try orange zest and dried cranberries or almond extract and dried figs. Top a warm blondie with vanilla ice cream and sauteed bananas for a yummy dessert.
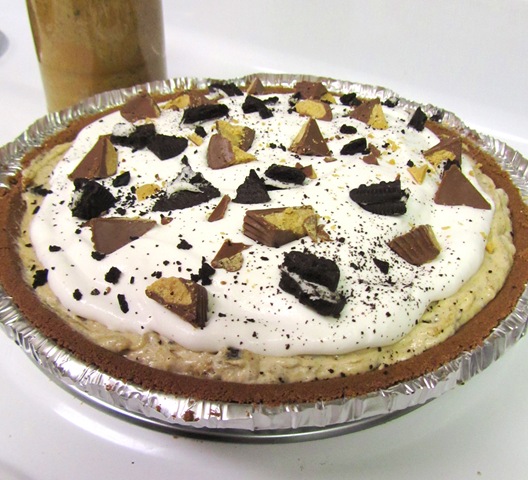
I Want Candy. Get inspired by your favorite candy choices. Love Reece’s Peanut Butter Cups? Chop some up and sprinkle them on top of your unbaked brownies. Or stick a mini cup on each one when they are still warm from the oven. Love Almond Joy? Throw some sweetened shredded coconut and chopped almonds into your batter.
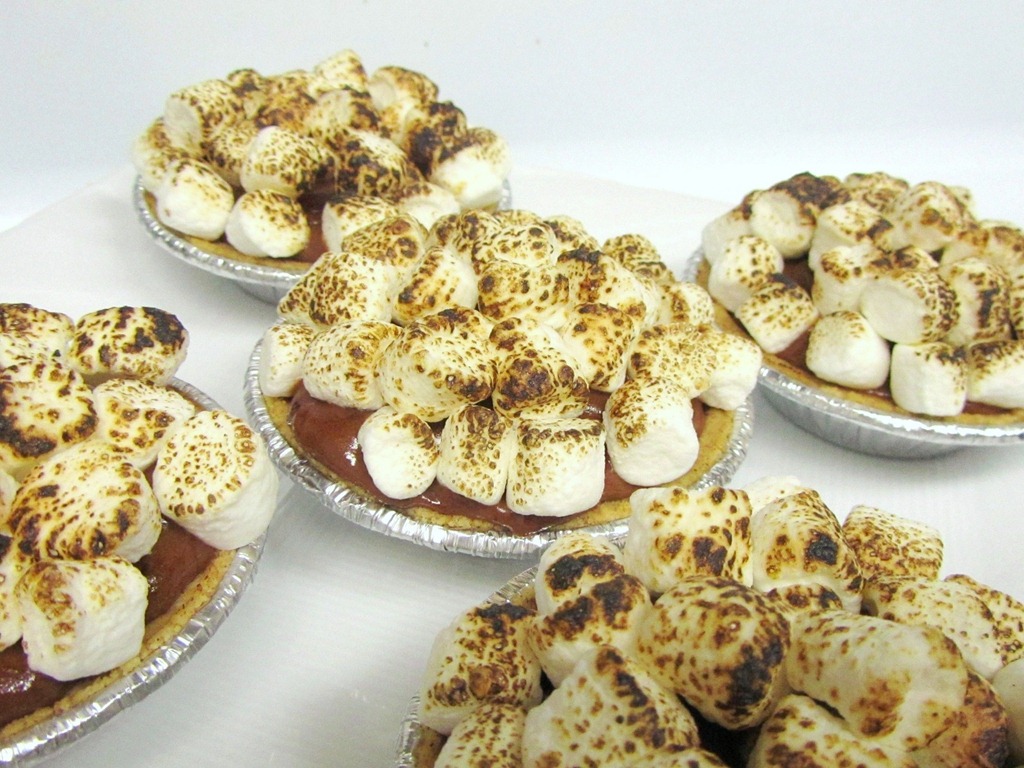
Kid Around. Reminisce about what kinds of flavor combos you loved as a kid and use them as your baking muse. Add some peanut butter into the blondie mix and top with strawberry jelly and chopped peanuts for a PB&J twist. Spread marshmallow fluff onto cooled brownies and sprinkle with Graham crackers to evoke a campfire feel. (Or try our S’mores Brunettes!)

Go Ethnic. Think about what kinds of global cuisines excite your palate and spice up your bars with those seasonings. Add a touch of cayenne and cinnamon to your brownies for a Mexican feel. Try matcha powder or ginger chews for an Asian flare. Jasmine or lavender add a subtle exotic vibe.

Get Festive. Decorating tricks are not just for kids. Holidays and birthdays are the perfect excuse to get your sprinkle on. We love any excuse for food coloring in blondies. Red, white and blue for July 4th. Yellow and pink for Easter. Green for St. Patty’s. The options are endless.
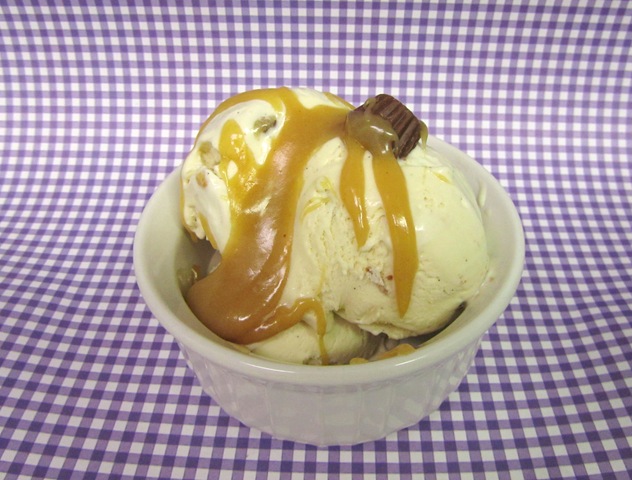
Sundae Fun Day. Ice cream toppings make great blondie and brownie additions. Try spreading some wet nuts on top or mix them in pre-baking. Magic Shell makes a tasty and travel friendly topping. Caramel and butterscotch sauce make a great quick and easy swirl in. Chopped maraschino cherries with some cherry liqueur create a decadent grown up brownie.

Giveaway Details

*This giveaway is open to US residents only*

To enter leave a comment below.

For additional entries (max of 3 entries per person), leave a comment below to tell me:

-You follow me on Twitter

-You are a fan of Keep It Sweet on Facebook

Giveaway is open until Wednesday (4/6)  at midnight (est).

Puerto Rico Wedding Weekend

This past weekend I was in Puerto Rico for my cousin’s wedding.  It was one of the best weekends I’ve had in a long time with amazing weather, gorgeous pools and beach, and good food.  The best part was that there was a great balance of spending time with my family (almost all of  my mom’s family was there!) and pool time with my book (read one and a half books from the Hunger Games).  Between the sun and the time dancing, drinking and eating with my family it was amazing.  Here are some highlights:

Traditional Puerto Rican food at the rehearsal dinner: shredded pork, chicken, mixed vegetables and plantains (my favs!)

rehearsal dinner food

Birthday cake at the rehearsal dinner- my cousin got married the day after he turned 27!

P1030841b

Really impressive cake, moist and delicious with a whipped cream-like icing

P1030849b

Dancing on the beach at the rehearsal dinner

P1030839

Pre-wedding photos

P1030853

Matt and me

P1030857

Picture with my mom, sister and grandfather

P1030867

My dad and sister

P1030875

Such a gorgeous bride and groom during sunset

P1030911

Amazing backdrop to the ceremony

P1030909

Reception photos

P1030919

EAGLES!!! Philly pride:-)

P1030941

They used the red velvet cake to cut, yum!

P1030943

This is why I love my sister

P1030958

Picture with the best man / brother of the groom

P1030963

Matt with my cousins, uncle and friends

P1030961

Such a happy married couple!

P1030925

Quote of the night: “I don’t go to the casino to lose cupcakes” -Matt running back to the casino because he left his cupcakes there.

The day after the wedding, my sister, Matt and I went to Old San Juan to explore.  Authentic Puerto Rican food might be the best greasy hangover food;-)

Puerto Rican bread

puerto rican bread

Fried pork tenders, fried plantains and onions

Fried Pork Tenders, Fried Plantains and onions

“Meat pie” (PR version of shepherd’s pie) with rice and plantains

meat and potatoes with plantains and rice

I can’t believe that just a few days ago I was soaking up the sun in Puerto Rico.  Now I am back to cold and rainy New York and daydreaming about the palm trees.

What was the last trip you took?

Whip-Chipper Cookie Sandwiches

There are a few bloggers that I KNOW I’d be friends with in real life. Madison is one of them.  You can tell from her blog that she is a sweetheart.  I love going to her blog for delicious recipes like sweet potato veggie burgers, oatmeal chocolate chip cookie dough truffles and pear almond butter muffins, but  I also love reading about her life and her engagement/wedding planning!  I was so happy when she offered to do a guest post and she did not disappoint. Her cookie sandwiches look amazing and I can’t wait to try them myself.

Cookie_Whip_Sandwiches(1)

Hi there, Keep It Sweet readers! I’m Madison from Espresso and Cream. When Lauren was looking for a guest blogger, I jumped at the chance to get in the kitchen and bake up something sweet to share. Initially, I had planned to post a recipe for pesto, but then I remembered who I was talking to. Keep It Sweet readers can handle their sugary desserts, right?

Growing up, I learned to cook from my mom and our huge set of Southern Living magazine cookbooks. These cookbooks remain some of my favorites and my go-to resource when I need a recipe I can rely on. During high school I spent years trying to find ‘my’ chocolate chip cookie recipe. For some reason or another, it seemed critical that I have a recipe that others would rave about. I think it had more to do with boys than cookies, but that’s another story.

Junior year I hit the jackpot while browsing The All-New Ultimate Southern Living Cookbook. For goodness sake, the name of the cookie that caught my eye was The Ultimate Chocolate Chip Cookie. Sign me up. Of course, I made a few small tweaks to really customize it, and when I’m feeling crazy (or guilty) I make them with dark chocolate chips and whole wheat flour.

But the real magic moment comes when you combine two of these babies with a dollop of sweetened freshly whipped cream. Crunchy, chewy, creamy and most certainly sweet, these cookie sandwiches are the perfect mix of flavors and textures. Although they are most certainly a down-home dessert, don’t hesitate to serve them for any occasion. There is a time and place for a fancy dessert but there’s always time for a chocolate chip cookie sandwich.

[print_this]

Whip-Chipper Cookie Sandwiches

Ingredients

  • 3/4 cup butter, softened
  • 3/4 cup brown sugar
  • 3/4 cup granulated sugar
  • 2 large eggs
  • 2 1/4 cups all-purpose flour
  • 1/2 teaspoon coarse salt
  • 1 teaspoon baking soda
  • 8 oz. milk chocolate chips
  • 1 cup heavy cream
  • 1 teaspoon vanilla extract
  • 2 tablespoons powdered sugar

Cooking Directions

  1. Preheat oven to 350°F. With an electric mixer, beat butter and sugars at medium speed until creamy. Add eggs, one at a time, beating until just combined.
  2. In a second bowl, stir together flour, salt and baking soda. Add dry ingredients to wet ingredients, beating until just combined. Stir in chocolate chips. Drop by heaping tablespoons onto an ungreased baking sheet. Bake for 10 to 12 minutes, or until slightly browned on the edges and soft in the center. Remove to wire racks to cool completely.
  3. Meanwhile, with an electric mixer, beat heavy cream and vanilla until stiff and thickened. Beat in powdered sugar.
  4. Spread some of the whipped cream mixture onto one cookie. Top with a second cookie. Serve immediately.

[/print_this]

Cookie_Whip_Sandwiches(2)

Are there any bloggers that you would be real life friends with?

Accidentally Scuffins

Sometimes recipe experiments don’t work out.  Sometimes they work, just a little differently than you expect.

Cinnamon Apple Chunk Scuffins

I set out to make scones, but I ended up with scuffins!  A scuffin is basically the hybrid of a scone and a muffin.  These Cinnamon Apple Chunk Scuffins are hearty, chewy, and flavorful.  Like scones, they aren’t too sweet, but like muffins, they are nice and moist.  Even better than both, they are low in fat and added sugars.

Cinnamon Apple Chunk Scuffins

I got my inspiration from a bakery in Philadelphia.  Every time I am in the area, I buy a few of their delicious scones.  They supposedly are low in fat, high in fiber, etc., but they are also the size of my head.  My strategy is to buy a few different flavors and eat pieces of each one.  That way I never eat an entire scone, right?

Cinnamon Apple Chunk Scuffins

My favorite flavors are the apple and cinnamon varieties, so I decided to make my baked good a combination of the two.  These scuffins are full of delicious cinnamon chips and big apple chunksI hate when you get an apple dessert and can barely find the apple pieces! They are also made with whole grains.  I’m telling you, these are healthy!

They taste wonderful right out of the oven, but also taste good at room temperature.  I ate them alone or crumbled over greek yogurt with fruit and peanut butter.  You can also store them in the freezer and defrost for a healthy last minute snack.

apples 1

A note on the cinnamon chips: I was lucky enough to win a bag of cinnamon chips from Amy at Very Culinary, but you can check the Hershey’s website to see where they are sold near you.

cinnamon chips 1

The recipe was loosely adapted from Cooking Light

Whisk together flours and oatmeal in a large bowl

flours and oats 1

Add the remaining dry ingredients (through cinnamon) and whisk; set aside

dry ingredients 1

Combine the wet ingredients and whisk together until combined

wet ingredients 1 wet ingredients 2

Stir wet ingredients into dry

dough 1

Add the chopped apple and cinnamon chips; knead them in with your handsadd apple cinnamon chips

Shape dough into two round disks and place on a baking sheet lined with parchment paper; use a pizza cutter or sharp knife to slice each round into 8 pieces; do not separate the dough

Cinnamon Apple Chunk Scuffins

Bake for 15-20 minutes or until scuffins are firm and lightly brownedCinnamon Apple Chunk Scuffins

[print_this]

Cinnamon Apple Chunk Scuffins

Loosely adapted from Cooking Light

Yield: 16 scuffins

Ingredients

  • 3/4 cup all-purpose flour
  • 2/3 cup whole wheat flour
  • 3/4 cup old-fashioned oatmeal
  • 1/4 cup light brown sugar
  • 2 tablespoons granulated sugar
  • 2 teaspoons baking powder
  • 1/2 teaspoon baking soda
  • Dash salt
  • 1 teaspoon cinnamon
  • 3/4 cup fat free greek yogurt
  • 2 tablespoons unsweetened applesauce
  • 1 large egg white
  • 1/2 teaspoon vanilla extract
  • 1 1/2 cup chopped apple (~1 large apple)
  • 1/3 cup cinnamon chips

Cooking Directions

  1. Pre-heat oven to 400 degrees
  2. Whisk together flours and oatmeal in a large bowl
  3. Add the remaining dry ingredients (through cinnamon) and whisk; set aside
  4. Combine the wet ingredients and whisk together until combined
  5. Stir wet ingredients into dry
  6. Add the chopped apple and cinnamon chips; knead them in with your hands
  7. Shape dough into two round disks and place on a baking sheet lined with parchment paper
  8. Use a pizza cutter or sharp knife to slice each round into 8 pieces; do not separate the dough
  9. Bake for 15-20 minutes or until scuffins are firm and lightly browned

[/print_this]

Cinnamon Apple Chunk Scuffins

Have you ever had a scuffin?

Lemon Blackberry Cheesecake Bars

In case you didn’t know, Julie at Willow Bird Baking is hosting a cheesecake challenge.  This girl has made some unbelievable looking cheesecakes and has a hilarious video with some delicious results.  I don’t know how she came up with so many wonderful flavor combinations but I’m glad she did!

cheesecake 16

You all know I have mixed feelings about lemon, so I wouldn’t have normally chosen the Lemon Blueberry Cheesecake Squares with Shortbread Crust However, the husband requested it so why not?  Besides, it wouldn’t be much of a challenge if I used the same flavors I usually do.

lemon 2

I forgot to pick up blueberries yesterday, so I went with blackberries instead.  The texture adds a nice component to the creamy cheesecake and they are just a little tart when you bite into them.  It actually works very well with the lemon.

blackberries

And as for the lemon cheesecake?  I’ll give it to Julie, it is perfectly balanced.  I wasn’t overwhelmed by the flavor but it was extremely refreshing.  This would actually be a perfect dessert for a summer barbeque.

cheesecake 14

I used Julie’s recipe with the just a few changes:   white whole wheat flour in the crust, light cream cheese rather than regular, I added a teaspoon of vanilla to the batter and obviously blackberries instead of blueberries.

cheesecake 23

Start by making the crust; place flour and confectioners’ sugar in a food processor

flour and sugar for crust

Add chilled butter and pulse

add butter

Allow the butter and dry ingredients to combine, but don’t over mix

crust 1

crust 2

Press crust into a pan lined with parchment paper

crust 3

Bake until lightly browned

crust 4

While crust is cooling, beat softened cream cheese on high speed until fluffy

cream cheese cream cheese 1

Add eggs, vanilla and lemon juice and combine

add eggs, vanilla, sugar

Then add your sugar

add sugarcheesecake batter

When batter is creamy, ,pour over crust

batter on crust

Top with berries

top with blackberries

Bake until cheesecake is firm

baked 1 baked 2

Chill in refrigerator for a couple of hours before serving

cheesecake 7

Are you participating in Julie’s cheesecake challenge?  If so, which one are you making? If not, which one would you like to eat?

Mixed Fruit & Nut Butter

I love nut butter. Peanut butter, almond butter, mixed nuts, you name it. Just leave the coconut out and I am a happy girl.

There are a few standard jars that I like to have on hand, but lately I’m enjoying making my own nut butter. It’s fun and easy to make, and the taste from freshness is unbeatable. The best part is that when you do it yourself, there are so many ways you can customize the mix. Seasonings like salt, cinnamon and vanilla are basic additions to enhance the flavor of the nuts. Want to use peanuts or pecans, almonds or cashews? The selection is up to your discretion and there is no limit to how many you can use. While you are at it, why not add some mix-ins like raisins or chocolate chips?

I’ve seen a lot of nut butter inspiration on blogs:

Homemade Nut Butter (Perfect for a basic nut butter)

Chocolate Chip Cookie Dough Almond Butter (Cookie dough and almond butter in one? Yes, please!)

Pumpkin Spiced Almond Butter (I love the flavor of pumpkin all year round)

Cinnamon Vanilla Peanut Butter (Perfect spin on a classic)

4-Ingredient Dark Chocolate Almond Butter (I’ve made a variation of this, leaving out the oil, and it was delicious!)

Homemade White Chocolate Peanut Butter (Even for a white chocolate hater this looks heavenly)

This weekend I decided to make something different with what I had on hand, a Mixed Fruit and Nut Butter. Since I had 3 bags of nuts already open, I decided to combine them: Honey Roasted Peanuts, Roasted Almonds, and Roasted Cashews

Cashews Almonds Peanuts

I also wanted to add texture to the spread with some dried fruit. The dried blueberries and bing cherries add a wonderful chew and aren’t too sweet

Dried Cherries and Blueberries

The entire process took about 10 minutes from start to finish. Completely worth it!

Start by combining the nuts in a food processor for about 5 minutes; scrape the sides every minute or two

Nuts in food processor

When nuts are fully ground and the texture is drippy, add the cinnamon and salt if needed; run food processor for another 30 seconds

Making Nut Butter 1

Finally, add dried fruit and run through food processor for about 3 minutes or until the fruit is as small as you’d like (run for less time if you want bigger dried fruit chunks)

Making Nut Butter 2 Making Nut Butter 3

Store in a leftover nut butter jar or tupperware at room temperature for up to a month

Nut Butter 1

[print_this]

Mixed Fruit & Nut Butter

I didn’t t add any salt because the nuts I used were salted enough. The nut butter comes out to ~100 calories / tablespoon which is similar to most natural peanut butters.

Total Time: 10 minutes

Yield: 1 cup + 2 tablespoons

Serving Size: 1 tablespoon

Calories per serving: 100

Ingredients

  • 1 cup roasted cashews
  • 2/3 cup honey roasted peanuts
  • 1/2 cup roasted almonds
  • 1/2 teaspoon cinnamon
  • up to 1 teaspoon salt to taste
  • 3 tablespoons dried bing cherries (unsweetened)
  • 1/4 cup dried blueberries (unsweetened)

Cooking Directions

  1. Start by combining the nuts in a food processor for about 5 minutes; scrape the sides every minute or two
  2. When nuts are fully ground and the texture is drippy, add the cinnamon and salt if needed; run food processor for another 30 seconds
  3. Finally, add dried fruit and run through food processor for about 3 minutes or until the fruit is as small as you’d like (run for less time if you want bigger dried fruit chunks)
  4. Store in a leftover nut butter jar or tupperware at room temperature for up to a month

[/print_this]

I have been eating the nut butter by the spoonful or spreading it on english muffins.  How would you eat homemade nut butter?

Back to Flex Mussels

Living in NYC, we don’t go to the same restaurant twice unless it is really good.  Last time we went to Flex Mussels, we had a wonderful experience, and I have not been able to get the deep fried whoopie pie out of my head since!  So when our friends suggested Flex Mussels for dinner this weekend, I couldn’t say no.

The big difference last night, was that we went to the 13th Street location, where Zac Young, the famous pastry chef from Top Chef: Just Desserts,  usually works.  Well, not only was Zac there, but we actually met him and talked to him for a few minutes!  Actually, Matt said hello and introduced us, and I kind of blathered about.  I don’t really get excited about actors, but celebrity chefs are my thing and I was completely star-struck.  Good thing I have a husband that was able to form complete sentences and ask to take a picture with Zac.Lauren and Zac

I still can’t get over how cool he was.  If you watched Just Desserts, he is exactly like he was on the show.  I did manage to ask him if he eats the desserts he makes, and he told me he actually just eats desserts, since they don’t have calories.  Can you see why I love him?Lauren Zac and Matt

Anyway, the food was just as good as last time.  Matt and I shared the Goat Cheese Salad (“toasted goat cheese, simple greens, roasted beets, candied walnuts, apples”).  The greens were crisp and fresh and there was a good balance of ingredients.

For the table we ordered a few things to share:

2 orders of Truffle Fries

Truffle Fries

The fries were crispy and flavorful topped with mixed seasonings and parmesan cheese.  They were accompanied by an aromatic truffle oil.

Little Neck Mussels: “fresh chopped clams, bacon, red pepper, breadcrumbs, herbs”

The Little Neck Mussels

These mussels were different from any mussels I’ve had before.  I loved the texture that was added from the breadcrumbs.

Maine Mussels: “lobster, smoked bacon, corn, white chowder, parsley”


Maine Mussels 1

Maine Mussels 2

The Maine variety was extremely flavorful.  If you like bacon, I’d highly recommend this version.  We had this version last time and I’m glad we ordered it again.

Italiano Mussels (no photo): “calamari, roasted garlic, red wine, tomato sauce”

These were the perfect mussels for bread dipping.  The red sauce was chunky and flavorful.  The calamari were a little overcooked, but other than that these were great too.

Even though the salad, mussels and fries was more than enough food, we couldn’t leave without ordering dessert.  I was so tempted to get donuts or the whoopie pie again, but I wanted to try something new.  Everything on the dessert menu sounded amazing, but Zac had said that his favorite was The  Flexy Cream Egg.

Dessert Menus

I usually shy away from panna cotta, it just isn’t my thing, but the dessert sounded so interesting Matt and I had to try it.

Dessert Menu 2

The dessert had a beautiful presentation.

Flexy Cream Egg 1

A thin chocolate shell was filled with the panna cotta and topped with the salted chocolate shortbread cookie crumbs.  Of course it wouldn’t be a Zac dessert without gold dust painted across the plate.

Flexy Cream Egg 2

The panna cotta was creamy and flavorful but I especially liked the cookie crumbs- crunchy, sweet and salty all at the same time.Flexy Cream Egg 3

Thanks Flex Mussels and Zac for another terrific meal.  We will definitely be back!

In other news, the Husband started a blog!  Check out Matt Eats Food for his review of Flex Mussels and some of his daily eats.

Do you have restaurants that you go to repeatedly or do you always try something new?

Brownies for a Guest

brownie 11

One of my best friends is coming to town.

Kristen and I have been friends since we were in 2nd grade.  No, that is a lie.  We have known each other since then but actually weren’t really friends until 6th grade.  I don’t really remember why it took so long, but we have been best friends ever since.  She was even a bridesmaid in my wedding.

When given the choice, Kristen requested a dessert with dark chocolate and fruit or dark chocolate and peanut butter.  Well, it’s been almost 2 weeks since I posted a dessert with chocolate and peanut butter so I figure that it was about time to make another one.  I don’t want my readers going through withdrawal or anything.

These Fat Witch Brownies with Peanut Butter Chips are from Lora’s wonderful blog, Cake Duchess. I saw the brownies the other day and couldn’t resist making them.  Besides, brownies are terrifically easy for weeknight baking.  The brownies came out incredibly fudgey and moist with the added texture of peanut butter chips.  Some people might say they are so rich you can only eat a small piece (I am not one of them).brownie 14

I followed Lora’s recipe with very few changes.  I whisked everything together rather than using a mixer and doubled the portion of peanut butter chips.  Check her blog for the specifics and to send her some hugs (she just shared the news of a health scare).  We are thinking about Lora and her family and wish her the best.

Start by melting butter and chocolate together in a saucepan over low heat; set aside

chocolate and butter chocolate and butter melted

In a large bowl, whisk together eggs

eggs

Then whisk in sugar and vanilla

eggs sugar vanilla whisked eggs sugar vanilla

Whisk in chocolate and butter mixture

chocolate and butter added

Whisk flour and salt

add flour flour mixed in

When dry ingredients are completely incorporated, fold in peanut butter chipsadd peanut butter chips

batter in pan

Pour batter into pan and bake for about a half hour or until a knife or toothpick comes out clean

brownie baked

Top brownie with powdered sugar and serve

brownie 6

What do you bake when you are short on time?

Pear and Cheese Pockets

I have a few weaknesses in life:

1) Post-holiday candy sales at CVS

2) Ice cream on sale at the market*

3) Bulk anything at Costco

*Who can blame me when it costs $7.99 / half gallon in NYC!

Pear and Cheese Pockets

It must be in my blood to love Costco. My Dad is a walking advertisement for the store. He won’t make a purchase anywhere else until he knows Costco doesn’t have that particular item (that includes clothing, kitchen appliances, tools, etc.). Actually, for someone who isn’t a big shopper, the man can easily get sucked into buying almost anything there. If they sold drum sets in the store, he’d probably sleep there. So, it is no surprise that although I live in a tiny apartment with limited storage space, I insist on having a membership and grabbing whatever I can because it is such a good deal. Never mind the fact that we store toilet paper under the bed and canned chickpeas in several different cabinets. I even bought Kirkland brand Uggs this year for such a good price that I could throw them away when it warms up if I can’t find a place to keep them.Pear and Cheese Pockets

On our most recent trip to Costco we purchased so much fruit (bananas, pears, asian pears, mangos, nectarines, strawberries, and blueberries) that the husband started to get stressed out about eating it all. He clearly underestimates my daily produce consumption. To make him feel better, though, I promised to use some for baking. The berries and bananas were already gone and some of the other fruit had dwindled down, but we still had a lot of just-ripened juicy pears.

pears

I wanted to make something tasty that could be eaten for breakfast, snacks or dessert and wouldn’t weigh you down. At the same time, I didn’t want to make it “diet-like.” These Pear and Cheese Pockets are a perfect compromise. They are somewhere in-between a danish, poptart, and toaster strudel with a combination of fresh and packaged ingredients.

I used these crescent roll sheets for the pockets and filled them with some cooked pears and a lightly sweetened cream cheese filling. They are best served fresh out of the oven when the filling is warm and gooey and the outside is crisp but soft in the middle. However, leftovers can be stored in the refrigerator and re-heated via toaster.

crescent rolls

Start by making the pear filling

pears sliced

Melt butter over low heat

butter in pan

butter melted

Add brown sugar and combine

add brown sugar

butter sugar combined

Once brown sugar and butter are melted, add pears and stir to coatadd pears

Add cinnamon to mixture and stir

add cinnamon

Cook pears over medium heat until softened, about 5 minutes; remove from heat and set aside

pears cooked

For cream cheese filling, beat cream cheese in a mixer until creamy

cream cheese

Add vanilla and greek yogurt

add vanilla and greek yogurt

Once combined, stir in confectioners’ sugar

add sugar

Once fillings are ready, lay out the dough

dough

Cut each package into 8 rectangles dough sliced

Stretch rectangles out on foil sprayed with cooking spray; top one side of dough with about a teaspoon of cream cheese mixture

spread filling

Then add a couple tablespoons of pear fillingPear and Cheese Pockets

Fold the other half of the dough over and press down around the edges to seal; take a fork and press down around the edges fancy them up

Pear and Cheese Pockets

Bake for 12 –13 minutes or until top is golden brown

Pear and Cheese Pockets

[print_this]

Pear and Cheese Pockets

Yield: 16 pockets

Ingredients

  • 3 large pears, thinly sliced
  • 2 tablespoons unsalted butter
  • 3 tablespoons light brown sugar
  • 1 teaspoon cinnamon
  • 1 8-ounce package light cream cheese, softened at room temperature
  • 2 tablespoons fat free greek yogurt
  • 1/2 teaspoon vanilla extract
  • 1/3 cup confectioners’ sugar
  • 2 8-ounce packages crescent roll dough

Cooking Directions

  1. Pre-heat oven to 325 degrees
  2. To make the pear filling, melt butter over low heat
  3. Add brown sugar and combine; once brown sugar and butter are melted, add pears and stir to coat
  4. Add cinnamon to mixture and stir
  5. Cook pears over medium heat until softened, about 5 minutes; remove from heat and set aside
  6. For cream cheese filling, beat cream cheese on high speed until creamy
  7. Add vanilla and greek yogurt and beat on high
  8. Once combined, stir in confectioners’ sugar
  9. Once fillings are ready, lay out the dough
  10. Cut each package into 8 rectangles
  11. Stretch rectangles out on foil sprayed with cooking spray; top one side of dough with about a teaspoon of cream cheese mixture without coating the edges
  12. Top cream cheese with about 2 tablespoons of pear filling
  13. Fold the other half of the dough over and press down around the edges to seal; take a fork and press down around the to add a design
  14. Bake for 12-13 minutes or until top is golden brown

[/print_this]

Pear and Cheese Pockets

What are your shopping weaknesses?

Ice Cream Inspiration

Did you know that Cold Stone sells ice cream cupcakes?  They do.  Did you know that ice cream is my ultimate portion control weakness?  It is.  If you put this in front of me and left me alone, it would be gone when you came back.

Black Bottom Ice Cream Cupcakes

Individual ice cream cupcakes, however, this is portion control I can live with.  Using Cold Stone as my inspiration, I created Black Bottom Ice Cream Cupcakes, a dessert that combines the sweet crunch of chocolate, creamy ice cream and and soft spongy cake!

Black Bottom Ice Cream Cupcakes

I used a white cake mix (gasp), made with applesauce and egg whites, fat free strawberry ice cream, and semi-sweet chocolate chips.  The combinations of flavors are endless and I can’t wait to make different versions of these cupcakes.  They would be a perfect dessert for a child’s birthday party or for an adult like me who has no control around ice cream.

There are a few components to this recipe, but are really easy to make.

Start by making the “cake” of the cupcake; use a cookie dough scoop (about 2 tablespoons) to place batter into cupcake tins

batter in muffin tin 2

The cupcakes are small so they will bake quickly, 8-10 minutes

cupcakes baked

While cupcakes are cooling, melt chocolate and coat the bottom of separate cupcake baking cups (1-2 tablespoons of chocolate each); freeze for about 10 minutes or until chocolate is hard

chocolate in cups

Meanwhile, remove ice cream from freezer to soften

strawberry ice cream

When chocolate has hardened, scoop about a quarter of a cup of ice cream into each cup

ice cream in cups

Place cakes on top of ice cream and push down to secure

cake in cups

Cover with saran wrap and freeze cupcakes for at least one hour

Carefully unwrap frozen cupcake

cupcake 1

Black Bottom Ice Cream Cupcakes

Top with whipped cream

Black Bottom Ice Cream Cupcakes

And jimmies (yes, that’s what I call them)

Black Bottom Ice Cream Cupcakes

[print_this]

Black Bottom Ice Cream Cupcakes

Ingredients:

1 Prepared white cake batter from 1 box mix
3 cups semi-sweet chocolate chips
1/2 gallon strawberry ice cream

Directions:

Pre-heat oven as directed on cake mix box
Prepare cake batter
Use a cookie dough scoop (about 2 tablespoons) to place batter into cupcake tins filled with paper cup holders or sprayed with cooking spray
Bake cake 8-10 minutes or until a knife comes out clean
While cupcakes are cooling, melt chocolate in the microwave or on the stove
Coat the bottom of separate cupcake baking cups with melted chocolate (about 1-2 tablespoons of chocolate each)
Freeze for about 10 minutes or until chocolate is hard
While chocolate is chilling, remove ice cream from freezer to soften
When chocolate has hardened, scoop about a quarter of a cup of ice cream into each cup
Place cakes on top of ice cream and push down to secure cupcakes
Cover cupcakes with saran wrap and freeze for at least one hour
Serve topped with whipped cream and jimmies

Notes:

If your freezer is not very cold, make sure to serve immediately or cupcakes will melt

You can control the ingredients and make them as light or as decadent as you’d like

[/print_this]

Black Bottom Ice Cream Cupcakes

What is your favorite way to eat ice cream?

Must Make This Now

There are a few occasions when I see a recipe on a blog and I know that I need to make it immediately. Of course, I bookmark several new recipes each week, but I never have time to try all of them.  Unsurprisingly, it was a chocolate and peanut butter recipe that made the “must-make-this-now” cut.

Flourless Chocolate Cake with Peanut Butter Frosting and Chocolate Glaze... and kind of healthy!

When I saw this cake on chocolate and carrots, I wanted to stick my fork through the screen. Realizing that the cake was made with black beans, I was even more intrigued.

black beans

I’ve actually made black bean brownies before, but they were dense and fudgy. This cake, on the other hand, looked light and, well, cakey.

Flourless Chocolate Cake with Peanut Butter Frosting and Chocolate Glaze... and kind of healthy!
Last week, I had some time off from work and took advantage of the opportunity to try this wonderful dessert.  Links to the recipe components for this Chocolate Black Bean Cake with Peanut Butter Cream Cheese Frosting and Chocolate Glaze are below.

Start the cake by combining dry ingredients: cocoa, baking powder and baking soda; set aside

dry ingred

Combine black beans, sugar, vanilla, and some of the eggs in a blender until mixture becomes liquid; set aside

all blender ingredients

Beat softened butter in a mixer until light and creamy

butter creamed

Add remaining eggs, one at a time

butter and egg

Once fully combined, add the black bean mixture and mix; then add the dry ingredients

added black bean mixture

Mix batter until everything is well combined, batter will be just like regular chocolate cake batter!

dry ingred added

I did not have small cake pans, so I baked the cake in a spring-form pan instead (20-25 minutes)

batter in pan

Set cake aside to cool

cake baked

For cream cheese peanut butter frosting, use cream cheese softened at room temperature

cream cheese

Beat well until light and creamy

cream cheese whipped

Add peanut butter and then confectioners’ sugar

cream cheese with peanut butter

Frosting is ready when creamy but slightly stiff (I used fat free cream cheese and had to add a tablespoon of milk to the icing because it was too stiff)peanut butter icing

Scoop peanut butter frosting onto cooled cakeicing on cake 1

Cover cake entirely

icing on cake 5

Since we didn’t have cream, I made a chocolate glaze instead of a ganache

glaze ingredients

Combine chocolate, butter, and corn syrup over low heat; stir in vanilla

glaze 1

Top cake with glaze immediately

pouring glaze 1

Slice and serve!

Flourless Chocolate Cake with Peanut Butter Frosting and Chocolate Glaze... and kind of healthy!

The black bean cake was light, moist and perfectly complemented by the rich chocolate glaze and creamy peanut butter frosting.  It was lower in calories than a typical cake, but still satisfying enough that I was able to enjoy one slice and walk away (a slight miracle for me).  I can’t wait to make it again!

Click links below for the following recipes:

Chocolate Black Bean Cake

Peanut Butter Cream Cheese Frosting

Chocolate Glaze

Flourless Chocolate Cake with Peanut Butter Frosting and Chocolate Glaze... and kind of healthy!

What was the last recipe you saw and had to make immediately?

Cinnamon Swirl

I love cinnamon.  I use it in my oatmeal, yogurt, cottage cheese and even to season my sweet potatoes.  Cinnamon supposedly increases your metabolism, but at the rate I consume it, that means I should be burning fat like nobody’s business.  Hmm, not so much.  Regardless, it tastes delicious and is especially delightful in the form of cinnamon rolls.  When I started thinking of cinnamon rolls, I imagined a perfect morning where I’d wake up to a fresh-out-of-the-oven giant gooey cinnamon roll accompanied by a rich cup of coffee.  Then I freaked out at the thought of yeast started thinking of cookies.

cookies 13

Although I used strong coffee throughout the recipe, the flavor didn’t quite come through.  I’ll have to play with it again, but luckily, despite the lack of coffee flavor, this cookie is delicious.  This Cinnamon Roll Cookie is a rich and chewy sugar cookie wrapped around a light but gooey cinnamon swirl filling.  For now, I’ll just have to dunk the cookies in coffee as I eat them.

The recipe is pretty easy, but you need to give yourself time to chill the dough.  Plan for about ~3 hours from start to finish.

Start by sifting flour, salt and baking powder;  set aside

dry ingred

Beat butter and sugar in a large mixing bowl until light and fluffy

butter and sugar butter and sugar creamed

Beat in egg, coffee and vanilla

adding egg, vanilla, coffee egg etc mixed

Stir in dry ingredients until well-combined

add dry ingred

Place dough on large piece of seran wrap

dough 1

Roll dough into a rectangle about 1/4 inch thick;  wrap tightly with additional seran wrap and refrigerate for 1 hour

dough 3

Once dough is chilled, uncover and brush top of dough with coffee

dough 4

painting coffee 1 painting coffee 2

Combine sugar, cinnamon and melted butter

brown sugar mix

Spread mixture evenly over dough

brown sugar mix 2

Allow dough to come to room temperature so that it is soft enough to bend without braking

Carefully roll dough tightly from one long end to the other dough rolled 1

When dough is rolled like a long cinnamon bun, wrap tightly with seran and chill again in refrigerator for 1 hour

Pre-heat oven to 325 degrees dough rolled 2

Once dough is chilled again, unwrap and slice into cookies about 1/4 inch thick

dough on sheet 4

Bake on baking sheets lined with parchment paper until the center of cookies is no longer wet, about 15 minutes; cool cookies on cooling rack

cookies baked 4

[print_this]

Cinnamon Roll Cookies

Adapted from Martha Stewart

Yield: 3 dozen cookies

Ingredients

  • 2 cups all-purpose flour
  • 1/4 teaspoon salt
  • 1/2 tsp baking powder
  • 1/2 cup + 2 tablespoons unsalted butter, softened, separated
  • 1 cup granulated sugar
  • 1 egg
  • 2 tablespoons, separated strong brewed coffee
  • 1/2 teaspoon vanilla
  • 1/4 cup light brown sugar
  • 1/2 teaspoon cinnamon

Cooking Directions

  1. Sift flour, salt and baking powder. Set aside
  2. Beat 1 stick butter and sugar in a large mixing bowl until light and fluffy
  3. Beat in egg, 1 tablespoon of coffee, and vanilla
  4. Stir in dry ingredients until well-combined
  5. Place dough on large piece of seran wrap and roll dough into a rectangle about 1/4 inch thick
  6. Wrap tightly with additional seran wrap and refrigerate for 1 hour
  7. Once dough is chilled, uncover and brush top of dough with remaining coffee
  8. Melt remaining butter (2 tablespoons)
  9. Combine sugar, cinnamon and butter
  10. Spread mixture evenly over dough
  11. Allow dough to come to room temperature so that it is soft enough to bend without braking
  12. Carefully roll dough tightly from one long end to the other
  13. When dough is rolled like a long cinnamon bun, wrap tightly with seran and chill again in refrigerator for 1 hour
  14. Pre-heat oven to 325 degrees
  15. Once dough is chilled again, unwrap and slice into cookies about 1/4 inch thick
  16. Bake on baking sheets lined with parchment paper until the center of cookies is no longer wet, about 15 minutes

[/print_this]

cookies 1

What do you do with cinnamon?

A Sweet Start to Your Day

The below post is from Lauren at Healthy Food for Living.  You may remember that I used her recipe to make delicious Chocolate Almond Butter Cookies last week.  She was so nice to put together a fantastic breakfast-themed post for the blog.  These recipes would be a perfect sweet start to the day and I can’t wait to try some of them!!  Lauren – thank you for putting together such a wonderful post!

Hello Keep It Sweet Readers!

Another Lauren here – you may know me from my blog Healthy Food For Living (www.healthyfoodforliving.com). If that is the case, then you are well aware of my near insatiable sweet tooth. In my world, a meal isn’t complete without a sweet component to it. Whether that means fresh fruit served with an egg sandwich for brunch, Greek yogurt with a sandwich for lunch, or a baked sweet potato alongside roasted chicken for dinner, my sweet tooth must be fed.

Then there’s breakfast. Ah, breakfast. My favorite meal of the day, mostly because sweets are not only accepted at this point in the day, they are revered. I thought it would be appropriate to compose a guest post featuring dessert-for-breakfast inspired recipes in order to “keep it sweet”! The following recipes are healthy enough to enjoy first thing in the morning, but are sweet enough to satisfy a dessert craving.

In keeping with the recent return of frigid temperatures and snowy weather to New England, (that brief thaw was such a tease!), I thought I’d start with a warm and comforting rice pudding recipe. Traditionally served as dessert, rice pudding can easily fuel you through the morning hours if you use hearty brown rice and a small amount of unrefined sweetener.

Apple Cinnamon Brown Rice Pudding

IMG_4481-500x375

Serves 4-6

Ingredients:

  • 2 cups water
  • 1 cup short-grain brown rice
  • pinch of salt
  • 4 cups milk of choice (skim, 1%, almond, soy, etc.)
  • 1 Tbsp brown rice syrup
  • 3 Tbsp Grade B pure maple syrup
  • 1 tsp pure vanilla extract
  • 2 tsp ground cinnamon
  • generous 1/2 cup raisins
  • 1 large apple, peeled, cored, and finely chopped

Directions:

    1. Combine water, rice, and salt in a large, heavy-bottomed pot (such as a dutch oven). Bring to a boil, stir once, and cover with a tight-fitting lid. Reduce heat to low and simmer for about 40 minutes, or until most of the water is absorbed.
    2. Remove rice from heat, place in a bowl, and set aside.
    3. Add 4 cups of milk, brown rice syrup, maple syrup, vanilla, and cinnamon to the pot. Bring to a very low boil over medium heat, stirring often so the milk doesn’t burn. Lower heat to medium/medium-low.
    4. Add in the cooked rice, raisins, and chopped apple. Cook over medium/medium-low heat, stirring frequently. If a “skin” forms, just stir it back into the pudding. Simmer until the milk cooks down and the rice is creamy, about 30 minutes. NOTE: It is especially important to tend to the pudding towards the end of the cooking time. Do not walk away from the stove, or your pudding will burn.
    5. Transfer rice pudding to a large bowl, and let cool.
    6. Serve warm or cold.

There is something about this brown rice pudding that instantly elicits from me a contented sigh and satisfied smile; some special quality that other dishes simply cannot rival.  Perhaps it is the serendipitous synthesis of chewy brown rice, creamy milk, and subtly sweet fruit – of both the fresh and dried varieties – that makes this pudding so delightful; perhaps it is the knowledge that I’m feeding my body food that is as healthy as it is delicious. You can make a full batch of this rice pudding on the weekend, and reheat the leftovers with an additional splash of milk throughout the workweek for a quick breakfast.

Another classic winter dessert that I deem breakfast-worthy is bread pudding (clearly, I love carbs!). I have not one, but TWO breakfast bread pudding recipes to share with you – each featuring a vegetable that I adore: pumpkin and sweet potato. Both recipes call for hearty whole wheat bread that is soaked in an orange-hued “custard” before being baked to soufflé-like perfection.

Sweet Potato Pie Bread Pudding

IMG_7642

yields 9 servings

Ingredients:

  • 1 1/4 cup 2% milk
  • 2 Tbsp pure maple syrup
  • 2 Tbsp brown sugar or Sucanat (or 1/4 cup for a sweeter bread pudding)
  • 1 tsp ground cinnamon
  • 1/4 tsp ground nutmeg
  • 1/8 tsp ground cloves
  • 1/8 tsp ground allspice
  • 1 tsp pure vanilla extract
  • a pinch of salt
  • 3 eggs, lightly beaten
  • 2 cups sweet potato puree (bake about 2 lbs of sweet potatoes at 400°F for 1 hour or until very soft, peel, puree, and measure out 2 cups)
  • 10 slices whole wheat sandwich bread, cut into 1 inch cubes (about 4 1/2 cups)

Directions:

    1. Combine the milk through sweet potato puree in a large bowl, whisking until well combined. Add bread cubes and stir gently to coat.
    2. Spoon mixture into an 8×8 inch square baking dish coated with cooking spray (alternately, you can prepare 6 individual ramekins). Cover and chill for at least 1 hour or up to 4 hours.
    3. Preheat oven to 350°F.
    4. Place square dish (or ramekins) in a 13×9 inch baking dish; add hot water to larger dish to a depth of 1 inch. Cover with foil, and bake at 350°F for 25 minutes (more like 15 for individual ramekins). Uncover and bake an additional 10 minutes (or 5 for ramekins).
    5. Let cool for a few minutes. Serve warm or at room temperature.

Pumpkin Raisin Bread Pudding

IMG_4080-500x375

very loosely adapted from Cooking Light‘s Pumpkin Bread Pudding

yields 9 servings

Ingredients:

  • 6 slices whole wheat cinnamon raisin bread, cut into 1 inch cubes (about 2 1/2 cups)
  • 4 slices whole wheat bread, cut into 1 inch cubes (about 2 1/2 cups)
  • 1 1/4 cup 2% milk
  • 1/4 cup pure maple syrup
  • 1 tsp pumpkin pie spice
  • 1/2 tsp ground cinnamon
  • a pinch of salt
  • 3 eggs, lightly beaten
  • 1 (15 oz) can pumpkin puree
  • 1/3 cup raisins

Directions:

    1. Combine the milk through pumpkin puree in a large bowl, whisking until well combined. Add bread cubes and raisins, stir gently to coat.
    2. Spoon mixture into an 8×8 inch square baking dish coated with cooking spray. Cover and chill for at least 1 hour or up to 4 hours.
    3. Preheat oven to 350°F.
    4. Place square dish in a 13×9 inch baking dish; add hot water to larger dish to a depth of 1 inch. Cover with foil, and bake at 350°F for 25 minutes. Uncover and bake an additional 10 minutes.
    5. Let cool for a few minutes. Serve warm or at room temperature.

Either one of these breakfast bread puddings are sure to warm you up on a cold morning. Warm spices, delicate sweetness, and a light texture render these bread puddings a true delight!

Don’t feel like cooking in the morning, but still crave a sweet & satisfying breakfast? Perhaps I can tempt you with a Carrot Cake Sandwich.

Carrot Cake Sandwich

IMG_5575

Serves 1

Ingredients:

  • 1/2 cup finely shredded or grated carrots, preferably organic
  • 2 tsp pure maple syrup, divided
  • 2 Tbsp light whipped cream cheese, (or neufchatel), at room temperature
  • 1/4 tsp ground cinnamon
  • 1/8 tsp ground ginger
  • 1/8 tsp ground nutmeg
  • 2 slices whole wheat cinnamon raisin bread
  • 2 Tbsp chopped walnuts, toasted
  • 2 Tbsp raisins

Directions:

    1. Stir together the cream cheese and 1 tsp maple syrup in a small bowl until well combined. Set aside.
    2. In a separate bowl, combine the shredded carrots, remaining 1 tsp maple syrup, and spices.
    3. Spread one slice of bread with the maple cream cheese. Top with the toasted walnuts and raisins. Spoon on the carrots and top with the remaining bread slice.

Inspired by one of my all-time favorite desserts, this sandwich truly does taste like a slice of healthy carrot cake. Toss on some pineapple rings and/or shredded coconut if you like – either way I think you’ll love this “cakewich”!

To conclude this lengthy post, I wanted to suggest some sweet variations on my ultimate go-to breakfast: oatmeal. On most winter mornings I whip up a serving of hot stovetop oats using the following basic recipe (which can be tweaked according to your preferences):

Basic Stovetop Oatmeal

Serves 1

Ingredients:

  • 1/3 cup old-fashioned rolled oats
  • 1/3 cup milk of choice (I love unsweetened vanilla almond milk)
  • ½ cup water
  • ½ tsp ground cinnamon
  • 1 ripe banana, sliced thin

Directions:

    1. Combine all ingredients in a small saucepan set over medium heat. Stir, bring to a gentle boil, then reduce heat to medium-low. Cook, stirring with a rubber spatula, for 1-2 minutes, or until you have achieved the desired consistency.
    2. Spoon into a bowl and serve hot.

I almost always top my oats with a spoonful of peanut or almond butter, but I have some other ideas for additions that are sure to make your oatmeal dessert-worthy:

  • Pumpkin Pie Oatmeal: add in 1/3 cup pure pumpkin puree in step 1. Top cooked oatmeal with a sprinkling of pumpkin pie spice and a drizzle of pure maple syrup.
  • Apple Crisp Oatmeal: replace the banana with apple slices that have been sautéed in a bit of butter, maple syrup, and cinnamon until tender. Top cooked oatmeal with a sprinkling of apple pie spice and chopped toasted walnuts.
  • Double Chocolate Oatmeal: add in 1-2 Tbsp of unsweetened cocoa powder in step 1. Top cooked oatmeal with a small handful of grain-sweetened (or semi-sweet) chocolate chips.

Thanks for letting me share some of my favorite healthy ways to enjoy sweets first thing in the morning! I hope you try some of them – and please feel free to stop by Healthy Food For Living for some more recipes.

Big News!

Welcome to the NEW Keep It Sweet!

If you currently subscribe to the Keep It Sweet emails, you will need to re-subscribe.  For Google Reader followers,  you will need to update the URL.

Special thanks to Julie at Savvy Eats for doing all the work.  She transferred the entire blog and did the site design, too.  Check out Savvy Blog Services if you are looking for help moving or doing design work for your blog.

Twix Gone Wrong

For Valentine’s Day, I thought it would be fun for Matt and me to make a homemade version of one of his favorite candies, Twix Bars.  I’d seen a ton of great-looking recipes around the blog world and thought it would be a good idea to take ideas from them but make my own version.  You can see different examples of homemade Twix Bars on Mangio Da Sola, Hoosier Homemade, Chocolate and Carrots, and Not Without Salt.

I started with the Mangio Da Sola shortbread crust, easy enough

shortbread crust

I thought that using packaged caramels would be a really easy shortcut for the middle layer; I guess I forgot how hard they get so quickly

caramels

Topped the caramel with salt, because I am kind of obsessed with that combination

caramel salt layer

And then melted milk chocolate; here you really can’t go wrong

chocolate layer

The first problem was getting the bars out of the pan; the shortbread was too crumbly and cutting through the caramel was tough

done 1

I think a foil-lined pan would have been better

done 8

These would have been so much better with a layer of caramel sauce or filling, instead of melted caramel candies (unless breaking a tooth is your goal)

done 5

We tried to eat them but it just wasn’t worth it, I may have eaten the entire layer of milk chocolate off the top… wasting chocolate is just wrong!

done 6

Have you had any desserts gone wrong recently?

Easiest Cookie Ever, and Delicious Too!

When I saw Lauren’s suggestions for Valentine’s Day treats included this cookie, I knew I had to try it!  Lauren has a wonderful blog that makes incredibly delicious and healthy versions of food that everyone loves.  Unfortunately, I didn’t have any chocolate peanut butter on hand, but I did have some of this chocolate almond butter on hand.

chocolate almond butter

Since I wanted to make the cookies immediately, I decided to adapt her recipe for what I had on hand and make Flourless Chocolate Almond Butter Cookies.

Flourless Chocolate Almond Butter Cookies - Easiest cookie ever!

Reasons to make these cookies:

1. They are deliciously light and fudgey at the same time.

2.  This is the easiest cookie recipe I have ever made.  3 steps, that is it!

3.  Portion control!  This recipe makes 8 cookies.  If you are nervous about eating the entire batch, you can’t get yourself into too much trouble*.  The cookies are pretty big, too.

*Each cookie comes out to 5 weightwatchers points+, as a result, the entire batch is 40 points+ which is less than the extra weekly points you get.

Flourless Chocolate Almond Butter Cookies - Easiest cookie ever!

Step 1:  Mix together almond butter, brown sugar, whisked egg white, baking soda, vanilla extract and salt

all ingredients in bowl

Step 2:  Stir in chocolate chips

add choc chips

Step 3:  Bake cookies

dough on pan

Did I say they were easy?

Flourless Chocolate Almond Butter Cookies - Easiest cookie ever!

[print_this]

Flourless Chocolate Almond Butter Cookies

Adapted from Healthy Food for Living

Yield: 8 cookies

Ingredients

  • 1/2 cup chocolate almond butter
  • 2 tablespoons light brown sugar, packed
  • 1 egg white, whisked
  • 1/2 teaspoon baking soda
  • 1 teaspoon vanilla extract
  • 1/4 teaspoon salt
  • 1/4 cup semi-sweet chocolate chips

Cooking Directions

  1. Pre-heat oven to 350 degrees
  2. Mix together almond butter, brown sugar, whisked egg white, baking soda, vanilla extract and salt
  3. Stir in chocolate chips
  4. Use a cookie dough scoop or tablespoon to shape 8 cookies on a baking sheet lined with parchment paper
  5. Bake for ~12 min or until tops of cookies are no longer loose

[/print_this]

Flourless Chocolate Almond Butter Cookies - Easiest cookie ever!

What is the easiest dessert you have made?