All posts by Keep It Sweet

What’s Happening Lately at Keep It Sweet Desserts

It is a good thing we took our vacation at the end of February, because I don’t think I’ve stopped running around since we are back.  March was a busy month and April is showing signs of the same.  While it is completely exhausting, and I would love a day off for a haircut and some fun Spring shopping, there is definitely a natural high that I get from being busy.

You already know about some of our trip, the BlogHer lunch at the Sunburnt Calf, and Keep It Sweet Desserts’ first birthday, here is what else I’ve been up to…

Last weekend I met up with some bloggers for a day of NYC fun, of course I had to bring samples to share.

image_4

I’ve already spent some time with Joanne and Tara (both of whom I adore).  It was wonderful to get to finally meet Erin who was in town for just a few hours, as well as Jen and Kayle who live in the area.  Tara has a great photo of all of us after brunch.  Sadly missing was Tracey who had the worst luck ever with car trouble that morning.

Work-wise, I’ve been occupied with Easter and Passover orders (don’t worry, Matzo Crack is still available!), but I’ve also been busy making cake pops for some Anthropologie events.  I love working with a brand that I love to shop.

image_2

I’ve also been working on improving my packaging over the last few months to make it just a bit more special.  It is a work in progress but I’m really excited about this new “cookie” insert!

image_3

Remember when I mentioned that March is full of family birthdays?  The last one was for my Mom on the 29th.  We celebrated yesterday with her favorite food, cake.  Finding a dessert for my dad was challenging, but I know with my mom it is all about the icing!  I put together 3 layers of chocolate pound cake (baked in 6, 8 and 10-inch round cake pans), filled the layers with this chocolate buttercream, and covered everything with this vanilla buttercream.  Right now I’m just regretting that I didn’t bring home any leftovers!

imagephoto

Oh, and in other fun news, keep your eyes open for some Keep It Sweet Desserts giveaways over the next couple of months!  Audra hosted one last week and Carrie will have one this week!

And finally, I have some exciting news that I will be sharing…… in a few days.  Follow me on Facebook or Twitter for the latest!!

Happy 1st Birthday to Keep It Sweet Desserts!

March is a huge birthday month in my family, so it is only appropriate that Keep It Sweet Desserts squeezed in there as well.  I still remember thinking to myself, just a few hours before the website went live, “I have no idea what is about to happen”.  That could not have been more true!

SONY DSC

Yes I developed a business plan and yes I had goals, but the first twelve months of running this company has opened up opportunities, challenges and business ventures that I never could have imagined.

For instance, I…

Brought desserts on set / met the cast of Royal Pains

Was featured in Star Magazine

Participated in a friendly office bake-off

Was featured on Fox & Friends

Became known for some of the best brownies in the New York City area

SONY DSC

Made cake pops for numerous Anthropologie events

Was featured by Fox Small Business Center

Was surprised by my mom with KISD t-shirts for the family

Had my entire family working with me through the holidays

Made friends with other awesome foodie entrepreneurs

SONY DSC

Was featured on New York Live

Became a finalist for the Martha Stewart American Made Award

Learned important lessons

Helped raise money for several charities by contributing cookie platters, favors and auction items to events

Participated in filming the pilot for a reality TV show

It has been an amazing and wild ride!

2012-05-08_1336510568

*Thanks for being a part of such an incredible year.  Be sure to Instagram, Tweet, Facebook, etc. about your Keep It Sweet Desserts experience! #KISDesserts*

A Taste of Australia at The Sunburnt Calf in New York City

I was recently invited to a BlogHer lunch hosted by Tourism Australia at The Sunburnt Calf in New York City. Blogger events are always fun because I get to meet and see some of my “blog friends.” This was also a good opportunity to experience Australian cuisine and learn about Australia’s food and wine culture.

SONY DSC SONY DSC


While I’ve had my fair share of childhood Outback Steakhouse experiences (I used to go with my best friend and her family while we were growing up!) and have been to one or two Australian restaurants in the city, I never really got the chance or took the time to understand what Australian food actually is. Representatives from the different regions of the country–including Queensland, South Australia, and Tasmania–spoke to us about the lifestyles of their areas. (Hi Audra!)

SONY DSC

Michael Moore, a world-renowned chef, cookbook author and entrepreneur, defined Australian cuisine as laid-back but sophisticated: sophisticated in the quality of food, but laid-back in atmosphere. I really liked how he described it that way, and it made me think of California a little bit. Everyone also emphasized the farm-to-table movement across the regions and just how open and light everything is. So much calmer than crazy New York City. Honestly, the pictures and descriptions of the different regions made me want to go to Australia immediately. Maybe I can get someone to send me there for one of their Food and Wine Festivals… Wishful thinking!


And as for the food at the event, this was definitely a step up from my typical made-at-home salad lunch! Take a look at the beautiful and flavorful dishes we were served!


Classic Prawn Cocktail, with shredded iceberg and creamy cocktail sauce. The shrimp were fresh and the cocktail sauce was just the right touch to highlight the shellfish.

SONY DSC


Stuffed Mushrooms, with wild mushroom mousse, olive tapenade, and Manchego. The mushrooms were meaty and substantial without being overly filling for an appetizer. I was happy that the flavor from the olive tapenade was not overpowering; the flavors just came together nicely.

SONY DSC SONY DSC


Oysters “Kilpatrick”: tempura-fried oyster, pickled shallots, and Worcestershire-bacon butter. This was my favorite dish of the day. The oysters were perfectly cooked and the flavors were great. The bacon gave it a nice smokiness, while the shallots added the perfect acidic balance.

SONY DSC


Steamed Buns with red braised pork belly. The buns were fresh and soft, which complimented the savory meat and fresh garnishes well.

SONY DSCSONY DSC


We had a choice of three entrees, but I still got photos of the other two beautiful plates!


BBQ’d Barramundi Fillet with sea scallops, frisee salad, new potatoes, anchovy aioli. I actually chose this dish because I am a sucker for sea scallops. One of the two scallops was seared perfectly, and the fish was light and flavorful; it felt slightly more substantial than tilapia. We actually saw a photo of the biggest Barramundi and it was huge!

SONY DSC


Moroccan Vegetable Tagine with roasted almond and mint couscous. I didn’t taste it but I could smell Joanne’s across the table. It smelled amazing!

SONY DSC


Grilled Australian Rack of Lamb with roasted winter vegetables and minted yogurt. Another beautifully plated dish. I think that is Jacqueline’s arm in the back. :-)

SONY DSC


And finally dessert! Pavlova with sticky meringue, fresh cream, kiwi, mango, and passion fruit sauce. I loved the passion fruit sauce!

SONY DSC


Peach Melba with vanilla ice cream and raspberry sauce. I didn’t try it, but those who did said it was good.

SONY DSC


Thank you so much to Tourism Australia for hosting this lunch! This is a sponsored post, but all opinions stated are my own.

What to do and where to stay in San Diego, Part 1

Spring officially starts in a few days, but you wouldn’t believe it with the snow on the ground and freezing temperatures outside.  This blast of winter in mid-March is making me wish I was back in San Diego!

We had such an amazing trip that I wanted to share some of our favorite places that we visited in the week that we were there.

Matt and I looked into a ton of different hotel options but ultimately decided to stay at Estancia La Jolla.  We were convinced by the website’s photos of Spanish-inspired architecture and I’m happy to say that it was even more beautiful in person.  I should have gotten more photos of the hotel, but I was too busy taking it all in and enjoying the sunshine.

What to do and where to stay in San Diego, Part 1

Before we even arrived at the hotel, their hospitality was apparent through tweeting with them.  When we did get there, they continued to impress us.  Everyone at the hotel was nice and helpful.  We were treated with a surprise bottle of champagne and chocolates that we enjoyed for a quiet night in with room service one evening.

Below is a photo right outside of their spa.  Matt and I splurged on a couple’s massage and it was completely worth it.  Before the massage, I was sitting outside by the fire in a fluffy robe reading my book, pretty sure that was one of my favorite afternoons.

What to do and where to stay in San Diego, Part 1

While the weather in San Diego is unbeatable, I didn’t think it would be warm enough in February to go to the pool.  Even though I dreaded the thought of putting on a bathing suit, the unseasonably warm temperatures that we had at the end of our week swayed me.  How can you not want to live here?

What to do and where to stay in San Diego, Part 1

What to do and where to stay in San Diego, Part 1

What to do and where to stay in San Diego, Part 1

Oh, and the food!  We didn’t pick the hotel for its dining options, but I was more than impressed with breakfast.  We had gotten a package that gave us a $25  daily breakfast credit so we had a couple of morning meals in-house.  Can I just say this was one of my favorite hotel breakfasts ever?  It was an egg white frittata with a bazillion veggies and chicken sausage.  I skipped the cheese because there were so many flavors and didn’t miss it at all.  A little avocado smeared on whole wheat toast with a slice of this frittata was a pretty great way to start the day.  Matt and I actually shared it after the first time I ordered it because the portion was so big!

What to do and where to stay in San Diego, Part 1

Speaking of breakfast, if you ever visit San Diego, you NEED to go to Snooze Eatery… and promise me you won’t be on a diet that day.

What to do and where to stay in San Diego, Part 1

We actually enjoyed our first meal / breakfast at Snooze and what a way to kick off vacation.  We had woken up at 4am that morning (well, pretty much every morning), so we had no problem arriving just a few minutes after they opened at 6:30am.  The best part of that was missing out on the crazy wait that they apparently get every morning.

What to do and where to stay in San Diego, Part 1

We first heard about Snooze from our friends who actually just got engaged this past weekend (!!!), but everyone else who knows anything about San Diego also said we needed to go there.

The first order of business was pancakes.  They have an incredible variety of decadent dessert-flavored options on a regular basis, but apparently there is also a Cinnamon Roll option that isn’t even on the menu.  Glad I had the inside scoop:-)

What to do and where to stay in San Diego, Part 1

The best part? They let you mix and match!  We were able to select three different flavors for our order and went with Sweet Potato, “Coffee and Donuts”, and Cinnamon Roll.

This photo is not a joke.

What to do and where to stay in San Diego, Part 1

Both of us agreed that the sweet potato was the best one.  The texture and flavor of that pancake were so perfect that you didn’t even need any toppings.  The cinnamon roll pancake was a close second with its insane toppings (it is the one in front in the photo above).  The coffee and donuts was just ok.  The coffee dipping sauce was pretty amazing but I would have preferred another sweet potato pancake instead.

What to do and where to stay in San Diego, Part 1

Supposedly there is also some crazy good peanut butter cup option but I didn’t want to get one that Matt wouldn’t share.  Guess I just need to go back on another visit!

What to do and where to stay in San Diego, Part 1

The other thing that Snooze is well-known for is its eggs benedicts.  Honestly, this is not something I usually get excited about, but Matt loves eggs benedict and I figured it wouldn’t hurt to add some protein to the meal.

What to do and where to stay in San Diego, Part 1

This is another place where you get to mix and match.  We got one of the basic Ham Benedict III and one of the Chilaquiles Benedict.

What to do and where to stay in San Diego, Part 1

As someone who isn’t a big red-meat eater and really could be vegetarian pretty easily, I have to say that the Chilaquiles Benedict was kind of lifechanging.  The meat under the egg was just so melt-in-your mouth perfect and even though it sounds like something that would completely gross me out, it was seriously incredible.  I think Matt was more excited about me liking it than he was about eating it lol.

Oh, and we scraped off most of the hollandaise because it was completely unnecessary.

What to do and where to stay in San Diego, Part 1

We could not have picked a better way to kick off our vacation.  This meal is my new favorite hiking fuel.

What to do and where to stay in San Diego, Part 1

I can’t wait to share more photos (and food!) from our trip!

This is not a sponsored post.  Matt and I paid for the hotel and meals and all opinions are my own. 

(Real) Pistachio Cupcakes with Brown Sugar Buttercream

Flavorful pistachio cupcakes made from scratch and topped with the best brown sugar buttercream.

Recipe for Pistachio Cupcakes with Brown Sugar Buttercream

My dad isn’t a dessert person.

Pistachio Cupcakes with Brown Sugar Buttercream

I know, cover your mouth in horror!  Him and my sister both… my mom and I, we are just made differently.  Actually, I relate to my dad in a lot of other ways.  His math and science-geared brain, his smile, and his stubbornness, to name a few.

Pistachio Cupcakes with Brown Sugar Buttercream

When I was growing up we used to get in such arguments where we would fight it out all the way, each of us standing firm on either side until the very end when one person was clearly “right”.  But at that point, we would resolve it, both content in how the conversation was finalized.  Yes, I did deserve the nick-name “Last-Minute Lauren” and yes, real chemists probably do know better than my idiotic 10th grade chemistry teacher.

Pistachio Cupcakes with Brown Sugar Buttercream

Well, it is that stubborn part of me that refused to let his birthday go without making some dessert that he would like.  There are a few that we all know he enjoys from time to time- angel food cake, pecan pie, and very crispy cookies.  Well, sorry, but those are just not exciting enough for a birthday dessert.

Pistachio Cupcakes with Brown Sugar Buttercream

Knowing that he does love pistachios I decided to try to win him over from that direction.  The result: WIN for me!  He loved the cupcakes.  Well, win for him too, then.  He just might have skipped the buttercream and passed his along to my mom, but hey, I’ll take it.

Pistachio Cupcakes with Brown Sugar Buttercream

(Real) Pistachio Cupcakes with Brown Sugar Buttercream
 
Flavorful pistachio cupcakes made from scratch and topped with the best brown sugar buttercream.
Author:
Recipe type: Dessert
Makes: 2½ - 3 dozen regular-sized cupcakes
Ingredients
Pistachio Cupcakes:
  • 4⅜ ounces (~1 cup) roasted and salted shelled pistachios (plus more for garnish)
  • 9⅝ ounces (~2½ cups) cake flour
  • 3½ ounces (3/4 cup) all-purpose flour
  • 1 tablespoon baking powder
  • 1 teaspoon baking soda
  • ¼ teaspoon table salt
  • 1½ cups ice cold water
  • ½ pound (1 cup / 2 sticks) unsalted butter, softened at room temperature
  • 13⅛ ounces (~1¾ cup) granulated sugar
  • 1 tablespoon vanilla extract
  • 4 x-large egg whites, separated
  • ¼ teaspoon cream of tartar
Brown Sugar Buttercream:
  • 4¼ ounces egg whites at room temperature (~4 large egg whites)
  • 1 pound 0.5 ounces light brown sugar (~1 cup, packed)
  • pinch of salt
  • ½ pound (1 cup / 2 sticks) of room temperature unsalted butter sliced into tablespoons
  • ½ teaspoon vanilla extract
Instructions
Pistachio Cupcake
  1. Pre-heat oven to 325; line muffin tins with cupcake liners and set aside
  2. In a food processor, pulse the pistachios just until they are coarsely chopped; remove 2 tablespoons and place in a large bowl
  3. Continue to pulse remaining pistachios until they are finely ground; be careful not to grind too long or they will begin to turn into more of a paste; add to bowl with other pistachios
  4. Sift flour, baking powder, baking soda and salt into the bowl of pistachios; whisk mixture and set aside
  5. In the large bowl of an electric mixer with the paddle attachment, beat butter and sugar on high speed until light and creamy (at least 5 minutes)
  6. Add 1 egg white and vanilla and mix until combined; scrape the sides of the bowl with a spatula
  7. Turn mixer down to the lowest speed and slowly add part of the dry and wet ingredients, starting and ending with the dry ingredients; do not overmix
  8. Remove bowl and set aside
  9. Use a clean bowl (I wipe mine down with white vinegar) and whisk attachment and whisk the 3 remaining egg whites and cream of tartar until soft peaks form (several minutes on medium-high speed)
  10. Carefully fold egg whites into batter just until combined
  11. Use a large cookie dough scoop or small ladle to evenly distribute batter into prepared tins
  12. Bake 14-16 minutes or until a toothpick comes out clean from center of cupcakes (I usually test 1 or 2 towards the center of the tin)
Brown Sugar Buttercream:
  1. Wipe down your metal mixing bowl, whisk attachment, whisk and candy thermometer with lemon juice or white vinegar to make sure they are all grease free
  2. Place mixing bowl over pot of shallow simmering water (do not want bowl in the water) with candy thermometer attached
  3. In that bowl, combine brown sugar and egg whites, whisking continuously until temperature measures 160 degrees (if you do not have a candy thermometer, you want the mixture to be warm and the sugar to be dissolved); this will take about 5 minutes
  4. Place bowl back on mixer and place a bowl of ice directly underneath to help the cooling process; use whisk attachment and beat meringue in medium speed until a creamy meringue is formed, it should be thick but not stiff; bowl should also cool down while you are mixing
  5. Once texture is right and bowl has cooled, reduce speed to low; add butter, 1 tablespoon at a time, until it is completely combined; whisk in vanilla
  6. Pipe or spread buttercream over cooled cupcakes as desired; sprinkle with extra chopped pistachios
Notes
If your buttercream is too wet, it may have been too warm; place bowl in fridge for 15-20 minutes and then mix again
Cupcakes slightly adapted from cake by Kitchen Trial and Error who adapted it from Baked Explorations
Buttercream adapted from Martha Stewart


Pistachio Cupcakes with Brown Sugar Buttercream

So what if I ate more cupcakes than he did.  Happy (belated) birthday, Dad!
This post contains affiliate links.

Make something from the blog? Be sure to share it onInstagram with the tag #KeepItSweetDesserts.

You might also like:

Brown Sugar Cupcakes with Cinnamon Ginger Buttercream

Brown Sugar Cupcakes with Cinnamon Ginger Buttercream

Caramelized White Chocolate Truffle Pumpkin Cupcakes

Caramelized White Chocolate Truffle Pumpkin Cupcakes

Mini Lemon Cupcakes

Mini Lemon Cupcakes

Mini Cookies ‘n Cream Cupcakes

Mini Cookies ‘n Cream Cupcakes

Well, I’m pretty much at that point before vacation where I’m in a little bit of denial about how much I need to do beforehand.  Lots and lots and lots of cookies need to be made and my head is already in a world where the sun is shining and I have a tequila infused cocktail on my hand.

Mini Cookies ‘n Cream Cupcakes

Never mind that I am freaking out a little bit about being away from the kitchen for a week, no biggie.  I’ll just keep pushing that worry to a place in the far corner of my brain!  Who needs stress and anxiety when I can get excited about hiking, beaches, tacos and the sun.  We are heading west for a glorious 7 days in San Diego and I couldn’t be more excited.  While the rest of the world relaxed during Thanksgiving, Christmas and New Years, my vacation time is now revolving around Hallmark holidays.  I hoped/am hoping that saving my days off for after Valentine’s Day proves to be a good move.

Mini Cookies ‘n Cream Cupcakes

My lists of places to visit and explore and places to eat is nice and long thanks to the help of Krissy and Kathy, but if you have anything to add to the list, all suggestions are welcome!  I’ve only been to San Diego once for a couple of days as a teenager and Matt has never been.  Good thing we are very good at packing copious amounts of eating into our trips!

Mini Cookies ‘n Cream Cupcakes

But before I go, I couldn’t leave without sharing a sweet recipe with you.  Mini cupcakes are one of my favorite treats because the ratio of buttercream to cake is just so much better than the regular sized version, and mini means you can eat many of them, right?  The bonus? This Cookies ‘n Cream cupcake was a serious hit and my husband, who has recently been deemed the “Oreo expert” of our apartment, gave them firm approval.

Mini Cookies ‘n Cream Cupcakes
 
Mini cupcakes full of Oreos in the cake AND the buttercream.
Author:
Recipe type: Dessert
Makes: 24 mini cupcakes
Ingredients
Cupcakes:
  • 5¾ ounces (~1 cup plus 2 tablespoons) all-purpose flour
  • 2 tablespoons cornstarch
  • 1¼ teaspoon baking powder
  • ⅛ teaspoon salt
  • 5⅝ ounces (~3/4 cup) granulated sugar
  • 2 large eggs (or 1 x-large egg plus 1 yolk) at room temperature
  • ½ tablespoon pure vanilla extract
  • 2 ounces (4 tablespoons) unsalted butter, melted
  • ¼ cup vegetable oil
  • ½ cup milk at room temperature (I used skim)
  • ½ cup cup roughly chopped or broken Oreos (~4 cookies)
Buttercream:
  • 6 ounces (3/4 cup) unsalted butter, softened at room temperature
  • 4 ounces regular or light cream cheese
  • 2 cups powdered sugar
  • 1 teaspoon vanilla extract
  • ¼ cup finely ground Oreo crumbs (~3 cookies)
Instructions
Cupcakes:
  1. Pre-heat oven to 350 degrees
  2. Line a cupcake pan with cupcake liners or grease the cups with butter or non-stick cooking spray; set aside
  3. In a medium bowl, whisk together flour, cornstarch, baking powder and salt; set aside
  4. In the large bowl of an electric mixer, beat the sugar, eggs and vanilla on high speed for about 3 minutes or until mixture is well combined and thick
  5. Add butter and oil and beat on high until well combined; scrape sides of the bowl with a spatula and mix for another minute
  6. Reduce the speed to low and add ⅓ of the dry ingredients and then ½ milk; add another ⅓ of dry ingredients and remaining milk; add remaining dry ingredients and remove from mixer immediately
  7. Use a spatula to incorporate any dry ingredients that have are not fully combined; distribute batter evenly among cupcake cups with a ladle or ice cream scoop
  8. Bake in center of oven for 12-16 minutes or until a toothpick comes out clean
  9. Allow cupcakes to cool for several minutes and then remove from tin and place on cooling rack; set aside and prepare buttercream
Buttercream:
  1. Beat butter and cream cheese in the bowl of an electric mixer with the paddle attachment on high speed for several minutes until butter is light and creamy
  2. Add 1 cup of powdered sugar and mix on low speed until combined; add remaining powdered sugar and vanilla and increase speed of mixer to high and beat until frosting is light and fluffy
  3. Stir in Oreo crumbs until evenly distributed
  4. Pipe or spread onto cooled cupcakes as desired
Notes
Yellow Cupcakes from Food and Wine

 
Mini Cookies ‘n Cream Cupcakes

Make something from the blog? Be sure to share it onInstagram with the tag #KeepItSweetDesserts.

You might also like:

No Churn Oreo Fudge Swirl Ice Cream

No Churn Oreo Fudge Swirl Ice Cream

3-Layer Cookies and Cream Cake

3-Layer Cookies and Cream Cake

Oreo Pound Cake with Chocolate Cream Cheese Icing

Oreo Pound Cake with Chocolate Cream Cheese Icing

The best oreo cupcakes!

Valentine’s Day for Chocolate Lovers

Well, Valentine’s Day is just a few days from now and what says I love you better than chocolate?  I have plenty of recipe inspiration for you, but if your sweetheart is too far to bake for, there is still time to order a chocolate sweet from Keep It Sweet Desserts!

Chocolate Sweets for Valentine’s Day from Keep It Sweet Desserts:

Brownies & Blondie Pack

Chocolate Lover’s Cookie Box

KISD Perfect Chocolate Chip Cookies

Triple Chocolate Cookie Sandwiches

Valentine’s Day Gourmet Gift Basket

Peanut Butter Cup Stuffed Triple Chocolate Cookies from Keep It Sweet Desserts

And for those of you showing some love in the kitchen, here are some of my favorite chocolate recipes!

Brownies:

Fudgy Double Crème de Menthe Brownies

Oreo Crusted Brownie Pie with Cream Cheese Icing

Peanut Butter Caramel “Baked Brownies”

peanut butter caramel brownies

Candy:

Blueberry Pretzel Clusters

Oreo Mallow Clusters

Cheesecake:

Salted Caramel & Brownie Cheesecake Bars

Vanilla Bean and Chocolate Cheesecake Bars

Vanilla Bean and Chocolate Cheesecake Bars

Cupcakes:

Chocolate Covered Strawberry Cupcakes

Cookie Bottomed Cupcakes with Chocolate Cream Cheese Icing

Low Fat Vegan Chocolate Cupcakes

Triple Chocolate Cheesecake Cupcakes

Triple Chocolate Cheesecake Cupcakes

Ice Cream:

Black Bottom Ice Cream Cupcakes

Salted Caramel and Chocolate Chip Cookie Dough Ice Cream Bars

Salted Caramel Cookie Dough Ice Cream Bars

Other:

Magic [cookie bar] Pie

M&M Cookie Dough Cups

M&M Cookie Dough Cups

Looking for more chocolate inspiration? Check out my “I Dream In Chocolate” Pinterest board!

Make something from the blog? Be sure to share it onInstagram with the tag #KeepItSweetDesserts.

Fluffernutter Chocolate Cake

You favorite chocolate cake covered with peanut butter and marshmallow swirled icings.

Fluffernutter Chocolate Cake

Sometimes cakes don’t work out like you want them to.  But sometimes, they turn out better.

Fluffernutter Chocolate Cake

This cake actually started out as a recipe for “salted caramel fudge cake” but frankly all I got was chocolate cake.  Certainly not enough to stand on its own!  As a result, I did what any normal person would do, went into my freezer for my collection of “extra buttercream” and went to town.

Recipe for Fluffernutter Chocolate Cake

What, not everyone stores “extra buttercream” just because?  I highly recommend it.  Good things happen when you do!  See also: Brownies with White Chocolate Buttercream and Mocha Ganache. Chocolate Dipped Peanut Butter Cookie Sandwiches and Macarons

Anyway, I decided it had been way too long since I made a dessert revolving around chocolate and peanut butter (has it seriously been since July?!).  That is a travesty that needed to be immediately fixed.  And fixed it was.

The result:  I convinced myself that I was slicing the cake for photos and taking a bite for photos… but that bite turned into way more cake than I should be eating these days.  Oh, but in the moment it was so worth it.

Fluffernutter Chocolate Cake

Fluffernutter Chocolate Cake
 
You favorite chocolate cake covered with peanut butter and marshmallow swirled icings.
Author:
Recipe type: Dessert
Makes: 15 servings
Ingredients
  • 1 chocolate cake baked in a 9x13 pan, cooled (can use box mix or something easy like this 1-bowl chocolate cake recipe
  • 1 batch Fluffy Peanut Butter Frosting (recipe below)
  • 1 cup (1/2 of batch) Easy Marshmallow Buttercream (recipe below)
Fluffy Peanut Butter Frosting
  • ½ cup (1 stick) unsalted butter, softened at room temperature
  • 1¼ cup creamy peanut butter
  • ½ cup powdered sugar
Easy Marshmallow Buttercream
  • ¾ cup (1½ sticks) unsalted butter, softened
  • ~7 ounces marshmallow fluff (amount in a small jar)
  • 1½ cups powdered sugar
  • 1 teaspoon vanilla extract
Instructions
  1. Spread peanut butter frosting over entire cake
  2. Drop spoonfuls of marshmallow buttercream over peanut butter frosting layer
  3. Use the back of a knife to carefully swirl the marshmallow buttercream into the peanut butter frosting (any kind of marble effect will work!)
  4. Cut and serve
Fluffy Peanut Butter Frosting
  1. Beat butter until light and creamy; beat in peanut butter until creamy and smooth
  2. Mix in confectioners’ sugar on low speed just until combined and then beat for a couple of minutes until light and fluffy
Easy Marshmallow Buttercream
  1. Cream butter on high speed until light and fluffy
  2. Add fluff and combine on high speed until smooth
  3. Add sugar and mix on low speed until combined; increase speed to high
  4. until light and fluffy
  5. Mix in vanilla on high speed until combined
Notes
The frostings really speak for themselves here, so I won't tell if you use your favorite chocolate cake mix
If you want it to be even more peanut buttery, use the Reese's Pieces Cake Bars recipe with the Easy Marshmallow Buttercream shown here


Fluffernutter Chocolate Cake

Make something from the blog? Be sure to share it on Instagram with the tag #KeepItSweetDesserts.

You might also like:

Peanut Butter Snack Cake

Peanut Butter Snack Cake

Chocolate Pound Cake with Peanut Butter Whipped Cream

Chocolate Pound Cake with Peanut Butter Whipped Cream

Sublime Peanut Butter Cup Ice Cream Pie

SUBLIME Peanut Butter Cup Ice Cream Pie!!!

Fluffernutter Chocolate Cake - best frosting combo ever!

Special Keep It Sweet Desserts Valentine’s Day Gift Giveaway!

*GIVEAWAY CLOSED*

SONY DSC

With the holiday that celebrates love just around the corner, I thought it was time to share some love with you!  What better way to do that than with a gift basket full of some of my favorite sweets?!

And not only that, I’ll be adding a Keep It Sweet Desserts gift certificate to the mix.  That way you can get some treats for yourself, too!

Keep It Sweet Desserts Valentine's Day Gift Basket

Contest Details

NO PURCHASE NECESSARY

  • Winner Receives:  1 Valentine’s Day Gift Basket for 8-10 people with shipping included (good for UPS Ground shipping anywhere in the US) PLUS a gift certificate for $25 that is eligible for anything on the KeepItSweetDesserts.com website.  Both can be used for winner or as gifts.  Total value is $90.
  • Restrictions: Contest is open to anyone 18 years or older, but products are only available for shipping within the US.  Valentine’s Day gift basket to be sent in time for Valentine’s Day delivery unless otherwise requested for a later date this year.  Gift Certificate eligible for one year from the date of issue.
  • The giveaway is sponsored by me via Keep It Sweet Desserts.
  • Giveaway ends at midnight est on Monday February 4th, once giveaway is over, winner will be chosen by a random number generator
  • Winner will be contacted by email within 24 hours of contest closing and will have 24 hours to respond. If there is no response after 24 hours, a new winner will be chosen.
  • This promotion is in no way sponsored, endorsed or administered by, or associated with Twitter, Pinterest or Google+.

How to Enter

1.  Mandatory Entry: Leave a comment telling me what item you want to try the most

2,  Leave separate comments for each of the (4) additional optional entries:

*GIVEAWAY CLOSED*

How to Make Macarons and Some Super Bowl Ideas

This past Saturday, Matt and I actually had a few hours with nothing on the agenda and I actually had energy, shocking!  So I finally experimented with something I’ve been wanting to try forever, macarons!

Macarons with Chocolate Buttercream

I’ve loved macarons since I first tried them at the famous La Duree in Paris almost six years ago.

(Oh to be 22….)

dinner at la duree in 2007 - the first time I had a macaron!

Since then, I’ve tried a range of not-so-good specimens to just perfectly light and crisp shells sandwiched with creamy decadent fillings (this girl’s macarons are not a joke!).

Macarons with Chocolate Buttercream

Famous for their difficulty and challenges, I was terrified that my first attempt would be a failure. However, when I saw Annie’s step-by-step instructions for a fail-proof Italian method, I knew I had to try it.  Plus, Matt said he would help so I knew there was another person to help make some judgment calls.

Macarons with Chocolate Buttercream

To keep things simple, I just used made a plain shell. I really wanted to get the hang of a basic recipe before playing around with it and potentially messing with the structure.  Since I had some basic chocolate buttercream on hand, it worked for the filling. Next time, however, I’ll definitely try something more exciting like red velvet, peanut, or S’mores (or one of the other bazillion flavors I have pinned).  I would also prefer a lighter swiss meringue buttercream instead.  I think it would complement the macaron texture better.

Macarons with Chocolate Buttercream

All in all, I was thrilled with a pretty successful first attempt!  I think it helped that there was almost no humidity and I really took my time.  While I am clearly not an expert after that, I thought I’d share some tips that I used and / or will use going forward.

Macarons with Chocolate Buttercream

Tips for Making Macarons:

Equipment

  • Definitely make sure you have a kitchen scale and candy thermometer, this is the kind of recipe you want to be precise with
  • Make sure your mixing bowl and whisk are really clean before you start, any grease will prevent the egg whites from forming a meringue (I wipe the equipment with white vinegar before starting)

Ingredients

  • Choose fresh ingredients; my almond meal was at the almost stale state and while I have a very sensitive palate, I can definitely tell that something is slightly off in flavor
  • Speaking of almond meal, I used Trader Joes; I think next time I’d look for some that is finer or pulse it through a food processor a few times to eliminate any interference with the clean, crisp texture

Process

  • Read the directions a few times to make sure you understand how each step works; setting up your mise en place certainly helps
  • Be patient!  Almost every time I make some form of meringue I get paranoid that it won’t work, it just takes a few minutes more than I expect
  • Take your time folding the meringue into the almond meal paste, it is very delicate
  • Also take your time as you pipe your shells, that way yours might actually end up all the same size (mine definitely range!)
  • Be careful removing the shells from your parchment paper or slipat as to not break them

Storage

  • Store macarons for several days in refrigerator or up to six months in the freezer; bring to room temperature before serving

Macarons with Chocolate Buttercream

Even though it felt like a lot of work at the time, now I’m so excited to make them again.  Now that I know what the batter is supposed to feel and look like, I’ll be a lot more confident for the next go around.

Oh, and in case you are looking for some fun ideas for your Super Bowl snacking on Sunday, check out some of the links below!

You should probably hurry to place a last minute order for the Smoked Sea Salted Caramel Chocolate Chip Cookies

Fun Pick-up Desserts for Super-Bowl

My “Party Apps” Pinterest board has a ton of great recipes

Super Bowl Party Ideas from Young Married Chic (also check out these push-up pops!)

Super Bowl Recipes from Baked by Rachel

Upscale Party Food ideas from the Novice Chef

14 Super Bowl Recipes from Incredients Inc.

Make something from the blog? Be sure to share it on Instagram with the tag #KeepItSweetDesserts.

Current Cravings

I was so excited for things to calm down so that I could spend a couple of weeks developing fun recipes to share with you and use for the Cookie of the Month Club.  Plans aside, life gets in the way and I was completely wiped out by the flu for the first week or so of January.  Things are starting to pick back up again with Super Bowl and Valentine’s Day around the corner, but hopefully I’ll be able to steal a few minutes for kitchen experiments.

Since I don’t have any new recipes to share, I thought I’d share some links for sweets I’ve been craving lately.

Carrot Cake Ice Cream from Eats Well With Others. Yes, I realize it is cold out but it is never too cold for ice cream.

carrot cake ice cream

S’mOreo Seven Layer Bars from Something Swanky. I have no words.

Smoked Sea Salted Caramel Chocolate Chip Cookies from Keep It Sweet Desserts. Football is a great excuse to eat cookies.

Smoked Sea Salted Caramel Chocolate Chip Cookies

Peanut Butter Toast Crunch Marshmallow Treats from Young Married Chic.  Obsessed with this cereal, to put it mildly.

Peanut Butter Toast Crunch Marshmallow Treats

Chocolate Cobbler from Dessert for Two. Valentine’s Day date heaven.

Red Velvet Cookie Sandwiches from Keep It Sweet Desserts. Cream Cheese Icing always makes me weak in the knees.

Red Velvet Cookie Sandwiches

Peanut Butter Baklava from Crazy for Crust.  Never thought I’d crave baklava until now.

Cookie Butter-Cream Cheese Crumb Cake from Vanilla Sugar Blog. So many good things in one place.

Cinnamon Roll Stuffed Blondies from Buns in my Oven.  Where do I start?

Perfect Chocolate Chip Cookies with Salted Caramel Buttercream from Keep It Sweet Desserts. This is a new offering and I just want to keep them all to myself.

SONY DSC

Cinnamon Pull Apart Bubble Bread w/ Cinnamon Cream Cheese Glaze from Bakeaholic Mama.  Breakfast, lunch, and dinner, please.

Peanut Butter & Cinnamon Chocolate Chunk Cookies from Une Gamine dans la Cuisine.  These look and sound amazing.

Peanut Butter & Cinnamon Chocolate Chunk Cookies

And of course you can follow me on Pinterest for many more!

Make something from the blog? Be sure to share it on Instagram with the tag #KeepItSweetDesserts.

Sweet & Salty Party Cookies for a Virtual Bridal Shower

Sweet & Salty Party Cookies

Sweet & Salty Party Cookies. aka Salted Milk Chocolate Almond Caramel Corn Cookies.  Nothing less for my lovely friend, Christina!

Christina Bridal Shower (4)

Sweet & Salty Party Cookies

For those of you who don’t know her, Christina is the incredibly sweet blogger behind Dessert for Two.  She is getting married soon and since she is such an amazing example of what a blogger should be, I knew we needed to celebrate.  Krissy put together the pretty invitation and from there it wasn’t hard to get a group of bloggers to agree.

Sweet & Salty Party Cookies

I’ve been emailing with Christina forever, but got to meet her in person when she came as my plus-one to a Foodbuzz Festival event last fall. She was just as awesome in person as she is on her blog. We even talked about her relationship with the Mr. and I could tell that an engagement was right around the corner:-)

Sweet & Salty Party Cookies

I’m so incredibly happy for her and can not wait to hear all about their fabulous wedding.  I just know there will be incredible food, lots of drinking and a whole lot of people there to celebrate a wonderful couple.  Oh, and I’m pretty sure she is going to be one beautiful bride.

Sweet & Salty Party Cookies

Want to know what else everyone else brought to the party?  Check out the delicious dishes that the other bloggers contributed for Christina’s Virtual Bridal Shower!

Strawberry Macarons from Krissy
White Wedding Cake Cupcakes from Julie
Mini  “I Do”-nuts from Tara
Moon Pie Cupcakes from Madison
Whiskey Walnut Blondies from Jenna
Brown Butter Snickerdoodles from Joanne
Lemon Cupcakes with Sweet Tea Frosting from Kristan
Chocolate Covered Cheerios from Shelly
Mini Coconut Cream Pies from Megan

Sweet & Salty Party Cookies

Sweet & Salty Party Cookies
 
Salted Milk Chocolate Almond Caramel Corn Cookies
Author:
Recipe type: Dessert
Makes: ~40 cookies
Ingredients
  • 9.25 ounces (~2 cups) all-purpose flour
  • 2 teaspoons table salt
  • 1 teaspoon baking soda
  • 6 ounces (3/4 cup / 1½ sticks) unsalted butter, softened at room temperature
  • 8.25 ounces (~1 cup packed) light brown sugar
  • 3.75 ounces granulated sugar (~1/2 cup)
  • 1 x-large egg + 1 x-large egg yolk at room temperature
  • 1 tablespoon vanilla extract
  • 6 ounces (3/4 cup) milk chocolate almond Hershey kisses (about 35), roughly chopped (can be substituted with chopped milk chocolate and unsalted almonds)
  • 2.5 ounces (1½ cups) caramel corn (I used Popcorn Indiana) + ¼ cup additional
  • Sea salt to taste
Instructions
  1. Pre-heat oven to 350 degrees; line baking sheets with parchment paper or a slipat and set aside
  2. In a medium bowl, whisk together flour, table salt and baking soda; set aside
  3. In the large bowl of an electric mixer, beat together butter and sugars on high speed until light and fluffy
  4. Scrape sides of the bowl with a spatula; add egg, egg yolk and vanilla; beat at medium speed until well-combined
  5. Reduce speed to low and slowly add flour mixture just until combined; stop mixer and scrape sides of the bowl with spatula
  6. On low speed, add in kisses and all but ¼ cup of additional caramel corn
  7. Use a medium cookie dough scoop and place scoops of cookie dough on prepared baking sheets 1-2 inches apart; press the additional caramel corn into top of dough and sprinkle each with sea salt
  8. Bake cookies 11-12 minutes or until edges are a light golden brown
  9. Set aside to cool; best results if eaten same day (caramel corn begins to get a little stale) and store in an airtight container


Sweet & Salty Party Cookies
This post contains affiliate links.

Make something from the blog? Be sure to share it on Instagram with the tag #KeepItSweetDesserts.

You might also like:

Salted Caramel and Peanut Oatmeal Cookies

Salted Caramel and Peanut Oatmeal Cookies

Sweet and Salty Candy Bar Blondies

Sweet and Salty Candy Bar Blondies

Sweet and Salty Toll House Pie

Sweet and Salty Toll House Pie

The best sweet and salty cookies!

Winter Fruit Crisp {Gluten-free}

I made this fruit crisp so long ago, I had to hunt through piles and piles of notes and butter-stained papers to find it.  Well, I guess Thanksgiving wasn’t that long ago, but right now it feels like a lifetime.

Winter Fruit Crisp {Gluten-free}

Fruit crisps are one of my favorite desserts.  I mean, anything that is served warm with ice cream is always good, but since there is fruit you can pretty much rationalize that it is healthy, too.  This version is a good compromise since it is made with oatmeal and oat flour.  Butter, sugar, what?  Just look at all that fruit!

Winter Fruit Crisp {Gluten-free}

I’ve actually been making a version of this for years but wanted to take out the gluten so that my sister could also enjoy it for the holiday.  Honestly, you don’t miss a thing.  I could not taste a difference and neither could any of our guests.

Winter Fruit Crisp {Gluten-free}

Winter Fruit Crisp {Gluten-free}
 
A warm and comforting winter dessert! This fruit crisp is full of apples, pears and cranberries.
Author:
Recipe type: Dessert
Makes: 12-18 servings
Ingredients
Topping:
  • 4 ounces (~1 cup) oat flour (I pulsed my oatmeal in the food processor until it was the consistency of flour)
  • 3⅜ ounces (~1 cup) old fashioned oatmeal
  • 5.5 ounces (~2/3 cup, tightly packed) light brown sugar
  • 4 ounces (1/2 cup /  1 stick) unsalted butter at room temperature, cut into small cubes
Filling:
  • 6 medium apples (preferably a combination of honey crisp and granny smith)
  • 3 large pears, any type (ripe but still firm)
  • 2 cups fresh or frozen cranberries
  • 5⅝ ounces (~3/4 cup) granulated sugar
  • 1⅜ ounces (~1/3 cup) oat flour (I pulsed my oatmeal in the food processor until it was the consistency of flour)
  • ½ tablespoon ground cinnamon
  • 1 tablespoon fresh lemon juice (~1/2 lemon)
  • 3 ounces (6 tablespoons / ¾ stick) unsalted butter, chilled, cut into small pieces
Instructions
  1. Pre-heat oven to 350 degrees; grease a 9x13 or two 8-inch square baking dishes and set aside
  2. In a medium bowl, prepare topping; mix together oat flour, oatmeal and brown sugar
  3. Add butter and use fingers to combine until mixture is slightly lumpy; set aside
  4. Prepare filling; In a very large bowl, stir together fruit, granulated sugar, oat flour, cinnamon, lemon juice and butter
  5. Spread filling into prepared baking dish(es); sprinkle evenly with topping
  6. Bake for about 1 hour 20 minutes or until filling is bubbling, apples can be poked with a fork and topping is browned; if you see that topping has started to get to brown, lightly cover with tin foil for remainder of baking time
Notes
Adapted from Bon Appetit
*If serving to someone with a gluten allergy make sure your ingredients are labeled gluten-free
Best served warm with vanilla ice cream or frozen yogurt.
The entire dish can be made ahead of time and kept in refrigerator until ready to bake; may require extra cooking time if cold


Make something from the blog? Be sure to share it on Instagram with the tag #KeepItSweetDesserts.

You might also like:

Skillet Apple Crisp with Brown Butter Sauce

Skillet Apple Crisp with Brown Butter Sauce

Summer Berry Skillet Crisp

Summer Berry Skillet Crisp

Blackberry, Peach & Pistachio Crisp

Blackberry, Peach & Pistachio Crisp


Amazing Winter Fruit Crisp

The Top Keep It Sweet Desserts of 2012

This weekend has been amazing.  It started with a late afternoon pedicure Friday (with one of my favorites), and after finishing up some computer work, went into full-force relaxation with Matt.  Wine, movies, TV and healthified nachos for dinner were all included.  Today we are heading to see my family for a quick visit before I return to put together some late holiday and New Year’s orders. 

It might sound crazy after so many hours in the kitchen, but I really miss baking for fun.  I miss creating new recipes to share with you and just messing around for new product ideas or Cookie of the Month flavors.  My head is already spinning with all sorts of concoctions to put together during these quieter days.  There bags of candy sitting in my pantry are just dying to be baked with.

In the meantime, in case you are looking for some last minute end of the year baking inspiration, I thought I’d share with you some of the 2012 favorites.

And the 10 most popular blog posts of 2012 are…

10 most popular blog posts of 2012

10.  Flourless Chocolate Cookies

9.  Peanut Butter Cake with Salted Caramel Cream Cheese Icing & Chocolate Ganache

8.  Oreo Crusted Brownie Pie with Cream Cheese Icing

Oreo-Crusted-Brownie-Pie-w-Cream-Cheese-Icing

7.  Mixed Berry Sauce

6.  Sweet and Salty Candy Bar Blondies

Sweet-Salty-Candy-Bar-Blondies

5.  Strawberry Shortcake Cupcakes

4.  Easy Lemon Shortbread Cookies

3.  Simple Vanilla Cupcakes with Chocolate Cream Cheese Icing

Joy-the-Baker-Vanilla-Cupcakes-w-Choc-Cream-Cheese-Icing

2.  22 Easy Dessert Recipes that Make You Seem Like a Pro

1.  Strawberry Cheesecake Cookies

Of course while I do adore some of the reader favorites (ahem Oreo Crusted Brownie Pie with Cream Cheese Icing), I wanted to put in my two sense on the best recipes I’ve posted this year (although limiting that to 10 is so hard)…

Best Recipes of 2012

10.  Apple Cinnamon Blondies

9.  Mini Halloween Confetti Cookie Sandwiches

Mini-Halloween-Confetti-Cookie-Sandwiches

8.  Margarita Frosting Shots

7.  Fudgy Double Crème de Menthe Brownies

6.  Blueberry Chocolate Chunk Frozen Yogurt

5.  Chocolate Stout Celebration Cake

Chocolate-Stout-Celebration-Cake

4.  Banana Brownie Chunk Greek Frozen Yogurt

3.  Triple Chocolate Cheesecake Cupcakes

2.  Brown Sugar Cupcakes with Cinnamon Ginger Buttercream and Ginger Cookie Pecan Brittle

1.  Salted Caramel & Chocolate Chip Cookie Dough Ice Cream Bars

Salted-Caramel-Chocolate-Chip-Cookie Dough Ice Cream Bars

And finally, this post was for sure the most meaningful blog post (to me) that I’ve shared with you to date.

I hope that all of you celebrating have a wonderful Christmas.  In light of recent events in Newtown, this week I’ll be counting my blessings a few extra times and telling my loved ones what they mean to me.

Make something from the blog? Be sure to share it on Instagram with the tag #KeepItSweetDesserts.

The Keep It Sweet Desserts Holiday Rush Part 2

It is the Friday before Christmas and 99% of the holiday shipments are out the door.  As things started to quiet down this week I had a few minutes to reflect on the craziness that has been my life for the past few weeks. 

What I’ve learned from the holiday rush:

Meltdowns happen.  Sometimes you run out of printer ink in the middle of sending out a corporate order and have to make two trips to Staples to get the right cartridge.  Sometimes that happens again.  Sometimes you think you put too much flour in your cookies and freak out until you taste them in their perfection.  Sometimes you can’t get caramel right in the middle of a gazillion brownie batches and your husband has to step in and show you what to do.  Sometimes you are tired, hungry and haven’t had a shower in what seems like too long.  Sometimes your hands bleed when you move them because they are so dry from non-stop ware and tare.  Sometimes you don’t exercise for a month.  Sometimes you eat cookies for lunch.  Sometimes you think there is no way you can possibly get everything done.  Sometimes you lock yourself out of the kitchen.  Sometimes all of your cookie dough scoops break.  Yeah, there were lots of meltdowns.  All I can say is, my husband and family probably deserve a metal, or at least a lifetime supply of cookies. 2012_12_14_16_51_346314407141891815_30774790_X-Pro II

Asking for help does not mean that you aren’t good enough.  In fact, it means you are smart.  I’m pretty much the last person in the world to ask someone to help me do anything.  Actually, I can barely even accept offers for help when they come.  This time, things were different.  Thousands of baked goods were not going to be baked, wrapped, shipped and tracked by just one person in a short period of time.  At first, I had a really hard time asking some people to help, but once I saw how much better off I was with an extra pair of hands in the kitchen or packaging, I kept it up.  Thank you a million to Matt (husband of the year), Mom, Dad, Jess, Marcia, Mark, Matt and Deena for helping me.  Thank you Mom and Dad for schlepping to my kitchen and apartment multiple times a week and putting up with my moments.  Thanks Jess for late nights working when you had your own job to go to the next morning.  Thanks Mark and Marcia for filling in on any kitchen odd-jobs that came up.  Thanks Matt and Deena for turning your Friday night into a brownie-baking marathon.  And thanks to my Matt for, well, everything.  Extra shout-outs to those who witnessed multiple meltdowns (aka most of you).

2012_11_30_23_55_335655814134685523_30774790_Hudson2012_11_25_19_53_332634801859911462_30774790_Normal2012_12_02_17_56_337649711513787850_30774790_Amaro2012_12_02_17_57_337650108856982997_30774790_Rise

Running a bakery is serious physical labor.  While I haven’t been to the gym in weeks, I’ve been on my feet all day every day, lifting heavy equipment, stirring monstrous batches of brownies and schlepping eight thousand different things from my apartment to the kitchen and back.  That had to account for at least a portion of the five and a half million cookies I ate.

2012_11_08_16_44_320218862812060740_30774790_Normal2012_12_13_18_48_345648303037931274_30774790_Nashville2012_12_17_20_36_348601618692497080_30774790_Brannan2012_12_14_15_23_346269804544056523_30774790_Willow

People who say they are too busy to eat healthy are not lying.  When you are in the middle of doing a gazillion different things the idea of stopping for lunch, even a twenty minute one, does not sound appealing.  Hence broken cookies, brownie ends or really any leftover food in sight makes a meal instead.  Time to food shop?  Maybe when picking up ingredients.  Time to cook?  Not even close.  I tried snacking on sugar snap peas one day and it was way too time consuming.

2012_12_07_19_43_341327099674156259_30774790_Rise2012_11_21_17_16_329657088568122935_30774790_Amaro

You might think you are sick of eating brownie ends, but you’re really not.

Being around other people going through similar experiences seriously helps.  Some of the other people that work at my kitchen space include Jeff and Jen from Pipsnacks (love them) and Kathleen from Cocoamains (that woman makes amazing macarons).  Apparently I wasn’t the only person in the world working like a madwoman and it made me feel better to know that.2012_12_01_01_49_336438192230817464_30774790_Hudson2012_11_14_22_50_324751673350872750_30774790_Hudson

When you work so insanely hard you feel like you can’t go anymore, do anything else or talk to anyone, you can probably do one more thing. 

When you work so insanely hard you feel like you could sleep for a month, skinny peppermint mocha lattes will be your best friend.

2012_11_25_12_19_332406787129663432_30774790_Hudson

When you work so insanely hard you do more than you ever thought you could do, hearing from happy customers is the most rewarding experience you could ever imagine.  Hearing feedback from customers, seeing people come to the website and buy gifts after they have devoured theirs, seeing an unbelievable review on yelp, and just knowing that my sweets put a smile on someone’s face is the most gratifying experience.  My company is my heart and soul, everything I put out there is me, so the feedback I get always hits me on a personal level.

Thank you, as always, for your constant support and bearing with me through this wonderfully crazy time!

Now, if someone could just drain all the sugar out of my system and point me in the direction of the closest treadmill, I’ll be occupied until next Christmas.

2012_11_24_17_12_331829024421240065_30774790_Hudson

The Keep It Sweet Desserts Holiday Rush Part 1

When Matt told me he wrote a blog post, I thought the title would be “when my wife went crazy,” but given that it wasn’t, I agreed to post his perspective on Keep It Sweet Desserts.  Look out for my thoughts on the holiday rush in the next few days.  Okay, now back to packaging…

Hello World! This is Lauren’s husband (part-time Taste-Tester and Dishwasher of Keep it Sweet Desserts) checking in.  Lauren has been missing since Thanksgiving and I’m pretty concerned, she was last seen surrounded by hundreds of outgoing boxes in our Living Room and she may have gotten lost. There is some new girl, who claims to be my wife, but it’s hard to tell since she is covered in flour, butter and melted chocolate.  I’ll let you know if I find her! Anyway, I wanted to give everyone an update on what has been going on the last few weeks.

Here’s the news:

1. As promised, we donated a portion of November sales to the Community Food Bank of New Jersey for Hurricane Sandy Relief.  They are currently distributing over 200,000 pounds of food daily to families displaced by the hurricane.  We thank everyone that ordered and helped contribute to this great cause.

2. Our first holiday season has been a great success.  Lauren has been inundated with all types of orders, from all parts of the country, for all types of occasions.  It takes a lot of coordination to run this business and I’m excited for it to quiet down a bit so we can put our heads together and figure out how to improve operationally and logistically.  One thing I’ve noticed from watching Lauren, is that baking is the easy part.  Selling, shipping, and marketing a product is the hard part.  So far, she’s up to the task!

3. Lauren has been working non-stop since Thanksgiving to fulfill these orders, which has been really tough.  She has been working from 7am to well past 10pm seven days a week, to ensure that everything goes out on time.  I’m pretty sure she has not had a day off in over a month and I am very proud of her.  As always, I’m mostly concerned with quality control testing, i.e. eating a blondie here or a triple chocolate cookiethere, just to make sure everything is just right:-)

4. Lauren received some pretty large corporate orders this year and so far has gotten excellent feedback from her clients.  One thing corporate clients want is good service.  When hundreds of orders are being sent out to different addresses with different messages, there is a tremendous amount of coordination that needs to take place to make it happen.  Keep It Sweet Desserts is committed to making this easy and affordable for corporate clients. We have already had some interest in repeat business for next year!

5. This could not have been done without help from our families and friends who despite their full time jobs, came in on the weekends to help with the abundance of orders that all seem to need to go out at the same time!  We have had a few PhDs, MBAs and JDs taping up boxes and washing dishes – definitely not their typical day’s work.  Not one of them asked for anything in return and for that we thank you!  You are all loved very much and this could not have been done without you.

6. Next year we will need to hire bakers, sales people and packers.  Let us know if you are in the NY/NJ area and are interested in being part of a growing new business!

7. There is still time to get your orders in for the holiday season.  Lots of people are tough to shop for, so if you need something last minute, send them a KISD gift certificate or Cookie of the Month Clubmembership!

We hope everyone has a Happy Holiday Season and New Year.  Here are some pictures from our last few adventurous weeks.

photo (21)

photo (18)photophoto (14)photo (17)

photo (16)

Salted Brown Butter M&M Cookies

The best M&M Cookies!!!

Salted Brown Butter M&M Cookies

I have so much I want to say and tell you about what is going on here at Keep It Sweet Desserts, but my thoughts are coming through in a pretty chaotic stream of consciousness so I’ll hold off until things calm down a bit!

Salted Brown Butter M&M Cookies

For now, though, I can say, I am SO happy I planned ahead and sent out my Food Blogger Cookie Swap packages early this year.  If I had waited, my cookies would have been who knows what and my photos rushed and blah.  I took these photos a few weeks ago when I was enamored with the wonderful chew in the cookie and fragrant aroma coming out of my kitchen.  For the swap, I wanted to make something that combined some of my favorite elements of a cookie, chew and salt.  While the brown butter flavor was only slightly apparent in the final product, the texture of these cookies and overall taste more than made up for that.  I sent my cookies to Angie, Crystal, and Michelle, I just hope they agreed!

Salted Brown Butter M&M Cookies

And of course I enjoyed receiving cookies in the mail for myself (such a nice change of pace!) from some wonderful bloggers.  Caroline (who I already adore) made wonderful florentines.  I was so impressed that she packaged them without them breaking at all!  Felice sent great Rosemary Lemon Shortbread cookies, the smell was amazing!  And finally, I got some terrific Cherry Chocolate Pecan Oatmeal Cookies from Cher.  What better way to find new blogs than by exchanging cookies?!

Salted Brown Butter M&M Cookies

Salted Brown Butter M&M Cookies
 
Author:
Recipe type: Dessert
Makes: 2 dozen medium-sized cookies or 1 dozen large cookies
Ingredients
  • ½ cup (1 stick) unsalted butter, softened
  • 1⅞ ounces (1/4 cup) granulated sugar
  • 5½ ounces (2/3 cup) packed light brown sugar
  • 1 x-large egg at room temperature
  • 1 teaspoon vanilla extract
  • 7 ounces (1½ cups) all-purpose flour
  • ½ teaspoons baking soda
  • ½ teaspoon salt
  • 1 cup M&Ms
  • Sea salt for sprinkling
Instructions
  1. Brown the butter: Heat butter in a small heavy saucepan over medium heat, stirring constantly, when butter turns to an amber/light brown color, remove from heat immediately (You should be able to smell the deeper more caramel flavor of the butter) pour browned butter immediately into a small bowl and set aside to cool
  2. Once butter has cooled, place in the large bowl of an electric mixer with sugars; beat on high speed until well combined
  3. Add egg and vanilla, mix on medium speed until well mixed
  4. In a separate medium-sized bowl, whisk together flour, baking soda and salt; slowly add to wet ingredients with mixer on low speed; do not over mix
  5. Slowly stir in M*Ms
  6. Chill dough for 24 hours for best results (minimum of 2 hours) before baking
  7. When ready to bake,pre-heat oven to 350 degrees; line baking sheets with parchment paper and set aside
  8. Scoop cookie dough with a medium (~2 tablespoons) or large (~4 tablespoons) cookie dough scoop on to prepared baking sheets
  9. Bake cookies until firm: 7-8 minutes for medium and 9-10 minutes for large
  10. Allow to cool before serving

 
Salted Brown Butter M&M Cookies

Oh, and want to know what’s keeping me busy lately?  Mostly this, a ton of this, and quite a bit of this.  Yes, I may or may not be turning into an actual baked good.

Salted Brown Butter M&M Cookies
The Great Food Blogger Cookie Swap 2012

Make something from the blog? Be sure to share it on Instagram with the tag #KeepItSweetDesserts.

You might also like:

Peanut Butter Cup Heath Bar Brown Butter Cookies

Peanut Butter Cup Heath Bar Brown Butter Cookies

Gluten-Free Brown Butter Chocolate Chip Cookies

Gluten-Free Brown Butter Chocolate Chip Cookies

Brown Butter Chocolate Chunk Cookie Cake

Brown Butter Chocolate Chunk Cookie Cake

Baby Shower Chocolate Clusters for a Virtual Shower!

Baby Shower Chocolate Clusters for a Virtual Shower!

SURPRISE!!  A few of us are hosting an intimate blogger baby shower for sweet Rachel at The Avid Appetite!  Rachel is having a baby girl and I am so thrilled for her and Sean!  Rachel is one of my favorite blog friends, we’ve actually had dinner together a couple of times.  I’m excited for her and her family and can’t wait to hear/read all about it!

For Rachel’s shower, I did what any person who about negative ten minutes of free time would do, I made a no-bake treat.  To make it festive, I topped my little chocolate clusters with some cute little pink candy cane sprinkles.  Lucky for Rachel, some of the other bloggers made even more delicious sounding treats, be sure to check them out!

Garlic Mini Monkey Bread from Yums and Loves

Candy Stuffed Peanut Butter Bars from the Lean Green Bean

Pumpkin Whoopie Pies with Maple-Marshmallow Filling from Eats Well with Others

Baby Shower Chocolate Clusters from Keep It Sweet Desserts

Congratulations, Rachel! I hope I get to meet your baby girl in person soon:-)

Baby Shower Chocolate Clusters for a Virtual Shower!

Baby Shower Chocolate Clusters for a Virtual Shower!
 
Author:
Recipe type: Dessert
Makes: 12 servings
Ingredients
  • 12 ounces milk chocolate, chopped
  • 1 cup mini marshmallows
  • 4 sheets graham crackers, broken into small pieces
  • Pink sprinkles (or blue for a boy!)
Instructions
  1. Line a baking sheet with wax paper and set aside
  2. Place chocolate in a microwave-safe bowl and melt by heating in 30-second increments and stirring chocolate in between
  3. Once chocolate is melted, fold in marshmallows and graham crackers
  4. Use a large spoon to place clusters on wax paper
  5. Drop sprinkles over clusters as desired

In case you haven’t seen my Twitter or Facebook rants, things are a little nuts with holiday at Keep It Sweet Desserts!   I’ll be back tomorrow with a great cookie recipe and hopefully coherent post!

Make something from the blog? Be sure to share it on Instagram with the tag #KeepItSweetDesserts.

You might also like:

Pretty in Pink Buttercream Cups

Pretty in Pink Buttercream Cups

Peanut Butter Caramel Candy Cups

Peanut Butter Caramel Candy Cups

Chocolate Covered Peanut Butter Ritz Sandwiches

Chocolate Covered Peanut Butter Ritz Sandwiches

Pumpkin Cinnamon Roll Cheesecake

Pumpkin Cinnamon Roll Cheesecake

Last night was my 10-year high school reunion.  I didn’t really know what to expect, but for some reason I was a little nervous about going.  There was the whole cliché of wanting to look good, which isn’t all that convenient two days after Thanksgiving, but I also wondered if it would be all that interesting given Facebook’s presence in all of our lives.

Luckily, my best friends since forever and I had dinner beforehand which made walking into the event a little less nerve-racking.  Oh, and a jalapeno blackberry margarita didn’t hurt either.

Pumpkin Cinnamon Roll Cheesecake

But I have to tell you, I’m not sure what I was so worried about.  It was actually really nice to see most of the people who were at the reunion.  I spoke to a girl who sat next to me in third grade.  She was the nicest person then, at eight years old, and she is just as nice today.  There were a few people who had seen Keep It Sweet Desserts postings on Facebook and ordered cookies, they came up to me and raved about them.  And then there were others who told me that they voted religiously during the Martha Stewart American Made contest.

Frankly, I was overwhelmed by how many people wanted to hear about my business and tell me how wonderful they think it is.  Of course some of these people had been my friends, but there were others who I didn’t even think knew me way back in my awkward teenage years.  So to all of my UD 2012 classmates, you guys are pretty awesome.

Pumpkin Cinnamon Roll Cheesecake

Meanwhile, it has been such a crazy week that at 6am this morning I headed back from Philly to package lots and lots of desserts.  It was hard to be motivated to come back and work after a week of very little sleep, but then I remembered the Thanksgiving leftovers I’d avoided in my effort to look good for the reunion.  Let’s just say that the last of this cheesecake did not stand a chance.

Pumpkin Cinnamon Roll Cheesecake
 
Pumpkin cheesecake meets cinnamon roll!
Author:
Recipe type: Dessert
Makes: 12 servings
Ingredients
Cinnamon Roll Batter
  • 9¼ ounces all-purpose flour (2 cups)
  • 2 teaspoons baking powder
  • ½ teaspoon table salt
  • 5 ounces granulated sugar (2/3 cup)
  • 4 tablespoons (1/2 stick) unsalted butter, softened at room temperature
  • 1 x-large egg, at room temperature
  • ½ cup whole milk at room temperature
  • 1 tablespoon pure vanilla extract
Pumpkin Cheesecake Filling
  • 2 8-ounce packages cream cheese, softened at room temperature (I actually snuck in fat free cream cheese, SHHH don’t tell!)
  • 2⅛ ounces (1/4 cup, packed) light brown sugar
  • 1⅞ ounces (1/4 cup) granulated sugar
  • ½ ounce (1½ tablespoons) all-purpose flour
  • ½ teaspoon ground cinnamon
  • ¼ teaspoon ground nutmeg
  • ¼ teaspoon ground ginger
  • ⅛ teaspoon table salt
  • 2 x-large eggs at room temperature
  • 1 teaspoon pure vanilla extract
  • 1 cup canned pumpkin (not pumpkin pie filling)
Cinnamon Filling
  • ⅓ cup unsalted butter, melted
  • 8.25 ounces (1 cup, packed) light brown sugar
  • 3 tablespoons ground cinnamon
  • Cream Cheese Icing
  • 3 ounces cream cheese (preferably light or regular here)
  • 4 tablespoons (1/2 stick) unsalted butter, softened at room temperature
  • 1½ cups powdered sugar
  • ½ teaspoon pure vanilla extract
Instructions
  1. Pre-heat oven to 350 degrees; grease a 9 inch spring-form pan (also, wrap with tin foil if your pan tends to leak like mine); set aside
  2. Prepare cinnamon roll batter
  3. Sift flour, baking powder and salt into a medium bowl; set aside
  4. In the large bowl of an electric mixer, beat sugar and butter on high speed for several minutes or until light and fluffy
  5. Add eggs, milk and vanilla and beat on medium speed until combined; scrape sides of bowl and with mixer on low speed, slowly add in dry sifted dry ingredients; mix just until combined
  6. Spread half of this batter onto the bottom of the spring-form pan, this will be the bottom layer; grease your hands to help press batter down
  7. Prepare cheesecake filling
  8. In the large bowl of an electric mixer, using the whisk attachment, beat cream cheese until light and creamy
  9. Add sugars, flour and seasonings and beat on high speed; scrape the sides of the bowl
  10. Add eggs and vanilla, beat on medium speed
  11. Mix in pumpkin until combined
  12. Pour cheesecake batter over cinnamon roll layer
  13. Prepare cinnamon filling
  14. Stir together butter, brown sugar and cinnamon
  15. Drop spoonfuls of cinnamon filling on top of cheesecake layer
  16. Top that with big drops of cinnamon roll batter; use a knife to carefully swirl the batter
  17. Bake cheesecake for 45-55 minutes or until top is firm and lightly browned
  18. Chill cheesecake in fridge for a few hours or overnight
  19. Prepare cream cheese icing
  20. In the large bowl of an electric mixer, beat butter on high speed until light and creamy
  21. Add powdered sugar and vanilla; mix on low for one minute then beat on high speed for several minutes until frosting is light and fluffy
  22. Pipe or spread icing on cheesecake as desired; I iced around the sides of the cheesecake and piped a big swirl on top to play on the “cinnamon roll” theme
  23. Slice, serve and enjoy!
Notes
Adapted from The Girl Who Ate Everything who found it on Culinary Concoctions by Peabody
This cheesecake has a lot of components and dirties a lot of bowls, but the end result is completely worth it
Store cheesecake in fridge up to four days

Pumpkin Cinnamon Roll Cheesecake

P.S.  Stay tuned for an AMAZING Cyber Monday special!

Make something from the blog? Be sure to share it on Instagram with the tag #KeepItSweetDesserts.

You might also like:

Cinnamon Roll Blondie Bites

Cinnamon Roll Blondie Bites

Giant Caramel Apple Cinnamon Bun

Giant Caramel Apple Cinnamon Bun

Pumpkin Cinnamon Bun Ice Cream

Pumpkin Cinnamon Bun Ice Cream

It doesn't get much better than cheesecake + pumpkin + cinnamon roll

A Big Keep It Sweet Desserts Thank You

It’s Thanksgiving morning and after a week of crazy, I’m finally taking a few minutes to sit down, reflect, and just enjoy the holiday that brings together two of my favorite things, food and family.

This is the second year that Matt and I are hosting Thanksgiving (although our years of Thanksgiving with friends was good practice), and it might have been a little bit insane to do so in the midst of Keep It Sweet Desserts’ first holiday season, but now that I’m here, I’m so glad that we are.  It is the way I can show some people in my life how grateful I am for them.

I’m thankful for an incredible husband who has supported me through this great venture in my life.  Through the daily emotional ups and downs he is always there with a big hug, kind words, or breakfast for dinner.

I’m thankful for the most amazing parents who taught  me to work hard, believe in myself and be kind to others along the way.  My mom’s baking was obviously a huge influence on me, but she also started her own business years ago and that inspired me as well.  My dad works incredibly hard and has shown me how to be patient and diligent to gain success.

I’m thankful for my sister who is my best friend.  She is the most kind, funny, and incredibly hard working person I know.  I’ve never known anyone else to consider others in everything that they do.

I’m thankful for in laws who welcomed me like a daughter from day one.  They are such incredibly generous people and their huge hearts are amazing.

I’m thankful for a brother and sister-in-law who have been so supportive of my business and will rave about my cookies to any stranger on the street.  I’m also SO excited that just a few months from now there will be a little Lilling running around and I get to be an aunt!!!

I’m thankful for my friends and extended family who are near and far.  We might not speak every day and I might not see you as often as I like, but your support in ordering cookies, posting on Facebook and telling everyone about my business makes me feel so loved. I wish I could list every single one of you here but you know who you are.

I’m thankful for YOU, my readersYou’ve motivated me and helped build my confidence to follow my dreams.  You’ve voted for me, ordered cookies, and been my advocate through all sorts of social media.  I know that Keep It Sweet Desserts would not exist without the community that exists for food blogging.

I hope that you all have a very Happy Thanksgiving.  The rest of my day will be spent enjoying the company of my family and lots of food, giving thanks for all that I can throughout.

Finally, a few Keep It Sweet Desserts items:

Don’t forget a portion of November proceeds are going to the Community Food Bank of New Jersey.  On a day like today, it is even more important that we remember there are many people still dealing with the aftermath of Hurricane Sandy.

Saturday is Small Business Saturday!  I am so excited that Keep It Sweet Desserts is a part of that this year!

I can not wait for the Keep It Sweet Desserts Cyber Monday special!  It is a surprise but it is a good one!!  We rarely do sales and promotions so this will be a special way to really give thanks to my customers!

No-Bake Rice Krispie Toffee Fudge Candy Bars

No-Bake Rice Krispie Toffee Fudge Candy Bars

1 week. 7 days.  Some amount of hours that does not feel like enough.

No-Bake Rice Krispie Toffee Fudge Candy Bars

That’s how much time there is until Thanksgiving.  Don’t get me wrong, I’m so excited for the holiday, but boy did things get crazy really fast!  It seems like just yesterday I was in the summer lull and just like that I’m organizing and delegating (SO thankful for family members who like to help!) for Thanksgiving dinner all the while coordinating hundreds of corporate orders to go out over the next 30 or so days.

My current mantra: do anything and everything possible ahead of time. If I had the space, I’d have all of my UPS boxes made and piled for the mass exodus that will be taking place in the form of Fudgy Caramel Pecan Brownies.  I’ve even started chopping the gazillion pounds of chocolate that will be transformed into Peppermint Mocha Cookies, Peanut Butter Cup Stuffed Triple Chocolate Cookies and so on. I actually thought I was so smart to pull out the food processor to help but when it started to smell like fire I decided that chopping would be my arm workout for the day.  If there is one added benefit to being super busy that I didn’t expect, it would be the fact that I don’t actually have to workout because this job can be extremely physically demanding.

No-Bake Rice Krispie Toffee Fudge Candy Bars

Anyway, back to my main point, getting ahead.  I have a gazillion amazing desserts planned for our Thanksgiving dinner (between my mom and I there might be more desserts than people), but I’m definitely trying to get some done in advance and sneak them into my day when I have a few free moments.  That is where these No-Bake Rice Krispie Toffee Fudge Candy Bars come in!  They took almost no time to make (oh, except for that chopped chocolate that you know I love…), and once they are done you can stick them in the freezer until the day you want to eat them.  Not all holiday desserts have to be complicated!

5.0 from 1 reviews
No-Bake Rice Krispie Toffee Fudge Candy Bars
 
Author:
Recipe type: Dessert
Makes: 24-48 servings depending on desired size (I cut them into small pieces to compliment the rest of the dessert spread!)
Ingredients
  • 6½ ounces milk chocolate, roughly chopped
  • 1½ ounces bittersweet chocolate, roughly chopped
  • 5 tablespoons light corn syrup
  • 7 tablespoons unsalted butter, sliced
  • 5½ cups Rice Krispies
  • ½ cup bittersweet chocolate chips
  • ¼ cup toffee bits
Instructions
  1. Line a 13x9 baking pan with tin foil and set aside
  2. Pour Rice Krispies into a large bowl and set aside
  3. In a medium saucepan, melt together chopped chocolates (not chips), corn syrup and butter, stirring constantly until combined
  4. Remove from heat and pour over Rice Krispies; use a spatula to combine
  5. Add chocolate chips and toffee bits and combine
  6. Spread mixture into lined pan and pack down using the back of the spatula
  7. Cover pan and place in refrigerator to chill for at least four hours
  8. Once chilled, remove foil from pan and slice into squares to serve
  9. Store tightly in a cool place up to two days or wrap and freeze until the day of
Notes
Slightly adapted from Nigella Kitchen
If making these gluten-free, check that all of your ingredients are specifically marked as such.


No-Bake Rice Krispie Toffee Fudge Candy Bars

Make something from the blog? Be sure to share it onInstagram with the tag #KeepItSweetDesserts.

Looking for other EASY desserts to add to your holiday menu?

Easy Low Fat Pumpkin Sheet Cake

Apple Cinnamon Blondies

Chewy Ginger Cookies {Gluten-Free}

Chocolate Covered Cookie Butter Pretzels

Six Fun and Easy Ice Cream Desserts

White Chocolate Cinnamon Bun Rice Krispie Treats

22 Easy Desserts That Make You Seem Like a Pro

Chewy Gooey Cinnamon Toffee Blondies

And of course, that is where I can help!

No-Bake Rice Krispie Toffee Fudge Candy Bars

Desserts You Need This Fall

Well, with everyone hunkering down for the next couple of days to hopefully stay safe from the storm, I’ll officially start to make my way through the piles of recipes and cookbooks in my apartment to come up with a Thanksgiving menu.

Ok, who are we kidding, I need to decide on desserts!  While I could be perfectly happy with an entire meal that revolves around pumpkin, I’m pretty sure my family doesn’t feel the same.  Here is some inspiration for all sorts of Fall desserts (pumpkin AND other)  that you probably need to make now or for Thanksgiving in just a few weeks!

Apple Desserts

Apple Cinnamon Blondies from Keep It Sweet

Desserts You Need This Fall like these Apple Cinnamon Blondies from Keep It Sweet

Caramel Apple Cake from An Edible Mosaic

Desserts You Need This Fall like this caramel apple cake

Apple Pie Coffee Cake from Cake Duchess

Desserts You Need This Fall like this apple pie coffee cake

Apple Cinnamon Crumb Cake from Keep It Sweet

Desserts You Need This Fall like this Apple Cinnamon Crumb Cake

Salted Caramel Apple Cheesecake Bars from Eats Well With Others

Desserts You Need This Fall like these salted caramel apple cheesecake bars

Apple Upside Down Cake from the Avid Appetite

Desserts You Need This Fall like this apple upside down cake

Caramel-Chocolate Apple Tart from Une Gamine Dans La Cuisine

Fall Trifle from Keep It Sweet

Apple, Orange and Lemon Chiffon Cake from Food Wanderings

Snickers Apple Tart from Culinary Concoctions by Peabody

Caramel Apple Cake Trifle from Keep It Sweet

Caramel Apple Cinnamon Roll Cupcakes from the Spiffy Cookie

Apple and Peanut Butter Oatmeal Crumble from Keep It Sweet

Pear Treats

Spiced Apple Pear Pies in Mason Jars from Young Married Chic

Desserts You Need This Fall like these mason jar pies

Poached Pomegranate Spiced Pears from Jeanette’s Healthy Living

Desserts You Need This Fall like these Poached Pears

Apple Pear Crumb Cake from An Edible Mosaic

Desserts You Need This Fall like this apple pear crumb cake

Bosc Pears with Rum, Mascarpone and Ginger Syrup from Lemons and Anchovies

Pear and Cheese Pockets from Keep It Sweet

Pumpkin!

Gooey Pumpkin and Peanut Butter Oatmeal Bars {Gluten-free} from Keep It Sweet

Desserts You Need This Fall like these Gooey Pumpkin Peanut Butter Oatmeal Bars

Pumpkin Crunch Cake from Chef Dennis

Desserts You Need This Fall like this pumpkin crunch cake

Vegan Maple Pumpkin Pie from Cake Duchess

Desserts You Need This Fall like this vegan maple pumpkin pie

Chocolate Pumpkin Cake with Vanilla Bean Swiss Meringue Buttercream from Grace’s Sweet Life

Desserts You Need This Fall like this Chocolate-Cake-with-Pumpkin-from-Graces-Sweet-Life

Easy Low Fat Pumpkin Sheet Cake from Keep It Sweet

Desserts You Need This Fall like this Easy Low Fat Pumpkin Sheet Cake

Pumpkin Chocolate Cheesecake Bars from Keep It Sweet

Pumpkin Banana Nut Bread from Live Life

Spice Cookie Dough Stuffed Pumpkin Whoopie Pies from Sprinkle Bakes

Gingersnap Spiced Mini Pumpkin Pies from Pass the Sushi

Brown Butter Pumpkin Cake Cheesecake with Salted Caramel from Willow Bird Baking

Frozen Pumpkin and Chocolate Yogurt Pie with Salted Caramel Cream Sauce from Keep It Sweet

Pumpkin Cheesecake from Dessert for Two

Pumpkin Pie Cookie Dough Truffle Pops from Keep It Sweet

Gluten-Free Pumpkin Chocolate Chip Cookies from the Wannabe Chef

Lightened Up Pumpkin Cream Cheese Swirl Bars from Cookies and Cups

Fudge Striped Pumpkin Peanut Butter Cookies from How Sweet It Is

Brown Butter Pumpkin Cupcakes with Caramel Cream Cheese Frosting from Tracey’s Culinary Adventures

Biscoff Pumpkin Oatmeal Cookies from Two Peas & Their Pod

Other Fun Fall Flavors:

Brown Sugar Cupcakes with Cinnamon Ginger Buttercream and Ginger Cookie Pecan Brittle from Keep It Sweet

Desserts You Need This Fall like these Brown Sugar Cupcakes with Cinnamon Ginger Buttercream

Butternut Squash Cupcakes with White Chocolate Frosting from from Une Gamine Dans La Cuisine

Desserts You Need This Fall like these Squash Cupcakes

Mini Halloween Confetti Cookie Sandwiches from Keep It Sweet

Desserts You Need This Fall like these Mini-Halloween-Confetti-Cookie-Sandwiches

Halloween Goblin Goo Parfaits from Baked by Rachel

Ginger Maple Miso Ice Cream from Spabettie

Brown Butter Bourbon Spice Cookies from Bake Your Day

Sticky Cider Pecan Cakes with Cinnamon Ice Cream and Salted Caramel via The Little Loa

Gingerbread Scones {Low Carb & Gluten-free} from All Day I Dream About Food

Biscoff Caramel Cookie Bars from Dinners, Dishes and Desserts

Make something from the blog? Be sure to share it onInstagram with the tag #KeepItSweetDesserts.

Cookie Butter Lava Whole Wheat Banana Muffins

Healthy banana muffins with a surprise cookie butter filling.

Cookie Butter Lava Whole Wheat Banana Muffins

I think I looked at about fifty different banana muffin and bread variations before finally deciding to make these muffins.  My objective was to make something healthy but special.  I didn’t want plain old banana bread and I sure didn’t want something that was boring and dry.

Cookie Butter Lava Whole Wheat Banana Muffins

Luckly, I had bookmarked Jenny’s recipe for these banana muffins a few months ago.  And since I wanted Matt to be able to enjoy the treat as well, I obviously had to trade out the peanut butter for something my husband wouldn’t make a face at.

Cookie Butter Lava Whole Wheat Banana Muffins

Considering I’ve had an open jar of Cookie Butter forever, it was the perfect solution.  The molten center full of oozing speculoos spread is the perfect surprise when you break open the otherwise wholesome banana muffin.  The muffins are actually low in fat and have the perfect balance of healthy enough for breakfast but good enough for dessert.  You know how I love that.

Oh, and considering I practically inhaled one when I went to just taste a sample, you know they are good.

Cookie Butter Lava Whole Wheat Banana MuffinsCookie Butter Lava Whole Wheat Banana Muffins

Cookie Butter Lava Whole Wheat Banana Muffins
 
Healthy banana muffins with a surprise cookie butter filling.
Author:
Recipe type: Breakfast, Brunch
Makes: 14 muffins
Ingredients
  • 1 cup Cookie Butter (or speculoos spread of choice)
  • ½ cup powdered sugar
  • 1 cup mashed brown bananas (about 2 medium)
  • 3¾ ounces (1/2 cup) granulated sugar
  • 2 ounces (1/4 cup, packed) light brown sugar
  • 2 x-large egg whites
  • ½ teaspoon vanilla extract
  • 1 cup low fat buttermilk
  • 5½ ounces (1 cup) whole wheat flour
  • 1¾ ounces (1/3 cup) oat bran
  • 1 teaspoon baking soda
  • ¼ teaspoon salt
  • ¼ teaspoon ground cinnamon
Instructions
  1. Pre-heat oven to 350 degrees; line a muffin tin with cupcake liners and set aside
  2. In a medium bowl, mix together cookie butter and powdered sugar
  3. Use a medium cookie dough (about 2 tablespoons) scoop to scoop a ball of cookie butter mixture into each cupcake liner
  4. In another medium bowl, whisk together flour, oat bran, baking soda, salt and cinnamon; set aside
  5. In a large bowl, whisk together remaining ingredients (bananas through buttermilk)
  6. Stir in dry ingredients just until combined
  7. Use a large cookie dough scoop or ladle to evenly distribute batter into cups (over and around cookie butter filling)
  8. Bake 20-25 minutes or until a knife comes out clean from center
  9. Note:  These muffins are best when they are still warm from the oven but are still good covered at room temperature for up to two days after baking.  To get the full lava effect, microwave the room temperature muffins for about 7 seconds each.
Notes
Significantly adapted from Picky Palate

Cookie Butter Lava Whole Wheat Banana Muffins

Make something from the blog? Be sure to share it on Instagram with the tag #KeepItSweetDesserts.

You might also like:

Chocolate Covered Cookie Butter Pretzels

Chocolate Covered Cookie Butter Pretzels

Lighter Chocolate Chip Banana Cake

Lighter Chocolate Chip Banana Cake

Healthy Blueberry Banana Bread

Healthy Blueberry Banana Bread

Sweet and Salty Candy Bar Blondies

The fudgiest blondies loaded with everyone’s favorite sweet and salty candies.

Sweet and Salty Candy Bar Blondies

When I asked my Father-in-Law what he wanted for his birthday dessert, his only request was chocolate covered pretzels.  Sweet and salty, who doesn’t love those?

Sweet and Salty Candy Bar Blondies

But come on, it is a birthday dessert!  And since chocolate covered pretzels are what I make as an afterthought when I have extra melted chocolate, I just had to make something else.

Sweet and Salty Candy Bar Blondies

So I threw together something else sweet and salty that required just a little more time and effort than the pretzels (of course I made those too) and was thrilled with the result.  What I love about blondies is how flexible they can be.  You can load them up with whatever you are in the mood for.  Since Halloween is just a couple of weeks away, these would be the perfect way to use up any extra candy or the inevitable post-holiday candy sale purchases.

Sweet and Salty Candy Bar Blondies

Sweet and Salty Candy Bar Blondies
 
The fudgiest gooey blondies loaded with everyone's favorite sweet and salty candies.
Author:
Recipe type: Dessert
Makes: 12-16 servings
Ingredients
  • ½ cup (1 stick) unsalted butter
  • 12⅜ ounces (1½ cups packed) light brown sugar
  • 7 ounces (1½ cups) all-purpose flour
  • 1 teaspoon table salt
  • ½ teaspoon baking powder
  • 2 x-large eggs
  • 1 teaspoon vanilla extract
  • ½ cup honey roasted peanuts
  • ½ cup M&Ms
  • ⅓ cup chopped Heath Bars (~8 minis)
  • ¼ cup Reese's Pieces (I used mini but regular sized would work, too)
Instructions
  1. Pre-heat oven to 350 degrees; line an 8x8 or 9x9 baking dish with parchment paper and set aside
  2. In a medium-sized saucepan over medium heat, melt butter and brown sugar, stirring constantly; remove from heat and set aside when butter is completely melted
  3. In a medium bowl, whisk together flour, salt and baking powder; set aside
  4. In a large bowl, whisk together eggs and vanilla; whisk in butter and sugar mixture
  5. Whisk in flour mixture until almost combined and then fold in any remaining crumbs with a spatula
  6. Fold in peanuts and candy until evenly distributed throughout batter
  7. Pour into prepared baking pan
  8. Bake for 30-35 minutes or until a knife comes out clean
  9. Set aside to cool before cutting
Notes
Blondies will stay fresh for several days if wrapped or packaged in an air-tight container.  They also freeze incredibly well, just wrap them tightly in tin foil.


Sweet and Salty Candy Bar Blondies

Make something from the blog? Be sure to share it on Instagram with the tag #KeepItSweetDesserts.

You might also like:

Big, Chewy, Sweet and Salty Peanut Butter Cookies

Big, Chewy, Sweet and Salty Peanut Butter Cookies

Sweet and Salty Party Cookies (with caramel corn!)

Sweet and Salty Party Cookies (with caramel corn!)


Sweet and Salty Toll House Pie

Sweet and Salty Toll House Pie

Chocolate Makes Everything Better

This post is brought to you by Ghirardelli Intense Dark™ Chocolate.

Ghirardelli Intense Dark™ Chocolate

Lately I’ve been trying not to eat about a billion cookies a day.  Shocking, I know.  But would you believe that something like that caught up with me and apparently my clothes are all a bit tight?  Apparently I need to get back to everything in moderation or else the holidays are going to put me in a permanent state of sweatpants.

Ghirardelli Intense Dark™ Chocolate

But I am human, and a woman, after all, so there is something in my blood that says that I must eat something sweet every day.  And after a long day in the kitchen and on my feet, when I am physically and mentally spent, I just need a little something to help unwind.  And while cookies will never be cut out from my life, I try to limit them to once a week.  As a result, something like a few squares of chocolate after dinner does wonders and makes each night just a little bit better.

Ghirardelli Intense Dark™ Chocolate

That is why I was thrilled to get the chance to sample several of the Ghiradelli Intense Dark Chocolates.  Sure, I’m always tempted to eat a whole bar or two, but because of the richness, a little does go a long way.  And paired with a cup of decaf coffee or a glass of red wine, I’m forced to sit down, slow down, and really relax.

Ghirardelli Intense Dark™ Chocolate

My thoughts on the flavors I’ve tasted:

-Overall, they all have a wonderful richness that you can only get in a quality chocolate

-The Sea Salt Soiree had a nice texture and flavor, though I could have used just a tad more salt; if you like a subtle sweet and salty contrast you will love it

-The Toffee Interlude has a great toffee flavor and texture

-I wasn’t blown away by the Cabernet Matinee; the richness and texture were there but it had a little too much grape flavor to me (as opposed to wine)

Ghirardelli Intense Dark™ Chocolate

Now the only trick will be pacing myself as I make my way through the other flavors!

Ghirardelli Intense Dark™ Chocolate

Ghirardelli_logo(1)

Easy Low Fat Pumpkin Sheet Cake

This 5-ingredient pumpkin cake is so good, you would never know it is guilt-free!

This past Saturday, I took some of my own advice and set aside a day where no work would be done!  It was actually something I scheduled a few weeks ago when the Jewish holidays had me swamped.  Scheduling time off is one of the best ways I can really force myself to take a break and a good way to motivate myself when things are a little crazy.

Easy Low Fat Pumpkin Sheet Cake from Keep It Sweet Desserts

The day off meant getting to hang out with Matt.  We did mostly everyday activities like working out, grocery shopping and watching TV, but that is just how I like it.  The highlight of Saturday, though, was homemade pizza and champagne for dinner with some junky movies on the television.  It was our second time making pizza dough from scratch and I was reminded of just how worthwhile the few extra minutes of making dough can be.

Easy Low Fat Pumpkin Sheet Cake from Keep It Sweet Desserts

Of course, I couldn’t end the day without dessert.  And since it was an “off” day, I let myself cheat a little with cake mix.  Oh, but in case you were worried I at least made two cakes: chocolate cake for Matt and pumpkin cake for me.  I couldn’t help myself.

Easy Low Fat Pumpkin Sheet Cake from Keep It Sweet Desserts

This cake recipe is actually a nod to my college days.  Cooking usually consisted of boca burgers, egg beaters and salads with the occasional stir fry thrown in.  And while I loved to bake, we didn’t keep many basic ingredients in the apartment so cake mix recipes were the perfect solution.  I actually made a version of this cake for my roomate’s birthday one year (miss you, Rach!).  Pretty sure she and I ate most of it ourselves…

Easy Low Fat Pumpkin Sheet Cake from Keep It Sweet Desserts

The best part about this cake (besides the short list of ingredients and ease of making) is how moist and delicious it is without having much fat.  The moisture in the pumpkin gives the cake a perfect texture and you don’t even need frosting.  But a cake without frosting, what fun would that be?

Easy Low Fat Pumpkin Sheet Cake
 
Low fat pumpkin cake that's so good you won't know it only took 5 ingredients!
Author:
Recipe type: Dessert
Makes: 15 servings
Ingredients
  • 1 15.25 box spice cake mix
  • 1 15-ounce can pure pumpkin (not pumpkin pie mix)
  • ½ cup water
  • 1 1.4 box pumpkin spice instant pudding
  • 1 cup light almond milk OR 1¼ cup skim milk
  • 1 8-ounce container fat free cool whip
  • Optional:  Fall sprinkles and gingersnap crumbs
Instructions
  1. Pre-heat oven to 350 degrees; spray a 9x13 baking dish with non-stick cooking spray and set aside
  2. In a large bowl, stir together cake mix, pumpkin and water until combined
  3. Spread into baking dish and bake 25-30 minutes or until a knife comes out clean from the center
  4. Set cake aside to cool and prepare frosting
  5. In a large bowl, whisk together pudding mix and milk for two minutes
  6. Fold in cool whip just until combined
  7. Spread frosting over cake and serve; store leftovers in refrigerator up to 3 days

Easy Low Fat Pumpkin Sheet Cake from Keep It Sweet Desserts

Make something from the blog? Be sure to share it on Instagram with the tag #KeepItSweetDesserts.

You might also like:

Healthy Pumpkin Banana Baked Oatmeal

Healthy Pumpkin Banana Baked Oatmeal

One Bowl Pumpkin Blondies

One Bowl Pumpkin Blondies

My Favorite Pumpkin Bread

My Favorite Pumpkin Bread

The Easiest Pumpkin Cake

Mini Halloween Confetti Cookie Sandwiches

These cookies are so much fun for Halloween, not to mention, delicious!  Cater them to your holiday of choice with different colors.

Mini Halloween Confetti Cookie Sandwiches

As much as I prepared before launching Keep It Sweet Desserts, there is so much learning that I’ve done on the job over the last few months.  Countless lessons learned, mistakes made, products changed and instances of thinking on my feet.  I’ve been mentally making a list but I thought I’d share a few of the more important highlights*.

Mini Halloween Confetti Cookie Sandwiches

1)  When you do anything for the first time, you won’t get it 100% right.  Learn from the challenges and mistakes to do it better next time.

2) There is no one right way.  Talk to people and get advice but figure out what is best for you and your business, one strategy does not fit all.

3)  But still, talk to people.  Take what pieces of advice you can and implement them when and how you can.  I talked to someone in marketing a few weeks ago and was overwhelmed by all of the ideas she had because there is no way that I can do everything.  However, I picked a few elements that I could act on right away and did that.

Mini Halloween Confetti Cookie Sandwiches

4)  And along with that, there is ALWAYS more work to do; prioritize, prioritize, prioritize.

5)  There is always more work to do, force yourself to take breaks (for me that is out of the kitchen and away from the computer).  I spend a lot of my time working from home so whenever I am home I feel like I need to be productive.  If I never take a break, I’ll burn myself out and that won’t get my business anywhere.

6) Be patient.  Don’t hire people, build kitchens and buy equipment until you are over capacity.  I actually learned this in my last job but constantly am reminded of how important it is to be conservative with my growth expectations.

Mini Halloween Confetti Cookie Sandwiches

7) Think long term and invest in the future, whether through time, money or people. Find a way to balance this with being patient.

8)  Put yourself out there.  Send emails, make phone calls, go to networking events.  This is something I still need to work on.  I’m always afraid of being too pushy, but no one made money waiting for business to show up at their door.

9)  Give.  The other day I was talking to the CIO of a major company.  He is one of the most successful people I know, yet he is also one of the most generous.  He is generous with his family, friends, community and colleagues in a way I constantly admire.  He said to me, “the more you give, the more you get back.”

10)  Stay months ahead of the holidays.  Believe it or not, I’m already behind on Valentine’s Day.  For someone who is a notorious procrastinator, It is almost a miracle that I’m getting you a Halloween recipe a few weeks in advance.

Mini Halloween Confetti Cookie SandwichesMini Halloween Confetti Cookie Sandwiches

These cookies are easy and fun to make.  I took a simple sugar cookie base and sandwiched it with one of my favorite buttercreams.  Plus, I made them mini, which is always fun.

Mini Halloween Confetti Cookie Sandwiches
 
These cookies are so much fun for Halloween, not to mention, delicious! Cater them to your holiday of choice with different colors.
Author:
Recipe type: Dessert
Makes: ~3 dozen cookie sandwiches
Ingredients
Cookies:
  • 13⅞ ounces (3 cups) all-purpose flour
  • 1 teaspoon baking soda
  • ½ teaspoon table salt
  • 13⅛ ounces (1¾ cups) granulated sugar
  • 2⅛ ounces (1/4 cup packed) light-brown sugar
  • 1 cup (2 sticks) unsalted butter, softened at room temperature
  • 1 extra-large egg
  • 1 teaspoon vanilla extract
  • ⅔ cups Halloween colored sprinkles
Buttercream:
  • 6 tablespoons (3/4 sticks) unsalted butter, softened at room temperature
  • 2 ounces regular or light cream cheese
  • 1 cup powdered sugar
  • ½ teaspoon vanilla extract
  • 26 drops yellow food coloring
  • 13 drops red food coloring
Instructions
Cookies:
  1. Preheat oven to 350 degrees; line baking sheets with parchment paper and set aside
  2. In a large bowl, whisk together flour, baking soda and salt; set aside
  3. In the large bowl of an electric mixer, beat together butter and sugars on high speed for several minutes or until mixture is light and fluffy; scrape sides of the bowl with a spatula
  4. Add egg and vanilla and beat on medium speed for a 2 minutes; scrape the sides of the bowl with a spatula
  5. With mixer on low, slowly and carefully add the flour mixture; add the sprinkles and mix just until combined; use a spatula to fold the sprinkles completely into the batter
  6. Use a small cookie dough scoop (about 1 tablespoon) to scoop the cookie dough onto prepared baking sheets with each cookie about an inch apart
  7. Bake for 7-9 minutes or until cookies feel slightly firm to the touch
  8. Set cookies aside to cool and prepare filling
Buttercream:
  1. Beat butter and cream cheese in the bowl of an electric mixer on high speed or until light and creamy
  2. Add ½ cup of powdered sugar and mix on low speed for one minute; add remaining sugar, vanilla and food coloring
  3. Mix on low speed for one minute and then scrape the sides of the bowl; beat on high speed for several minutes or until buttercream is light and fluffy
To Make Cookie Sandwiches:
  1. Match cookies in pairs so that each side is about the same size
  2. Spread about 1 teaspoon of frosting on the bottom of one cookie from each pair
  3. Top other cookie and press down lightly
  4. Store cookies in an airtight container up to three days; may be frozen for up to one month
Notes
Cookies adapted from Martha Stewart


Mini Halloween Confetti Cookie Sandwiches

*In no specific order.

Make something from the blog? Be sure to share it on Instagram with the tag #KeepItSweetDesserts.

You might also like:

Mini Funfetti Cupcakes

Mini Funfetti Cupcakes

Meyer Lemon Sprinkle Cookies

Meyer Lemon Sprinkle Cookies

Baby Blue Cake Pops & A Virtual Baby Shower!


Baby Blue vanilla cake pops made from scratch!

Baby Blue Cake Pops from scratch!

SURPRISE!  Today’s post is a special part of Krissy’s surprise virtual baby shower!  A special thanks to sweet and talented Audra for organizing the shower.

Baby Blue Cake Pops from scratch!

I met Krissy last year at the Foodbuzz Festival and she was absolutely as sweet as can be.  We’ve been friends ever since and I’m hoping to see her and meet baby Ezekiel when I am in California next year!

Baby Blue Cake Pops from scratch!

I’ve actually been making a lot of cake pops lately.  Some for baby shower favors and then some more for an Anthropologie event.  The baby shower made a lot of sense because they went off of the line “Andrea is about to pop” so I figured, why wouldn’t that be perfect for Krissy’s shower, too?

Baby Blue Cake Pops from scratch!

Note the missing cake pops above, Matt could not stop eating them!

Baby Blue Cake Pops from scratch!

Since Krissy is expecting a baby boy, I wanted to make the pops a pretty baby blue, and a white cake seemed the best base for that.  That cake combined with a basic buttercream and coated with white chocolate made the perfect combination.  I actually think that while these are very baby shower friendly, they would also be a nice addition to a winter wonderland themed party!

Baby Blue Cake Pops from scratch!

Of course there are some other wonderful ladies participating in this shower with so many delicious recipes.  I only wish we could all get together to celebrate Krissy in real life!

Audra of The Baker Chick | Mini Salted Caramel Brownie Pies
Averie of Averie Cooks | Cinnamon Oatmeal Date Bars with Chocolate Chunks
Cassie of Bake Your Day | Red Bell Pepper Ranch Cheese Dip
Erin of Big Fat Baker | Blueberry Punch
Jacqueline of The Dusty Baker | Kid-friendly Gluten-and-Dairy-Free Chicken Fingers
Lauren of Keep It Sweet | Baby Blue Cake Pops From Scratch
Nicole of Sweet Peony Blog | Roasted Blueberry Cupcakes with Cream Cheese Frosting

Baby Blue Cake Pops
 
Homemade cake pops (no cake mix!) are perfect for a special occasion.
Author:
Recipe type: Dessert
Makes: 50 cake pops
Ingredients
  • 1 Baby Blue Cake
  • 1 batch Baby Blue Buttercream
  • ~50 6-inch lollipop sticks
  • 32 ounces white chocolate, roughly chopped
  • ½ cup blue sprinkles
Instructions
  1. Line a baking sheet with wax paper and set aside
  2. Break cake into pieces and place in a large bowl; crumble cake into small crumbs with fingers
  3. Add buttercream to cake and mix with a spoon until all cake crumbs are coated
  4. Use a medium cookie dough scoop or large spoon to scoop balls of dough onto wax paper
  5. Use your hands to roll the cake scoops into balls
  6. Cover with another sheet of wax paper and place in freezer for at least two hours
  7. Prepare another baking sheet with wax paper for finished pops
  8. Once cake balls are frozen, you can make them into pops
  9. Put white chocolate in a heat-safe bowl and place in over a pot of simmering water; stir chocolate constantly
  10. until melted (you can also melt the white chocolate in the microwave)
  11. Remove balls from freezer; dip the top of each lollipop stick about ⅓ of an inch into the white chocolate and immediately press into cake ball two thirds of the way through
  12. Once complete, dip each cake pop, one at a time, into white chocolate; lightly tap off excess chocolate and place cake pop on wax paper; decorate with sprinkles immediately before chocolate hardens
  13. Repeat until all cake pops are dipped and decorated
  14. Allow to cool and for chocolate to harden before serving
Notes
Inspired by Bakerella

 
Baby Blue Sheet Cake
 
Author:
Recipe type: Dessert
Ingredients
  • 1 cup milk (I used skim) at room temperature
  • 6 x-large egg whites at room temperature
  • ½ tablespoon vanilla extract
  • 3 drops blue food coloring
  • 2¼ cups (8⅝ ounces) cake flour
  • 1¾ cups (13⅛ ounces) granulated sugar
  • 4 teaspoons baking powder
  • 1 teaspoon table salt
  • ¾ cup (1½ sticks) unsalted butter, softened at room temperature
Instructions
  1. Pre-heat oven to 350 degrees; spray a 9x13 pan with cooking spray and set aside
  2. In a medium bowl, whisk together milk, egg whites, vanilla and food coloring; set aside
  3. In the large bowl of an electric mixer, whisk together flour, sugar, baking powder and salt; add butter and beat on low speed until all of the ingredients are in wet lumps
  4. Add half of milk mixture and beat on medium speed for 1-2 minutes or just until combined; scrape the sides of the bowl with a spatula and then add remaining milk mixture; beat on medium speed just until combined without overmixing
  5. Pour batter into prepared pan and bake 25-35 minutes or until a knife comes out clean from center
  6. Set aside to cool and prepare buttercream
Notes
Cake adapted from Baking Bites

Baby Blue Buttercream
 
Author:
Recipe type: Dessert
Ingredients
  • ¾ cup (1½ sticks) unsalted butter, softened at room temperature
  • 4 ounces regular or light cream cheese
  • 2 cups powdered sugar
  • 1 teaspoon vanilla extract
  • 2 drops blue food coloring
Instructions
  1. Beat butter and cream cheese in the bowl of an electric mixer on high speed or until light and creamy
  2. Add one cup of powdered sugar and mix on low speed for one minute; add remaining sugar, vanilla and food coloring
  3. Mix on low speed for one minute and then scrape the sides of the bowl; beat on high speed for several minutes or until buttercream is light and fluffy


Baby Blue Cake Pops from scratch!

You might also like:

Pink Champagne Cake Pops

Pink Champagne Cake Pops

The best homemade cake pops!

Dessert for Breakfast or Breakfast for Dessert

I might be an oatmeal girl most days of the week, but pancakes and other sweet treats will always have a special place in my heart.  Often, when we go on vacation, we will try to balance breakfast with an egg white omelet and a side of donuts, pancakes or waffles.  We all deserve to start the day with a treat every now and again!  Inspired by my love of all things dessert, I even started a Pinterest board for breakfasts that taste like dessert.  Since I’m sure I’m not alone, I’ve rounded up almost 30 sweet treats for breakfast and included them below:

Brown Butter Cinnamon Rolls from the Baker Chick

brown butter cinnamon rolls

Chocolate Chip Cookie Dough Glazed Pancakes for One from Healthy Food for Living

Chocolate Chip Cookie Dough Glazed Pancakes for One

Crème Brulee French Toast from That Skinny Chick can Bake

Crème Brulee French Toast

Reese’s Peanut Butter Chocolate Waffles from Krissy’s Creations

Reese's Peanut Butter & Chocolate Waffles-5

Bananas Foster Oats from An Edible Mosaic

Bananas Foster Oats

Chocolate Mousse for Breakfast from Jeanette’s Healthy Living

chocolatemousse_findingvegan

Gingerbread French Toast from Created by Diane

Gingerbread-French-Toast-with-GingerbreadButter-530x353

Blueberry Chocolate Chunk Banana Bread from Keep It Sweet Desserts

Blueberry-Chocolate-Chunk-Banana-Bread-Gluten-Free-10_thumb

Bagel Bread Pudding from The Actor’s Diet

Bagel Bread Pudding

Cinnamon Roll Waffles from Pass the Sushi

Cinnabun_waffles_0040-1024x675

Cinnamon-Banana Stuffed Muffins from Espresso and Cream

Cinnamon-Banana Stuffed Muffins

Chocolate Banana Crepes from Liv Life

chocolate banana crepes

Cinnamon Bun Oats from An Edible Mosaic

cinnamon bun oats

Vegan Banana Nut Breakfast Cake from Bake Your Day

vegan-banana-nut-breakfast-cake-211-560x373

Funfetti Baked Donuts from Chocolate and Carrots

Funfetti-Whole-Wheat-Baked-Donuts-6279

Rolled Oats, Cardamon & Cherries Upside Down Cake from Food Wanderings

Rolled Oats, Cardamon & Cherries Upside Down Cake

PB&J Waffle Sandwich from The Actor’s Diet

PB&J Waffel Sandwich

Blueberry Buckwheat Pancakes with Roasted Cardamom-Vanilla Rhubarb Compote from Eats Well with Others

Blueberry Buckwheat Pancakes with Roasted Cardamom-Vanilla Rhubarb Compote

Peanut Butter and Chocolate Chip Oat Muffins from Bran Appetite

Peanut Butter and Chocolate Chip Oat Muffins

Crumb Donuts from Dessert for Two

CrumbDonutsfinal3forsite

Triple Chocolate Muffins with Peanut Butter Swirl from Keep It Sweet Desserts

double-chocolate-muffins-12_thumb

Whole Wheat Banana Pancakes with Warm Maple Glaze from Live Life

banana bancakes

Apple Cinnamon Pop Tarts with Caramel Icing from Baked by Rachel

poptarts

Dark Chocolate Cake Donuts with Salted Caramel Glaze from Grace’s Sweet Life

Dark-Chocolate-Cake-Donuts-with-Salted-Caramel

Twix Muffins from Cake Duchess

twix-muffins-muffin-monday-1_thumb[4]

Blueberry Cinnamon Rolls from Sweet Pea’s Kitchen

blueberry-cinnamon-rolls21

And a few additions from some friends:

Saffron Donuts with Rosewater Icing from Spagetti

Cherry Pancakes from Spagetti

Double Rich Chocolate Pancakes from Spagetti

Raspberry & Cream Stuffed French Toast from The Avid Appetite

Chocolate Covered Banana Oats from The Avid Appetite

Strawberry Baked Oatmeal from The Avid Appetite

I think it is time for a pot-luck breakfast where we all bring one of these treats!

*And just a reminder, I’m a finalist for a Martha Stewart American Made Award!  Keep voting every day through the 24th!!*

Mini Lemon Cupcakes with Perfect Silky Buttercream

Mini lemon cupcakes with the silkiest lemon buttercream.
Mini Lemon Cupcakes with Perfect Silky Buttercream

First off, for those of you who don’t already know, I’m a finalist for a Martha Stewart American Made Award!  Not only is this an honor, but it is also an amazing opportunity.  The winner will be selected based on VOTES and will be honored at the American Made event in New York City AND appear in Martha Stewart Living Magazine.  On top of that, Keep It Sweet Desserts would get $10,000 to help grow the business. It couldn’t get much better than that.

Please help me by voting EVERY DAY from now through September 24th!  I’ve been doing pretty well so far, but can use a little extra push in the contest.  Your support means the world to me.  For those of you who have been voting, tweeting, facebooking and emailing, thank you a million times over!

Please VOTE for Keep It Sweet Desserts!

Now, onto cupcakes.  These lovelies were just one of the desserts that we enjoyed to celebrate my husband’s 29th birthday.  His birthday is today (HAPPY BIRTHDAY MATT!!!!!!), but we had our families over to celebrate on Sunday night.  Dinner was all about the meat:  hot dog appetizers (full-size, not mini); burgers; and two different cuts of steak.  There was also a side of mashed potatoes, tomatoes and mozzarella and a chopped salad.  To my vegetarian friends, please know that we bought high quality meat that came from well-treated animals.

Mini Lemon Cupcakes with Perfect Silky Buttercream

And yes, Matt did eat all of the different items we served.  I, however, had my once-a-year cheeseburger and lots of salad on the side.

Lucky for me, my meat-loving husband also loves dessert.  I like to take credit for his refined sweets palate and discretion over worth-it desserts but he should also get credit for the quality of all of the Keep It Sweet Dessert cookies and bars.  He is an MVP taste-tester.  But I digress.

As for the birthday desserts, it was a menu of all things Matt loves:  Yellow layer cake with chocolate buttercream frosting, warm salted chocolate chip cookies AND warm chocolate chip cookie cheesecake (Thank, MOM!) just out of the oven, and finally these Mini Lemon Cupcakes with Perfect Silky Buttercream.

Mini Lemon Cupcakes with Perfect Silky Buttercream

While I would never request a lemon dessert for my birthday, I’m glad that Matt did!  These cupcakes were the perfect balance of lemon flavor without an intensely sweet or overly sour note to them.  If anything, Matt thought there could have been a little more lemon in the frosting, but I really wanted it to just compliment the cake, not overtake it.

Mini Lemon Cupcakes with Perfect Silky Buttercream
 
Mini lemon cupcakes with the silkiest lemon buttercream.
Author:
Recipe type: Dessert
Makes: 36 mini cupcakes
Ingredients
Lemon Cupcakes
  • 1 cup + 3 tablespoons (5⅛ ounces) all purpose flour
  • 1 teaspoon baking powder
  • ½ teaspoon table salt
  • ¼ cup plain greek yogurt (I used fat free)
  • ¼ cup milk (I used skim)
  • 1 tablespoon fresh lemon juice (about ½ of a lemon)
  • 1 tablespoon lemon zest (about 1 lemon)
  • 1 teaspoon vanilla extract
  • ½ cup (1 stick) unsalted butter softened at room temperature
  • ¾ cup granulated sugar (5⅝ ounces)
  • 2 large eggs at room temperature
Lemon Kissed Swiss Meringue Buttercream
  • ½ cup egg whites (I used 3 extra-large but pasteurized egg whites work fine)
  • 1 cup granulated sugar
  • 1⅛ cups (2¼ sticks) unsalted butter, softened and cut into 1-inch cubes
  • 1 tablespoon lemon zest (about 1 lemon)
  • ½ tablespoon vanilla extract
  • <1/8 teaspoon table salt
Instructions
Lemon Cupcakes
  1. Pre-heat oven to 350 degrees; fill mini cupcake tins with 36 cupcake wrappers; set aside
  2. In a medium bowl, whisk flour, baking powder and salt; set aside
  3. In a separate bowl, combine yogurt, milk, lemon juice, lemon zest, and vanilla; set aside
  4. In a large bowl with an electric mixer, beat butter and sugar on high speed for several minutes or until light and fluffy; at this point you can’t really overbeat the batter, you want to get as much lightness at this stage as you can; scrape the sides of the bowl with a spatula
  5. Add eggs, one at a time, beating at medium speed for one minute after each; scrape the sides of the bowl with the spatula
  6. Reduce speed to low and slowly add ⅓ of flour mixture and then ½ of wet ingredients; repeat with ⅓ of flour mixture and remaining wet ingredients; add remaining flour mixture and remove from mixer immediately (there should still be lumps in the batter)
  7. Gently fold batter so that you can no longer see any dry ingredients but there are still some small lumps; do not overmix
  8. Evenly distribute batter into cupcake wrappers; I find this easiest with a medium cookie dough scoop or small ladle
  9. Bake cupcakes for 10-12 minutes or until a toothpick comes out clean from a center cupcake; do not overbake
  10. Set cupcakes aside to cool and prepare frosting
Buttercream:
  1. Wipe the bowl of an electric mixer, whisk attachment, whisk, spatula and candy thermometer with a paper towel and vinegar to clean (if any grease is on these items your meringue will not work)
  2. Place egg whites and sugar in mixing bowl over pot of simmering water; water should not be high enough to touch mixing bowl
  3. Whisk mixture slowly but constantly until temperature reaches 160 degrees F, about 5-10 minutes
  4. Remove from stove and attach bowl to electric mixer with whisk attachment
  5. Put mixer on low to medium speed and whisk until meringue is shiny and thick and bowl has cooled down to room temperature; if bowl does not cool and meringue has formed, you can put an ice bath under the mixing bowl while it is mixing
  6. Once ready, replace whisk attachment with paddle attachment and add cubes of butter one at a time mixing on low speed until the mixture is light and creamy; if mixture gets lumpy, keep mixing for several minutes; if it gets runny, place bowl in fridge for 10 minutes before continuing to mix
  7. Stop mixer to scrape sides of bowl and continue to beat on low speed for another minute
  8. Add lemon zest, vanilla, and salt and mix on medium speed until the SMB is light and creamy
  9. Frost cupcakes as desired (I prefer piping for swiss meringue buttercream)
Notes
Cupcakes adapted from Sweetapolita
Buttercream adapted from Sweetapolita
Cupcakes are best that day or refrigerated overnight; may be frozen up to one month and served at room temperature


Mini Lemon Cupcakes with Perfect Silky Buttercream

Don’t forget to VOTE!!!

Make something from the blog? Be sure to share it on Instagram with the tag #KeepItSweetDesserts.

You might also like:

Mini Lemon Layer Cake for Two

Mini Lemon Layer Cake

No Churn Lemon Ice Cream

No Churn Lemon Ice Cream

Easy Lemon Shortbread Cookies

Easy Lemon Shortbread Cookies

Apple Cinnamon Blondies

Apple Cinnamon Blondies

I always thought that summer was my favorite season, but this year I can’t wait for the temperature to go down a bit.  Maybe it was the ultra-hot weather this summer that was more conducive to air conditioning than afternoon walks.  I’m not quite sure, but whatever it is I’m ready for fall.

Apple Cinnamon Blondies

And in the spirit of fall, there are few better ways to get started than with apples.  I have always had a weakness for any dessert loaded with giant chunks of apples and flavored with spicy cinnamon, so these Apple Cinnamon Blondies are absolutely perfect.  They are chewy and delicious on their own, but even better warm with a scoop of ice cream, given that they seem like an apple pie/blondie hybrid.

An-apple-a-day-LG

I’m sharing the recipe over on Baked by Rachel as a part of her Apple a Day Party!  Rachel is celebrating apples all month long!

Apple Cinnamon Blondies

And speaking of fall, Keep It Sweet Desserts has two brand new cookies!  The first is the Smoked Sea Salted Caramel Chocolate Chip Cookie.  It is a spin-off from a popular cookie I sent out for Cookie of the Month Club in the spring.  The other is one of my favorites, a Cinnamon and Chocolate Chip Pumpkin Pie Cookie.  You don’t want to miss out.

Apple Cinnamon Blondies

Make something from the blog? Be sure to share it on Instagram with the tag #KeepItSweetDesserts.

You might also like:

Apple and Pear Crisp

Obsessed with this pear and apple crisp!

Apple Pie Crumble Bars

Apple Pie Crumble Bars

Cinnamon Chip Oatmeal Blondies

Cinnamon Chip Oatmeal Blondies

Brown Sugar Cupcakes with Cinnamon Ginger Buttercream and Ginger Cookie Pecan Brittle

Moist brown sugar cupcakes topped with a flavorful buttercream and surprise brittle topping.
Brown Sugar Cupcakes with Cinnamon Ginger Buttercream and Ginger Cookie Pecan Brittle

Sometimes it is easy to get in a rut.

A cookie rut. An exercise rut. A wearing the same $12 gap t-shirt every day rut.

Brown Sugar Cupcakes with Cinnamon Ginger Buttercream and Ginger Cookie Pecan Brittle

We get a little comfortable with the usual. Cookies are easy and I’ve gotten great at them. I know what ingredients make the best dough, what amount of refrigeration time creates the best final product and what flavor combinations will always taste good (chocolate and peanut butter, obviously). I’m not being cocky, I just spend many hours most days making cookies for my business.

Brown Sugar Cupcakes with Cinnamon Ginger Buttercream and Ginger Cookie Pecan Brittle

I’m not actually in an exercise rut right now, I’m in more of a Sean T kicks my butt every single day and I can’t wait until Insanity is over phase. And the t-shirts? Yeah, I can’t help it. I’ll stop when the weather cools down and I can break into my new fall wardrobe.

Brown Sugar Cupcakes with Cinnamon Ginger Buttercream and Ginger Cookie Pecan Brittle

Sometimes these ruts are really hard to escape. But sometimes, all it takes is just a little bit of excitement over something new. At the start of Insanity I was excited because I wanted to look like those women in the video (ahem, no matter how many level 3 drills I do, it isn’t happening).

Brown Sugar Cupcakes with Cinnamon Ginger Buttercream and Ginger Cookie Pecan Brittle

Well, ever since we went to Bi-Rite, I’ve had the brown sugar ice cream on the brain.  That dark, almost burnt brown sugar flavor and the swirls of ginger throughout were such a perfect combination of flavors.  I’ve been wanting to recreate that experience in a different way.

I don’t know how it happened exactly, but the idea of this cupcake just popped into my head last week.  It was one of those moments where as soon as it happened, I had to do something.  Brown sugar cupcakes were in and out of the oven before I really knew what hit me.  What followed was a lightly flavored creamy swiss meringue buttercream and a sweet and salty crunchy topping inspired by one of my favorite bloggers.  The result was almost too good.

Brown Sugar Cupcakes with Cinnamon Ginger Buttercream and Ginger Cookie Pecan Brittle

2.0 from 1 reviews
Brown Sugar Cupcakes with Cinnamon Ginger Buttercream and Ginger Cookie Pecan Brittle
 
Moist brown sugar cupcakes topped with a flavorful buttercream and surprise brittle topping.
Author:
Recipe type: Dessert
Makes: 17 cupcakes
Ingredients
  • 1 batch brown sugar cupcakes
  • 1 batch cinnamon ginger swiss meringue buttercream
  • 1 batch ginger cookie pecan brittle
Instructions
  1. Prepare cupcakes as directed below
  2. While cupcakes are cooling, prepare brittle and set aside to cool
  3. Once cupcakes and brittle are cool, make frosting; frost cupcakes with a spatula or piping bag and top with broken brittle pieces
  4. Serve immediately; if you are making cupcakes in advance, do not top with brittle until just before serving

2.0 from 1 reviews
Brown Sugar Cupcakes
 
Ingredients
  • 1½ cups (7 ounces) all-purpose flour
  • 1 teaspoon baking powder
  • ¼ teaspoon table salt
  • ½ cup (1 stick) unsalted butter, softened at room temperature
  • 1⅛ cup (10.25 ounces) tightly packed light brown sugar
  • 2 extra large eggs at room temperature
  • ½ teaspoon vanilla extract
  • ⅜ cup buttermilk
Instructions
  1. Pre-heat oven to 325 and line regular-sized cupcake tins with cupcake wrappers; set aside
  2. Sift together flour, baking powder and salt into a medium bowl; set aside
  3. In a large mixing bowl, beat together butter and brown sugar on medium-high speed using an electric mixer for several minutes; beat until very light and fluffy
  4. Scrape the sides of the mixing bowl; add eggs, one at a time, beating on medium speed in-between until each egg is combined
  5. Add vanilla and beat on high for one minute
  6. Reduce speed of mixer to low and slowly add one half of flour mixture, do not overmix
  7. Add buttermilk and then remaining flour mixture; turn off mixer before all dry ingredients are combined; remove bowl of mixer and slowly fold batter until dry ingredients are combined; do not overmix
  8. Evenly distribute batter into 17 prepared cupcakes, filling about ⅔ of each cup
  9. Bake cupcakes for 18-22 minutes or until a toothpick comes out clean
Notes
Slightly adapted from Martha Stewart
I wasn’t thrilled with the appearance of the cupcake by itself, it was completely flat on the top. Luckily, the taste and moist texture more than made up for it and the frosting covered up any lackluster looks I was worried about.
The cupcakes can be made up to one month in advance and frozen. Defrost for a couple of hours at room temperature prior to frosting.

 
2.0 from 1 reviews
Cinnamon Ginger Buttercream
 
Author:
Recipe type: Dessert
Ingredients
  • ½ cup egg whites (I used 3 extra-large but pasteurized egg whites work fine)
  • 1 cup granulated sugar
  • 1⅛ cups (2¼ sticks) unsalted butter, softened and cut into 1-inch cubes
  • ½ tablespoon vanilla extract
  • 2 teaspoons ground ginger (if you are using fresh ground ginger, start with less and add more to taste)
  • 1½ teaspoons ground cinnamon
  • <1/8 teaspoon table salt
Instructions
  1. Wipe the bowl of an electric mixer, whisk attachment, whisk, spatula and candy thermometer with a paper towel and vinegar to clean (if any grease is on these items your meringue will not work)
  2. Place egg whites and sugar in mixing bowl over pot of simmering water; water should not be high enough to touch mixing bowl
  3. Whisk mixture slowly but constantly until temperature reaches 160 degrees F, about 5-10 minutes
  4. Remove from stove and attach bowl to electric mixer with whisk attachment
  5. Put mixer on low to medium speed and whisk until meringue is shiny and thick and bowl has cooled down to room temperature; if bowl does not cool and meringue has formed, you can put an ice bath under the mixing bowl while it is mixing
  6. Once ready, replace whisk attachment with paddle attachment and add cubes of butter one at a time mixing on low speed until the mixture is light and creamy; if mixture gets lumpy, keep mixing for several minutes; if it gets runny, place bowl in fridge for 10 minutes before continuing to mix
  7. Stop mixer to scrape sides of bowl and continue to beat on low speed for another minute
  8. Add vanilla, ginger, cinnamon and salt and mix on medium speed until the SMB is light and creamy
Notes
Adapted from Sweetapolita
You can frost the cupcakes up to one day in advance and keep them chilled until ready to serve so that the buttercream does not melt. Serve at room temperature

2.0 from 1 reviews
Ginger Cookie Pecan Brittle
 
Author:
Recipe type: Dessert
Ingredients
  • ½ cup granulated sugar
  • ¼ cup light corn syrup
  • ¼ cup lightly chopped raw pecans
  • ¼ cup broken gingersnaps (about 3 cookies)
  • ½ teaspoon table salt
  • ½ teaspoon unsalted butter
  • ½ teaspoon vanilla extract
  • ½ teaspoon baking soda
Instructions
  1. Line a baking sheet with parchment paper and set aside
  2. In a large microwave-safe bowl, stir together sugar and corn syrup; microwave mixture on high for three minutes
  3. Stir in pecans, gingersnaps and salt; put in microwave for one minute and then stir; microwave for another thirty seconds keeping an eye on the mixture so as not to burn
  4. Stir in butter and vanilla; microwave for 30 seconds; be careful bowl may get very hot
  5. Stir in baking soda and immediately spread brittle onto parchment paper
  6. Allow to cool for 30 minutes; break brittle into small pieces for cupcakes
  7. If not using immediately, store in an airtight container for up to five days
Notes
Slightly adapted from Dessert for Two
The brittle can be made a couple of days in advance and stored in an airtight container until ready to use.  Top the cupcakes with the brittle right before serving for best results.


Brown Sugar Cupcakes with Cinnamon Ginger Buttercream and Ginger Cookie Pecan Brittle

Cookies, what?

Make something from the blog? Be sure to share it on Instagram with the tag #KeepItSweetDesserts.

You might also like:

Pumpkin Cake with Pecan Pie Glaze

Pumpkin Cake with Pecan Pie Glaze

Brown Butter Chocolate Pecan Blondies

Brown Butter Chocolate Pecan Blondies

Chewy Milk Chocolate Ginger Cookies

Chewy Milk Chocolate Ginger Cookies

Banana Brownie Chunk Greek Frozen Yogurt

Banana Brownie Chunk Greek Frozen Yogurt

Well, I think I am officially old.

Banana Brownie Chunk Greek Frozen Yogurt

My 28th birthday is on Tuesday and while I know that in the big picture that really isn’t old, I certainly feel it.  After a late night out in the city last night, my body is just begging for a day of rest.  A big difference from when I moved to New York six years ago.

cooking bananas for Banana Brownie Chunk Greek Frozen Yogurt

In fact, a lot of things have changed in those six years.  Jobs, twice.  Boyfriend turned fiance turned husband.  Sister turned real life best friend.* Studio turned one bedroom then into two.  Jean size.  Insecurities faded**.  Passions realized.  Parents seen more as equals.  Views on life.  Priorities.  Dislike of goat cheese to love of goat cheese.  Suits to chef coats.

*Well, that wasn’t exactly a change, just more of a realization

**Some

brownies for Banana Brownie Chunk Greek Frozen Yogurt

It is actually amazing how much has changed but then again there is a lot that stayed the same.  Love of dessert.  Partner in life.  Balance of health and pleasure.  Love of family.  Drive, motivation, determination.  Heart. Morals.  Devotion to peanut butter, pumpkin, and fresh baked cookies.  Joy in baking for others.  Desire to eat only worth-it foods.  And of course, a love of frozen yogurt.

making Banana Brownie Chunk Greek Frozen Yogurt

You knew I’d tie this recipe in somehow.  I’ve actually been meaning to make this recipe since the last frozen yogurt I made.  It just took most of the summer for me to remember to put the ice cream maker bowl back in the freezer.  Matt gets credit for that reminder.

Banana Brownie Chunk Greek Frozen Yogurt

This frozen yogurt is creamy and full of fudgy brownie chunks to add the perfect indulgent touch.  The only thing missing is a little peanut butter swirl but I figured I’d be better off if I made a dessert my husband would also eat.

Banana Brownie Chunk Greek Frozen Yogurt

Banana Brownie Chunk Greek Frozen Yogurt
 
Caramelized bananas and fudgy brownies make the best frozen yogurt!
Author:
Recipe type: Dessert
Makes: 1 quart
Ingredients
  • 3 large brown bananas cut into slices (about ¼ inch thick)
  • 2 tablespoons light brown sugar, tightly packed
  • ½ teaspoon cinnamon
  • 1 teaspoon unsalted butter
  • 1½ cups fat free plain Greek yogurt
  • 2 tablespoons granulated sugar
  • ⅓ cup fudgy brownie pieces, size based on preference
Instructions
  1. Place banana slices, brown sugar, cinnamon and butter in a heavy duty saucepan over medium-high heat; cook until bananas and sauce are very thick, stirring occasionally; remove from heat
  2. Place two thirds of the banana mixture in a food processor or blender and puree
  3. In a large bowl, combine yogurt, sugar and pureed bananas; fold in remaining banana mixture and brownies
  4. Place in refrigerator for one hour or until mixture has cooled
  5. Once cooled, freeze yogurt in ice cream maker as directed by manufacturer's instructions
  6. Serve immediately or store prepared frozen yogurt in freezer until ready to eat (allow to defrost and soften a few minutes before serving)
Notes
Already frozen ripe bananas will work just as well as fresh
This frozen yogurt isn't overly sweet making it the perfect base for a touch of hot fudge or peanut butter sauce and whipped cream

Oh, and beware.  This yogurt barely lasted a full day in my house.

Banana Brownie Chunk Greek Frozen Yogurt

Make something from the blog? Be sure to share it on Instagram with the tag #KeepItSweetDesserts.

You might also like:

Blueberry Chocolate Chunk Frozen Yogurt

Blueberry Chocolate Chunk Frozen Yogurt

Gingersnap Peach Crumble Ice Cream

Gingersnap Peach Crumble Ice Cream

Fudgy Brownie Ice Cream Sandwiches

Fudgy Brownie Ice Cream Sandwiches

Ad Hoc in Yountville, CA

SONY DSC

ad hoc had to be one of my favorite restaurants in Napa.  You may be familiar with Thomas Keller, who is well known for the infamous Per Se and French Laundry.   However, ad hoc is so different from those two restaurants, perhaps only overlapping in its high quality and delicious food.

SONY DSC

While those restaurants are a more refined and very expensive exploration of French cuisine, ad hoc is a family style restaurant focused on seasonal comfort food.  They have one menu of four courses every night and the only option you have is whether or not you want to add a supplemental dish to your main course.  As someone who tends to be very particular about what I am in the mood for, I was a little nervous about what we might find on the menu (admittedly hoping for their famous fried chicken).  My apprehension was completely unnecessary, though, as everything they served was delicious.  It was actually nice to have someone make all of my decisions for me, too.

SONY DSC

(I couldn’t resist tasting their fresh bread even though I knew I had plenty of food coming).

SONY DSCSONY DSC

Our first course was a watermelon salad.  The combination of watermelon, and savory vegetables was delicious, especially topped with a blackberry dressing.  The kicker, though, was the unbelievable financier croutons.  Did you catch that?  They put cookies on our salad!!!

SONY DSC

The second and main course was spice rubbed pork shoulder.  I very rarely order meat in restaurants because I’m usually drawn to the fish and vegetarian dishes, but oh my was this good.  The pork was so flavorful and spicy.  It was served over a combination of rice and beans that Matt enjoyed (I don’t like rice).

SONY DSC

My favorite part of this course was the plate of fried green tomatoes.  They were firm but juicy and perfectly crispy on the outside.  The sauce reminded me of tartar sauce and actually went really well with the tomatoes.  I was a little disappointed I had to share these.

SONY DSC

We also opted to try the side of albacore tuna salad…. certainly not your traditional tuna salad!  Again, we didn’t need more food, but Matt made a good point that we were there once and might as well try everything.

SONY DSC

The third course was a cheese plate.  There was toasted crusty buttered bread, lamb chopper cheese (SO good!) and a mint english pea spread of sorts.  The three items together made for a perfect combination.

SONY DSCSONY DSC

Last but certainly not least was a make-your-own sundae for dessert.  At first I was disappointed that we weren’t getting a baked good (I figured we could get something Bouchon-like), but the homemade vanilla ice cream and toppings more than made up for that.  I seriously considered licking my bowl but the waitress came over to our table before I had the chance to embarrass myself.

SONY DSCSONY DSC

We very seriously considered going back to ad hoc again during the trip but unfortunately didn’t have a chance.  Now Matt gets the menu emailed to him on a daily basis and pretty much every day we consider hopping on a plane to the west coast.  This obviously isn’t a vegetarian or kosher-friendly restaurant, but for anyone else with minimal dietary restrictions, it is a must visit in Napa!

The winner of the KISD Perfect Chocolate Chip Cookies is Jessica!

Random Integer Generator

Here are your random numbers:

29

Timestamp: 2012-08-13 23:06:47 UTC

Blog Birthday Giveaway 2.0

Chocolate Chip Cookies 13

This year my blog’s birthday feels like something even more special.  Although my blog posts have been less frequent than I would like, this part of the website is very special to me.  Blogging about my passion is how I figured out my dream…  I still can’t believe that I’m running an online bakery and dessert catering company.  Even more than that, I can barely believe that it has already exceeded my expectations and working like crazy for something I love is one of the most rewarding experiences of my life.  I have a feeling that big things are coming in the next year and am so happy that I get to share that with you!

To celebrate two years of blogging and thank you for supporting me, I’m giving away one dozen KISD Perfect Chocolate Chip Cookies

Contest Rules:

1)  Open to US Residents only (sorry international friends!)

2)  Contest is open through Sunday August 12th at midnight est

3)  Cookies can be shipped to you or a friend of choice (in the US)

4)  Winner will be picked with a random integer generator

To Enter:

Leave separate comments below for the following (total of 4 potential entries):

1)  Anything you want!  Tell me what your favorite Keep It Sweet Desserts product is, tell me what your favorite Keep It Sweet recipe is, tell me what you ate for breakfast.

2)  Follow me on Twitter

3)  Follow me on Pinterest

4)  Pin this post

Bi-Rite Creamery in San Francisco

Bi-Rite Creamery in San Francisco

Bi-Rite Creamery in San Francisco

Most of you know by now that ice cream is my favorite food group.  Well, tied with peanut butter, of course.  I literally crave it all year round and on most birthdays choose ice cream cake or ice cream pie over any other dessert. Okay, in addition to other desserts.

Bi-Rite Creamery in San Francisco

The thing is, being a volume eater, I choose frozen yogurt or slow churned versions most days of the year.  You know I only believe in eating calories that are absolutely worth it, so I have a hard time setting aside over 300 calories for a tiny half cup portion of typical premium ice cream.  But show me an ice cream that is as flavorful, creamy and unbelievably delicious as that at Bi-Rite and any thoughts of calories are completely out the window.  I don’t know the nutrition information for their ice cream but frankly, I really don’t care.  Their ice cream is for complete unadulterated pleasure.

Bi-Rite Creamery in San Francisco

When we booked our trip to Napa, we didn’t make any plans until last minute.  The exception, however, was that we knew we would be stopping for ice cream at my favorite place in the world (okay, maybe one of my top 10 favorite places).  Even my husband who isn’t as ice cream obsessed as I am thought that was mandatory.

Bi-Rite Creamery in San Francisco

You see, we had visited Bi-Rite three years before on a trip to San Francisco when all of our friends who had lived there said it was a must-try.  When I was back in San Francisco in the fall for the Foodbuzz festival, Joanne and I walked six or so miles from brunch to have ice cream for lunch (normal?).  The amazing thing is that after hyping up Bi-Rite in my head and to everyone else over the last three years, the ice cream STILL exceeded my expectations.

Bi-Rite Creamery in San Francisco

Maybe it is that they start with real ingredients (ahem, roasted banana ice cream that TASTES like bananas, not some artificial banana flavor).  Maybe it is that they use local dairy.  Or maybe it is that they stick huge chunks of snickerdoodles into their ice cream (that is the ricanelas).  All I know is, I’ve tasted many flavors (they let you sample as many as you want!) and every.single.one. was delicious.

Bi-Rite Creamery in San Francisco

On this visit, I had Malted Vanilla with Peanut Brittle and Milk Chocolate Pieces, Brown Sugar with Ginger Caramel Swirl, and Ricanelas.  We may or may not have detoured there on our way to the Oakland airport (I told you I love that place)… and on that visit I got Coffee Toffee, Brown Sugar with Ginger Caramel Swirl (I had to get it again) and Roasted Banana.

Bi-Rite Creamery in San Francisco

Matt’s picks were Balsamic Strawberry, Salted Caramel and Cookies n Cream topped with hot fudge… smart man!

Bi-Rite Creamery in San Francisco

Eating ice cream this good is the only way I’ll pose for a photo after an early morning flight to San Fran.  Hello airplane look.

Bi-Rite Creamery in San FranciscoBi-Rite Creamery in San Francisco

Did I mention the to-go containers?  I had to use every ounce of my will power not to take those with me for the plane ride.  They even have ice cream cakes that sound like heaven.  Now if you can figure out a way to get one of those to me on the east coast for my birthday in a couple of weeks, I will shower you with cookies forever.  I don’t make false promises.

Bi-Rite Creamery in San Francisco

Go there!

JAFCO Fun in the Sun Event

SONY DSC

Last week I had the pleasure of participating in JAFCO’s Third Annual Fun in the Sun Event on Long Island.  JAFCO is a non-profit organization that helps abused and neglected Jewish children find group shelters, homes, and mentoring in Jewish communities and families.  The help and guidance that the organization provides to young children and teenagers paves the way for these individuals to be successful and happy adults.  I was thrilled to be a part of the event by providing a raffle item and sharing profits of cookie sales with the charity.

SONY DSC

The event was a great opportunity to help JAFCO, but it was also a great opportunity to share my brand with some new people.  I showed up with hundreds of cookies packaged for sales, a slideshow with photos of my products and samples of the Triple Chocolate Cookies and Black and White Blondies.  Everybody loves samples.

SONY DSC

SONY DSC

The cookies I brought to sell were the KISD Perfect Chocolate Chip Cookies, Triple Chocolate Cookies, S’mores Cookies and  Peanut Butter Chocolate Chip Cookies with Chocolate Buttercream.

SONY DSC

Chocolate Chip was by far the most popular with the Triple Chocolate following as second popular.  Sidenote: who were all of these people telling me they don’t like peanut butter?!

SONY DSCSONY DSCSONY DSC

While I didn’t sell as many packages as I thought I might (too many dieters, apparently), I met some great women and had a huge stack of business cards disappear.  Thank you so much to JAFCO for doing what you do and letting me be a part of a great event!

SONY DSC

Chocolate Chunk Pistachio Oatmeal Cookies

Chocolate Chunk Pistachio Oatmeal Cookies

In my undying adoration of peanut butter over the years, I’ve looked past some other nuts that are just as delicious.  Sure, I’ve shown almonds some love (even cashews, too).  But in all this time, I’ve ignored pistachios.

Chocolate Chunk Pistachio Oatmeal Cookies

Well, one giant bag of pistachios from Costco later and I won’t ever make that mistake again.  Salted pistachios are just so completely underrated as a snack, to top salads and especially to add a salty crunchy kick to baked goods.

Last week I added them to a salad of field greens topped with blue cheese, sliced strawberries and mango vinaigrette and this week I stuffed them into a chewy oatmeal cookie full of chocolate chunks. This nut can do no wrong.

Chocolate Chunk Pistachio Oatmeal Cookies

So this cookie recipe originated from the Old World Inn, the bed and breakfast we stayed at in Napa.  The first time we went there, three years ago, we were one over by their afternoon plates of cookies and late night chocolate dessert bar.  Those cookies, though, stood out the most.  The inn’s chewy chocolate chip cookie was flat and innocent looking but just so delicious.  I made the original recipe shortly after that first Napa trip and hadn’t made them since.  As soon as I came home with a giant bag of pistachios, I knew a play on that cookie dough recipe would be the perfect suit.

Chocolate Chunk Pistachio Oatmeal Cookies

Chocolate Chunk Pistachio Oatmeal Cookies
 
Chewy oatmeal cookies with big chunks of chocolate and crunchy salty pistachios.
Author:
Recipe type: Dessert
Makes: 2 dozen cookies
Ingredients
  • ¾ cup all purpose flour
  • ½ teaspoon baking soda
  • ½ teaspoon table salt
  • ½ cup (1 stick) unsalted butter, softened at room temperature
  • ½ cup firmly packed light brown sugar
  • ½ cup granulated sugar
  • 1 egg yolk at room temperature
  • ½ teaspoon vanilla extract
  • ¾ cup old-fashioned rolled oats
  • ½ cup roughly chopped dark chocolate
  • ½ cup salted shelled pistachios, lightly chopped
Instructions
  1. In a medium bowl. whisk together flour, baking soda and salt; set aside
  2. In the bowl of an electric mixer, beat butter and sugars on high speed until light and fluffy
  3. Add egg yolk and vanilla and mix on medium speed until combined; scrape sides of the bowl with a spatula as needed
  4. Reduce speed to low and slowly add flour mixture; add the rolled oats and mix on low just until combined
  5. Stir in chocolate and pistachios just until combined
  6. Refrigerate dough for one hour before baking
  7. Pre-heat oven to 350 degrees and line baking sheets with parchment paper
  8. When oven is hot, scoop cookie dough using a medium cookie dough scoop or tablespoon (about 2 tablespoons each) onto baking sheets leaving at least 1½ inches between each scoop
  9. Bake cookies in oven for 9-11 minutes or until they appear firm around the edges and on the tops; do not overbake
Notes
Adapted from the Napa Old World Inn


Chocolate Chunk Pistachio Oatmeal Cookies

You might also like:

Cranberry & White Chocolate Pistachio Dusted Cookies

Cranberry & White Chocolate Pistachio Dusted Cookies

Brown Butter Pistachio Cake

Brown Butter Pistachio Cake w Candied Pistachio Topping

Pistachio Cupcakes with Brown Sugar Buttercream

Pistachio Cupcakes with Brown Sugar Buttercream

Chocolate Chunk Pistachio Oatmeal Cookies are always a crowd pleaser!

A Week in Wine Country

Last week in Napa was amazing!  I didn’t realize how much I needed a vacation until I got back and found myself refreshed and energized in a way I haven’t been in a few months.  Sometimes you just need that.  Here are some highlights from our eating, drinking and relaxing.  I’ll be sharing some more details on some of the places we visited in California in coming posts.

SONY DSC

I love you Bi-Rite.

SONY DSC

First meal in San Fran had to be tacos

SONY DSC

Pretty winery

SONY DSCSONY DSC

One of our favorite wineries, Matt is obsessed with their ‘05 Cab

SONY DSC

Necessary

SONY DSC

Before dinner at Farm

SONY DSC

Good hiking

SONY DSCSONY DSC

We made a friend

SONY DSC

9 miles of hiking followed by a bottle of champagne = perfection (don’t worry, we hydrated too)

SONY DSC

Ad Hoc make-your-own sundae, yes!

SONY DSCSONY DSCSONY DSCSONY DSCSONY DSC

Mature.

SONY DSC

What do you do when you have nothing to do? Drink champagne with a view

SONY DSC

Bucket of donuts, enough said.

SONY DSC

SONY DSC

While in Napa, we stayed at the Old World Inn. This was our second visit so they welcomed us with a bottle of champagne! The people there are very nice and we had a great time on our trip, but I have to say, the inn wasn’t quite as wonderful as it was on our first visit three years ago.

Salted Caramel & Chocolate Chip Cookie Dough Ice Cream Bars

Salted Caramel & Chocolate Chip Cookie Dough Ice Cream Bars

I may be on vacation this week eating and drinking my way through Napa, but I’d still stop everything if I had more of these ice cream bars to eat.  These Salted Caramel and Chocolate Chip Cookie Dough Ice Cream Bars were an upgrade or shall I say “how can I make an amazing dessert the best it can be?” to the Chocolate Chip Cookie Dough Ice Cream Bars I made last summer.  By adding a layer of gooey salted caramel and swapping a hard chocolate shell for a soft layer of chocolate ganache I made something that I find myself craving again and again.

This recipe is actually one that I developed months ago and have been dying to share.  To make this heavenly dessert yourself, flip through the beautiful new Foodie Crush Magazine!

Salted Caramel & Chocolate Chip Cookie Dough Ice Cream Bars

Chocolate Peanut Butter Banana Oatmeal Bites {Gluten-free} {Vegan}

Chocolate Peanut Butter Banana Oatmeal Bites {Gluten-free} {Vegan}

Well, I think/hope that this will be the last banana recipe for a little while.  As I said before, the banana consumption in my apartment has a direct correlation with our workout frequency and things are finally back to normal at home.  We are headed to Napa later this week so the motivation of a trip filled with food and wine (plus actually wanting to fit into my summer clothes) has helped.  Even Matt got motivated by vacation and is back on the Insanity track.  Funny how my husband going back to the gym makes me want to workout more.

Chocolate Peanut Butter Banana Oatmeal Bites {Gluten-free} {Vegan}

So this recipe is another win for not-so-decadent but satisfying.  If you look at the ingredient list (peanut butter, oatmeal, bananas) you will probably agree that these could make for a breakfast on-the-go, afternoon snack OR dessert.  They look a little bit like cookies but are a little softer and chewier, almost like a cookie/muffin top hybrid.  The chocolate in the peanut butter is enough to satisfy my cravings and the sweetness in the bananas means that you don’t need to add any sugar.  I may or may not have snuck a few of these right out of the freezer for a treat.

Chocolate Peanut Butter Banana Oatmeal Bites {Gluten-free} {Vegan}

Chocolate Peanut Butter Banana Oatmeal Bites {Gluten-free} {Vegan}
 
Healthy chocolate, peanut butter and banana cookies.
Author:
Recipe type: Dessert
Makes: 40 oatmeal bites
Ingredients
  • 2 cups old-fashioned oatmeal (make sure to use a gluten-free brand if avoiding gluten)
  • 1 cup Dark Chocolate Dreams peanut butter
  • 1 cup mashed ripe banana (~2 medium bananas)
  • 1 teaspoon baking soda
  • ½ teaspoon vanilla extract
  • ¼ teaspoon table salt
Instructions
  1. Pre-heat oven to 350 degrees; line two baking sheets with parchment paper and set aside
  2. In a medium bowl, stir together all ingredients until well combined
  3. Use a mini cookie dough scoop or tablespoon to scoop batter onto prepared sheets about 1 inch apart
  4. Bake 7-10 minutes or until they are firm

Chocolate Peanut Butter Banana Oatmeal Bites {Gluten-free} {Vegan}

This post contains affiliate links.

Blueberry Chocolate Chunk Banana Bread {Gluten-Free}

Gluten-free banana bread that is moist and just as delicious as regular.  No crazy ingredients needed.

Blueberry Chocolate Chunk Banana Bread {Gluten-Free} from KeepItSweetDesserts.com

Besides my tight shorts, another symptom of my less than stellar gym attendance is an abundance of browning bananas in my kitchen.  They are the pre-workout snack of choice in our apartment and when they don’t get eaten it means Matt and I are slacking.

Let’s just say that this recipe and that pie are not the last banana recipes you will see for a while.  Oops.

Blueberry Chocolate Chunk Banana Bread {Gluten-Free} from KeepItSweetDesserts.com

I claimed to have made this gluten-free treat for my sister, but after eating slice after slice of this surprisingly moist and flavorful banana bread, I’ll call myself out.  It may be made with almond meal, but you will not miss the flour at all.  The texture is almost spot-on and the blueberries and chocolate more than make up for anything you could possibly be missing.

Again, I chose the recipe because it is no-fuss gluten-free baking.  Some other almond-meal based desserts I’ve made include Chewy Ginger Cookies and Chocolate Chunk Cookies.

Blueberry Chocolate Chunk Banana Bread {Gluten-Free} from KeepItSweetDesserts.com

Blueberry Chocolate Chunk Banana Bread {Gluten-Free}
 
Gluten-free banana bread that is moist and just as delicious as regular. No crazy ingredients needed.
Author:
Recipe type: Dessert
Makes: Serves 8-12
Ingredients
  • 120 grams / 4¼ ounces (~1½ cups) almond meal
  • 100 grams (2 whole) eggs + 90 grams (3) egg whites, lightly whisked
  • 2 fluid ounces / ¼ cup canola oil
  • 170 grams / 6 ounces (~3/4 cup, tightly packed) light brown sugar
  • 200 grams / 7 ounces (~1 cup or 2 medium) mashed ripe bananas
  • 1 teaspoon vanilla extract
  • 1 teaspoon ground cinnamon
  • ¾ teaspoon baking powder
  • ½ teaspoon salt
  • 1 cup blueberries, rinsed and dried
  • ½ cup dark chocolate chunks
Instructions
  1. Pre-heat oven to 350 degrees.  Grease a 5x10 loaf pan with butter or non-stick cooking spray; set aside
  2. In a large bowl, whisk together all ingredients except for blueberries and chocolate chunks; whisk just until combined
  3. Gently fold in blueberries and chocolate chunks
  4. Pour batter into prepared baking pan; bake for 45-55 minutes or until top is no longer wet and a knife comes out clean from center
  5. Allow to cool before removing from pan and slicing
Notes
Adapted from The Wannabe Chef


Blueberry Chocolate Chunk Banana Bread {Gluten-Free} from KeepItSweetDesserts.com

For some other easy gluten-free recipes, just check out the gluten-free tag!

Fudgy Brownie Crunch Banana Ice Cream Pie

Fudgy Brownie Crunch Banana Ice Cream Pie

I was talking to some friends a few weeks ago about working out, eating healthy, etc.  For as long as I remember I’ve worked out hard most days of the week and watched what I ate 80% of the time.

Fudgy Brownie Crunch Banana Ice Cream Pie

But when I started running a bakery full-time, things changed.  My days got longer and I started spending most of them on my feet.  My legs ache when I wake up in the morning and sometimes I’m too busy to care if I eat an extra broken cookie or five.

Fudgy Brownie Crunch Banana Ice Cream Pie

They said to me, “but I’m sure you get sick of the desserts.”

Fudgy Brownie Crunch Banana Ice Cream PieFudgy Brownie Crunch Banana Ice Cream Pie

I wish.  Sure, every once and a while I’ll get sick of one item.  For instance, I always have extra brownie edges, so for a few days I got sick of the brownies.  But then there were the oatmeal cookies to go to… and then the triple chocolates.  There is no getting “sick” of sweets in my world.  It is either a curse or a blessing.

For the most part, I put those extra pieces on reserve in my freezer for friends and family, but every once and a while a few times a week I break into the stash.  Last week I even told Matt, “I accidentally ate a cookie.”

Is that even possible?

Fudgy Brownie Crunch Banana Ice Cream Pie

So now that I know giving up dessert is pretty much impossible for this sugaraholic, I’m trying to find some items that are a good middle ground.  Not so healthy and fake-tasting that I end up eating what I was avoiding to begin with, but almost good for you but really satisfying so you think you are eating something else.

This pie is the perfect example of that.  There is an indulgent crunchy chocolate filling on the inside, but the other layers are lower in fat, including an “ice cream” made with bananas.  Fruit on the ingredient list means I can have an extra slice, right?  I also used a No Pudge brownie mix as well as fat free cool whip but you can use whatever you prefer.

Fudgy Brownie Crunch Banana Ice Cream Pie

Fudgy Brownie Crunch Banana Ice Cream Pie
This pie is adapted and inspired by an ice cream pie my mom used to make for me us.  When she finally gave me the recipe for the addicting crunchy filling I couldn’t wait to make a batch!
Serves 12

Ingredients:
1 package brownie mix plus ingredients called for on box
1/3 cup hot fudge, homemade or store bought
1 1/2 cups Chocolate Pie Crunch (below)
3 cups cool whip (1 1/2 8-ounce containers)
3 ripe medium bananas, broken into chunks and frozen

Directions:
Pre-heat oven according to brownie mix instructions
Grease or spray a 9-inch spring-form pan and set aside (if you pan is prone to leaking, wrap tin foil tightly around the bottom half)
Prepare brownie batter as directed on box; spread into prepared pan
Bake brownie for 20-25 minutes or until a knife comes out clean
While brownie is baking, prepare Chocolate Pie Crunch
When brownie is done, allow to cool for several minutes and then gently spread hot fudge over brownie while it is still warm
Sprinkle with 1 1/2 cups Chocolate Pie Crunch
When brownie has completely cooled, spread cool whip over top; cover pan with foil and freeze for 30 minutes or until cool whip layer is firm
Once cool whip layer is firm, make the banana “ice cream’; place frozen bananas in a food processor and run on high for a few minutes until mixture is thick and creamy
Spread banana ice cream over cool whip
Cover pan with foil and place back in freezer 2 hours or until banana ice cream is firm

[print_this]

Chocolate Pie Crunch
Makes 5 1/2 cups

Ingredients:

1 9-ounce package chocolate wafers
6 ounces semi-sweet chocolate, chopped
1 1/2 tablespoons canola oil

Directions:

Line a baking sheet with wax paper and set aside
Crush chocolate wafers into small pieces and place in a large bowl
Heat chocolate and oil in a small saucepan over low-medium heat, stirring constantly until mixture is melted and smooth
Pour over crushed wafers immediately and stir until all cookie pieces are coated
Spread mixture out on baking sheet and freeze for 10 minutes or until firm
Break into pea-sized pieces and store in a ziplock bag in freezer until ready for use

Extra can be stored in a ziplock bag in the freezer up to one month

Recipe courtesy of my mom who got it from a friend…

[/print_this]

Fudgy Brownie Crunch Banana Ice Cream Pie

This post is for PIE DAY (tomorrow June 20th)!  How are you celebrating?

Chocolate Covered Cookie Butter Pretzels

Chocolate Covered Cookie Butter Pretzels

Yes, I’m still alive.  I’ve just been buried in butter, sugar and chocolate… especially in the form of blondies over the last few weeks.  Keep It Sweet Desserts was lucky enough to get a very flattering mention in Star Magazine and readers have been calling, emailing and placing orders like crazy.  It is amazing.

Chocolate Covered Cookie Butter Pretzels

Some highlights include: “What makes your black and white blondies black and white?” (that would be the dark and white chocolate chips) as well as “Can I order over the phone? I don’t have an email address… or a computer.”  Can’t make this stuff up.

Chocolate Covered Cookie Butter Pretzels

And if I told you how much someone was willing to pay for overnight shipping for a rush delivery you might choke so I won’t mention that (ahem, over $100).  Hey, when you need brownies, you really need brownies.

Chocolate Covered Cookie Butter Pretzels

But last week in-between a college friend’s wedding hangover, a late night rush to the eye doctor for a scratched cornea, celebrating our 2nd anniversary and a list minute trip to Philadelphia to see my 94-year old grandfather (highlight: his reaction to the cost of college today, low: having to remind him that my grandmother died five years ago), I managed to get back into the kitchen for some actual recipe creation.

Let me pause to tell you that I absolutely love what I am doing.  But on weeks when I am busy processing orders for my regular cookies, brownies and bars, I miss my moments of creativity.  That is part of why I love the Cookie of the Month Club and a huge reason why I won’t stop blogging.  There is always something new and fun to do in the kitchen and I don’t want to lose those opportunities.  So when I finally had a few minutes of “play” time, I did something that I’ve wanted to do for a while.  I dipped pretzels in cookie butter and then in chocolate and sprinkled some sea salt in top.  Addicting snack? Father’s Day gift?  Party dessert?

Chocolate Covered Cookie Butter Pretzels
Makes 2 dozen

Ingredients:
2 dozen short salted pretzel rods
2/3 cup cookie butter (or any version of creamy speculoos)
6 ounces dark chocolate, roughly chopped
Sea salt, to taste

Directions:
Line a baking sheet with wax paper and set aside
Dip pretzels into cookie butter and place on lined baking sheet; freeze for thirty minutes or until cookie butter is firm
Melt chocolate in the microwave in 30-second increments, stirring in-between
Dip pretzels in chocolate and immediately sprinkle wish sea salt
Allow pretzels to cool before serving (I put them in the refrigerator to speed up the process)

Chocolate Covered Cookie Butter Pretzels

Margarita Frosting Shots

Margarita Frosting Shots

Happy Hour never tasted so good.

Margarita Frosting Shots

What’s that? You don’t usually take shots of frosting to unwind after a hard day?  Pretty sure that needs to change now.  Cheers to to butter, sugar, cream cheese and… tequila!

Margarita Frosting Shots

You might remember these margarita cookie bars I made for Cinco de Mayo?  The dessert that turned me lime-dessert-hating self around?  Well, ever since, I’ve been thinking about my love of tequila frosting.  And let’s face it.  Sometimes the cookie/cupcake/brownie we bake is really just an excuse to eat copious amounts of frosting.  So I decided it was time to do something about that.

Margarita Frosting Shots

These frosting shots are perfectly portioned so that you get enough for your frosting fix, but not so much that you’ve devoured an entire bowl of cream cheese icing… because face it, it can happen.

Margarita Frosting ShotsMargarita Frosting Shots

I hope my friends don’t mind if I never make cupcakes again.

Margarita Frosting Shots

Margarita Frosting Shots
Serves 12

Ingredients:
8 ounces cream cheese
1/2 cup (1 stick) unsalted butter, softened at room temperature
1 tablespoon fresh lime zest (1 lime)
2 tablespoons good quality tequila
1/4 teaspoon salt
2 cups powdered sugar*
1/4 cup graham cracker crumbs
1/4 cup salted pretzel crumbs

Directions:
Use the whisk attachment of an electric mixer to beat butter and cream cheese on high speed until light and creamy
Mix in tequila, lime zest and salt; add in sugar ½ a cup at a time or until at desired consistency (*2 cups was the perfect amount for me but i;f you want a thicker texture you may want to add up to another ½ cup)
Sprinkle graham cracker crumbs and pretzel crumbs on the bottom of 12 tall shot glasses
Pipe frosting so that each shot glass is half full
Sprinkle graham cracker crumbs and pretzel crumbs over each frosting layer
Pipe remaining frosting to fill each glass
Serve with small spoons

Margarita Frosting Shots

The winner of the Nestle Drumstick giveaway is Kayle.

Random Integer Generator

Here are your random numbers:

29

Timestamp: 2012-05-29 00:22:50 UTC

Blueberry Chocolate Chunk Frozen Yogurt

Blueberry Chocolate Chunk Frozen Yogurt - low fat but delicious

This week has been full of ice cream but I’m sending you off on a long weekend with a real bang – I made something frozen and delicious and dare I say it…. healthy!  This frozen yogurt is full of great things like nonfat greek yogurt and blueberries, but even better than that it is full of flavor.  In an effort to kick off summer eating dessert while having clothes that fit I’ll be filling up on lots of this yogurt over the next few weeks.  While blueberry and chocolate are one of my favorite combinations, I see many more flavors happening very soon.

Blueberry Chocolate Chunk Frozen Yogurt - low fat but delicious

So many of you have left me extremely supportive comments, facebook messages, tweets and Instagram notes over the last few weeks and it is just so overwhelming.  I know a lot of you are curious as to what is going on behind the scenes with my business.  I’m thinking about posting a “day in the life” if that interests you.

Blueberry Chocolate Chunk Frozen Yogurt - low fat but delicious

As for how things are going… I am pleased to say that I couldn’t be happier.  The site launched just over two months ago and already I’ve processed over 100 online orders, catered several events, provided favors and gift fillers to a few different people and delivered desserts to a TV show’s cast and crew.  In the few moments that I’m not baking, I’m networking and  and strategizing ways to grow the business.  When I’m not doing either of those things, I’m brainstorming new recipes for the blog, Seasonal Desserts and Cookie of the Month Club.

Blueberry Chocolate Chunk Frozen Yogurt - low fat but delicious

The best part of everything has been the feedback that Keep It Sweet Desserts has received thus far.  It seems a bit silly that I am still nervous every time I send a package or deliver an order, because people are really loving my sweets.  While there has been a little bit of PR, most of the business so far is word of mouth.  Many customers are those who have received a box of cookies as a gift and are now passing on the sweets to someone else.  I could not ask for much more satisfaction than that.

Blueberry Chocolate Chunk Frozen Yogurt - low fat but delicious

Thank you again for being there for me through all of this!

Get the recipe for Blueberry Chocolate Chunk Frozen Yogurt here!

Summer Fun with Nestle Drumsticks and a Giveaway!

<Giveaway details at the end of the post>

SONY DSC

So clearly I like ice cream.  And while I love coming up with different types of ice cream cakes, pies, etc., sometimes it is nice to have someone else do the work for you.  Because on an ideal summer day, I’m not standing by a hot oven.  I’m going for a morning walk, grabbing an iced coffee, sitting by the pool or the beach with a good book and ending the day with a barbeque and ice cream or frozen yogurt.

SONY DSC

And while in our area we haven’t had too many beach days yet, we have had a few warm sunny days here there that were perfect for long walks and dinner made on the grill.  Sometimes there is nothing better than a night full of friends, good (low maintenance) food and a big bottle of wine.

SONY DSC

As soon as I found out I was being given an opportunity to host a dinner party to try out Nestle’s new Drumstick Pretzel Dipped Cones, we invited our friends Matt and Deena over.  My Matt loves to grill so he made the call on making steak and lobster tails (but really, who am I to object to that?) so that left me on call for some veggies and dessert.  I made a big salad, steamed some corn and called it a day.  The food prep took far less time than hiding all of my baking tools and ingredients.

SONY DSC

We might have reached a minor hiccup in the plans when we temporarily locked ourselves out of the apartment with nothing but the proteins to grill, but minor details. 

SONY DSC

Dinner was delicious!  Matt spent a few minutes seasoning the food ahead of time, but was at the grill for less than 20 minutes.  Good food with more time for friends and relaxing = win.

SONY DSC

SONY DSC

Dessert obviously revolved around the Nestle ice cream cones.  My friend, Matt, was very excited about this.

SONY DSC

SONY DSCSONY DSCSONY DSCSONY DSC

But I am a baker/food blogger after all so who am I to just serve pre-made ice cream cones for dessert? Instead I threw together a make-your-own ice cream bar with the cones as one of the options. In addition, we had brownies, hot fudge (recipe below), peanut butter sauce (recipe below), oreo crumbs and jimmies.  The ice cream sundaes were the perfect end to a perfect day, thank you Nestle for this opportunity!

Homemade Peanut Butter Sauce - perfect for an ice cream sundae!

Homemade Peanut Butter Sauce
Serves 4

Ingredients:
2/3 cup natural salted creamy peanut butter
1/4 cup powdered sugar
3 tablespoons almond milk
1 teaspoon vanilla extract

Directions:
In a small saucepan, whisk ingredients together over low heat; continue to whisk until smooth and creamy
Best served immediately
Adapted from the Joy the Baker Cookbook

Homemade Hot Fudge
Serves 6-8

Ingredients:
4 tablespoons unsalted butter
3 ounces semi-sweet chocolate, roughly chopped
1/3 cup unsweetened cocoa powder
1/2 cup granulated sugar
1/2 cup almond milk
1 teaspoon vanilla extract

Directions:
In a medium saucepan, whisk ingredients together over low heat; continue to whisk until smooth and creamy
Best served immediately
Adapted from Serendipity Sundaes

Homemade Hot Fudge for an ice cream sundae bar

Ice Cream Sundae with Homemade Peanut Butter Sauce AND Homemade Hot Fudge

<Full disclosure:  Nestle has provided me with free products and other items in order to help with my review, but anything I receive from Nestle does not affect my thoughts on its company or their products.>

Do you want to to try out Nestle Drumstick Pretzel Dipped Cones or one of their other varieties?  I’m giving away coupons for two free boxes for you to enjoy.  Just leave a comment below saying anything by Thursday, May 24th at midnight est.

Fun and Easy Ice Cream Desserts to Start Your Summer

Is Memorial Day really this weekend?! Since I don’t want to think about wearing a bathing suit just yet, I’ll think about one of my favorite parts of summer… ice cream.  Well, I eat ice cream all year round, but there is something so nostalgic about going out for an ice cream cone on a summer night.  Whenever I do any summer entertaining, I can’t help but come up with a fun ice cream dessert to share.  Here are a few favorites that I’ve shared in the past:

Black Bottom Ice Cream Cupcakes

Fun and Easy Ice Cream Desserts to Start Your Summer

Chocolate Chip Cookie Dough Ice Cream Bars

Fun and Easy Ice Cream Desserts to Start Your Summer

Frozen Pumpkin and Chocolate Yogurt Pie with Salted Caramel Cream Sauce

Fun and Easy Ice Cream Desserts to Start Your Summer

Ice Cream Brownie

Fun and Easy Ice Cream Desserts to Start Your Summer

Peanut Butter Cup Ice Cream Pie

Fun and Easy Ice Cream Desserts to Start Your Summer

Root Beer Float Ice Cream Cake

Fun and Easy Ice Cream Desserts to Start Your Summer

White Chocolate Cinnamon Bun Krispie Treats

White Chocolate Cinnamon Bun Krispie Treats

Rice Krispies = Breakfast

Cinnamon Buns = Breakfast

-> By the transitive property of food, Cinnamon Bun Rice Krispie Treats = Breakfast

White Chocolate Cinnamon Bun Krispie Treats

Obviously.

Last weekend I wanted to add an (almost) gluten-free treat to our Mother’s Day brunch spread for my sister to enjoy.  I’d been looking for a good way to use these fun marshmallows that my mom picked up for me a couple of months ago and this finally seemed like a good time to use them.  I always end up saving products like this as long as possible.  Kind of like the special eggs I’ve had in my fridge for a couple of months (hmm, that probably isn’t a good thing).

White Chocolate Cinnamon Bun Krispie Treats

Anyway, these treats ended up being the perfect way to use those marshmallows- they are extra cinnamon-y from the added cinnamon chips and the white chocolate drizzle adds a bit of creaminess to each bite.  What could be better for breakfast, brunch or… ahem, dessert?

White Chocolate Cinnamon Bun Krispie Treats

Head over to Fox for the recipe!

Happy Hour Desserts at the Momtrends Sparkle Event

2012-05-08_1336510568

Last week I provided the sweets for the Momtrends Sparkle event.  It was a great way to showcase some of my desserts and meet a ton of women who are also entrepreneurial and career-minded.  I always leave something like that excited from all of the energy that these women exude.

SONY DSC

The event took place during “happy hour” so I thought that happy hour themed desserts would be perfect.  I also wanted to make everything mini so that people could eat desserts and socialize at the same time.  Plus mini desserts always mean you can try one of everything!  I’ve included photos of the gorgeous jewelry at the event, for more information on each of the companies check out the Momtrends post.  I’ve decided that as soon as I hit a big milestone I’ll be treating myself to something pretty… maybe one item from each jeweler? Hmm….

The Sweets

Margarita Sandwich Cookies

SONY DSC

Mudslide Truffles

SONY DSC

Pink Champagne Cupcakes (the crowd favorite)

SONY DSC

Chocolate Stout Cupcakes (my favorite)

SONY DSC

Melinda Maria jewelry

2012-05-08_1336511415

Dana Rebecca Designs

2012-05-08_1336511462

Dalla Nonna

2012-05-09_1336528109

Graziela

2012-05-09_1336528278

Nicole from Nik’s Naks was also there.  I can’t wait to buy some gifts from her! 

2012-05-09_1336531089

There I am nice and awkward with my cousin, Julia and Nicole from Momtrends

MomTrends Photo

Photo from Nicole Feliciano of Momtrends

And before I forget, the winner of the Hershey Kiss Brownie Bites is #30, Jackie who left the sweet comment “Hang in there!!! You are amazing, and you’ll be super successful because you deserve it!”

True Random Number Generator 30Powered by RANDOM.ORG

Just Because

SONY DSC

Just because…

I am so up to my neck in butter and chocolate I can barely see straight

I ate too much leftover Mother’s Day cake today, can you say “too full for dinner?”

I’m starting to get nervous about meeting cast members from this show when I bring desserts my friend ordered for some birthdays (can someone please come dress me tomorrow morning?)

I’m incredibly behind on blog posts even though I actually do have recipes that need sharing

I’m so thankful for the help of my sister and husband last night because without them I wouldn’t have gotten a record number of Keep It Sweet Dessert orders out this morning

I so badly want to hire an assistant but I don’t have time to figure out if I can afford one

I have 5 dozen more cookies to make tonight and I just can’t stand up yet

You are patient enough to get through my crazy babbling lately

and finally

…I’m thankful for all of you supporting me on this new adventure

…Just because all of that, I’m giving away one dozen (12) Hershey Kiss Brownie Bites to one of you!  I recently took them off of the site because I needed to trim down the variety a bit, but they are too good not to get a moment on the spotlight.  Just leave a comment below saying anything to enter to win! 

SONY DSC

Mandatory Entry:

Leave a comment below

Leave separate comments for any of the following additional entries:

Follow me on Twitter

Follow me on Pinterest

Fine Print:  Maximum of three entries per person.  Giveaway is open until Wednesday night (May 16th) at midnight est.  Open to US only.

Apple Cinnamon Crumb Cake

Moist, flavorful cake full of apple chunks topped with a thick layer of buttery crumb topping.  The perfect breakfast or brunch treat!

Apple Cinnamon Crumb Cake

Every time I think I can predict the ebbs and flows of my new business I’m absolutely wrong.  But you know what, I’ve never been so happy to be wrong.

I really thought that as soon as I got all of my Mother’s Day orders out early this week, things would slow down and I’d get a little break to catch up on emails, blogging, and everything else like the giant pile of clean laundry on my living room chair.  Doing laundry I don’t mind, putting it away is a different story.

Apple Cinnamon Crumb Cake

So despite my expectations, this week turned into a crazy get-as-much-as-possible-done-until-you-can’t-stand-up-anymore kind of week.  Unexpected last minute Mother’s Day orders came in, I catered the desserts for a MomTrends event (more on that in another post) and a few exciting orders- several as gifts for Emmy nominees and one for a TV show cast and crew.  I’ll be delivering to the TV show in person so that should be fun!

Oh, and did I mention I am hosting Mother’s Day brunch?  Luckily brunch is one of the easiest meals to prepare for.  We are starting with the basics of bagels, lox, etc. and then a few additions like frittata (easy), fruit (also easy), and whatever last minute desserts I can’t help but make.  Brunch really is one of my favorite meals (when eaten at lunch time of course, who can wait for a late breakfast?) because bagels are one of the best foods on the planet, but the highlight for this meal might just be this amazing apple crumb cake.  I made it last weekend and Matt and I each enjoyed a giant piece before I froze the rest for Sunday (guess I had a feeling the week could get crazy).

Apple Cinnamon Crumb Cake

This cake is the perfect balance of a thick layer of buttery crumb topping over a moist and flavorful cake batter.  Initially I planned to make a blueberry version, but the price of blueberries was insane so I went with apple instead.  Apples might not really be in season anymore, but Granny Smith apples are pretty dependable all year long.   I can not wait to serve this at brunch, and will definitely be making it again!  Head over to Fox for the recipe.

Make something from the blog? Be sure to share it on Instagram with the tag #KeepItSweetDesserts.

Apple Cinnamon Crumb Cake

Margarita Cookie Bars

Margarita Cookie Bars

Sometimes I think my brain has hit capacity and I can not learn or remember anything else.

Margarita Cookie Bars

Things like the day of the week and date are too much to keep track of.  All week this week I thought it was the day before.  On Tuesday I thought it was Monday, on Wednesday I thought it was Tuesday, and I still keep thinking today is Wednesday.  Maybe I’m just hopeful that I can will the week to last a little bit longer so that I have more time to get my work done?  Yeah, crazy thoughts.

Margarita Cookie Bars

And for some reason every day I have checked the calendar to figure out if it is still April or if we are on May 1st, 2nd or 3rd.  Oh, and this is all the while knowing that Cinco de Mayo is this Saturday.

Margarita Cookie Bars

Come on Lauren, put two and two together!  Well, good news for you- I may not have my head on straight these days when it comes to the calendar, but I was smart enough to realize I should bake something for Cinco de Mayo.  It isn’t a holiday I usually pay much attention to, but my sister is having a Cinco de Mayo housewarming party and I figured I better come prepared.

Margarita Cookie Bars

For someone who isn’t a huge fan of citrus desserts (as you know, I just recently got over my aversion to lemon), I surprisingly fell head over heals for this recipe.  Maybe it is that the lime flavored cookie bars are flavored just enough or maybe it is the creamy cream cheese frosting slathered over top.  Oh, or could it be the tequila in the frosting?  Whatever the reason, these cookie bars are hard to resist.  Head over to Fox for the recipe!

Franklin Fountain in Philadelphia

SONY DSC

You remember that trip we took to Philadelphia a few weeks ago where we ate our way through the weekend?

SONY DSC

Well, given the fact that I could live on ice cream, I was most excited for our trip to Franklin Fountain.  An old school ice cream shop that models itself from the soda shops that used to be popular, what could be bad?

SONY DSC

Well, you know how when you are excited about going to a restaurant and you quadruple check the menu online to decide what you want to order and you read every.single.review. to make sure you are getting the right thing? Wait, you don’t do that?

SONY DSC

Well, that is the basic preparation I made for our trip to Franklin Fountain.  I studied the sundae menu like it was my job (hmm as a food blogger, isn’t it?) and strategized on the exact best time to go during the weekend.  Note to Philly fans – Sunday shortly after opening seems to be ideal, no lines at all!

SONY DSC

I thought about what the ideal combination of ice cream flavors plus sundae toppings I could get that Matt would also enjoy.  Aka, no peanut butter.

SONY DSC

So when we finally were ready for our ice cream indulgence, I was imagining the ice cream of all ice creams and sundae of all sundaes in my head.  This dessert (lunch?) was going to be mind-blowing.

SONY DSC

Well, as much as I hate to admit it, I was really disappointed.  I loved the décor, loved the menu, loved all of the old school details that were incorporated into Franklin Fountain… but when it came down to what really matters, the ice cream, I have to give it a “meh.”

SONY DSC

Don’t get me wrong, the ice cream wasn’t bad, but it certainly wasn’t mindblowing.  As someone who would fly across the country solely for the purpose of some Bi Rite the ice cream just wasn’t up to par.  I kind of felt like I’d rather be indulging in a big bowl of slow churned if the real stuff wasn’t going to be outrageously good.

SONY DSCSONY DSC

We had the Vesuvius and the hot fudge and whipped cream were certainly delicious additions, but the coffee and cookies ‘n cream ice creams underneath were as standard as Breyer’s from the super market.  I’m embarrassed to admit it, but after a few bites of the sub-par ice cream I called it quits and satisfied my craving with frozen yogurt instead.  Crazy? Probably.

SONY DSC

Have you ever looked forward to a meal so much that your expectations could not possibly be met? 

SONY DSC

Strawberry Shortcake Cupcakes

Strawberry Shortcake Cupcakes

Last weekend when Matt took these brownies with him to a friend’s birthday, I was en route with these Strawberry Shortcake Cupcakes (and wine of course) for a good friend’s housewarming.  One of my best friends from growing up recently moved to NYC with her husband so I was thrilled to be welcoming her to the city.

Strawberry Shortcake Cupcakes

I was also thrilled with how these cupcakes turned out.  I’ve been trying different yellow cupcake recipes for months and this was the first one that was perfectly light, fluffy and had a nice dome to it.  Plus, they were easy to make which is always a plus.

Of course I wanted to add a special touch to the cupcake so I went with a strawberry buttercream to top them off.  My high-cake-to-frosting loving husband couldn’t get enough of it.  He just might have eaten the three cupcakes that day… The strawberry flavor shines through nicely without overpowering the cupcake as a whole.

Strawberry Shortcake Cupcakes

Strawberry Shortcake Cupcakes
Makes 12 cupcakes

Yellow Cupcakes:
1 cup plus 2 tablespoons all-purpose flour
2 tablespoons cornstarch
1 1/4 teaspoon baking powder
1/8 teaspoon salt
3/4 cup granulated sugar
2 large eggs at room temperature
1/2 tablespoon pure vanilla extract
4 tablespoons unsalted butter, melted
1/4 cup vegetable oil
1/2 cup milk at room temperature (I used skim)

Pre-heat oven to 350 degrees
Line a cupcake pan with cupcake liners or grease the cups with butter or non-stick cooking spray; set aside
In a medium bowl, whisk together flour, cornstarch, baking powder and salt; set aside
In the large bowl of an electric mixer, beat the sugar, eggs and vanilla on high speed for about 3 minutes or until mixture is well combined and thick
Add butter and oil and beat on high until well combined; scrape sides of the bowl with a spatula and mix for another minute
Reduce the speed to low and add 1/3 of the dry ingredients and then 1/2 milk; add another 1/3 of dry ingredients and remaining milk; add remaining dry ingredients and remove from mixer immediately
Use a spatula to incorporate any dry ingredients that have are not fully combined; distribute batter evenly among cupcake cups with a ladle or ice cream scoop
Bake in center of oven for 13-17 minutes or until a toothpick comes out clean
Allow cupcakes to cool for several minutes and then remove from tin and place on cooling rack; set aside and prepare buttercream

Strawberry Buttercream:

1/2 cup (1 stick) unsalted butter, softened at room temperature
1/2 cup strawberry jelly
1 cup powdered sugar

Beat butter in the bowl of an electric mixer with the paddle attachment on high speed for several minutes until butter is light and creamy
Add jelly and beat on high speed for one minute; scrape the sides of the bowl and beat for an additional minute
Add powdered sugar and mix on low speed until combined; increase speed of mixer to high and beat until frosting is light and fluffy
Pipe or spread onto cooled cupcakes as desired

Yellow Cupcakes from Food and Wine

Strawberry Shortcake Cupcakes

Blueberry Rhubarb Shortbread Bars

Blueberry Rhubarb Shortbread Bars

This was one of those weeks where I should be thankful I made it to Friday alive.  400 cookies for a local event, lots of packages, business development when I could fit it in and excitement over all that my friend Rachel has done for me (see here and here).

Blueberry Rhubarb Shortbread Bars

And somehow, luckily, I was able to fit these beautiful bars into the mix!  Rhubarb is such a wonderful summer fruit for baking but this was actually my first time using it.  For some reason those stalks had intimidated me up until now.  But don’t be afraid, all you have to do is chop them up, cook them down and you are on your way to something delicious.

Blueberry Rhubarb Shortbread Bars

In this case, the rhubarb filling got a vibrant boost from some fresh blueberries I picked up the other day.  They aren’t quite in season but they looked so good I couldn’t resist.  Besides, the rhubarb filling is lovely, but the color and additional flavor punch from the blueberries is a welcome addition.  All baked into one of my favorite shortbread bar recipes these bars are very hard to resist.

Blueberry Rhubarb Shortbread Bars

I taste tested an entire edge of the pan and then quickly wrapped the rest of the bars and stuck them in the freezer for an upcoming party.  If I had not done that, I think I would have gotten myself into trouble.  Head over to Fox for the recipe!

Fudgy Double Crème de Menthe Brownies

Fudgy Double Crème de Menthe Brownies

Saturday was a case of “I have a few hours in the kitchen to make non-KISD desserts, how much can I bake for the blog and how fast?”

Fudgy Double Crème de Menthe Brownies

Of course I had another reason to bake, other than for Matt to have three cupcakes as an afternoon snack.  And the reason wasn’t to give me an excuse to eat the last three brownies sliver by sliver until they “magically” disappeared.  But Matt was going to a birthday party and I was headed to a housewarming party and apparently when you run a bakery you are expected to bring baked goods.  Who knew?

Fudgy Double Crème de Menthe Brownies

In fact, any time I show up empty handed I get some pretty disappointed faces.  Even from our friends and family members on diets, they are always slyly trying to see if I have a plate/box/bag of goodies behind my back.

Fudgy Double Crème de Menthe Brownies

But I digress.  These brownies went to the birthday party and they were a perfect case of “what do I have on hand that needs to be used up?”  We had leftover mint buttercream in the freezer that has been taking up valuable real estate for a while and a bag of Andes pieces in the drawer from before the holidays.

Fudgy Double Crème de Menthe Brownies

Let me tell you, those two items did not go to waste.  These brownies were a heavenly combination of fudgy, creamy, rich and minty all at the same time.  A few hours after I finished the leftover brownies, I completely regretted not doubling the batch.  Looks like the rest of those Andes candies won’t be around for long!

Fudgy Double Crème de Menthe Brownies

Fudgy Double Creme de Menthe Brownies
 
Author:
Recipe type: Dessert
Makes: 12 servings
Ingredients
Brownies
  • 3 ounces semi-sweet or bittersweet chocolate, roughly chopped
  • ½ cup (1 stick) unsalted butter, sliced
  • 1⅓ cup granulated sugar
  • 2 large eggs
  • ½ teaspoon vanilla extract
  • ⅔ cup all-purpose flour
  • ¾ cup Andes crème de menthe pieces or chopped Andes candies
Creme de Menthe Buttercream
  • ½ cup (1 stick) unsalted butter, softened at room temperature
  • 2 cups powdered sugar
  • ¼ cup creme de menthe
Instructions
Brownies
  1. Pre-heat oven to 350 degrees
  2. Grease a 9x9 brownie pan or baking dish with cookie spray or butter; set aside
  3. In a large microwavable bowl, melt chocolate and butter by microwaving in 30-second increments and stirring in-between
  4. Whisk in sugar until well combined
  5. Whisk in eggs and vanilla until well combined
  6. Whisk in four just until combined
  7. Fold in crème de menthe pieces
  8. Pour batter into prepared baking dish and bake 25-30 minutes or until a knife comes out clean
  9. Set brownies aside to cool and prepare buttercream
Creme de Menthe Buttercream
  1. Beat butter in the large bowl of an electric mixer on high speed until light and creamy
  2. Add powdered sugar and crème de Menthe and mix on low until incorporated
  3. Increase speed to high and mix until filling is light and fluffy
  4. Spread buttercream over cooled brownies; slice and serve
Notes
Brownies adapted from Baker’s


Make something from the blog? Be sure to share it on Instagram with the tag #KeepItSweetDesserts.

You might also like:

Thick and Fudgy Peppermint Mocha Brownies

Thick and Fudgy Peppermint Mocha Brownies

Mint Cookies and Cream Buttercream Cups

Mint Cookies and Cream Buttercream Cups

Thin Mint Cookie Cake

Thin Mint Cookie Cake

The fudgiest brownies with creme de menthe candies AND frosting!

Peanut Butter Oatmeal Cookie Dough Balls for Earth Day

Peanut Butter Oatmeal Cookie Dough Balls 12a

How has everyone’s week been?  My days have just flown by and every night as soon as I finished in the kitchen I practically collapsed in exhaustion.  Working more hours lately has meant less time in the gym but my legs have never been so sore.  I wear sneakers in the kitchen most of the time but would love tips on how to not feel like I’ve run a marathon every day.  Because the days when I do get a workout in, boy is it tough.  I think I need to bring yoga back into my life!

Peanut Butter Oatmeal Cookie Dough Balls 10c (2)

So in celebration of Earth Day, I wanted to share one of my favorite recipes from the blog again – These Peanut Butter Oatmeal Cookie Dough Balls make me so happy because:

1)  Peanut butter and chocolate, enough said

2)  [Mostly] healthy ingredients = cookie dough for snacking

3)  No-bake super easy recipes are exactly what I need these days

So if you missed them the first time around do not miss them this time!  What better way to celebrate Earth Day than with a healthy dessert (or snack) that doesn’t require the oven?  Head over to Fox for the recipe.

A Weekend Getaway in Philly

Philly Weekend on Instagram 1

This past weekend was exactly what we needed.  Two nights and two days of Matt and I doing only what the two of us wanted to do and of course that revolved around eating.

I had actually spend the first part of Friday visiting with my mom and getting in a pre-weekend TRX workout (sore much?) which was a nice treat.  For some reason, though, the traffic from my Parents’ house in the suburbs all the way to the city was horrendous.  That half hour drive took two hours so when I was greeted in my room with champagne and chocolate covered strawberries it was heaven.

We decided to stay nearby and went to the Oyster House for happy hour and dinner.  Matt said these were the best oysters EVER and I was pretty in love with my crab cake.  All crab, no filler, perfection!  Matt also said the lobster roll was delicious.

Philly Weekend on Instagram 2Philly Weekend on Instagram 3

Saturday morning “brunch” (who am I kidding, it was 8am, let’s call it breakfast) was one of my favorite meals all weekend.  We went to Sabrina’s Café near the art museum and I’m now wishing we went back there on Sunday, too.  The restaurant menu was extensive and I probably could have ordered ten other things and been very happy. Plus, our waitress was awesome.  Anyone who is as passionate about food and dessert as I am (which she was), is an instant winner.  She even gave us a list of bakeries to try while we were in town.

SONY DSCSONY DSC

I had an amazing egg white and cheddar scramble breakfast sandwich loaded with fresh veggies and stuck between two pieces of amazing Le Bus multigrain bread.  The bacon went to Matt and I devoured the rest of the sandwich.  The entire time I was eating I just kept saying, “I could eat this every day.”  For someone who eats oatmeal with peanut butter religiously, that is saying a lot!

Matt had the Barking Chihuahua which was basically a gigantic breakfast burrito.  He was also in breakfast heaven.

Philly Weekend on Instagram 4

Saturday morning was beautiful so we spent the next few hours walking around and working up our appetites for the next meal.  We also got to visit the Cake and the Beanstalk, a bakery owned by an old friend of mine’s husband.  They just opened last spring so it was nice to get another person’s perspective on starting a business in the dessert world.

Lunch landed us at Reading Terminal Market, a foodie heaven.  The place was slightly nuts but that is what you would expect on a Saturday afternoon.  I kept lunch light with a build-your-own salad from the Mediterranean stand (sidenote: how did I get salmon on my salad for under $7?) to keep room for dessert.  We shared a cake ball from Flying Monkey and a chocolate chip cookie and black and white cookie from the Famous 4th Street Cookie.  The cake ball was good but different- it tasted like buttery cake dipped in chocolate.  The chocolate chip cookie was good but not great (I’m especially picky about cookies these days) but I loved the black and white cookie.  It wasn’t as light and cakey as the New York version but it wasn’t quite as dense as a sugar cookie.  There was just something about it that had me wishing we had gotten a few more.

Philly Weekend on Instagram 6Philly Weekend on Instagram 5

Saturday night’s dinner was a bit of a ridiculous treat.  We were treated to a wonderful meal at 10 Arts.  Highlights of the meal included A LOT of wine, Ricotta Ravioli, Octopus with Grilled Romaine and incredible beignets.  The meal was supposed to come with panna cotta but I am SO glad I requested something different.  I sampled Matt’s and it was just eh, but the beignets…. oh they just melted in your mouth!  I may or may not have tried to eat the rest of the bourbon caramel with my fork when they were gone.

Philly Weekend on Instagram 12Philly Weekend on Instagram 13

Oh and did I mention the fabulous gift we received?  The incredible woman who was waiting on us gave us a copy of Eric Ripert’s new book… which he had signed.  Love!  I need to meet that man one day.

Philly Weekend on Instagram 7

Sunday’s eats weren’t quite as exciting.  We went back to Reading Terminal Market for a somewhat disappointing breakfast experience (I’ve never seen anyone so slow at making egg whites before).  The highlight was my latte from Old City Coffee.

That afternoon we stopped at the Franklin Fountain, more on that later…

SONY DSC

And then we finished the weekend off with a Phillys/Mets game.  The weather was phenomenal but thanks to our last minute plan I didn’t have sunscreen and ended up with a sunburn.  Who would have thought in April?!

Philly Weekend on Instagram 8

A hot dog for him, a veggie burger for me.

Philly Weekend on Instagram 9Philly Weekend on Instagram 10

The game might have been followed by a 4-hour traffic-filled drive back home but it was worth it!

On a separate matter, please consider donating to Share Our Strength as a part of the Great American Bake Sale.  Jackie at La Casa de Sweets has organized a fundraiser to help end childhood hunger in America.  Every donation will count as an entrance to win a dozen of my Black and White Blondies

Peanut Butter Cake with Salted Caramel Cream Cheese Icing & Chocolate Ganache for a SURPRISE virtual shower!

Peanut Butter Cake with Salted Caramel Cream Cheese Icing & Chocolate Ganache

When Erin emailed me about participating in Caroline’s virtual baby shower I could not say yes fast enough. Caroline is one of my favorite bloggers and I’ve loved seeing her excitement about the soon-to-come baby over the last several months. It is so obvious that she and Logan are going to be amazing parents.

Peanut Butter Cake with Salted Caramel Cream Cheese Icing & Chocolate GanachePeanut Butter Cake with Salted Caramel Cream Cheese Icing & Chocolate Ganache

Deciding on a dessert to make in honor of Caroline wasn’t all that hard because I know she loves peanut butter and chocolate almost as much as I do. Plus, I’ve been drooling over the peanut butter cake in the Joy the Baker Cookbook for months now! An even better coincidence, I was able to bring this cake for my brother-in-law’s birthday a couple of weeks ago. He is also a peanut butter and chocolate lover. Smart people.

Peanut Butter Cake with Salted Caramel Cream Cheese Icing & Chocolate GanachePeanut Butter Cake with Salted Caramel Cream Cheese Icing & Chocolate Ganache

The cake has a lot of components but they all came together really well.  A peanut butter cake that was light and moist, not dense like I would have expected (it also had just the right amount of peanut butter flavor, not overwhelming at all) was the perfect base.  The salted caramel cream cheese icing could have been eaten by the spoonful and the rich chocolate ganache brought it all together very nicely.  I don’t usually mess with nuts in my cakes, but I decided to sneak in a layer of chopped honey roasted peanuts to add a contrasting texture.  The additional peanut flavor didn’t hurt either!

Peanut Butter Cake with Salted Caramel Cream Cheese Icing & Chocolate Ganache

It seems I’m not the only blogger excited for Caroline!  Be sure to check out the other posts to see what other treats were involved at the shower:

Drinks:

Healthy Food For Living – Carrot Cake Colada

Bran Appetit – Strawberry Mint Sparkling Lemonade

Savory:

Baked Bree – Pancetta and Chive Quiche

Simply Whole Kitchen – Mini Quinoa Bites with Goat Cheese Pesto

Pastries:

Food Doodles – Chocolate Peanut Butter Cream Filled Whole Wheat Cream Puffs

Kevin & Amanda – Baby Cinnamon Buns

Desserts: 

Baked by Rachel – Mini Lemon Lime Cheesecakes

Bake Your Day- No Bake Lemon Cheesecakes with Lemon Blueberry Sauce

Eat Good 4 Life – No Bake Mini Raspberry Cheesecakes

Fearless Homemaker – Angel Food Cupcakes with Whipped Vanilla Cream

Itzy’s Kitchen – 10 Grain Chocolate Chip Cookies

Texanerin Baking – 100% Whole Grain Chocolate Carrot Cake Cupcakes
Peanut Butter Cake with Salted Caramel Cream Cheese Icing, Chocolate Ganache & Honey Roasted Peanuts
Serves 12-16

2 8 or 9-inch layers of peanut butter cake cooled (recipe below)
1 batch of salted caramel cream cheese frosting (recipe below)
1 batch of chocolate ganache cooled (recipe below)
1 cup honey roasted peanuts, roughly chopped plus additional for garnish

To put together cake, place 1 layer of peanut butter cake on a large flat plate (if you are traveling with the cake, it helps topout a little frosting underneath so that I does not slide)
Level bottom cake layer with a cake leveler or serrated knife
Top with about a cup of frosting and spread evenly; sprinkle chopped peanuts over frosting
Level second cake layer and then place it over frosting and peanuts
Frost top and sides of cake evenly with remainder of frosting
Drizzle chocolate ganache over cake as desired and sprinkle with a few extra peanuts as a garnish
Allow ganache to set about an hour before slicing and serving cake
Store leftover cake in refrigerator up to three days

Peanut Butter Cake
Source: Joy the Baker Cookbook

Ingredients:
2 1/4 cups all-purpose flour
2 teaspoons baking powder
1 teaspoon baking soda
1/2 teaspoon salt
1/4 cup smooth peanut butter
6 tablespoons unsalted butter, softened
1/2 cup granulated sugar
1/2 cup packed light brown sugar
3 large eggs
1 cup plus 2 tablespoons buttermilk

Directions:
Pre-heat oven to 350 degrees
Grease two 8 or 9-inch round pans; line bottoms of the pans with parchment paper and then grease and lightly flour entire pans; set aside
In a large bowl, whisk together flour, baking powder, baking soda and salt; set aside
Cream peanut butter, butter and sugars in the large bowl of an electric mixer on medium-high speed for several minutes until light and fluffy; scrape sides of the bowl with a spatula and continue to beat for another minute
Add eggs, one at a time, mixing on medium speed until combined between each addition; scrape sides of the bowl again
Put mixer on low speed and slowly add half of the flour mixture; stop mixer and add buttermilk then mix on low just until combined; add remaining flour and mix on low speed just until mixture is almost combined; remove bowl from stand and fold batter with a spatula just until smooth
Divide batter evenly between pans and lightly tap on counter to remove air pockets
Bake cake for 15 minutes and then turn each pan 180 degrees; continue to bake for 10-15 minutes or until a knife or toothpick comes out of the center clean
Allow cake layers to cool in pans 10 minutes until carefully removing from pan and allow to completely cool on a wire rack

Salted Caramel Cream Cheese Frosting
Adapted from this Salted Caramel Buttercream

Ingredients:
3 8-ounce packages cream cheese
3 3/4 cup powdered sugar*
1 1/2 teaspoons vanilla extract
3/4 cup salted caramel sauce

DIrections:
Beat cream cheese in the bowl of an electric mixer on high speed for several minutes or until light and creamy
Add sugar, a cup at a time, mixing on low speed between each addition; increase speed to high and mix until fluffy
Add vanilla and caramel sauce mixing until well-combined and frostilists light and creamy
*If  consistency is too wet for cake add additional sugar 1/2 cup at a time and beat well until frosting reaches desired consistency

Chocolate Ganache
Source: Sticky, Chewy, Messy, Gooey

Ingredients:
4 ounces semi-sweet or bittersweet chocolate, finely chopped
1/2 cup heavy cream
1 tablespoon unsalted butter
1 tablespoon light corn syrup

Directions:
Put chocolate in a heatproof bowl and set aside
Put remaining ingredients in a heavy saucepan and place over medium-high heat; stir constantly until butter is melted
When cream mixture comes to a boil and bubbles begin to rise on entire surface, remove from heat and pour over chocolate
Allow chocolate to sit for one minute then stir to combine until smooth and creamy
Allow to cool before pouring over cake; if not using immediately, store in an airtight container in the refrigerator up to a week

Peanut Butter Cake with Salted Caramel Cream Cheese Icing & Chocolate Ganache

Strawberry Cheesecake Cookies

SONY DSC

Even though I LOVE my job now and am so proud of how successful Keep It Sweet Desserts seems to be so far, I still look forward to the weekend.  This week I crammed as much work as possible into Monday-Thursday so that I can spend three full days out of the kitchen and (for the most part) away from the computer.  I seriously can not remember the last time I went for that long of a stretch.  Even last weekend when I had some time to relax I still spent some of each day working and baking.  Being a one-woman-shop has made me appreciate my free time on another level.

SONY DSC

Weekend plans in Philly include dinners here and here but obviously the food I’m looking forward to most is ICE CREAM at Franklin Fountain.  Although, this should be pretty fun for lunch tomorrow.  Oh, you are wondering what activities we have planned.  Nothing yet.  We will probably spend the time in between meals walking off all those delicious calories.  It’s all about balance, right?

Speaking of food, if you like cheesecake but don’t want to commit to a big slice, think about trying these cheesecake cookies posted on Fox today!

Chocolate Chunk Meringues

Chocolate Chunk Meringues

How was everyone’s weekend?  I can’t help but be envious of anyone who got an Easter basket yesterday.  For my entire life I’ve wanted one, is that weird?  You better believe that I will be taking advantage of the post-Easter candy sales, though!  I hope I can get my hands on some of those solid milk chocolate Hershey’s eggs with the pastel candy shells, they have been my favorite Easter candy forever.

Chocolate Chunk Meringues

While I didn’t get an Easter basket, I did have a wonderful weekend, one of the best in a while.  We spent both Friday and Saturday nights with family for the Passover seders.  It was such a nice treat that we got to be with both my family and Matt’s family on Saturday.

I have to admit that the weekend highlight, though, was Saturday morning and afternoon.  That was the first day since I don’t remember when that Matt and I got to just relax and do whatever we wanted for the better part of a Saturday.  It started with sleeping “late” (i.e. 7am) and then proceeding to be in my PJs all day while we watched TV and started planning a vacation.  Speaking of which, would someone like to plan that vacation for us?

After months of working around the clock every.single.day. and a head full of stress, it was the best Saturday I could have asked for.  It was sad to see the weekend end, but next weekend we are going on a mini getaway to Philly.  We had a credit for a hotel stay so we are taking advantage of it to get some time to ourselves.  Any suggestions of things we should do are welcome.  Note: I grew up outside of Philly so we have already done all of the regular tourist stuff.

Chocolate Chunk Meringues

For Saturday’s seder, I brought dessert of course.  After being on my feet all week I was happy to have some leftover Matzo Crack and Flourless Brownies (special requests) from Passover orders.  I did want to make a little something else, though.  With all the extra egg whites I had in my fridge, I had big plans for a fancy pavlova.  However, tired feet and lack of sleep got the best of me so I stuck with something simple, meringue cookies.  I spiced them up with chopped chocolate chunks and you know what?  These were such a hit!  I’ll say it again, the key to Passover desserts is sticking with things that aren’t meant to be something else.  Naturally flourless is key.
Chocolate Chunk Meringues
Makes ~6 dozen meringues
Note: Before making your meringues, make sure your mixing bowl and whisk attachment are very clean.  I wiped mine down with white vinegar to ensure there was no leftover grease to prevent the meringue from forming.

Ingredients:
6 egg whites
1 teaspoon cream of tartar
1/4 teaspoon salt
1 1/4 cup granulated sugar
8 ounces dark chocolate, roughly chopped

Directions:
Pre-heat oven to 250 degrees; line two baking sheets with parchment paper and set aside
In the large bowl of an electric mixer with the whisk attachment, beat the egg whites, cream of tartar and salt at medium speed until the mixture has formed soft peaks
In crease the speed to medium high and slowly add the granulated sugar, one heaping tablespoon at a time
Keep mixing for several minutes until the meringue is stiff and glossy
Remove bowl from mixer and gently fold in the chocolate
Use a teaspoon to drop meringues onto prepared baking sheets about 1/2 inch apart (they do not expand much in the oven)
Place baking sheets in the middle and lower portions of the oven; bake for 1 hour 15 minutes to 1 hour 30 minutes or until meringues are firm  and no longer spongy; the edges may start to brown
Remove parchment paper from the baking sheets and allow to cool; store in an airtight container away from humidity up to three days
Adapted from Food and Wine

Chocolate Chunk Meringues

There is another dessert giveaway on Chocolate and Carrots today!  Go check it out and say hi to Caroline:-)

Magic Cake Bars for Easter

SONY DSC

For the record, Matt wanted me to take a picture of my hand over the cake and pretend it was the hand of our little niece or nephew helping in the kitchen. 1) We don’t have any nieces or nephews 2) No one wants to see my hands after twelve hour days in the kitchen and 3) Seriously? My hands aren’t THAT small.

SONY DSC

This is one of those desserts that you can make last minute for Easter with minimal time in the kitchen, just enough time to get some help from your little ones (if you have any).  And even though it is super simple, this is one of the most addicting things I’ve made in a while.  Moist cake with a crispy crunchy topping.  What’s not to love?

SONY DSC

Head over to Fox to get the recipe!

SONY DSC

Disclaimer:  I love box mixes and pre-made cookie dough, especially when I am as busy as I have been over the last couple of months.  However, all of the baked goods that I sell on my website or provide for any type of catering service are made completely from scratch.

Birthday Brunch

SONY DSC

A couple of weeks ago we celebrated my mother-in-law’s 60th birthday with a brunch party.

2012-03-25_12-54-36_266 (2)

Marcia decided that for her birthday, she wanted to thank all her friends and family for being a part of her life.  She even asked that no one get her a gift but donate to a family charity instead.

SONY DSC

Brunch was a lot of fun.  Matt’s family was there, my parents, and most of Marcia’s friends that I have gotten to know over the last zillion eight years.  Several people made speeches, including Matt’s almost-91-year-old grandma.  That is her below with the red hair.  Pretty incredible, huh?

SONY DSC

I’m not big on making speeches, especially when it comes to emotions.  I bring desserts instead:-).

SONY DSC

SONY DSC

SONY DSC

On the menu: Yellow Cake with Chocolate Icing (per request), Peanut Butter and Jelly Regelach, Salted Caramel Butter Bars, and Triple Chocolate Cookies.  Each guest also got a favor I put together: Fudgy Caramel Brownies (no nuts) and Black and White Blondies.  I wish I had gotten a photo of the favors!

IMG_0319 (2)

(Please excuse my shiny forehead, powder anyone?)

SONY DSC

Oh, and did I mention my mom’s perfect touch to the dessert table?  How gorgeous are these pink tulips.  They added the perfect pop of color to the table and to our room.

SONY DSC

No recipe today, but Friday’s is a good one!

Good news! Samara at Deconstruct the Girl is giving away a dozen Keep It Sweet Desserts… enter now!

Chewy Ginger Cookies {Gluten-free}

Chewy Ginger Cookies {Gluten-free}

Today I’m guest posting over on All Day I Dream About Food.  In case you’ve never been to Carolyn’s blog, she has an impressive collection of low carb and gluten-free desserts.  The woman has a real talent in the kitchen!  These cookies are another example of easy gluten-free baking:  No complicated ingredients and so easy to make!  Definitely go to say hi and see the recipe.

In other news, if you want to try some desserts on my website Julie at Willow Bird Baking and Lynn from The Actor’s Diet are hosting Keep It Sweet Dessert giveaways!  Be sure to check them out.

Ooey Gooey Peep Stuffed Cookies

Ooey Gooey Peep Stuffed Cookies

These days, it is very rare that I make a dessert recipe a second time.  Other than what I am selling, I like to constantly try new things and am always on a mission to share something new and creative with you.

Ooey Gooey Peep Stuffed Cookies

But sometimes, your friends and family cling onto that cookie you made and ask you about it every time you see them for an ENTIRE YEAR.  Never mind that the recipe takes all of 20 minutes to put together.  Never mind that there is pre-made cookie dough involved.  Never mind that I’ve baked you cakes that take HOURS until they are in their final form.  Seriously, why are the easiest desserts sometimes the biggest hits?  This is a frustrating but wonderful thing all at the same time.

Ooey Gooey Peep Stuffed Cookies

So when Peep season started again I finally caved and made these cookies for a second time.  I have to admit, there is something irresistible about a giant cookie oozing with a gooey melted peep right out of the oven.  Stick some salty pretzel in there and you really do have a winner.

Ooey Gooey Peep Stuffed Cookies

Want to make these cookies for  your Easter celebration or just because you can’t stock up on Peeps fast enough while they are everywhere you turn?  Go get the recipe here!

Ooey Gooey Peep Stuffed Cookies

Chocolate chip cookies stuffed with Peeps so freaking genius!

Make something from the blog? Be sure to share it on Instagram with the tag #KeepItSweetDesserts.

What to Bake for Passover

In case you didn’t notice, we are officially moved over to my new site!  You may want to double check that your feed or email subscription are coming from the right place.  Please let me know if you are having any problems as we are still working out some glitches… which may include disappearing recipes.

———————————————————————–

I am a little bit all over the place this week!  Monday’s post never happened and it is a small miracle I’m getting this one up today.  The new website launched Sunday afternoon and I’m already busy fulfilling orders like a mad woman.  It looks like next week I’ll be up to my eyeballs in matzo!  While the first influx of orders seemed overwhelming at first, once I took a step back and got organized with lists and spreadsheets I felt a lot better.  That really has been the key for me working from home this last week and a half… lots of lists and very specific daily schedules.

Some of you commented that you were interested in hearing about the business so I’ll definitely give you some updates on how things are going and how life has changed.  For one thing, I think my blog post regularity might come in waves.  Whenever I have some KISD downtime, I work on the blog… but sometimes there is none.  I’ll do my best to keep the new recipes coming, though!  And be on the lookout for special discounts or giveaways in upcoming posts.

Next week Passover starts and for those of you who don’t know, it means 8 days without bread, or really anything with leavening… plus a whole list of surprising rules like no peanuts or chick peas (depending on your sect).  Let’s just say I follow the holiday to the best of my ability.  My biggest Passover pet-peeve, though, is the recreation of foods that just aren’t meant to be made without flour, especially when it comes to dessert.  Trust me, a kosher-for-Passover chocolate chip cookie is jut not going to be very good.  So as a result, I’ve made some recipes that lend themselves to being Passover friendly without even trying:

Chocolate Truffles 3-ways

Flourless Chocolate Cookies

cookie 14

Flourless Chocolate Almond Butter Cookies

cookies 9

Low Fat Banana Cheesecake with Almond Crust with Mixed Berry Sauce

slice of cheesecake 8

Mint Chocolate Chip Meringues

Mint Chocolate Chip Meringues 2

Spring Cleaning Chocolate & Peanut Butter Lover’s Bark

Spring Cleaning Chocolate & Peanut Butter Lover's Bark

One week down and I’m feeling really good about this working from home thing.  I’m sure that some of the beginner’s high will die down after a while, but I’m glad to be off to such a productive start!  Sure, I might have left out half of the baking soda in a cookie recipe and taken a batch of brownies out of the pan when they were still warm and too fragile to move, but it can’t all be perfect.  The upside (or downside?) of baking mistakes is that I get to eat those batches.  Hmm, maybe I need to be a bit more careful or I’m going to have to start doing INSANITY multiple times a day!

Spring Cleaning Chocolate & Peanut Butter Lover's Bark

Speaking of baking mistakes, it seems that any time I make anything that requires melted chocolate for dipping I melt double or triple the chocolate I need.  A couple of weeks ago I found myself with a big bowl of melted chocolate and didn’t want it to go to waste.  I quickly flipped through my drawers and found a few bags of candy that were due to be used up.  Lots of chocolate and lots of peanut butter but not too much for some candy fun!  You can find the recipe for this highly addictive Chocolate & Peanut Butter Lover’s Bark on Fox!

Spring Cleaning Chocolate & Peanut Butter Lover's Bark

Oh, and an exciting heads up!  The new website should be up by Monday so keep an eye out for the blog move.  I’ll be keeping everyone updated via Twitter and Facebook, but any RSS or e-mail subscribers are going to have to re-subscribe once the move is complete.

M&M Cookie Dough Cups

MandM Cookie Dough Cups (egg-free!)

Some things are too delicious not to share.

These M&M Cookie Dough Cups had the potential to be perfectly done and pretty, but my impatience got the best of me and most of the cups ended up jagged and a little funny looking.  Luckily they tasted so good I forgot how funky looking they were while I was eating them!  Next time I’ll take my time to get a prettier productSmile

MandM Cookie Dough Cups (egg-free!)

M&M Cookie Dough Cups
Makes ~16 cups

Ingredients:
16 ounces semi-sweet baking chocolate
3/4 cup all-purpose flour
1/2 teaspoon salt
1/2 cup (1 stick) unsalted butter, softened
1/2 cup packed light brown sugar
1/4 cup granulated sugar
1/2 teaspoon vanilla
1/2 cup M&Ms

Directions:
Prepare chocolate cups: Line muffin tins with paper cup holders and set aside.  Melt chocolate in the microwave in 30-second increments, stirring in-between
Once chocolate is completely melted, paint a layer on the inside of each paper cup holder with a paintbrush or the back of a spoon; the thicker the chocolate layer, the easier it will be to peel your paper
Set chocolate cups aside to cool in fridge and prepare cookie dough
In a medium bowl, whisk together flour and salt; set aside
Beat butter and sugars with an electric mixer on medium-high speed for a few minutes or until light and fluffy; add vanilla and beat for another minute
Scrape the sides of the bowl and stir in flour on low speed until combined; stir in M&Ms
Set cookie dough aside
Carefully remove paper liners from chocolate cups; scoop cookie dough into each cup using an ice cream scoop
Store cookie dough cups in fridge until ready to serve


MandM Cookie Dough Cups (egg-free!)

Vanilla Cookie Krispie Treats {Gluten-Free}

Vanilla Cookie Krispie Treats {Gluten-Free}

I decided to start this working from home thing with a bang.

Vanilla Cookie Krispie Treats {Gluten-Free}

5:15am wake-up

6 am INSANITY workout

6:45 try not to die while writing my blog post

Vanilla Cookie Krispie Treats {Gluten-Free}

I feel the 3pm exhaustion coming on already.  Luckily, in a time like that, there are super easy desserts to make that have everyone falling in love.  Seriously.  I brought these Vanilla Cookie Krispie Treats to my sister’s birthday party and her friends all thought I was a culinary genius.  I tried to explain to them that they took about 15 minutes of work from start to finish but they just wouldn’t believe me.  Guess I’ll just have to continue to look like a kitchen rockstar even when I’m unable to move.

Vanilla Cookie Krispie Treats {Gluten-Free}

Vanilla Cookie Krispie Treats {Gluten-Free}
Serves 20

Ingredients:
3 tablespoons unsalted butter
1 10.5 -ounce bag marshmallows
3 cups gluten-free rice krispies
3 cups roughly chopped gluten-free vanilla sandwich cookies (about 20 cookies)

Directions:
Spray a 13×9 baking dish with non-stick cooking spray
In a large pot, melt butter over medium heat
Stir in marshmallows until melted (will take several minutes)
Remove from heat and stir in cereal and cookies until completely coated
Press into prepared baking dish; wax paper helps to press the mixture down minimal sticking
Allow to cool before cutting into squares and serving; store in an air-tight container for up to a 5 days

Vanilla Cookie Krispie Treats {Gluten-Free}

St. Patrick’s Day Mint Chocolate Cookie Sandwiches

St. Patrick’s Day Mint Chocolate Cookie Sandwiches

I’m usually so bad about coming up with holiday-themed desserts.  But today, in honor of my LAST DAY OF WORK and tomorrow being St. Patrick’s Day, I’m sharing something so easy that you won’t mind making it last minute.

St. Patrick’s Day Mint Chocolate Cookie Sandwiches

The secret to these sandwiches is a pre-made wafer cookie.  Shhh, I won’t tell.  Stuff them with homemade mint buttercream and dip them in chocolate then no one will care.  Sometimes it is all about the buttercream anyway.

St. Patrick’s Day Mint Chocolate Cookie Sandwiches

On another note, after today I’ll be starting my sort-of-new life where I generally work from home, create my own schedule and have to self-motivate.  My plan is to create a schedule for myself every Sunday night, get up early every morning for the gym (my usual) and then get dressed and work all day.  I’d love any tips you have on staying motivated and being efficient when you work from home!

St. Patrick’s Day Mint Chocolate Cookie Sandwiches

Oh and suggestions on how to not end up in the kitchen eating cookies all day would probably be helpful too.

St. Patrick’s Day Mint Chocolate Cookie Sandwiches

Oh wait, you want to know how to make these?  Head on over to Fox for the recipe!

St. Patrick’s Day Mint Chocolate Cookie Sandwiches

Cappuccino Cheesecake Cake Bars

Cappuccino Cheesecake Cake Bars

I made these cheesecake bars a few weeks ago after going through my collection of recipes that I’d emailed to myself over time.  There was expired cream cheese in my kitchen that I wanted to bake with and was lacking for ideas.

Cappuccino Cheesecake Cake Bars

Luckily I found this recipe on Noble Pig a while ago and was smart enough to save it.  I made just a couple of changes based on ingredients I had on hand and was very happy with the outcome.  The layer of moist mocha cake is topped with a creamy coffee flavored cheesecake.  You can even taste a hint of the liquor that is in there.  Plus, I added cinnamon chips which make almost anything more delicious.

Cappuccino Cheesecake Cake Bars

Cappuccino Cheesecake Cake Bars

Serves 24

Ingredients:
Cake Layer:
1-1/4 cups all-purpose flour
3/4 cup granulated sugar
1/4 cup unsweetened cocoa
2 Tablespoons instant espresso powder
1 teaspoon baking powder
1/2 teaspoon baking soda
1 teaspoon ground cinnamon
1/2 teaspoon ground nutmeg
1/2 teaspoon salt
1/2 cup buttermilk
4 tablespoons unsalted butter, melted
Cheesecake Layer:
2 8-ounce packages light cream cheese, softened
1/2 cup granulated sugar
2 eggs
1/4 cup coffee liqueur (I used Starbucks)
1/2 cup mini semi-sweet chocolate chips
1/2 cup cinnamon chips

Directions:
Preheat oven to 350 degrees
Line a 9 x 13 baking dish with parchment paper and spray the paper with non-stick cooking spray
Prepare cake layer; whisk together flour, sugar, cocoa, espresso powder, baking powder, baking soda, cinnamon, nutmeg, and salt in a large bowl; set aside
Combine buttermilk and melted butter in a small bowl; stir into flour mixture just until combined
Spread cake layer evenly into prepared pan; note that the batter may be thick and you may need to press it down with the back of a spatula
Prepare cheesecake layer; beat cream cheese with an electric mixer on high speed until light and creamy; add sugar and mix on medium speed until combined
Add eggs and liqueur; beat for several minutes or until smooth and creamy
Stir in chocolate chips and cinnamon chips
Pour cheesecake layer over cake batter and bake in center of oven for 25-30 minutes or until cheesecake is set
Refrigerate a couple of hours until cool and completely set
Cut into squares and serve; store remaining cheesecake in the refrigerator.
Adapted from Noble Pig

Cappuccino Cheesecake Cake Bars

Easy Gluten-Free Chocolate Chunk Cookies

Easy Gluten-Free Chocolate Chunk Cookies

Today is my last Monday.

Easy Gluten-Free Chocolate Chunk Cookies

And if feels incredible.  Ever since I gave my two-weeks notice at work, that heavy feeling that has haunted me for so many Sunday nights and Monday mornings over the past several months has been gone.  No more anxieties about what crazy work politics or project stresses might come up that week.  No worrying about today’s priorities and if they will get done.  Really, it is incredible.

Easy Gluten-Free Chocolate Chunk Cookies

Now, that isn’t to say that I’m not feeling a new sort of anxiety.  As I get closer to the launch of my new site and dare I say it, new life, things in that world seem scarier and more intimidating.  Right now I’m set to launch two weeks from today and as that day gets closer new thoughts of self-doubt form every day.  Maybe my cookies aren’t as good as I think.  Maybe this shipping plan is completely wrong.  Maybe my brownies are too fudgy to make it to California.  Maybe I am just completely insanely nuts for leaving my day job and embarking on this new world.  And that is only a small portion if it.

Leaving the corporate world to start my own business and work on something I am 100% passionate about is absolutely exciting, but it has its own nerve-racking elements that just come with the territory. And as much as they like to keep me up at night just a bit, I think that is a good thing.  Because honestly, what better motivation is there to succeed than the fear of failure?

This Monday is the end of an old world and the beginning of a new me.

Easy Gluten-Free Chocolate Chunk Cookies

On a completely unrelated note, I made these cookies for my sister’s birthday a couple of weeks ago.  I wanted to make a few gluten-free recipes that didn’t include any crazy ingredients.  This recipe calls for almond meal which you can actually make yourself by grinding raw almonds in a food processor.  Almond flour is finer and might even improve the consistency, but either way you should end up with a chewy cookie oozing with chocolate and how can that be bad?

Gluten-Free Chocolate Chunk Cookies
Makes 26 cookies

Ingredients:
2 1/2 cups almond meal
1/4 teaspoon salt
1/4 teaspoon baking soda
10 tablespoons unsalted butter, melted
1 teaspoon pure vanilla extract
1/2 cup packed light brown sugar
1 cup dark chocolate chunks

Directions:
Pre-heat oven to 350 degrees
Whisk together almond meal, salt and baking soda in a medium bowl
In a small bowl, whisk together the melted butter, vanilla, and and brown sugar
Pour the wet ingredients over the dry and stir until combined
Stir in chocolate chunks
Scoop cookie dough balls with a cookie dough scoop (2 tablespoons each) onto baking sheets lined with parchment paper 1-2 inches apart
Bake ~8 minutes or until cookies are firm
Allow to cool before serving
Adapted from Une Gamine dans La Cuisine who adapted the recipe from Elena’s Pantry

Easy Gluten-Free Chocolate Chunk Cookies

Simple Vanilla Cupcakes with Chocolate Cream Cheese Icing and a Joy the Baker Book Review

Simple Vanilla Cupcakes with Chocolate Cream Cheese Icing

This week in the series of Joy the Baker spotlight and cook-off posts we were asked to write a review of the full cookbook.  And to be honest, I only have positive things to say.

Simple Vanilla Cupcakes with Chocolate Cream Cheese Icing

The Joy the Baker Cookbook has all of the elements that make me love a cookbook:

  • Beautiful colorful photos for EVERY recipe
  • Clear lists of ingredients and instructions that are easy to follow
  • Creative recipes that I wish I had come up with first
  • The author’s personal favorites of some classics
  • Interesting prose to introduce the author and the book as well as each recipe

Simple Vanilla Cupcakes with Chocolate Cream Cheese Icing

Sometimes when reviewing a product, I get a little nervous because I’ve been disappointed in the quality or it just isn’t as “great” as I thought it could be.  Well, in Joy’s case, the situation is the exact opposite.  As a fan of her blog for years, I certainly had high expectations for the cookbook.  But when the book came in the mail a few weeks ago, I could not stop reading through the recipes and staring at each photo.  I created a mile-long list of recipes that I can’t wait to try and each time I page through the book again (which I do for fun), I find something else that I can’t wait to make.

Her charming and funny personality shines through in every page and the variety of recipes does not disappoint.  Just to give you a few examples of things I still am dying to make:

  • Peanut Butter and Jam Milkshake
  • Baked Coffee Cake French Toast
  • Chocolate Bundt Cake with Chocolate Sour Cream Glaze

And the list goes on…

Simple Vanilla Cupcakes with Chocolate Cream Cheese Icing

So in this final week I couldn’t help but make another recipe to share.  This time I went with her Simple Vanilla Cupcakes and topped them with the Chocolate Cream Cheese Frosting.  I adapted the recipes slightly, but was thrilled with the flavors in the cupcakes and the icing.

Simple Vanilla Cupcakes with Chocolate Cream Cheese Icing
Adapted from the Joy the Baker Cookbook
Makes 12 cupcakes

Vanilla Cupcakes:
Ingredients:
1 1/3 cup all-purpose flour
1/4 teaspoon baking powder
1/4 teaspoon salt
1/2 cup (1 stick) unsalted butter, softened at room temperature
1 cup granulated sugar
2 x-large eggs
2 tablespoons vanilla extract
1/3 cup skim milk

Directions:
Pre-heat oven to 350 degrees and line a 12-cup muffin pan with paper or foil liners
In a medium bowl, whisk together flour, baking powder and salt; set aside
With an electric mixer, beat butter and sugar on medium-high speed for several minutes until light and fluffy
Add eggs, one at a time, beating on medium speed after each one
Add vanilla and beat until combined; scrape sides of bowl with a spatula and beat batter for another minute
Add half of flour mixture and turn mixer on low speed just until combined; add milk and mix on low until incorporated; add remaining flour and mix on low for one minute
Remove bowl from mixer and use a spatula to fold any unincorporated dry ingredients into the batter
Divide batter evenly among cups (a cookie dough scoop or small ladle can be helpful); bake for 20-25 minutes or until a toothpick comes out clean from center of cupcakes
Allow cupcakes to cool for several minutes before removing from pan; allow to cool completely prior to frosting

Chocolate Cream Cheese Frosting:

Ingredients:
4 ounces regular cream cheese
1/4 cup (1/2 stick) unsalted butter, softened at room temperature
3 tablespoons unsweetened good quality cocoa powder
3/4 cup powdered sugar, sifted
1 teaspoon vanilla extract

Directions:
Beat cream cheese on high speed with an electric mixer until smooth
Add butter and beat until light and creamy; scrape the sides of the bowl with a spatula and beat for another minute
Add cocoa powder and mix on low speed until combined
Add the powdered sugar and vanilla and mix on low speed until combined; scrape the sides of the bowl again and beat on high speed until icing is light and fluffy
Distribute frosting evenly among cupcakes

Simple Vanilla Cupcakes with Chocolate Cream Cheese Icing

This post is part of the Joy the Baker Cookbook Spotlight and Cook-Off sponsored by Hyperion and hosted at girlichef.  I received a free copy of the Joy the Baker Cookbook but all opinions expressed are my own.

Chocolate Stout Celebration Cake

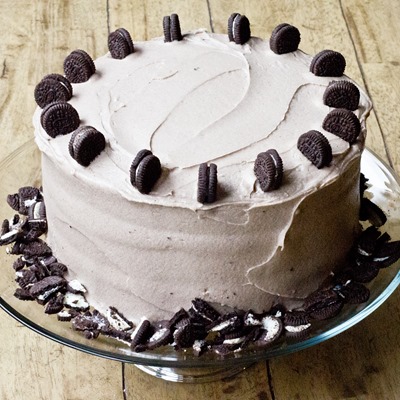
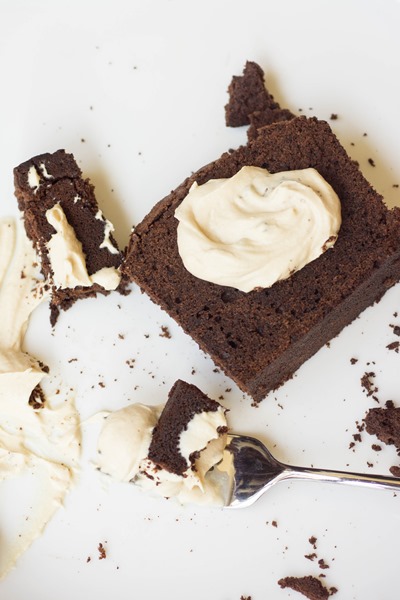
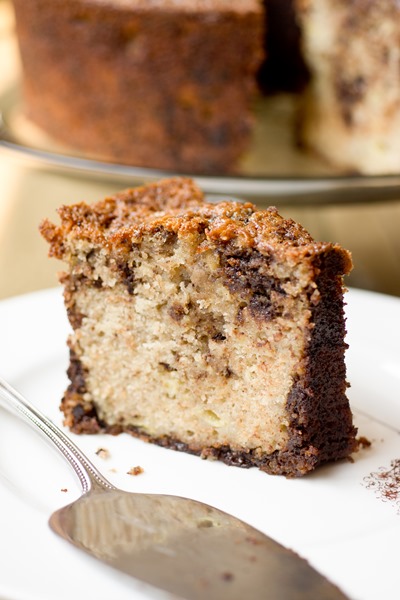
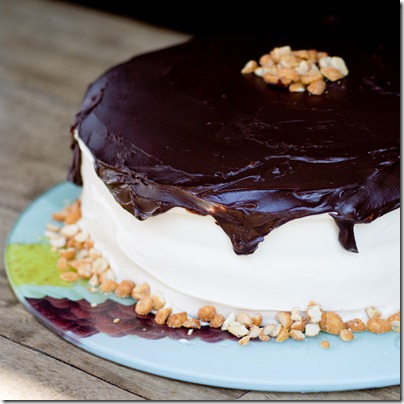
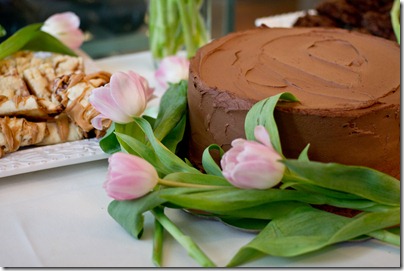
Rich chocolate stout cake with coffee swiss meringue buttercream on the inside and mocha buttercream on the outside!  A special cake for life’s special occassions and celebrations.

Chocolate Stout Celebration Cake Recipe

Ever since Thursday’s announcements, I’ve felt a huge sense of relief.  Now that you know about Keep It Sweet Desserts, I can be a lot more open about what is going on in my daily life.  Having my co-workers know, well, that is another level of weight lifted off my shoulders.

Chocolate Stout Celebration Cake Recipe

There were a lot of reasons that my job was no longer the place for me, but after four and a half years working at a company as it grew from thirty to almost three hundred people, I’ve built many relationships with people through meetings, conference calls and daily kitchen chats.  Not interacting with these people on a regular basis is going to be strange.  Telling them that would be the case was a lot more nerve-racking than I thought it would be.

Chocolate Stout Celebration Cake Recipe

Giving my two weeks notice at work was a little like breaking up with a boyfriend.  Except when I said “it’s not you, it’s me,” I pretty much meant it.  Sure, my job wasn’t perfect, but I’m leaving because it is time to pursue my passion.  Having some discontent in my professional life just made that decision make a little more sense.

Chocolate Stout Celebration Cake Recipe

Giving two weeks notice required one-on-one conversations with everyone I work with on a daily basis.  Once we got past the part of the conversations where I promised not to leave anyone in the lurch, my boss, and everyone else, seemed genuinely happy for me.  Some were excited and offered to put me in touch with valuable contacts, others promised to place orders with me as soon as the website is running.  My boss just requested, very seriously I might add, that I bring in samples before my two weeks are up. Fair enough.  The fact that these conversations went so well actually gave me a little regret at saying goodbye.

Chocolate Stout Celebration Cake Recipe

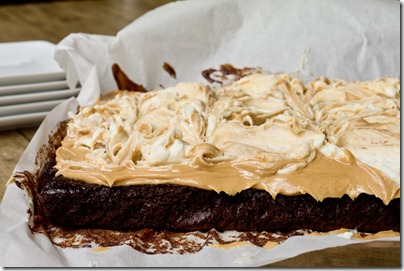
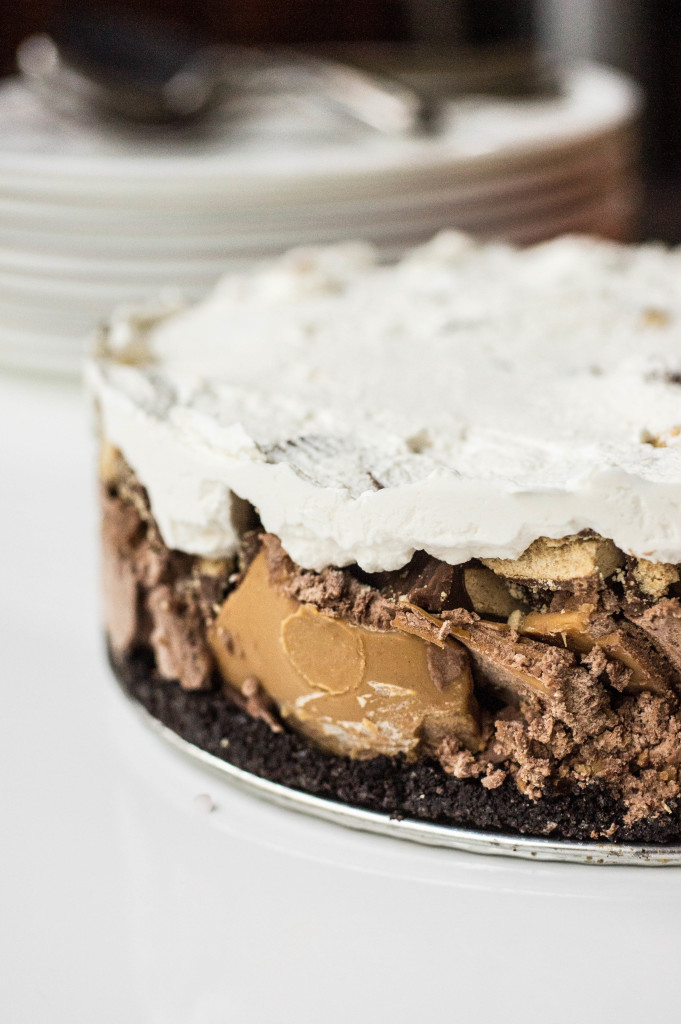
So this weekend, to celebrate the big announcement or stress eat my way through starting a business (either one, you decide), it only made sense to bake a somewhat over-the-top rich and delicious layer cake.

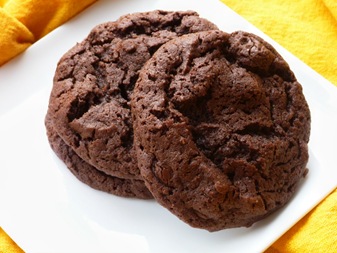
Chocolate stout cake.

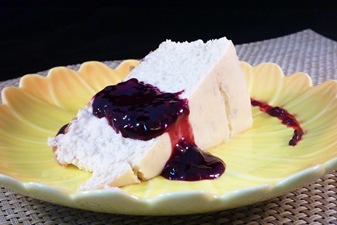
Coffee swiss meringue buttercream.
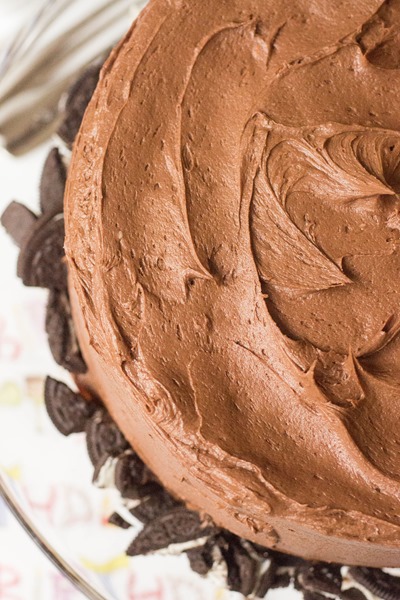
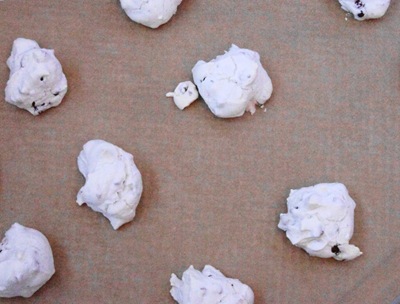
Mocha buttercream.

Rich, moist, decadent, everything you could ask for in one slice.  And I’m not exaggerating on the richness, I ate one slice (read: three slices in one) and it was enough for me.  Wait, who am I?

Chocolate Stout Celebration Cake Recipe

Make this cake for a birthday, St. Patrick’s Day, or even just because!
Chocolate Stout Celebration Cake
Serves 12-16

Ingredients:
1 recipe for Chocolate Stout Cake from Sweetapolita, cake only
1/3 recipe for Coffee Swiss Meringue Buttercream, recipe below
1 full recipe for Mocha Buttercream, recipe below

Directions:
Prepare chocolate stout cake layers following directions on Sweetapolita and set aside to cool
While cake is cooling, prepare coffee swiss meringue buttercream (“SMB”) and mocha buttercream and set aside
When cake has cooled, place one layer on a flat cake plate; use a serrated knife to shave the very top of the cake off so that the layer is flat
Spread a thick layer of the coffee SMB on shaved layer of cake, top only; gently place second cake layer on top of SMB
Spread mocha buttercream over top of cake and around the sides; I find that a long metal spatula works best for this
Store cake in refrigerator up to three days and serve at room temperature; prepared cake can also be wrapped tightly in seran wrap and then again in foil and frozen for a few weeks

Coffee Swiss Meringue Buttercream
Adapted from Sweetapolita (if this is your first time making SMB, her post is very helpful)
Makes enough to ice a full layer cake or fill two 9-inch 2-layer cakes

Ingredients:
1 cup egg whites (pasteurized egg whites work fine)
2 cups granulated sugar
2 1/4 cups (4 1/2 sticks) unsalted butter, softened and cut into 1-inch cubes
4 teaspoons instant espresso powder dissolved in 1 tablespoon boiling water, chilled
1/2 tablespoon vanilla extract
1/8 teaspoon salt

Directions:
Wipe the bowl of an electric mixer, whisk attachment, whisk, spatula and candy thermometer with a paper towel and vinegar to clean (if any grease is on these items your meringue will not work)
Place egg whites and sugar in mixing bowl over pot of simmering water; water should not be high enough to touch mixing bowl
Whisk mixture slowly but constantly until temperature reaches 160 degrees F, about 5-10 minutes
Remove from stove and attach bowl to electric mixer with whisk attachment
Put mixer on low to medium speed and whisk until meringue is shiny and thick and bowl has cooled down to room temperature; if bowl does not cool and meringue has formed, you can put an ice bath under the mixing bowl was it is mixing
Once ready, replace whisk attachment with paddle attachment and add cubes of butter one at a time mixing on low speed until the mixture is light and creamy; if mixture gets lumpy, keep mixing for several minutes; if it gets runny, place bowl in fridge for 10 minutes before continuing to mix
Stop mixer to scrape sides of bowl and continue to beat on low speed for another minute
Add chilled espresso, vanilla, and salt and mix on medium speed until the SMB is light and creamy
Store extra SMB in refrigerator up to a week or in freezer up to two months

Mocha Buttercream
Makes enough buttercream to ice outside of cake, double the recipe to use as filling and outside frosting

Ingredients:
1/2 cup (1 stick) unsalted butter, softened
4 cups powdered sugar
1/3 cup good quality unsweetened cocoa, sifted
6 tablespoons strong brewed coffee
1 teaspoon vanilla extract

Directions:
Using an electric mixer, beat butter on high speed until light and creamy
Add half of sugar and mix on low speed until combined
Add remaining sugar, cocoa, coffee and vanilla; mix on medium speed until smooth and creamy
Stop mixer to scrape sides of bowl and then continue mixing on high speed for another minute until creamy
Store buttercream in refrigerator up to a week or in freezer up to two months

Notes:
The only change I made to the Chocolate Stout cake was to substitute the sour cream with nonfat greek yogurt because that is what I had on hand; I used a bottle of Sam Adam’s Chocolate Stout from the winter collection
You can make the cake layers in advance and freeze them (well-wrapped) until ready to put the entire cake together
Cake can be iced in coffee SMB only if you don’t want as much chocolate (I’ll try not to judge)

Chocolate Stout Celebration Cake Recipe

I decided to bring half of this cake into the office to prevent myself from eating the entire thing.  Who is placing bets on whether my co-workers will love me or hate me by the time my last day rolls around?

Oreo Crusted Brownie Pie with Cream Cheese Icing

First of all, thank you for the amazing notes of support regarding my news!  I am still overwhelmed by the feedback.  Now onto deliciousness:-)

Oreo Crusted Brownie Pie with Cream Cheese Icing

I dreamt up this dessert a few weeks before I finally had the chance to make it.  Really I just thought about a few things I really like: Oreo crust- always good; Fudgy brownie- one of my ultimate weaknesses; Cream cheese icing- a pretty regular craving.

Oreo Crusted Brownie Pie with Cream Cheese Icing

So why not put them all together but in a pie shape instead of a bar?  Pie = big slices = win.

Oreo Crusted Brownie Pie with Cream Cheese Icing

Oh, and I almost forgot to mention that Matt officially proclaimed this the “Best.Dessert.Ever.”  He actually told me not to make the chocolate soufflés I had planned for our belated Valentine’s dinner because he just wanted to eat more of this pie.  For a man who orders the chocolate soufflé every time he sees it on a menu, those are some bold instructions.

Oreo Crusted Brownie Pie with Cream Cheese Icing

So head over to Fox for the recipe and make it today.  You may or may not want to double the recipe- one pie for you, one to share.

Keep It Sweet Desserts

A few years ago, I think maybe in college, I sat down with my husband, Matt (then boyfriend), and said, “I am a waste of space. I have no talents, no real hobbies… I’m directionless.”

cookie dough ice cream bar 25a

It was a recurring thought I had.  So many of my friends can play instruments, sing, write, act, play sports… I liked to do a lot of things, but I felt mediocre at all of them.  Once I got to the real world, I was good at my job, but being good at numbers and finance didn’t exactly make me feel like an interesting person.  Who wants to talk about leverage multiples at a party? Exactly.

Peanut Butter Oatmeal Cookie Dough Balls 12a

And then somewhere along the line, I found the kitchen, or it found me.  It was a place that always made me feel comfortable and at home, a place that I always wanted to be.  Growing up, my mom spent hours there.  Cooking dinners, baking cookies, making snacks, baking cakes, packing lunches, and baking some more.  I’d join her just to talk or even to lend a hand.  It was a natural place to be.  Send me to anyone’s house for dinner and I immediately find myself immersed in their kitchen with them.  I’m just drawn there.
Even when I worked 100-hour weeks as an investment banker, I’d find time to bake and entertain.  When my husband ran his first half marathon I made his favorite yellow cake with chocolate icing (which may or may not have been from a box mix at the time).  When New Years Eve came around, the dessert menu included truffles, cookies, brownies and more.  You may not want to mention the Halloween party where I prepped desserts ahead of time but had to work all that day and Matt got stuck cutting the crudite for the party.  Apparently if you don’t want to eat vegetables, you also don’t want to cut them.

Chewy Chocolate Chip Cookies 26a

My subsequent finance-related job required less hours which meant more time to bake.  We hosted Thanksgiving Dinners with our friends where the dessert table was my main focus.  How many people were coming? Well that is how many different desserts I would make.

Then, a couple of years ago, my free time opened up.  I was looking for a passion again.  I saw that my career path wasn’t for me long-term but I had no idea what I really wanted to do.  The moment that I am most thankful for is the moment that my sister convinced me that what I needed to do was start a blog. She said I should share my baking and creativity with more than just my friends and family.  She said that would help me figure out what I was looking for.

Lighter Carrot Sheet Cake with Cream Cheese Icing 11d

And that was the turning point.  My world has come a long way from my first few recipe posts (yikes!).  Blogging challenged me to try new things in the kitchen and make my desserts not only taste good, but look good too.  I became even more discriminatory in the desserts I would make and the desserts I would eat.  There is a whole world of cookbooks, bloggers and cooking shows with magnificent recipes, but you have to know how to weed through the bad ones.  I learned to navigate that even better.

Peppermint Mocha Frappucino Cookies 6a-1

So a few months ago, when I was becoming unsatisfied on a professional level, I started to put more effort and passion into baking and into my blog.  I met some people that had made careers out of their passions and inspired me.  I found myself writing a business plan and thinking about ideas that had been pipe-dreams in the past.  Dessert parties.  Cookie gift boxes.  Catering.  All of these ideas whirled around my head in a scary but exciting way.  I spent hours analyzing the pros and cons, the risks, the potential unending hours and all the pressure that could come with opening up my own business.  There were hours and hours in the kitchen testing recipes, over-salting cookies, throwing away brownies and eating way too many baked goods.  If I was going to do this, I was going to do this right.
So here I am, today.  And the news that I’ve been wanting to share but keeping secret for what feels like forever is out.  I’m scared and overwhelmed, excited, happy and anxious all at the same time.  Today I’m telling you that I’m leaving my current job, the career that I went to school for, what I’ve been doing for the last 5 1/2 years, and I am going for it.  I’m opening up Keep It Sweet Desserts, a place that will cater dessert parties and ship baked goods as gifts.  We will make party favors and cater the sweetest part of your event.  I’m living a dream I didn’t know I had.

Gingersnap Cookie Sandwiches with Lemon Cream Cheese Icing 8_1c-1

A few weeks ago, in the midst of planning for Keep It Sweet Desserts, working my current job and running the blog, I had one of my many meltdowns.  The roller coaster of emotions that I’ve gone through over the last couple of months can not be explained.  But Matt turned to me and he said, “Remember when you didn’t think you were good at anything? Well guess what.  You found it.  You found your talent, your passion and not only are you able to enjoy it, but now you are going to make it your job.  Look at that!”

SONY DSC

In the current whirlwind of emotions I need to thank all of you.  The comments, the tweets, the facebook messages, the emails, all of it has helped me have the confidence I needed to take this step.  To other bloggers out there who have made career changes, written cookbooks or just balanced everything in a seemingly perfect way, you have inspired me.  And to my friends and family who have put up with my absence or complaints over the last few months, your support has meant the world to me.

SONY DSC

So I hope you follow me on this journey and keep reading.  The blog won’t go anywhere, (well, it will move onto a new site when the Keep It Sweet Desserts website is up) and I’ll still be developing, blogging and sharing recipes as much as before.

Brown Butter Blueberry Muffins

Brown Butter Blueberry Muffins with Crumb Topping

So despite some unnecessarily stressful back and forth that has been going on in my life, I’m still set to share my news with you on Thursday.  Part of me is SO excited, but the rest of me is still nervous/terrified/anxious.  I know some of you are eager to know what my news is, but trust me, I’m even more eager to be able to share!  Just a couple more daysWinking smile

Brown Butter Blueberry Muffins with Crumb Topping

For the third week of the Joy the Baker spotlight and cook-off, we were able to make any recipe from Joy’s cookbook.  Considering I want to make almost everything in the book and NEED to make about half of the recipes, that was a tough decision.  But brown butter and a muffin with crumb topping all in one?  These muffins were definitely in the running.  Having plenty of fresh blueberries on hand sealed the deal.

Brown Butter Blueberry Muffins with Crumb Topping

These blueberry muffins came out of the oven perfect.  The texture of the muffin was light and cakey without being dry.  They smelled amazing and were really hard to photograph before diving in and eating them!

Brown Butter Blueberry Muffins with Crumb Topping

Brown Butter Blueberry Muffins
Source: Joy the Baker Cookbook
Makes 12 muffins

Ingredients:
Muffin ingredients:
7 tablespoons unsalted butter
1/3 cup milk
1 large egg + 1 large egg yolk
1 teaspoon vanilla extract
1 1/2 cups all-purpose flour
3/4 cup granulated sugar
1 1/2 teaspoons baking powder
1/4 teaspoon salt
2 cups fresh blueberries or frozen blueberries thawed and drained

Topping Ingredients:
3 tablespoons unsalted butter, cold
1/2 cup all-purpose flour
3 tablespoons granulated sugar

Directions:
Pre-heat oven to 375.  Line a muffin pan with paper or foil liners and set aside
Make the muffin batter
Brown the butter: Heat butter in a small heavy saucepan over medium heat, stirring constantly; when butter turns to an amber/light brown color, remove from heat immediately.  You should be able to smell the deeper more caramel flavor of the butter
Pour browned butter immediately into a small bowl and set aside
In a medium bowl, whisk milk, egg, egg yolk and vanilla until combined; whisk in brown butter and set aside
In a large bowl, whisk together flour, sugar, baking powder and salt; add milk mixture and stir just until combined; fold in blueberries
Distribute batter evenly among cupcake liners and set aside
Make crumb topping by combining the butter, flour and sugar with your fingers until most of the dry ingredients are in small clumps; sprinkle each muffin generously with topping
Bake muffins 18-20 minutes or until a knife or toothpick comes out of center of a muffin clean

Brown Butter Blueberry Muffins with Crumb Topping

This post is part of the Joy the Baker Cookbook Spotlight and Cook-Off sponsored by Hyperion and hosted at girlichef.  I received a free copy of the Joy the Baker Cookbook but all opinions expressed are my own.

Meyer Lemon Shortbread Bars

Meyer Lemon Shortbread Bars

By now you have probably seen a fair share of meyer lemon recipes.  It’s like meyer lemons are the new salted caramel lemon*.

Since I’m so picky when it comes to lemon desserts, I have to get really excited about an idea or recipe before trying it.  Well, it just so happens that a few months ago, I had an amazing lemon bar with a buttery crumb topping that I’ve wanted to replicate ever since.  It was moist and rich with the perfect balance of crumb topping to tangy lemon filling that just melted in your mouth.  Instead of playing with a regular crumb topping recipe, though, I thought I’d test out my favorite shortbread bar and swap out the filling for a meyer lemon layer instead.

The result- exactly as I had hoped.  If you like the flavor of meyer lemons and enjoy perfect buttery shortbread, you will love these.

Let’s be real, it is still a lemon.

Meyer Lemon Shortbread Bars

Meyer Lemon Shortbread Bars
Serves 12

Shortbread Ingredients:
2 cups all-purpose flour
1/2 pound (2 sticks) unsalted butter, softened
3/4 cups powdered sugar, sifted
1/2  cups granulated sugar
1/2 tablespoon vanilla extract
Filling Ingredients:
2 extra-large eggs at room temperature
3/4 cups granulated sugar
1/2 tablespoon grated meyer lemon zest (1 to 2 lemons)
1/3 cup freshly squeezed meyer lemon juice (~ 1 lemon)
1/3 cup all-purpose flour

Directions:
Pre-heat oven to 325
Grease a 9-inch square baking dish with non-stick cooking spray and set aside
Sift flour; set aside
Beat butter and sugars on high speed until light and fluffy; mix in vanilla until will combined
Stir in flour just until combined
Press half of the dough in to prepared dish and bake for about 15 minutes or until edges are golden brown; shape remaining dough into a disk and wrap tightly with seran wrap; chill in refrigerator
When bottom layer is done, set aside to cool and prepare filling
Whisk together eggs, sugar, lemon zest, lemon juice and flour; pour over crust
Bake crust and filling for 20-25 minutes or until filling is starting to set
Remove from oven and top with remaining dough but crumbling dough into pieces and distributing evenly over filling
Bake the bars for 20-25 minutes or until top of crumbs is golden brown
Store bars in refrigerator but are best brought to room temperature before serving

Shortbread recipe from Sticky, Chewy, Messy, Gooey; Filling adapted from Smitten Kitchen

Meyer Lemon Shortbread Bars

On another note, I impulsively bought my meyer lemons at Costco.  Some of them were used in these bars and a couple of others went into a scallop marinade.  I still have quite a few left, what should I do with them?

Chewy No-Bake “Thin Mint” Bars

Chewy No-Bake “Thin Mint” Bars

Sometimes I have a million recipe ideas going through my head at a time and can’t get into the kitchen fast enough.

And sometimes I have baker’s block.

Chewy No-Bake “Thin Mint” Bars

Every cookie or brownie variation will feel overdone and the creative section of my brain goes into freeze mode.

Sometimes I really get stuck and just need a day or two out of the kitchen, and sometimes all I need is a visit down unused ingredients lane.

Chewy No-Bake “Thin Mint” Bars

Half a bag of marshmallows that are living on the edge of stale? Check.  An open package of Oreos that I need to bake with before Matt eats the last sleeve? Got that.   A half-used package of chocolate mint candies that was hidden in the back of the drawer for months? Don’t mind if I do.  Oh yeah, and butter.  I always have butter.

Chewy No-Bake “Thin Mint” Bars

I’m so glad I took advantage of what I had on hand because these bars came together quickly, with minimal dish washing and no oven time.  Sometimes the best baking is no baking at all!  Especially when the end result tastes like a Thin Mint.

Take that Girl Scouts.

Head over to Fox to get the recipe for my Chewy No-Bake “Thin Mint” Bars!

Whole Wheat Honey & Goat Cheese Drop Biscuits

Whole Wheat Honey & Goat Cheese Drop Biscuits

Growing up, we didn’t eat a lot of fast food, but I do remember a few occasions when my dad would pick up KFC on his way home from work.  The thing is, I don’t remember anything about those meals except for the biscuits.  Buttery, flakey and light… they were so good.

It has been a long time since I had one of those biscuits.  I only eat fast food in acts of road-trip desperation, and even then my selections are limited to the standard but gross grilled chicken sandwich/salad options.  Blech.

And beyond that, biscuits have made very few appearances in my life.  Usually I save my butter-laden indulgences for cookies, cake, ice cream, etc.  Biscuits just take a backseat to my sweet tooth.  So when this week’s recipe selection for the Joy the Baker Cookbook Spotlight and Cook-Off included these whole wheat biscuits, I jumped at the chance to relive my childhood food memories in a slightly healthier and more grown-up way. Win.

Whole Wheat Honey & Goat Cheese Drop Biscuits

Whole Wheat Honey & Goat Cheese Drop BiscuitsWhole Wheat Honey & Goat Cheese Drop Biscuits
Source: Joy the Baker Cookbook
Makes 8 to 12 biscuits depending on size

Ingredients:
2 cups whole wheat flour
3 teaspoons baking powder
1/4 teaspoon baking soda
1 1/2 teaspoons salt
1/4 cup (1/2 stick) unsalted butter, cold and cut into cubes plus 2 tablespoons for pan
4 tablespoons soft crumbled goat cheese
1 cup buttermilk, cold
2 tablespoons honey

Directions:
Move rack into upper third of oven; place a 10-inch cast-iron skillet on rack and pre-heat oven to 400 degrees (you want the skillet to be hot)
In a medium bowl, whisk together dry ingredients
Use your fingers to incorporate butter and cheese into dry ingredients until most of the flour is in small chunks; form a well in center of ingredients and and set aside
Whisk together buttermilk and honey until somewhat combined; pour mixture into the well of the flour mixture and combine with a fork until all of the flour mixture is wet; set dough aside
Remove skillet from oven and coat with one tablespoon of butter
Drop 4-6 scoops of dough into batter using a large cookie dough scoop or ice cream scoop (about 1/4 cup each); make sure to leave a about an inch between each drop of dough
Place skillet back in oven and bake 14-16 minutes or until golden brown and lightly firm
Carefully remove cooked biscuits from skillet with tongs and set aside; repeat process with remaining butter and dough
Serve warm with honey; biscuits are best stored immediately but will last up to three days well-wrapped at room temperature

Whole Wheat Honey & Goat Cheese Drop Biscuits

This post is part of the Joy the Baker Cookbook Spotlight and Cook-Off sponsored by Hyperion and hosted at girlichef.  I received a free copy of the Joy the Baker Cookbook but all opinions expressed are my own.

Heath Bar Blondies with Brown Butter Frosting

Heath Bar Blondies with Brown Butter Frosting

Did you know that brown butter smells like heaven?

Heath Bar Blondies with Brown Butter Frosting

Yup, it pretty much does. But then again, so do fresh baked cookies, the combination of melted butter and chocolate, and homemade caramel.

Matt referred to our apartment as a fudgery recently, and although I don’t actually make fudge, the meaning behind his comment was true.  We live in an endless supply of  baked goods.  I’m convinced that whoever rents our apartment after us will wonder why their home smells like chocolate.  Maybe they should pay extra for that.

Heath Bar Blondies with Brown Butter Frosting

But I digress.  This weekend was full of a baking marathon unlike any I’ve had in a while.  I’m trying to get a little ahead of schedule on desserts for the blog, but now I have a dozen recipes that I want to share with you IMMEDIATELY.

Guess I now have something else to keep my mouth shut about.

But in the spectrum of those desserts, the one that was iced with a frosting that smelled like heaven seemed the most pressing to share.  These brown sugar-based blondies are dense and chewy, filled with one of my favorite candies for baking and topped with a frosting that might put you in a butter-loving coma.  You’re welcome.

Heath Bar Blondies with Brown Butter Frosting
Serves 12

Blondies:
1 cup all-purpose flour
1/2 teaspoon baking powder
1/2 teaspoon salt
1/2 cup (1 stick) unsalted butter, softened at room temperature
3/4 cup packed light brown sugar
1 egg
1 teaspoon vanilla extract
3/4 cup milk chocolate toffee bits or finely chopped heath bars

Frosting:
1/2 cup (1 stick) unsalted butter,  browned and chilled for an hour*
1 cup powdered sugar
1/4 cup milk

To Make the Blondies:
Pre-heat oven to 350 degrees
Grease a 9-inch baking dish with non-stick cooking spray or butter and set aside
In a medium bowl, whisk together the flour, baking powder and salt; set aside
With an electric mixer, beat together the butter and sugar on high speed until light and fluffy
Beat in the egg and vanilla until well combined
Stir in the flour mixture just until combined
Stir in the candy pieces
Bread batter into prepared baking dish and bake for ~20 minutes or until a knife comes out clean from the center; do not over-bake
Set aside to cool and prepare frosting

To Make the Frosting:
When brown butter is chilled, beat it with an electric mixer on high speed until light and creamy
Slowly add the remaining ingredients alternating 1/3 of sugar, 1/2 of milk, 1/3 of sugar, remaining 1/2 of milk and remaining 1/3 of sugar
Turn up the speed and mix until the frosting is light and creamy
Spread over cooled blondies
Store blondies in refrigerator but bring to room temperature before serving

Notes:
*To brown the butter, heat it in a heavy saucepan over medium heat, stirring constantly; when butter turns to an amber/light brown color, remove from heat immediately.  You should be able to smell the deeper more caramel flavor of the butter
Frosting adapted from Southern Living Magazine

Heath Bar Blondies with Brown Butter Frosting

And just to keep you excited for what is to come, this isn’t even the baked good that Matt claimed to be the “Best.Dessert.Ever.”

Flaxseed and Cracked Pepper Crackers

Two weeks*.

*someone please tell me I’m not jinxing myself

Flaxseed and Cracked Pepper Crackers

I can do anything for two more weeks, right? Keep secrets, work around the clock, do the equivalent of fifteen** jobs…

And in two weeks, I will finally be able to tell you what is going on.  Share with you what I’ve been wanting to share for a couple of months.  But until then, I’ll stuff my mouth with a handful of crackers if you ask.  Because secrets and sort-of lies are not my thing.  And if the stress of working around the clock with a huge amount of pressure to get things done and get them done well isn’t enough, the stress of being deceitful in any way is weighing on me in an unmeasurable way.

**slight exaggeration

Homemade Flaxseed and Cracked Pepper Crackers

So about these crackers!  If I had known how easy it would be to make crackers from scratch, I’d have started doing that long ago!  These crackers are full of whole grains and devoid of any preservatives or unreadable ingredients you get from your typical store-bought box.  So even if you eat handful after handful to silence yourself, you are in a pretty good place.

Homemade Flaxseed and Cracked Pepper Crackers

I got this recipe from the brand new Joy the Baker cookbook! I’ll be sharing a few more recipes over the next several weeks as I participate in a group of bloggers who have the opportunity to review Joy’s book.  Given that Joy’s blog was one of the first food blogs I ever read, to say I was excited about this is an understatement.

Flaxseed and Cracked Pepper Crackers
Source: Joy the Baker Cookbook
Makes 4 dozen crackers

Ingredients:
1/4 cup + 3 tablespoons golden flaxseed, separated or 1/4 cup + 1/4 cup ground flaxseed meal
1 cup whole wheat flour
1/2 cup all-purpose flour plus additional for rolling out dough
1/2 teaspoon baking soda
3/4 teaspoon salt
1/2 teaspoon cracked pepper
2 tablespoons unsalted butter, cold, cut into cubes
1/2 cup buttermilk (I used low fat)

Directions:
Pre-heat oven to 325 degrees; line two baking sheets with parchment paper and set aside
In a small food processor or blender, grind three tablespoons of flax seed for one minute to produce 1/4 cup of ground flaxseed meal
In a medium bowl, whisk together flours, flaxseed, flaxseed meal, baking soda, salt and pepper
Use a fork or your fingers to work butter into dry ingredients until you have small clumps of “dough”; not all dry ingredients will be binded together
Form a well in the center of the mix and pour buttermilk into the well; use a fork to combine until all of the dough is moist but shaggy
Roll the dough on a lightly floured work surface working half of the dough at a time; roll out with a rolling pin until dough is ~1/8 inch thick
Use a 1 1/2 inch round cookie cutter to shape crackers or cut with a pizza knife into 1 1/2 inch squares
Bake 15-18 minutes or until slightly browned around the edges and allow to cool
Store crackers in an airtight container up to four days
Notes: 
This is not your typical crunchy cracker.  I tried cooking them a little longer after the fact to get some crunch and ended up burning them (guess 15 extra minutes without checking on them was a bit too long).
I made smaller crackers (<1 1/2 inches x 1 inch each) and ended up with double the number of crackers.

Homemade Flaxseed and Cracked Pepper Crackers

To win a free copy of Joy’s cookbook visit girlichef!

This post is part of the Joy the Baker Cookbook Spotlight and Cook-Off sponsored by Hyperion and hosted at girlichef.  I received a free copy of the Joy the Baker Cookbook but all opinions expressed are my own.

Triple Chocolate Cheesecake Cupcakes

Triple Chocolate Cheesecake Cupcakes

Ever since I saw Lori’s Chocolate Cheesecake Cake, I have been dreaming of making something that could satisfy my desire to lock myself in a room with the cake and a fork.

Triple Chocolate Cheesecake Cupcakes

And while the last thing I need is an entire cake on my hands (oh wait, I do have an entire cake in my freezer… er…), cupcakes just seem so innocent.  Individual portions, easy to share with friends, harder to eat all at once since you have to unwrap each one… you get the drift.

Triple Chocolate Cheesecake Cupcakes

Well, unfortunately, or fortunately, these cupcakes are anything but innocent.  Light chocolate cake, creamy and mousse-like chocolate cheesecake and a hard chocolate glaze, well, you get my drift.

Triple Chocolate Cheesecake Cupcakes

So if you want to find a husband, get laid be the husband of the year, or turn your children into perfect angels, you might want to make a batch of these not-so-innocent cupcakes.
Chocolate Cheesecake Cupcakes
Makes 24 cupcakes

Ingredients:
Cake Layer:
3 ounces semi-sweet chocolate
6 tablespoons unsalted butter
3/4 cups granulated sugar
1 x-large egg
1 teaspoon vanilla extract
1 1/4 cup all-purpose flour
1/2 teaspoon baking soda
1/8 teaspoon salt
3/4 cups water
Cheesecake Layer:
1 8-ounce packages light cream cheese softened at room temperature
3/4 cups granulated sugar
1 x-large egg
1 tablespoons all-purpose flour
1/2 teaspoon vanilla extract
6 ounces semi-sweet chocolate
2 tablespoons unsalted butter
Glaze:
3/4 cup semi-sweet chocolate chips
3 tablespoons unsalted butter
1 tablespoon light corn syrup
1/4 teaspoon vanilla extract

Directions:
Pre-heat oven to 350 and line 24-cupcake tins with foil or paper cupcake liners
Prepare cake layer; microwave choc and butter in a bowl in 30-second increments stirring in-between until butter and chocolate are completely melted
Stir sugar into melted choc mixture until well blended; beat in eggs one at a time with a whisk
Beat in vanilla
Add 1/2 cup of flour, baking soda and salt and mix well
Add remaining flour alternating with water (starting and ending with flour) stirring in-between each addition just until smooth
Pour into prepared tins, ~2 tablespoons of batter per cup, and bake ~5 minutes or until cake layer is set but still wet
Reduce oven temperature to 325 and prepare cheesecake filling; beat cream cheese with an electric mixer until light, creamy and lumps are gone (about 5 minutes)
Add granulated sugar and combine on medium-high speed well until light and creamy
Beat in egg, on medium speed
Stir in flour
Add vanilla extract and salt and beat until mixture is thick and creamy
Melt chocolate chips and remaining 2 tablespoons of butter in the microwave using the same method as above with 30-second increments; mixture will get very thick
Add chocolate to the cheesecake filling and combine thoroughly
Pour chocolate batter over cake layer and bake for 6-8 minutes or until cheesecake is set
Once cupcakes are cool, prepare glaze; combine chocolate chips, butter and corn syrup in a small pot over low-medium heat and stir constantly until mixture is completely melted
Stir in vanilla and remove from heat; pour glaze over pie
Chill cupcakes in fridge for at least 2 hours and until ready to serve; they will keep in the fridge for a few days

Inspired by Recipe Girl, cake layer from Baker’s, glaze from All Recipes

Triple Chocolate Cheesecake Cupcakes

Apple and Peanut Butter Oatmeal Crumble

Apple and Peanut Butter Oatmeal Crumble

This past weekend, in the midst of browned butter muffins, goat cheese biscuits and that little eating fest called the Super Bowl, I decided I should bake something healthy for a change.  I know.  You just took a double take, didn’t you?

Apple and Peanut Butter Oatmeal Crumble

The thing is, I generally eat really healthy and exercise like a maniac to balance out everything that you see here.  But sometimes, no matter how many salads I eat or how often I go to the gym, the cookies/cakes/cheesecakes/truffles…. they absorb me.  They take over my brain and haunt me around my waistline.  They call my name from the oven, the freezer, halfway to the trash.  It is a crazy hold they have over me that I can’t quite explain. And on days or weeks like that, I try to trick myself. I put something in the oven that tastes good enough to be dessert but is wholesome enough for breakfast and for just a short moment, I am eating a treat that isn’t going to force me into a sugar high and crash spiral.

Apple and Peanut Butter Oatmeal Crumble

This dish falls into that category.  I had in my mind that I was going to make apple cinnamon breakfast cookies and ended up with something completely different but delicious nonetheless.  Heavy on fruit and whole grains but low on sugar, this crumble is a great way to start the day.  Top a serving with a dollop of Greek yogurt for some extra protein.  Feel like having some for dessert? Scoop some frozen yogurt right on top of a warm bowl.

Apple and Peanut Butter Oatmeal Crumble

Not to worry, I’ll be absorbed back into butter heaven momentarily.
Apple and Peanut Butter Oatmeal Crumble
Serves 8

Ingredients:
2 cups chopped Granny Smith apples (5 small apples or 2-3 large)
2 tablespoons Splenda or sweetener of choice
1 teaspoon cinnamon
1 1/2 cups rolled oats
1/2 cup whole wheat pastry flour
1 teaspoon baking soda
1/4 teaspoon salt
1/2 cup natural creamy peanut butter
1/2 cup egg whites
1 teaspoon vanilla extract

Directions:
Pre-heat oven to 350 degrees
Spray a 9 inch baking dish with non-stick cooking spray and set aside
In a medium bowl, combine apples, cinnamon and sweetener; set aside
In a large bowl, whisk together oatmeal, flour, baking soda and salt
Stir in peanut butter; it will be lumpy but that is okay
Stir in egg whites and vanilla
Stir in apples; there will be a high proportion of apples to batter
Spread mixture into prepared baking dish and bake for about 30 minutes or until top is firm and apples are tender
Serve warm for breakfast with Greek yogurt or dessert topped with frozen yogurt
Keep leftovers refrigerated for several days and re-heat before serving

Apple and Peanut Butter Oatmeal Crumble

How do you trick yourself out of eating a full batch of brownies?

Fun Pick-Up Desserts for Super Bowl

Fun Pick-Up Desserts for Super Bowl

It’s Thursday before Super Bowl and you’ve probably seen so many versions of buffalo chicken dip that your head is about to explode with hot sauce.  I love the traditional salty/creamy/fried/cheesy items as much as the next person, but it doesn’t mean that we can forget about dessert.  So for those of you looking for some fun pick-up desserts to add to the mix, here are some of my favorite less traditional ideas.

Bite Sized Chocolate Chip Cookies with Mocha Ganache A football game is the perfect excuse for delicious bite-sized cookie sandwiches

Blueberry Pretzel Clusters Three ingredients and probably five minutes to make, what’s not to love?

Fun Pick-Up Desserts for Super Bowl

Chewy Chocolate Covered Pretzel Bars These are one of the easiest things to make and they will please any sweet and salty lover; no fancy baking skills required

Double Chocolate Mint Crispy Treats These were a huge hit at my sister-in-law’s shower; another super easy recipe

Fun Pick-Up Desserts for Super Bowl

Grown Up S’mores Cookies Even the biggest chip and dip lover can’t resist

Individual Peanut Butter Cheesecakes, lightened up You can still enjoy cheesecake at the super bowl with these individual treats

Individual S’mores Brownies You might want to make a double batch

Kitchen Sink Cookies and Bars Throw in whatever ingredients you feel like, even the leftover broken pieces of potato chips and pretzels will work

Oreo Mallow Clusters Substitute the peeps with regular marshmallows for these super easy chocolate treats

Peanut Butter Cookie Dough Pretzel Pops These are actually a little bit healthy, really!

Pumpkin Pie Cookie Dough Truffle Pops I may or may not have eaten a few of these out of the freezer the other night

Fun Pick-Up Desserts for Super Bowl

Thick and Chewy Peanut Butter Chocolate and Toffee Bars I can’t wait to have an excuse to make these again

Now can someone please tell my body that calories don’t count during the Super Bowl?

Reese’s Pieces Cake Bars

Easy Reese’s Pieces Cake Bars

Sometimes you get busy.  There is week-old laundry to put away, streaked kitchen counters that need to be scrubbed and recipes to test.

There are websites to be designed, photos to be edited, and post-dessert workouts to get done.

Easy Reese’s Pieces Cake Bars

But there is also a blog to attend to and readers getting impatient.  Those readers who hate you for ruining their New Year’s resolutions in January but love you for making delicious desserts come so easy.  That has been the theme recently, hasn’t it? Easy cookies, easy truffles and now easy cake.

I know I’m not the only one around here that has a to-do list from one end of the apartment to the other.  Email drafts, post-it notes, calendar reminders and the worst ones, those where you take a mental note and say, “yes, I will remember this” but three days later you are in the middle of your shower and you think, “oh crap.”

Easy Reese’s Pieces Cake Bars

I am so thankful for easy desserts.


Reese’s Pieces Cake Bars
Makes 20 cake bars

Ingredients:
Reese’s Pieces Cake
1 chocolate cake mix plus ingredients called for on box, replacing oil with creamy peanut butter (my cake mix called for 1/3 cup of oil so I ignored that and used 1/3 cup of peanut butter)
3/4 cups Reese’s Mini Pieces or regular Reese’s Pieces lightly chopped
Fluffy Peanut Butter Frosting
1/2 cup (1 stick) unsalted butter, softened at room temperature
1 1/4 cup creamy peanut butter
1/2 cup powdered sugar

To make the cake
Pre-heat oven as directed on box
Spray a 13×9 baking dish with non-stick cooking spray
Follow directions on cake box, substituting peanut butter for oil; stir in Reese’s Pieces
Pour cake batter into prepared baking dish and bake for 25-30 minutes or until a knife comes out clean
Allow cake to cool

To make Frosting
Beat butter with an electric mixer until light and creamy
Beat in peanut butter until well combined
Add sugar and stir until combined; then increase speed to high and beat until frosting is light and fluffy
Ice cooled cake with prepared frosting and serve

Easy Reese’s Pieces Cake Bars

Where do you keep your to-do lists?

Spiced Cookie Butter Truffles

Spiced Cookie Butter Truffles

I think my husband/mother/co-workers/sister/friends/Twitter followers/neighbors/strangers are getting sick of me.  To be honest, I’m getting a little sick of me too.

Spiced Cookie Butter Truffles

No one wants to constantly hear about stress/anxiety/weight gain/impatience and any other complaints that seem to be incessantly on my mind these days.  If I didn’t have a constant supply of cookies/cupcakes/brownies/truffles/blondies to share I’d probably be completely deserted already.  But I’m pretty sure that the sweets I make can only get me so far and I better start looking at the positive or keeping my mouth shut.

Spiced Cookie Butter Truffles

So to make up for driving everyone I know crazy lately, here are some good things you should know:

  • Last night I got a gorgeous cookbook in the mail from this talented lady.  Everything looks good but her recipe for crab cakes is definitely calling my name
  • In addition to that delivery, my doorwoman (is that a term?) presented me with a big box of an upcoming product from here
  • After testing what feels like a million brownie recipes, my husband finally approved of the latest version and in fact said they were “ridiculous”
  • Friday night I have a date with this lady who I haven’t seen in over a month, thank g-d because I don’t think I could have lasted much longer
  • I finally get to meet the sweet veggie dreamgirl today!
  • Sometime soon you will find my recipes on a very.big.website.
  • And lastly, I got something over email that I can NOT wait to share and to be honest, all of this sketchy secret keeping is driving me nuts… I promise to share my news and plans soon!

Spiced Cookie Butter Truffles

Oh, and did I mention truffles?  If you haven’t heard about this speculoos/cookie butter/biscoff spread phenomenon you are five pounds thinner than me missing out.  These truffles may actually melt in your hands a little bit, but sometimes a messy dessert is worth it.

Spiced Cookie Butter Truffles
Yield: Makes ~30 truffles

Ingredients
3 tablespoons unsalted butter, softened at room temperature
1 cup Speculoos Cookie Butter or Biscoff Spread
2/3 cup finely ground gingersnap crumbs (~11 cookies)
4 ounces semi-sweet or dark chocolate finely chopped

Cooking Directions
Beat butter and cookie butter with an electric mixer on high speed until light and creamy
Add cookie crumbs and combine on high speed until thoroughly mixed
Refrigerate mixture for at least two hours
Scoop mixture by the teaspoon and roll each scoop into the ball; keep dough in refrigerator while scooping individual truffles
Once all balls are rolled, place them back in refrigerator or freezer
Melt chocolate; place chocolate in a microwaveable bowl and place in microwave for thirty second increments stirring in-between until chocolate is melted and smooth
Drizzle melted chocolate over chilled balls and freeze until ready to serve

Spiced Cookie Butter Truffles

What’s putting a smile on your face today?

[pinit]

Easy Lemon Shortbread Cookies

Lemon Shortbread Cookies 12

So here’s the thing.  I used to hate lemon desserts. And I used to hate shortbread. But that was when I thought all lemon desserts tasted like the filling to lemon meringue pie (still grosses me out) and all shortbread was boring and flavorless.

Lemon Shortbread Cookies 14

But at some point in the last couple of years, something clicked.  And while it would do my body good to become more picky about what range of desserts I will eat, my palate started to appreciate those two categories of sweets.

Some things can have a lovely lemon flavor but they don’t have to be sickeningly sweet.  Shortbread can be chewy and buttery and wonderful.  Who knew?

Lemon Shortbread Cookies 10

So when I had a minor baking mishap in the kitchen a few weeks ago and ended up half-way to shortbread dough, it occurred to me that I didn’t need to throw away the pound of butter that I’d already creamed.  Instead, I should make lemons out of lemonade take advantage of the ingredients I had on hand and make something else.

The end result was a pleasant surprise.  Chewy shortbread cookies with just the right amount of lemon- not overpowering, but refreshing.  And refreshing is good when biting into a rich shortbread cookie.

If you want an even stronger lemon flavor, you could probably add some lemon zest to your batter.  But I’m still easing into this lemon dessert thing so I’ll stop while I’m ahead.
Easy Lemon Shortbread Cookies
Yield: Makes 5 1/2 dozen cookies

Ingredients
4 cups all purpose flour
1 pound (4 sticks) unsalted butter, softened
1 1/2 cups granulated sugar
1 1/2 cups powdered sugar, sifted
4 tablespoons lemon juice (~3 lemons)
1 tablespoon vanilla extract
1/2 teaspoon salt

Cooking Directions
Pre-heat oven to 350 degrees
Line baking sheets with parchment paper or slipat; set aside
Sift flour; set aside
Cream butter and sugars until light and fluffy
Add lemon juice, vanilla and salt and beat until well combined
Stir in flour
Scoop with a medium cookie dough scoop (2 tablespoons each) onto prepared cookie sheets about 2 inches apart
Bake for ~15 minutes or until very light brown around the edges
Allow cookies to cool on cooling rack

Lemon Shortbread Cookies 2

What type of dessert did you used to hate but learn to love?

[pinit]

For the Love of Chocolate

Individual-Smores-Brownies-keep it sweet

We are ten days into the new year and I’m feeling a little all over the place.  On a regular basis I flip back and forth between being extremely excited about things that are happening and completely overwhelmed by all that I have to do.  There are some very big plans that are in the works, but I have a lot to do to make everything happen.  And while I am depending on some other people to do their parts, most of the effort is my responsibility.  The last thing I want to happen is to be so close to something I really want but not quite there because I’ve become a gating item.  That just isn’t an option.  It’s just slightly emotionally draining.

So in the midst of my mini breakdowns I started bookmarking a few over-the-top chocolate recipes.  And since my new recipes are a little slow for the blog at the moment, I figured I should share the chocolate love with all of you.  Here are some of the amazing chocolate recipes that I found and others shared with me.

pepp brownie eats well with others

Peppermint Brownies from Eats Well With Others

Better-Than-Crack Brownies from Pass the Sushi

Chewy Oatmeal-Spelt Chocolate Chip Bars from The Lunch Box

black bean Brownies_2 from espresso and cream

Black Bean Brownies from Espresso and Cream

Gluten-Free Brownie Cookies from The Spiffy Cookie

Homemade Chocolate Pudding with Bailey’s Irish Cream from My Baking Addiction

Chocolate-Cheesecake-Cake-from recipe girl

Chocolate Cheesecake Cake from Recipe Girl

Brownie Mosaic Cheesecake from Mel’s Kitchen Café

Chocolate Cake with Vanilla Frosting …and a good amount of ganache! from Bakerella

Mocha Cupcakes with Chocolate Mousse Frosting from Grace's Sweet Life

Mocha Cupcakes with Chocolate Mousse Frosting from Grace’s Sweet Life

Chocolate and Peanut Butter Birthday Cake from Yums and Loves

Quadruple Chocolate Loaf Cake from Magnolia Days

thin mint truffles from young married chic

Thin Mint Truffles from Young Married Chic

Volcano Cookies from Cookies and Cups

Giant Hershey Kiss Stuffed Chocolate Chip Cookies from Picky Palate

Triple Chocolate Oreo Oatmeal Cookies from Heather’s Dish

And a few chocolate treats from Keep It Sweet:

Chewy Chocolate Covered Pretzel Bars

Cookie Dough Topped Brownies

Chocolate Truffles (milk, dark or white)

Dark Chocolate Kissed Almond Butter

Individual S’mores Brownies

[pinit]

Chewy Gooey Cinnamon Toffee Blondies {Guest Post}

Chewy Gooey Cinnamon Toffee Blondies

Sorry, guys.  I tried to be nice but I just couldn’t keep these from you any longer.  I know, you are barely a week into your resolutions and trying to stay strong, but put down your carrot stick, break out your whisk (no mixer required), and make a batch of these.  Your mouth will immediately thank you because my Chewy Gooey Cinnamon Toffee Blondies are seriously the best blondies I’ve ever had.

Chewy Gooey Cinnamon Toffee Blondies

If you are ready to give into your sweet tooth, or at least save a recipe for your next get together (Super Bowl anyone?), head over to A Culinary Journey with Chef Dennis to get the recipe.  Dennis was kind enough to invite me to guest post and I would love if you would go and say hi!

[pinit]

Triple Chocolate Muffins with a Peanut Butter Swirl

Low Fat Triple Chocolate Muffins with a Peanut Butter Swirl

Today was my first day back to real life.

The early morning alarm, a half-awake trip to the gym, and then that rush to shower, eat breakfast, pack lunch and basically race against the clock to get to the office on time.

Low Fat Triple Chocolate Muffins with a Peanut Butter Swirl

I didn’t like it. Did I spend the last three weeks recovering from extreme burnout? Yes. But unfortunately that didn’t change the feeling of anxiety that weighed me down for the last precious hours of official vacation. The freedom that I felt through the end of the year with my email turned off and my responsibilities at the office on hold was incredible. There was definitely more smiling during that period of time than any other similar block of time over the last twelve months.

Low Fat Triple Chocolate Muffins with a Peanut Butter Swirl

It isn’t that I’m not happy in general, it’s just that I usually put the stress of my job and even my company on my shoulders. I go home at night and think about the model that needs fixing, the capital that needs to be raised or the co-worker that doesn’t get their work done. I think about the meetings that need to be scheduled, the emails that have to be sent and the trips that need to be booked. My old boss once told me not to care so much. He said, “don’t take this the wrong way, but you care too much.” He reminded me that I can only do what I can do and everything else is out of my control. It is just a job.

Low Fat Triple Chocolate Muffins with a Peanut Butter Swirl

So as I get back to the usual routine I’ll try to put aside that usual level of stress that I carry with me and just breathe. I’ll take each day as it comes and put forth the work that makes me feel good and know that everything else will play itself out. And in the moments where I feel that sharp pain in the back of my neck I’ll take a deep breathe, have a cup of tea and when all else fails eat some chocolate.

Oh right, that is what this blog is about! I made these muffins for my 15th (!!!) annual Christmas Eve brunch with my best friends from home and they were a huge hit. Chocolaty and moist like a muffin should be, but even better than that, they are on the lighter side, perfect for your New Years diet resolutions!

Low Fat Triple Chocolate Muffins with a Peanut Butter Swirl
Triple Chocolate Muffins with a Peanut Butter Swirl
Makes 12 muffins

Ingredients:
1 3/4 cup all-purpose flour
1/2 cup packed light brown sugar
1/4 cup unsweetened cocoa powder
1 teaspoon baking powder
1 teaspoon baking soda
1/2 teaspoon salt
1 cup water, warm
1/4 cup canola oil
1 egg, lightly beaten
1 tablespoon red wine vinegar
1/3 cup mini semi-sweet chocolate chips
~1/4 cup chocolate peanut butter (such as PB & Co)

Directions:
Pre-heat oven to 350 degrees
Line a regular sized muffin tin with paper liners or spray with non-stick cooking spray; set aside
In a large bowl, whisk together all dry ingredients (flour through salt); set aside
In a medium bowl, whisk together wet ingredients (water through vinegar) and chocolate chips
Pour wet ingredients into dry ingredients and stir just until combined (there should still be some small lumps in the batter)
Pour batter into prepared muffin tin
Drop a teaspoon of peanut butter onto each unbaked muffin; use a toothpick to lightly swirl peanut butter around top of muffin
Bake muffins 12-14 minutes or until a toothpick comes out clean and muffin tops are firm
Allow muffins to cool a few minutes before removing from pan
Adapted from Cooking Light

Low Fat Triple Chocolate Muffins with a Peanut Butter Swirl

On a separate note, my posts may be a little less frequent over the next several weeks.  Stick with me because good things are to come!

The Top Keep It Sweet Desserts of 2011

I can barely believe that 2011 is coming to an end.  It was one of those years where January feels like it was a lifetime ago, but in the blink of an eye, my vacation is coming to an end and I’m not quite sure I’ve accomplished everything I needed to.  But alas, I think that is how life always is.  The days that you want to last forever are gone as soon as you try to hold on to them, yet there are plenty of weeks that drag on and Friday evening seems to be a lifetime away.

If you told me January 1st where I’d be today, I don’t think I’d be surprised but I think I would be relieved.  This blog is doing really well, and actually has kept me going through some of the rougher days throughout the year.  Comments and emails from readers have been some definite highs.  Matt and I made a significant move into a new apartment where I can walk around in the kitchen and don’t feel like I’m getting whiplash watching TV.

The best part of this year coming to an end is that I am really looking forward to the start of a new year.  I’m not one to make resolutions, but I do like to come up with some goals for myself and big picture ideas of what I want the new year to look like.  Some exciting things may be coming down the road for Keep It Sweet and I can’t wait to see how it all unfolds.  I’ll be putting in a lot of hard work and time, but I have a feeling it will be worth it.  All I can say is, it is a good thing I have such supportive people in my life or I’d never have the guts to do half the things I want to.

And on that note, let’s take a look back at the year and your favorite recipes.  If I’ve learned nothing else from this, I at least know that I’m not the only one around here that likes peanut butter and cookie dough!

10.  Chewy Chocolate Chip Cookies

Chewy Chocolate Chip Cookies 26a

9.  Peanut Butter Caramel “Baked Brownies”

peanut butter caramel brownies 33a

8.  Ooey Gooey Filled Chocolate Chip Cookies with a Crunch

disappearing cookie 4

7.  Peanut Butter Cup Ice Cream Pie

peanut butter cup ice cream pie

6.  Peanut Butter Oatmeal Cookie Dough Balls

Peanut Butter Oatmeal Cookie Dough Balls 12a

5.  Cinnamon & Chocolate Chip Pumpkin Pie Cookies

SONY DSC

4.  Chocolate Chip Cookie Dough Ice Cream Bars

cookie dough ice cream bar 25a

3.  Peanut Butter Cheesecake Brownie Surprise (aka Best Dessert Ever)

best-dessert-ever-14_1

2.  Peanut Butter Cup Cookie Dough Brownie Bites

Peanut Butter Cup Cookie Dough Brownie Bites 2_1

1.  Flourless Chocolate Cookies

flourless chocolate cookie

And though some of those were my favorites too, here are the ten I picked that didn’t make that list:

10.  Margarita Cheesecake Bars

margarita cheesecake bars 6a

9.  Gingersnap Sandwich Cookies with Lemon Cream Cheese Icing

Gingersnap Cookie Sandwiches with Lemon Cream Cheese Icing 8_1

8.  Vanilla Bean and Chocolate Cheesecake Bars

Vanilla Bean and Chocolate Cheesecake Bars

7.  Salted Caramel Buttercream

frosted-cupcake-12_thumb1

6. Chocolate Chip Toffee Oatmeal Cookies with Peanut Butter Frosting

Chocolate Chip Toffee Oatmeal Cookies with Peanut Butter Frosting

5.  Cookie Bottomed Cupcakes

Cookie bottomed Cupcakes

4.  Black Bottom Ice Cream Cupcakes

black bottom ice cream cupcake 8a

3.  Thick and Chewy Peanut Butter Chocolate and Toffee Bars

Peanut Butter & Chocolate Toffee Bars 19a

2.  Chocolate Chip Blueberry Peanut Butter Cookies

Chocolate & Blueberry Peanut Butter Cookies 22c

1.  Pumpkin Pie Cookie Dough Truffle Pops

Pumpkin Pie Cookie Dough Truffle Pops 17

Do you have any Keep It Sweet favorites? I’d love to hear feedback if you baked anything from the blog!

[pinit]

Mini Banana Cupcakes with Mocha Buttercream

Mini Banana Cupcakes with Mocha Buttercream 6

Today I experienced something that I don’t remember experiencing before.

I was sugared out.  After baking three batches of cookies, two batches of cupcakes and “tasting” leftover desserts that have been lingering in my kitchen I am ready to give up sweets for my New Years resolution.

Mini Banana Cupcakes with Mocha Buttercream 5

Or not.  I mean really, do you honestly think I have any desire to do that?  I’m pretty sure that once I eat my next head of romaine lettuce I’ll be back on the baked good bandwagon.  Diet-related resolutions are overrated.  Besides, there are so many more important things to think about like how I can find a happy place in my family, career and friendships (hint: I already have 2 of the three).  You know, and other important things like “how many jars of peanut butter can I store in the apartment before Matt starts to worry (hint: it is more than nine).  And other stuff like how can I get the dishwasher to load, run and unload itself?

In the meantime, while I consider life’s biggest questions, go ahead and make these cupcakes.  The moist banana cupcake topped with a mocha buttercream is a delicious twist on this cake I made over a year ago.
Mini Banana Cupcakes with Mocha Buttercream
Makes ~6 dozen mini cupcakes

Ingredients:
Banana Cupcakes
2 1/2 cups all-purpose flour
1 1/2 teaspoons ground cinnamon
1 1/2 teaspoons baking powder
3/4 teaspoon baking soda
1/2 teaspoon salt
1 cup (2 sticks) unsalted butter, softened
1 1/2 cups granulated sugar
1 teaspoon vanilla
1 tablespoon instant coffee grinds
2 large eggs
6 tablespoons plain greek yogurt
2 cups mashed ripe bananas (~5 medium bananas)

Mocha Buttercream
1/2 cup (1 stick) unsalted butter, softened
4 cups powdered sugar
1/3 cup good quality unsweetened cocoa, sifted
6 tablespoons strong brewed coffee
1 teaspoon vanilla extract

Directions:
Cupcakes
Pre-heat the oven to 350 degrees
Line cupcake tins with paper cups or grease to prevent cupcakes from sticking
Sift dry ingredients (flour, baking soda, baking powder, cinnamon and salt)
Then whisk the dry ingredients together and set aside
Cream together the butter and sugar for a few minutes, until the mixture is light and fluffy
Then add the coffee grinds and vanilla and mix
Add in your eggs, one at a time
Then add in the half the dry ingredients, banana, and yogurt, mixing between each addition
Mix in the remaining dry ingredients at low speed, just until combined; don’t overbeat
Spoon batter into prepared cupcake tins and bake for ~12  minutes or until a toothpick comes out clean; remove baked cupcakes from tin and refill for subsequent batches
Set cupcakes aside to cool

Mocha Buttercream
Using an electric mixer, beat butter on high speed until light and creamy
Add half of sugar and mix on low speed until combined
Add remaining sugar, cocoa, coffee and vanilla; mix until smooth and creamy
Spread onto cooled cupcakes and enjoy

Cupcakes adapted from La Mia Vita Dolce

Mini Banana Cupcakes with Mocha Buttercream 4