All posts by Keep It Sweet

Mini Funfetti Cupcakes

Everyone’s favorite funfetti cupcake in mini form! Homemade funfetti cupcakes from scratch.

The most adorable funfetti cupcakes made from scratch!

I’ve been wanting to bake something from the Sweetapolita cookbook since I got it months ago, but really needed a special occasion to do any of her gorgeous creations justice. L’s birthday seemed the right time! And just a note, I bought Rosie’s cookbook with my own money. Her blog is one of my favorites and every single recipe I’ve ever made of hers has come out amazing. I had no doubt that the cookbook would be incredible (it is!).

Homemade funfetti cupcakes that are mini and oh so cute

So while I could have made one of the many layer cakes included in the cookbook, I wanted to continue with the theme of mini cupcakes instead. The mini desserts really lent themselves to a party where people were sampling several desserts and doing a lot of eating while standing and chatting. These mini funfetti cupcakes, with adorable little animal sprinkles I’d found at TJ Maxx a while ago, were the most popular dessert by far. We refilled the plate of cupcakes a couple of times because they just kept disappearing!

Everyone loves funfetti! These cupcakes were gobbled up at my son's birthday party

The cupcakes were light, fluffy and sweet. The buttercream? It was sweet but flavored with vanilla bean making it extra delicious. I’m going to risk being ostracized by the blog community by saying this, but I don’t usually like funfetti desserts. I’m just not a sprinkles person (insert GASP). But these cupcakes, yeah, they had me at fluffy frosting.

5.0 from 1 reviews
Mini Funfetti Cupcakes
 
Everyone’s favorite funfetti cupcake in mini form! Homemade funfetti cupcakes from scratch.
Author:
Recipe type: Dessert
Makes: ~4 dozen mini cupcakes
Ingredients
Cupcakes
  • 200g (1¾ cup) cake flour, sifted
  • 240g (1 cup + 3 tablespoons) granulated sugar
  • 10g (2 teaspoons) baking powder
  • 3g (1/2 teaspoon) salt
  • 90g (6 tablespoons) unsalted butter, cold and cut into tablespoons
  • 180 milliliters (3/4 cup) milk, at room temperature (I’ve had success with any type of milk)
  • 5 milliliters (1 teaspoon) pure vanilla extract
  • 3 milliliters (1/2 teaspoon) lemon juice
  • 160g (4 large) egg whites at room temperature
  • 60g (~1/2 cup) confetti quins (use something like this for best results, regular sprinkles or jimmies will melt into the batter)
Frosting
  • 280g (1¼ cup) unsalted butter, softened at room temperature
  • 1 gram (1/8 teaspoon) salt
  • 410g (3¼ cup) powdered sugar, sifted
  • 60 milliliters (1/4 cup) whole milk (use whole for best results; if using low fat or fat free milk, start with smaller amount)
  • 10 milliliters (2 teaspoons) vanilla bean past or pure vanilla extract
  • Additional confetti quins or sprinkles for decorating
Instructions
Cupcakes
  1. Pre-heat oven to 350 degrees; line mini cupcake pans with cupcake liners or grease the cups with butter flour or non-stick cooking spray; set aside
  2. Sift the flour, sugar, baking powder and salt into the large bowl of an electric mixer; use paddle attachment to mix on low speed while adding butter one piece at a time; mix until combined (butter pieces should be in pea-sized clumps with dry ingredients)
  3. In a medium bowl or small cup, whisk together half of milk, vanilla and lemon juice and set aside
  4. In a medium bowl or measuring cup, lightly whisk together egg whites and remaining milk; set aside
  5. Turn mixer to medium-low speed and gradually add the vanilla mixture; beat on medium-low speed for five minutes (do not overmix)
  6. Use a spatula to scrape the sides and bottom of the mixing bowl; add ⅓ of the egg white mixture and mix on low speed until combined; repeat with remaining egg white mixture (do not overmix!)
  7. Use a spatula to fold in confetti quins
  8. Distribute batter evenly among cupcake cups (filling each cup about ⅔ of the way full) with a small ladle or cookie dough scoop
  9. Bake for 11-12 minutes or until a toothpick comes out clean from center of cupcakes
  10. Allow cupcakes to cool for five minutes and then remove from pan to cool completely; set aside and make frosting
Frosting
  1. In the large bowl of an electric mixer with a paddle attachment, beat butter and salt on medium speed until pale and creamy (5-10 minutes)
  2. Add ⅓ of sugar and mix on low speed until combined; repeat until all sugar is incorporated; add milk and vanilla and mix on low for one minute; increase speed to medium high and beat until light and fluffy, about six minutes
  3. Pipe immediately or store in refrigerator up to three days and bring to room temperature before using (may need to beat again before use)
  4. Sprinkle additional confetti quins over frosting
  5. Cupcakes best enjoyed within two days; keep lightly covered at room temperature
Notes
Recipes barely adapted from The Seetapolita Bakebook
Cupcakes can be baked in advanced and frozen in an airtight container for one month before frosting and serving; bring to room temperature before frosting

This post contains affiliate links.

Make something from the blog? Be sure to share it on Instagram with the tag #KeepItSweetDesserts.

You might also like:

Meyer Lemon Sprinkle Cookies

Meyer Lemon Sprinkle Cookies

Mini Halloween Confetti Cookie Sandwiches

Mini Halloween Confetti Cookie Sandwiches

Mini Lemon Cupcakes

Mini Lemon Cupcakes

Mini Chocolate Cupcakes with Peanut Butter Buttercream

Rich chocolate cupcakes topped with a light and super creamy peanut butter frosting.

Obsessed with these Mini Chocolate Cupcakes with Peanut Butter Buttercream

L’s birthday party might not have been the picture perfect event I had planned (have I learned nothing after a year of being a mom?), but the desserts, they were pretty on point if I do say so myself. We had the best mini cookies (these and these), brownies, and two kinds of mini cupcakes. I might have overheard parents bribing their kids to eat some salad with the promise of another cupcake. Sounds reasonable to me!

SUCH amazing Chocolate Cupcakes with Peanut Butter Buttercream

These cupcakes are a chocolate and peanut butter lover’s dream. The beauty of the mini cupcake is that it is so much easier to get adequate frosting in each bite without getting it all over your face. Plus, you can eat quite a few before you feel like it’s a crime. Or, if you dare to stray from the classic peanut butter and chocolate combo, you will have plenty of room for tasting other desserts as well.

That peanut butter frosting is to die for!

Mini Chocolate Cupcakes with Peanut Butter Buttercream
 
Rich chocolate cupcakes topped with a light and super creamy peanut butter frosting.
Author:
Recipe type: Dessert
Makes: 5 dozen cupcakes
Ingredients
Chocolate Cupcakes:
  • 260g (~2 cups) all-purpose flour
  • 65g (~3/4 cup) good quality dark unsweetened cocoa powder
  • 10g (1¼ teaspoon) baking soda
  • 3g (1/2 teaspoon) salt
  • 170g (3/4 cup / 1½ sticks) unsalted butter, softened at room temperature
  • 375g (~1¾ cup) granulated sugar
  • 100g (2 large whole) eggs at room temperature
  • 5 milliliters (1 teaspoon) vanilla
  • 325 milliliters (1⅓ cups) brewed coffee
Peanut Butter Buttercream
  • 75g (~1/4 cup + 1 tablespoon) egg whites
  • 32g (~3 tablespoons) granulated sugar
  • Additional 150g (~3/4 cup) granulated sugar
  • 50 milliliters (~3 tablespoons + 1 teaspoon) water
  • 227g (1 cup) unsalted butter, softened and cut into 1-inch cubes
  • 195g (~3/4 cup) creamy peanut butter (do not use natural)
Instructions
Chocolate Cupcakes
  1. Pre-heat oven to 350 degrees
  2. Line mini cupcake pans with cupcake liners or grease the cups with butter flour or non-stick cooking spray; set aside
  3. In a medium bowl, whisk together flour, cocoa, baking soda and salt; set aside
  4. In the large bowl of an electric mixer with paddle attachment, cream butter and sugar; add eggs and vanilla and beat one minute at medium speed
  5. Reduce speed of mixer to low and add ⅓ of the dry ingredients; add ½ of coffee and repeat
  6. Add remainder of dry ingredients and turn off mixer; make sure not to overbeat; if there are any lumps fold them in with a spatula
  7. Distribute batter evenly among cupcake cups (just below rim of cupcake liner) with a small ladle or cookie dough scoop
  8. Bake in center of oven for 11-13 minutes or until a toothpick comes out clean; do not overbake
  9. Set cupcakes aside to cool and make frosting
Peanut Butter Buttercream
  1. Wipe the bowl of an electric mixer, whisk attachment, whisk, spatula and candy thermometer with a paper towel and vinegar to clean (if any grease is on these items your meringue will not work)
  2. Place egg whites in large bowl with whisk attachment and mix on medium speed; gradually add the 1⅛ ounces sugar; keep mixer on
  3. In a medium heavy duty saucepan, combine water and remaining 5¼ ounces of sugar over medium-high heat and whisk together; whisk occasionally until temperature of syrup reaches 248 degrees Fahrenheit
  4. Meanwhile, egg whites should begin to form loose peaks; if this happens before syrup is hot enough, reduce mixer speed to low
  5. Once syrup is hot enough, reduce mixer speed to medium-low and slowly and slowly add syrup to the mixer
  6. Increase speed to medium-high and keep mixer on for 10-15 minutes or until it holds stiff peaks AND bowl has cooled to room temperature
  7. Reduce the speed to medium and add softened butter, a couple of tablespoons at a time, until fully combined; mixture should be smooth and creamy
  8. If there are any lumps, increase speed to high until frosting becomes smooth
  9. Add peanut butter and combine on medium speed until well incorporated and buttercream is light and creamy
  10. Pipe onto cooled cupcakes
Notes
Keep in a cool dry place (best kept refrigerated during summer), covered
Best served within 3 days of baking
Cupcakes slightly adapted from Hershey
Buttercream adapted from the Bouchon Bakery Cookbook
Buttercream best used immediately or store in an airtight container in refrigerator and beat with the paddle attachment of an electric mixer before using

Make something from the blog? Be sure to share it on Instagram with the tag #KeepItSweetDesserts.

This post contains affiliate links.

You might also like:

Peanut Butter and Jelly Cupcakes

Peanut Butter & Jelly Cupcakes

Double Chocolate Stout Mini Cupcakes

Double Chocolate Stout Mini Cupcakes

Vanilla Cupcakes with Chocolate Cream Cheese Icing

Vanilla Cupcakes with Chocolate Cream Cheese Icing

Mini Chocolate Cupcakes with Peanut Butter Buttercream

Keep It Sweet Desserts Weekly Wrap-up 10/24/15

This past week was insane. Last weekend started out amazing celebrating L’s birthday, but his actual party ended up being a bit disastrous. L woke up super early on Sunday morning with the beginning of a cold. Add to that a minimal morning nap and the start of what I believe to be molar teething and he was a not-so-happy birthday boy. I felt so bad because this child is so happy all the time. At least he is a cute crier (trust me, plenty of tears were captured in photo).

Pumpkin lover for life

The week was rough on all three of us to say the least, but we rallied for some fun weekend time at the farm. We met my parents and best friend from growing up for ice cream (L’s first!), animals, and pumpkins galore. I think L actually loves pumpkins even more than me. It actually took a lot of convincing to get him to leave the pumpkin patch! Now I’m just crossing my fingers that things return to normal soon so I can get back to getting anything at all done and share some recipes I have ready for you.

Now for this week’s updates….

New posts on the blog:
Pumpkin Spice Cookie Butter Cookie Sandwiches

Amazing cookie sandwcihes! Made with the pumpkin spice cookie butter

This week’s most popular recipe/blog post:

Pistachio Cupcakes with Brown Sugar Buttercream

Pistachio Cupcakes with Brown Sugar Buttercream

Three favorite things I pinned all week:

Pumpkin Pie Layer Cake from Crepes of Wrath

Homemade Candied Pecan Pumpkin ice Cream Drumsticks from Blogging Over Thyme

Dark Chocolate Caramel Pumpkin Bark from Foodness Gracious

I hope that you all have a wonderful weekend!

Make something from the blog? Be sure to share it on Instagram with the tag #KeepItSweetDesserts.

Pumpkin Spice Cookie Butter Cookie Sandwiches

Chewy pumpkin spiced COOKIE BUTTER cookies sandwiched with buttercream, what could be better?

Amazing cookie sandwcihes! Made with the pumpkin spice cookie butter

I try to have some self-restraint when I bake. Sometimes it works, other times, not so much. I tell myself “I’ll just taste a bite” and then find myself three cookies deep in a hole. At that point, I know it’s time to immediately step away. With these cookie sandwiches? That’s what happened. I thought I could handle a bite or two but I was so wrong. A few cookies later and I was grabbing a tupperware to get them in the freezer and out of my sight asap. I even designated them as Matt’s “work cookies” in order to stop myself from eating them frozen. We all have our moments.

Pumpkin spice cookie butter! get it asap!!

See that empty cookie butter jar above? I purposely used the whole thing in the recipe. Because like the cookies, a near empty jar of cookie butter (and especially this pumpkin spice version) is the equivalent of crack. Dangerous, just dangerous.

Pumpkin Spice COOKIE BUTTER cookie sandwiches!

The cookies end up being on the thinner side, which lends them perfectly to being sandwiched with buttercream. Chilling the dough is necessary, though, or else your cookies will spread too much. If you bake them on the shorter end of timing, they will be chewier. The longer you bake them, the crunchier they will get. I like them soft and chewy so they melt in your mouth with the frosting.

Did I mention that the cookies AND the buttercream are made with pumpkin pie spice cookie butter? The good news is that you could make these with regular cookie butter (speculoos, Biscoff, whatever) as well. Or, you could use the regular version and add a bit of pumpkin pie spice. Trust me, you can’t go wrong either way.

new cookie obsession!

Pumpkin Spice Cookie Butter Cookie Sandwiches
 
Chewy pumpkin spiced COOKIE BUTTER cookies sandwiched with buttercream, what could be better?
Author:
Recipe type: Dessert
Makes: ~2½ dozen cookie sandwiches
Ingredients
Pumpkin Pie Spice Cookie Butter Cookies:
  • 130g (1 cup) all-purpose flour
  • 5g (1 teaspoon) baking soda
  • 113g (½ cup unsalted butter, softened at room temperature
  • 285g (1 cup) pumpkin pie spice cookie butter (found at Trader Joe's)*
  • 160g (¾ cup) granulated sugar
  • 117g (1/2 cup) packed light brown sugar
  • 110g (2 large) whole eggs at room temperature
  • 5 milliliters (1 teaspoon) vanilla extract
Pumpkin Pie Spice Cookie Butter Buttercream:
  • 113g (1/2 cup) unsalted butter, softened at room temperature
  • 100g pumpkin pie spice cookie butter (found at Trader Joe's)*
  • 160g (1 cup) powdered sugar
  • 5 milliliters (1 teaspoon) vanilla extract
Instructions
For the cookies:
  1. In a medium bowl, whisk together flour and baking soda, set aside
  2. Using a mixer, in a large bowl beat speculoos, butter and sugars on high until light and fluffy
  3. Beat in the eggs and vanilla until combined
  4. Reduce speed to low and stir in flour mixture just until combined
  5. Chill dough for 24 hours** for best results
  6. After dough has been chilled, pre-heat the oven to 350 degrees and line baking sheets with parchment paper
  7. Use a small cookie dough scoop to place cookie dough balls (about 1 tablespoon each) on top of parchment paper, 1-2 inches apart
  8. Bake 8-10 minutes and until cookies are lightly browned around the edges***
For the buttercream:
  1. Beat butter and cookie butter in the bowl of an electric mixer on high speed or until light and creamy
  2. Add powdered sugar and vanilla and mix on low speed for one minute; scrape the sides of the bowl; beat on high speed for several minutes or until buttercream is light and fluffy
To Make Cookie Sandwiches:
  1. Match cookies in pairs so that each side is about the same size
  2. Spread about 2 teaspoons of frosting on the bottom of one cookie from each pair
  3. Top other cookie and press down lightly
  4. Store cookies in an airtight container up to three days; may be frozen for up to one month
Notes
*You could make these with regular cookie butter (speculoos, Biscoff, whatever) as well. Or, you could use the regular version and add a bit of pumpkin pie spice.
**Chilling the dough is necessary, though, or else your cookies will spread too much.
***If you bake them on the shorter end of timing, they will be chewier. The longer you bake them, the crunchier they will get. I like them soft and chewy so they melt in your mouth with the frosting.


Make something from the blog? Be sure to share it on Instagram with the tag#KeepItSweetDesserts.

You might also like:

Cookie Butter Pumpkin Bites

Cookie Butter Pumpkin Bites

Cookie Butter & Salted Caramel Cookie Sandwiches

Cookie Butter & Salted Caramel Cookie Sandwiches

No Churn Cookie Butter Ice Cream

No Churn Cookie Butter Ice Cream

Pumpkin Spice Cookie Butter Cookies DREAMY

Keep It Sweet Desserts Weekly Wrap-up 10/17/15

We are busy celebrating L’s birthday and getting ready for his party so I’m going to keep this brief with all the weekly updates below! Hope you are having a great weekend:-)

Now for this week’s updates….

New posts on the blog:

Pumpkin Cookie Ice Cream

HOMEMADE Pumpkin Cookie Ice Cream!

Peanut Butter Snack Cake

Peanut Butter Chocolate Chip Snack Cale

New Mom Real Talk: A Look Back on a Year of Momhood

New Mom Real Talk: A Look Back on a Year of Momhood

This week’s most popular recipe/blog post:

Healthy Apple Cinnamon Muffins

Healthy Whole Wheat Apple Cinnamon Muffins!

Three favorite things I pinned all week:

Apple Ice Cream Cake Roll from Swooned

Toffee Apple Cupcakes from Love and Custard

Caramel Apple Cheesecake Cake from Recipe Girl

I hope that you all have a wonderful weekend!

Make something from the blog? Be sure to share it onInstagram with the tag #KeepItSweetDesserts.

New Mom Real Talk Edition 12

New Mom Real Talk: A look back on a year of momhood

Where do I even begin? I wanted to post a reflection on my first year of being a mom, but I didn’t realize it would be so difficult to put my thoughts and emotions into words.

2 days old

4 days old

It’s been a pretty nostalgic two weeks. The first cool days of fall used to remind me of college (kind of ironic since I went to school in Atlanta), but now I’m taken back to the weeks leading up to L’s birth and the days that immediately followed. That last few weeks of pregnancy were long. There was typical “I-gained-35-pounds” discomfort, I was so sick of being hot, and I just wanted to meet my baby already. I wasn’t even nervous about becoming a mom. I think that the only fear I had was of the unknown in regards to labor. When would it happen? How would I feel? How long would it take? I never shared L’s birth story here, but in summary, I never really went into labor. After a day of lower than normal kick counts, I went in for fluid level monitoring and when L’s heartbeat started going crazy, they broke my water (ouch), nothing progressed and a c-section seemed prudent. Afterwards we found out that it was the right decision and we were blessed to welcome a very healthy baby into the world.

almost 2 months old

NYE

When I think back to those first days in the hospital and then home recovering, it actually feels like it was a very long period of time. I think because in those first couple of weeks I felt like I already knew my baby as well as you can ever know another person. It was an incredible sort of bonding and being that I’m not sure how to express. The nightly wakeups for feedings just became a part of me. I didn’t resent the lack of sleep, in fact, I didn’t complain that I was tired, merely acknowledged it. I was just living and breathing for this new person in my life.

almost 3 months old

4 months old

The first couple of months with a baby really continue like that. A newborn just eats, sleeps, and requires a lot of diaper changes. They do start to stay awake a bit more and interact a bit towards the end of that period, but they really depend on you 100%. While L still depends completely on me and Matt, he can now express himself and his desires. If he wants cheerios, he will go into the bottom of his stroller and grab them. If he wants to get to something, he will crawl, cruise and climb there (or point to you and then the direction he wants to go). If he wants to read, he will grab a book and hand it to you. When did this little baby turn into his own person?  When I talk to people about being a mom, I can’t help but describe the incredible wonder that is watching a baby go from almost nothing to everything.

4 months old

8 months old

From the day I heard L’s heartbeat, through today, I’ve been in love. Each giggle, each new milestone, every single big smile, all of those things take that love to a deeper level than possible. Oh trust me, there are days when Matt gets home and I say “your turn” as soon as he walks through the door. I’ve had moments where I’m ready to cry in frustration. Though, as I reflect on this year as a whole, those moments seem so small and insignificant. Fleeting even. How will I feel three, five, ten and twenty years from now, Gd willing?

10 months old

What an incredible year and journey it has been. It’s changed me in ways I never thought imaginable. I’m a different person as a mom than I ever pictured or imagined. And yet, it’s all so natural, like it was always set to be this way. Thank you, L, for being such a magical part of my life. I couldn’t imagine it any other way. I love you.

11 1/2 months old

A look back on a year of New Mom posts:

Introducing L

Breastfeeding struggles (1 month old post-partum)

Breastfeeding struggles (1 1/2 months post-partum)

A new not-so-normal (2 months post-partum)

Breastfeeding update (3 months post-partum)

Body image (3 months post-partum)

Mom & baby must haves (for a newborn)

Day in the life with a 4 month old

Body image (6 months post-partum)

Tips for travelling with a baby

Real life (7 1/2 months post-partum)

Day in the life with a 7 1/2 month old

How to bake with a baby

Peanut Butter Snack Cake

Moist peanut butter cake studded with chocolate chips for an indulgent snack or simple dessert.

Peanut Butter Snack Cake (perfect for all times of day!)

I’m so excited to share another blogger cookbook with you today! Jennifer of Bake or Break just released her first cookbook, Quick-Shop-&-Prep 5 Ingredient Baking: Cookies, Cakes, Bars & More that are Easier than Ever to Make. I’ve known Jennifer for a few years now (she is a sweetheart!!) and was lucky enough to get an early copy of the cookbook from her publisher.

The theme behind the book is easy desserts. There are recipes as simple as Vanilla Bean Tea Cakes and as complex as Coffee Caramel Chocolate Poke Cake (yes please), but all of them limit themselves to a maximum of five ingredients beyond your normal pantry necessities. Such a great idea to minimize excess grocery trips. Plus, you are likely to have everything you need for a ton of the recipes in the book.

Peanut Butter Chocolate Chip Snack Cale

In going with the book’s theme, I opted to make a pretty easy recipe. And even better than that, it’s a dessert disguising itself as a snack so I can pretty much eat it all day long. This Peanut Butter Snack Cake was very easy to put together, no advanced baking skills needed! Plus, I didn’t have to do any extra grocery shopping because I had all of the ingredients on hand. And as an added bonus, Jennifer included volume AND weight measurements which made me extra happy. I ALWAYS weight my ingredients when I bake.

The results? This snack cake was very much enjoyed. The cake was moist, the chocolate chips were plentiful, and the peanut butter flavor actually seemed to develop more overnight (I love when you can bake a cake a day in advance without stressing that it won’t be as good).


5.0 from 2 reviews
Peanut Butter Snack Cake
 
Moist peanut butter cake studded with chocolate chips for an indulgent snack or simple dessert.
Author:
Recipe type: Dessert, snack
Makes: 12-16 servings
Ingredients
  • 180g (1½ cups) all-purpose flour
  • 5g (1 teaspoon) baking powder
  • 3g (1/2 teaspoon) salt
  • 113g (1/2 cup) unsalted butter, softened at room temperature
  • 128g (1/2 cup) creamy peanut butter
  • 100g (1/2 cup) granulated sugar
  • 50g (1/4 cup firmly packed) light brown sugar
  • 110g (2 large) whole eggs
  • 5 milliliters (1 teaspoon) pure vanilla extract
  • 120 milliliters (1/2 cup) milk (I used almond milk)
  • 170 (1 cup) semi-sweet chocolate chips (I used mini chips)
  • confectioners’ sugar (optional)
Instructions
  1. Pre-heat the oven to 350 degrees; grease an 8x8 baking pan (I used a 9-inch round cake pan); and set aside
  2. In a medium bowl, whisk together flour, baking powder and salt; set aside
  3. In the large bowl of an electric mixer, beat butter, peanut butter and sugars on medium speed until light and fluffy
  4. Add eggs, one at a time, mixing well after each; mix in vanilla
  5. Reduce the mixer speed to low and add ⅓ of the flour mixture followed by ½ of the milk; repeat until no flour is remaining and mix just until combined; stir in chocolate chips
  6. Spread batter into prepared pan and bake 35-40 minutes or until a knife or toothpick comes out clean from center; allow to cool at least 10 minutes before removing from pan
  7. Sprinkle confectioners’ sugar over cake before serving if desired

This post contains affiliate links

Make something from the blog? Be sure to share it on Instagram with the tag #KeepItSweetDesserts.

You might also like:

Peanut Butter Cake with Salted Caramel Cream Cheese Icing and Chocolate Ganache

Peanut Butter Cake with Salted Caramel Cream Cheese Icing and Chocolate Ganache

Chocolate Pound Cake with Peanut Butter Whipped Cream

Chocolate Pound Cake with Peanut Butter Whipped Cream

Peanut Butter & Jelly Cupcakes

Peanut Butter & Jelly Cupcakes

Peanut Butter Snack Cake - perfect all day long!

Pumpkin Cookie Ice Cream

Creamy pumpkin ice cream with huge chunks of pumpkin sandwich cookies. You don’t need an ice cream maker for this fun fall treat!

Super creamy pumpkin ice cream with cookie chunks!

The other week I picked up a bunch of fun fall treats from Trader Joe’s and Target. When I got home, I set them on my counter and said, “inspire me”.

And while this move usually works pretty well with me, I ended up with a million ideas that just didn’t seem interesting enough. But then I thought, what do I always like to make and eat? Ice cream, obviously. And thanks to a few big can’s of pumpkin and some pumpkin sandwich cookies (you can find Oreo and Trader Joe’s versions), a new no churn ice cream was born.

HOMEMADE Pumpkin Cookie Ice Cream! No churn!!!

This no churn ice cream recipe is so easy to make (as usual). It starts with the typical whipped cream and sweetened condensed milk combo but is enhanced with canned, pumpkin, a couple of different spices and huge chunks of cookies. Fall ice cream for the win! And if you are smart, you might just stock up on your pumpkin sandwich cookies so you can make this all year round.

HOMEMADE Pumpkin Cookie Ice Cream!

And just so you know, some things I bake for the blog and give away or use for entertaining. This ice cream? I ate the whole batch myself. I’m not sure if that should be embarrassing or not.

Pumpkin Cookie Ice Cream
 
Super creamy pumpkin ice cream filled with pumpkin sandwich cookies. No ice cream maker needed for this recipe!
Author:
Recipe type: Dessert
Makes: ~2 quarts
Ingredients
  • 475 milliliters (2 cups) heavy cream
  • 1 14-ounce can sweetened condensed milk (I used fat free, but any type would work)
  • 160g (2/3 cup) canned pumpkin (NOT pumpkin pie filling)
  • 10 milliliters (2 teaspoons) vanilla extract
  • 2g (3/4 teaspoon) ground cinnamon
  • ½g (1/4 teaspoon) ground nutmeg
  • 218g (~2 cups) chopped pumpkin sandwich cookies (14 cookies)
Instructions
  1. In the large bowl of an electric mixer with whisk attachment, beat cream on high speed for several minutes, just until stiff peaks form
  2. While whipping cream, in a separate large bowl, whisk together sweetened condensed milk, pumpkin, vanilla, cinnamon and nutmeg
  3. Once cream is ready, fold it into sweetened condensed milk mixture; stir in cookies
  4. Pour ice cream into a regular-sized loaf pan; wrap well with seran wrap or tin foil
  5. Freeze for 10 hours or overnight before serving
Notes
Base from Martha Stewart

Make something from the blog? Be sure to share it on Instagram with the tag #KeepItSweetDesserts.

This post contains affiliate links.

You might also like:

Pumpkin Cinnamon Bun Ice Cream

Pumpkin Cinnamon Bun Ice Cream

Pumpkin & Ginger Ice Cream Sandwich Cookie Cake

Pumpkin & Ginger Ice Cream Sandwich Cookie Cake


Keep It Sweet Desserts Weekly Wrap-up 10/10/15

And we are now another week closer to L’s first birthday! How in the world did that happen? Over the last couple of weeks I’ve gotten extra nostalgic about his early days at home. Those days of constant snuggles were so wonderful. Now I have to treasure the fleeting snuggles as my child wants to be constantly on the move. It makes the instances when he stops to give me a hug or slobbery kiss that much more special. Amazing the changes that take place in such a short time.

Little boy always on the move!

So for this week, other than crying over fleeting time, I’ll be getting organized for his little party and counting down the days to when he gets to eat his sweet treat. I’m making him a special smash cake that is anything but healthy because really, you only turn one once! I can’t wait to see his face when he tastes it.

Now for this week’s updates….

New posts on the blog:

Oreo Pound Cake with Chocolate Cream Cheese Icing

Oreo Pound Cake with Chocolate Cream Cheese Icing - now everyone requests this cake!

Apple and Pear Crisp

Obsessed with this pear and apple crisp!

This week’s most popular recipe/blog post:

Peanut Butter Caramel Candy Cups

Peanut Butter Caramel Candy Cups - dying over these

Five favorite things I pinned all week:

Apple & Goat Cheese Cake from The Cake Blog

Pumpkin Cake with Ginger Chocolate and Meringue from A Cookie Named Desire

Browned Butter Salty Pumpkin Sugar Cookies from The Spiffy Cookie

Brown Butter Pear Crumb Cake from Tutti Dolci

Caramel Macchiato Cake from Blahnik Baker

I hope that you all have a wonderful weekend!

Make something from the blog? Be sure to share it on Instagram with the tag #KeepItSweetDesserts.

Apple and Pear Crisp

Warm apple and pear crisp is comforting and delicious, especially with ice cream!

***This post was originally published five years ago! It’s one of my favorite recipes and was worth sharing again with new photos and an easily printable recipe. And yes, once again, we ate the whole thing in one weekend.***

Warm pear and apple crisp is seriously the best comfort food!

I call this a weekend dessert because it won’t last you more than 2 days.  Whether you live alone or with a significant other, or especially if you have kids, this dessert will be eaten in less than 2 days.  I speak the truth because I baked mine last night and now there is none left.

One week after a trip to Costco, we still had a ton of apples and pears left uneaten.  The apples wouldn’t go bad, but I knew the pears would be browned and bruised in a few days.  Obviously the only solution is baking:-)  Since I have seen so many apple crisps in the blogworld lately, I decided to jump on the bandwagon and make one of my own.

Obsessed with this pear and apple crisp!

Yesterday was an amazing day.  I had no real agenda and was able to take advantage of the cloudless sky and perfect temperatures with a walk along the west side of Manhattan.  It was my first weekend in MONTHS without an event or travelling.  It was amazing!  And really, there aren’t many things better than a perfect fall day that ends with a warm Apple and Pear Crisp topped with vanilla ice cream.

I used 3 bartlett pears and 3 honeycrisp apples (great deal on those at Costco, fyi) to make a crisp that should serve 6.  We got 4 servings…

Sidenote, any dessert served warm with ice cream is a winner in my book

Apple and Pear Crisp
 
Warm apple and pear crisp is comforting and delicious, especially with ice cream!
Author:
Recipe type: Dessert
Makes: 6 servings
Ingredients
Filling:
  • 3 large honeycrisp apples, thinly sliced*
  • 3 ripe but firm medium pears, thinly sliced**
  • 40g (1/4 cup) white whole wheat flour
  • 50g (1/4 cup) granulated sugar
  • 2g (1 teaspoon) ground cinnamon
Topping:
  • 80g (1/2 cup) white whole wheat flour
  • 115g (1/2 cup, tightly packed) brown sugar (light or dark)
  • 1g (1/2 teaspoon) ground cinnamon
  • 71g (5 tablespoons) unsalted butter, chilled
Instructions
  1. Pre-heat oven to 350 degrees
Make filling:
  1. Place apples and pears into a large mixing bowl
  2. Stir in the flour, sugar, and cinnamon until all fruit is coated
  3. Spread out the filling in a 9×9 pan or baking dish
Make topping:
  1. Cut your butter into the mixture of brown sugar, flour and cinnamon
  2. Use fingers to combine until you are left with small lumps and pour it over the apples
  3. Bake for about 50-60 minutes or until fruit is tender and bubbling and the topping is browned
  4. Allow to cool for a few minutes and then serve topped with ice cream and or whipped cream
Notes
*honeycrisp worked really well, a mixture of braeburn and granny smith would be good for a sweet and tart combination; peeling optional
**I used bartlett but bosc would also work; peeling optional

Amazing pear and apple crisp, we are obsessed

Make something from the blog? Be sure to share it onInstagram with the tag #KeepItSweetDesserts.

You might also like:

Skillet Apple Crisp with Brown Butter Sauce

Skillet Apple Crisp with Brown Butter Sauce

Winter Fruit Crisp

Winter Fruit Crisp

Apple Pie Crumble Bars

Apple Pie Crumble Bars

Oreo Pound Cake with Chocolate Cream Cheese Icing

Rich and ultra delicious oreo pound cake layered with luscious chocolate cream cheese icing.

Oreo Pound Cake with Chocolate Cream Cheese Icing <- want for my next birthday!

When you are a dessert blogger AND have run your own bakery, the expectations for birthday desserts are exponential. Not only that, but I always want to top the previous year’s birthday dessert with something new and better. Combine that with the fact that Matt actually baked for my birthday this year and last, his birthday dessert had to be pretty epic.

Holy CAKE - Oreo Pound Cake with Chocolate Cream Cheese Icing

Luckily, this cake is epic. I took an always successful cream cheese pound cake and loaded it up with oreos and baked it in layers to make way for some extra perfect chocolate cream cheese icing. This cake is no joke. The amount of butter and cream cheese used is pretty shameful, but it is completely worth it. In fact, Matt wouldn’t even share the leftovers with anyone (except me, phew!) and my father-in-law requested a re-make for his birthday as well.

Oreo Pound Cake with Chocolate Cream Cheese Icing - now everyone requests this cake!

I promise, if you bake this it will not disappoint!

EPIC Oreo Pound Cake!

Oreo Pound Cake with Chocolate Cream Cheese Icing
 
Rich and ultra delicious oreo pound cake layered with luscious chocolate cream cheese icing.
Author:
Recipe type: Dessert
Makes: 12-16 servings
Ingredients
Chocolate Chip Cream Cheese Pound Cake
  • 340g (1½ cups) unsalted butter, softened at room temperature
  • 227g (1 8-ounce block regular or light cream cheese)
  • 640g (~3 cups) granulated sugar
  • 330g (6 whole large) eggs at room temperature
  • 325g (~3 cups) cake flour, sifted
  • 5 milliliters (1 teaspoon) pure vanilla extract
  • The inside of 1 vanilla bean
  • 1g (1/4 teaspoon) salt
  • 127g (~1½ cups) chopped regular Oreos (from 10 cookies)
Chocolate Cream Cheese Icing
  • 227g (1 8-ounce block) regular or light cream cheese, softened at room temperature
  • 227g (1 cup) unsalted butter, softened at room temperature
  • 480g (3 cups) powdered sugar
  • 75g (3/4 cup) unsweetened cocoa powder
  • 5 milliliters (1 teaspoon) pure vanilla extract
Instructions
Make the cake:
  1. Pre-heat oven to 325 degrees; grease and flour two 9-inch round cake pans; line bottoms of pans with parchment paper and grease and flour the parchment paper; set aside
  2. In the bowl of an electric mixer, beat butter and cream cheese on medium-high speed until light and creamy; add sugar and beat mixture until light and fluffy; scrape the sides of the bowl
  3. Add eggs, one at a time, mixing on medium speed between each one until incorporated; mix in vanilla bean and extract on medium speed until combined and then scrape the sides of the bowl
  4. With mixer on low, slowly add the flour and the salt just until combined; do not overmix
  5. Remove bowl from mixer and fold in Oreos
  6. Pour batter into prepared baking pans and bake 40-50 minutes or until a knife comes out clean from center of each layer; edges will brown slightly; do not overbake
  7. Set aside cake to cool and prepare icing
Make the icing:
  1. Beat cream cheese on high speed with an electric mixer until smooth
  2. Add butter and beat until light and creamy; scrape the sides of the bowl with a spatula and beat for another minute
  3. Add cocoa powder and mix on low speed until combined
  4. Add half of the powdered sugar and mix on low speed until combined
  5. Add remaining powdered sugar and vanilla and mix on low speed until combined; scrape the sides of the bowl again and beat on high speed until icing is light and fluffy
Notes
Cake very slightly adapted from Brown Eyed Baker


Make something from the blog? Be sure to share it on Instagram with the tag #KeepItSweetDesserts.

You might also like:

3-Layer Cookies ‘n Cream Cake

3-Layer Cookies ‘n Cream Cake

Fudgy Black and White Devil’s Food Cake

Fudgy Black and White Devil's Food Cake

Mini Cookies and Cream Cupcakes

Mini Cookies and Cream Cupcakes

The most amazing oreo birthday cake!

Keep It Sweet Desserts Weekly Wrap-up 10/3/15

It actually was a really good week here. Some days were a bit long but I broke things up with a special dinner date! Erin from Well Plated was in town and we met up for a fantastic meal at ABC Kitchen on Wednesday. Our date lasted over three hours and was just so fun. The couple of ginger margaritas that I enjoyed didn’t hurt either. And yes I did suffer a mom hangover on Thursday. Not fun, but worth it.

11 1/2 months old!

This is L’s “I look so cute in overalls and a windbreaker that mom bribed me with the remote to take a picture” face.

Tonight is my sister’s engagement party and I’m so excited for all the celebrating! My parents have been planning for a while now and I know there will be so many special details. I’ll sneak some pictures onto snapchat (@keepitsweet_LL). I’ll try to report back on all the desserts, too. There will be a lot of them!

I hope everyone is staying dry and safe this weekend!

Now for this week’s updates….

New posts on the blog:

Healthy Apple Cinnamon Muffins

Healthy Whole Wheat Apple Cinnamon Muffins!

Oatmeal Cookie Wedges with Cinnamon & Chocolate Chips

Seriously good oatmeal cookie wedges! Perfect for entertaining

New Mom Real Talk: Five Tips on How To Bake With a Baby

How to Bake With a Baby - 5 tips you need!

This week’s most popular recipe/blog post:

One Bowl Pumpkin Blondies

Amazing (ONE BOWL!!) Pumpkin Blondies

Five favorite things I pinned all week:

Pumpkin Spice Latte Cupcakes with Caramel from

Maple Spice Pound Cake from Tutti Dolci

Caramel Apple Swirl Cheesecake Ice Cream from Cupcakes and Kale Chips

Sesame and Poppy Seed Bagel Loaf from Warm Vanilla Sugar

Spicy Roasted Grapefruit Margaritas from We Are Not Martha

I hope that you all have a wonderful weekend!

Make something from the blog? Be sure to share it on Instagram with the tag#KeepItSweetDesserts.

New Mom Real Talk Edition 11

New Mom Real Talk: 5 Tips on How to Bake with a Baby

Apparently it’s been four months since my last New Mom post. There has been been an amazing amount of change from 7 1/2 months to 11 1/2 months. At that point, L had only been mobile for a few weeks and now he is on the verge of walking. He basically spends most of the time giving me mini heart attacks while he climbs, dives and attempts flying. Adventures in momhood to say the least!

5 Tips on How To Bake with a Baby!

What I want to talk about in this post, though, is baking with a baby. A lot of people ask me how I find the time to bake with a little one so I thought it would be a useful blog post to share. And when I say baking with a baby, I don’t mean having L participate (though I look forward to the opportunity!), I mean figuring out how to bake around your baby’s schedule and needs. Note that I don’t have any childcare except for the occasional visit from a grandma.

1) Plan ahead: Most weekends, I look at my editorial calendar and then make a schedule of baking and photography for the week. I try to do 99% of this work while L is napping so I have about 3 hours / day. However, that is also the time I use to workout, shower (er….), catch up on computer work, cook dinner, etc.

Sidenote: someone recently asked me if I could put L in the bathroom to “sit and play” while I showered. I couldn’t help but laugh at the thought. That child would get into everything, and I mean everything if left to his own devices. Nice idea but, no.

If you aren’t a blogger, you luckily don’t have to worry about the daytime light and photography issue. If you are a baking blogger, like me, and your child naps twice a day, consider baking during nap number one and then take pictures during nap number two. That should give your recipe enough time to cool, etc. and hopefully you still have some good light (winter will be interesting…).

How to Bake With a Baby - 5 tips you need!

Make cookie dough early in the week and have a few options of times when you can bake the cookies.

2) Have a back-up plan: Babies may be on schedules, but they also have their own agendas. I can’t tell you how many times I thought I had it all figured out and L would surprise me by refusing to nap in his crib or waking up early from a nap. For the days when naps don’t happen, I send my condolences. Kidding (sort of), but that definitely throws a wrench in things.

From a mom perspective, my first objective is to get L to take a nap in some shape or form which means rocking/nursing him (not an option for long) to sleep, a stroller nap or a car nap. Obviously none of these options gives you time in the kitchen which is why you need a back-up plan. More specifically, have extra time in your schedule for when something like this happens. Consider baking when dad comes home (not ideal if you want a chance to unwind with your husband, are physically exhausted at this point, or just want to get other work done. Alternatively, save the work for the next nap. Eventually it will happen!

In terms of an early nap wake-up, this can be so frustrating! You are in the groove, you’ve got a cake in the oven, cookies set up to photograph by the window, and ice cream chilling in the freezer. Rock star mom! All of the sudden your little one wakes up and that forty five minute window you thought you had for productivity disappears. Think again. Get your baby, calm him down (because let’s be honest, babies never wakeup early from naps in a “good” mood), and get him entertained. Depending on how much time I need to buy, I’ll occasionally put L on the kitchen floor with a bowl and wooden spoon and have him “stir”. If I really need a good amount of time, or I need him to stay away from a photo shoot, I get him in the high chair with food or entertainment. Cheerios were invented for a reason! If your baby is young enough for a bouncy seat or  jumperoo, even better!

How to bake with a baby - 5 great tips!

3) Prioritize: What is imperative for you to get done? Is it that you just need something, anything, to bring for dessert to a party? Pick your easiest recipe. Do you have to make a big batch item for the school potluck? Make something like a blondie or brownie. Are you a blogger that has a sponsored post deadline quickly approaching? That should obviously be first on your list. Figure out what needs to get done asap and do that  first because you never know when your next nap time plan will go amok (see #2). And things like dishes? They can wait until later. I’m sure your husband is happy to help you load and unload the dishwasher.

4) Be organized and work efficiently: This really goes along with number 1! When you are planning things  out, think about what types of recipes you can make at the same time. For  example, cakes need plenty of baking time, can you use that time to make a cookie dough that you will be chilling overnight anyway? Or maybe photography yesterday’s recipe while the cake is baking.

When you know you have a day full of baking projects, take your butter and eggs out of the fridge in the morning so they will be ready for you at room temperature. Better yet, get most of your ingredients out along with special cake pans, etc. so that as soon as you have the chance to get to work, everything is ready to go! I’ve had times where I put L down for a nap only to realize that the specific cake pan I needed was in his room. Not to mention the time I woke him up while trying to get to a new bag of brown sugar. And yes, we have our “pantry” in L’s room. #apartmentproblems

How to Bake With a Baby!

Bake cake layers on day one and make frosting on day two to fit a layer cake into your schedule!

5) Make it fun: Even if you are blogger and baking has become a part of your job, don’t forget to have fun with it! You probably started baking because you loved it and don’t let the time constraints and challenges diminish that. If your baby is small enough, wear him while you bake (ah, I miss those days!). If he is old enough, find ways that he can “help” you. And if all else fails, save those cookies for stress eating later. Magic.

Any additional tips you have to share? Leave them in the comments!

Oatmeal Cookie Wedges with Cinnamon & Chocolate Chips

Chewy oatmeal cookie bars filled with cinnamon and chocolate chips then drizzled with extra chocolate make a delicious and pretty party treat.

Chewy Oatmeal Cookie Wedges with Cinnamon & Chocolate Chips

It’s so exciting when one of my friends publishes a cookbook! And in the world of blog friends, it seems to be happening more and more often. Lucky for me, my friend Miriam at Overtime Cook was generous enough to send me a copy of her newly published Something Sweet!

Miriam is a Jewish blogger from NYC that often has holiday-friendly desserts, but her cookbook is really just perfect for anyone with a sweet tooth. And given that she offers many dairy-free baking options (helpful if you are keeping kosher), it could even be useful for the dairy allergy dessert lovers in your life. Delicious dessert for everybody!

Seriously good oatmeal cookie wedges! Perfect for entertaining

The cookbook is full of gorgeous photos and a huge variety of desserts. In addition to these oatmeal cookie wedges, I really want to try Miriam’s fruity pebble cookies and peanut butter and banana chocolate chip bundt cake (duh). It was actually really hard to pick what recipe to try first but alas I settled on something that would be easy and fast to make.

These oatmeal cookie wedges are just that, easy! They are chewy, crunchy and full of flavor (lots of cinnamon plus bursts of chocolate!) but unlike baking cookies, you don’t have to spoon out each individual serving. Instead, you spread the batter into two cake pans and bake that way. So simple!

Chewy Oatmeal Cookie Wedges with Cinnamon & Chocolate!!!

5.0 from 2 reviews
Oatmeal Cookie Wedges with Cinnamon & Chocolate Chips
 
Chewy oatmeal cookie bars filled with cinnamon and chocolate chips then drizzled with extra chocolate make a delicious and pretty party treat.
Author:
Recipe type: Dessert
Makes: 24 servings
Ingredients
  • 237 milliliters (1 cup) oil (I used canola)
  • 212g (1 cup) granulated sugar
  • 234g (1 cup tightly packed) brown sugar
  • 165g (3 whole large) eggs
  • 5g (1 teaspoon) baking soda
  • 5 milliliters (1 teaspoon) vanilla extract
  • 2g (1 teaspoon) ground cinnamon
  • 3g (1/2 teaspoon) salt
  • 30 milliliters (2 tablespoons) milk (I used almond milk)
  • 262g (2 cups) all-purpose flour
  • 120g (1½ cups) old-fashioned oats
  • 90g (3/4 cup) cinnamon chips*
  • 90g (1/2 cup) semi-sweet chocolate chips* (original recipe calls for 1 cup total of add-ins)
  • optional: additional chocolate for drizzling
Instructions
  1. Pre-heat oven to 350 degrees; grease 2 9-inch round baking pans (I recommend lining with parchment paper for easy removal) and set aside
  2. In the large bowl of an electric mixer, beat oil and sugars on medium speed until combined
  3. Add eggs, baking soda, vanilla, cinnamon, salt and milk; beat until smooth
  4. With mixer speed reduced to low, carefully add flour and mix just until combined; add oatmeal and mix just until combined; stir in chips and do not overmix
  5. Divide cookie dough evenly between baking pans
  6. Bake for 30 minutes or until center has just set; do not overbake
  7. Allow to cool completely before removing from pan and slicing
  8. Optional: once cookies have cooled, melt chocolate and drizzle over cookies
  9. Store in an airtight container or ziplock bag; best enjoyed within 4 days of baking kept frozen up to two months
Notes
Recipe from Something Sweet (with permission)
*replace cinnamon chips and chocolate chips with DAIRY-FREE chocolate chips if making dairy-free

Oatmeal Cookie Wedges - pretty dessert for parties!

*This post contains affiliate links

Make something from the blog? Be sure to share it on Instagram with the tag #KeepItSweetDesserts.

You might also like:

Salted Caramel & Peanut Oatmeal Cookies

Salted Caramel & Peanut Oatmeal Cookies

Chocolate Chunk Pistachio Oatmeal Cookies

Chocolate Chunk Pistachio Oatmeal Cookies

Cinnamon Chip Oatmeal Blondies

Cinnamon Chip Oatmeal Blondies

Healthy Apple Cinnamon Muffins

A kid-friendly breakfast or snack, these healthy apple muffins are made with whole wheat flour and naturally sweetened!

Really Good Healthy Apple Cinnamon Muffins

When I think back to the first month after L was born, it comes back as a haze. Of course I remember the unbelievable sense of contentment I got when I’d snuggle on the couch with L curled up on my chest and the incredible connection that we seemed to make immediately. But while it was an amazing month, the limited broken sleep and c-section recovery turned my memories into a bit of a blur.

Healthy Whole Wheat Apple Cinnamon Muffins!

Want to know what else I remember clearly though? The hunger. There were only a couple of hours between feedings to rest and catch up on sleep so I’d sometimes choose my bed over food. But then, I’d wake up, I’d find myself starving with limited time to digest anything. I’d need food at that moment. Even more than that, food I could likely eat while holding and/or nursing a baby.

Healthy apple cinnamon muffins that are kid friendy!

So when my new neice was born a few weeks ago, I wanted to make something for my sister-in-law that could help with those moments of starvation when you don’t have time to think about what you are going to eat. You just need something ready and one-hand friendly. These healthy apple muffins really are the perfect solution for that kind of moment. They are full of whole grains, chopped apples and limited in sugars. In fact, I used maple syrup so there is no refined sugar at all! A healthy snack that tastes good and is quick to make and eat. It doesn’t get better than that when you have a newborn (okay, chocolate chunk cookies might be better than that).

Healthy Apple Cinnamon Muffins
 
A kid-friendly breakfast or snack, these healthy apple muffins are made with whole wheat flour and naturally sweetened!
Author:
Recipe type: Breakfast, Brunch, Snack
Makes: 12 muffins
Ingredients
  • 118 milliliters (1/2 cup) skim milk
  • 59 milliliters(1/4 cup) canola oil
  • 57g (1/4 cup) fat free plain greek yogurt
  • 118 milliliters (1/2 cup) maple syrup
  • 55g (1 large) whole egg at room temperature
  • 5 milliliters (1 teaspoon) vanilla extract
  • 160g (~1 cup) white whole wheat flour
  • 130g(~1 cup) all purpose flour
  • 5g (1 teaspoon) baking powder
  • 1g (1/4 teaspoon) baking soda
  • 2g (1 teaspoon) ground cinnamon
  • 1g (1/4 teaspoon) salt
  • 165g (1¾ cups) finely chopped Granny Smith apples (1-2 depending on size)
Instructions
  1. Pre-heat oven to 350 degrees; line a regular sized muffin pan with paper liners or spray with non-stick cooking spray
  2. In a medium bowl, whisk together wet ingredients (milk through vanilla) and set aside
  3. In a large bowl, whisk dry ingredients (flour through salt); form a well in center of dry ingredients and pour wet ingredients into the well
  4. Stir just until combined
  5. Fold in apples
  6. Distribute batter evenly in muffin pan and bake 15-20 minutes or until a toothpick comes out clean from center
  7. Allow to cool for five minutes before carefully removing muffins from pan; best served immediately
  8. Leftovers can be stored in an air-tight container at room temperature for a couple of days or in freezer for a few weeks

Make something from the blog? Be sure to share it on Instagram with the tag #KeepItSweetDesserts.

You might also like:

Gluten-Free Pumpkin Muffins

Gluten-Free Pumpkin Muffins

Cookie Butter Lava Whole Wheat Banana Muffins

Cookie Butter Lava Whole Wheat Banana Muffins

Whole Wheat Pistachio Muffins

Whole Wheat Pistachio Muffins


Keep It Sweet Desserts Weekly Wrap-up 9/26/15

Having a holiday on Wednesday made this the weirdest week but a good one! Last weekend we actually got to see a lot of friends we hadn’t seen in a while which was such a treat. Between an afternoon at the park, brunch in the city and dinner at our friends’ brand new house, L sure got in his social calls. With going back and forth to Philly mid-week, though, I’m glad this weekend will be a little less busy.

Baby in drawer

Meanwhile, my parents have more toys than we do for L, but climbing into the kitchen drawer is his new favorite activity. Of course!

Oh, and I almost forgot, I got to see Joanne for a lunch / ice cream date yesterday! Did you know she just got her PhD?! Now she is going on to be a double doctor. Go congratulate her!

Now for this week’s updates….

New posts on the blog:

Chocolate Pound Cake with Peanut Butter Whipped Cream

Chocolate Pound Cake with Peanut Butter Whipped Cream!!!

One Bowl Pumpkin Blondies

Amazing (ONE BOWL!!) Pumpkin Blondies

This week’s most popular recipe/blog post:

Easy Low Fat Pumpkin Sheet Cake

Easy Low Fat Pumpkin Sheet Cake from Keep It Sweet Desserts

Five favorite things I pinned all week:

Peanut Butter and Jelly Sandwich Cake from Sugar Hero

Pumpkin Pie Carmelitas from Willow Bird Baking

Pumpkin Spice Latte Rice Krispie Treats from Shugary Sweets

Apple Oatmeal Pancakes from Cookie and Kate

Chipwich Ice Cream Cake from Cookies and Cups

I hope that you all have a wonderful weekend!

Make something from the blog? Be sure to share it onInstagram with the tag #KeepItSweetDesserts.

One Bowl Pumpkin Blondies

Amazing pumpkin blondies that are easy to make. With chewy centers and crispy crackly tops, you will love this one-bowl dessert.

Amazing (ONE BOWL!!) Pumpkin Blondies

My sister’s engagement party is just a couple of weeks away and I’m so excited! It feels like a big kick off to about a year of celebrations. Of course for her shower and bachelorette party I’ll have to do a ton of planning, but for this event, I didn’t have a lot of responsibilities. In fact, my mom will have about 64 different desserts (or so it seems), and just asked me to make pumpkin blondies. Of course I was happy to oblige.

Lucky for me, these pumpkin blondies are not only delicious, but they are also so easy to make. Only one bowl (okay, really  a pot) is required so there is less cleanup, too! A recipe that allows me to stir by hand, put something in the oven and do a yoga workout during naptime is pretty ideal. I really need to start making one-bowl desserts more often.

Amazing (ONE BOWL!!) Pumpkin Blondies

5.0 from 2 reviews
One Bowl Pumpkin Blondies
 
Amazing pumpkin blondies that are easy to make. With chewy centers and crispy crackly tops, you will love this one-bowl dessert.
Author:
Recipe type: Dessert
Makes: 24 blondies
Ingredients
  • 700g (~3 cups firmly packed) light brown sugar
  • 170g (3/4 cup) unsalted butter
  • 120g (½ cup) canned pumpkin (NOT pumpkin pie filling)
  • 110 (~2 large) whole eggs at room temperature
  • 10 milliliters (2 teaspoons) vanilla extract
  • 460g (~3 cups + 6 tablespoons) all-purpose flour
  • 5g (1 teaspoon) baking powder
  • 5g salt (1 teaspoon)
  • 3g (1½ teaspoons) ground cinnamon
  • 1g (½ teaspoon) ground nutmeg
  • 90g (3/4 cup) white chocolate chips
  • 90g (3/4 cup) cinnamon chips
Instructions
  1. Pre-heat oven to 350 degrees
  2. Line a 13×9 pan with parchment paper; set aside
  3. In a medium heavy duty saucepan, heat brown sugar, butter and pumpkin over medium heat and stir constantly until melted into a thick golden brown mixture; remove from heat
  4. Whisk in eggs and vanilla until combined
  5. Whisk in flour, salt, baking powder, cinnamon and nutmeg just until combined; stir in chips
  6. Pour batter into prepared pan; Bake for 36-40 minutes or until top begins to crack and a knife or toothpick comes out clean
  7. Allow to cool before removing from pan and slicing; wrap leftovers tightly in seran wrap or tin foil and enjoy within one week; can be frozen for up to one month


Amazing (ONE BOWL!!) Pumpkin Blondies

Make something from the blog? Be sure to share it on Instagram with the tag #KeepItSweetDesserts.

You might also like:

Apple Cinnamon Blondies

Apple Cinnamon Blondies

Pumpkin Blondies with Caramelized White Chocolate Swirl

Pumpkin Blondies with Caramelized White Chocolate Swirl

Cinnamon Chip Oatmeal Blondies

Cinnamon Chip Oatmeal Blondies

Chocolate Pound Cake with Peanut Butter Whipped Cream

Rich dark chocolate pound cake topped with creamy, light and delicious peanut butter whipped cream.

Chocolate Pound Cake w Peanut Butter Whipped Cream

I have to be honest, when I first made this recipe, I was nervous that it wouldn’t meet my high expectations for dessert, but I was proved wrong. That says a lot because finding a chocolate cake that can stand up on its own is pretty darn hard. But this chocolate pound cake, full of rich dark cocoa powder and a ton of grated chocolate (hello, arm workout!) is certainly a cake that is good enough to eat alone. The dark chocolate flavor is poignant and the cake is dense and rich just like a pound cake should be.

But while you can eat the cake alone, I kind of think it calls for whipped cream. And while regular whipped cream would work, peanut butter whipped cream really seals the deal. I mean, if we are going to go there, you might as well really go there! Chocolate and peanut butter lovers, rejoice!

For those observing the holiday, I hope you all have an easy fast!

5.0 from 1 reviews
Chocolate Pound Cake with Peanut Butter Whipped Cream
 
Rich dark chocolate pound cake topped with creamy, light and delicious peanut butter whipped cream.
Makes: 8 –12 servings
Ingredients
For the pound cake
  • 140g (~1¼ cups) cake flour
  • 56g (2/3 cup) high quality dark unsweetened cocoa
  • 2½g (1/2 teaspoon) salt
  • 118 milliliters (1/2 cup) whole milk
  • 2g (2 teaspoons) espresso powder
  • 170g (3/4 cup) unsalted butter, softened at room temperature
  • 248g (1¼ cups) granulated sugar
  • 165g (3 large) whole eggs, at room temperature
  • 15 milliliters (1 tablespoon) vanilla extract
  • 120g grated dark chocolate (I used 72%)
For the whipped cream
  • 237 milliliters (1 cup) heavy whipping cream, cold
  • 20g (2 tablespoons) powdered sugar
  • 50 grams (3 tablespoons) creamy peanut butter (do not use “natural”)
  • 5 milliliters (1 teaspoon) vanilla extract
Instructions
For the pound cake
  1. Pre-heat oven to 350 degrees; generously grease a regular sized loaf pan with non-stick cooking spray or butter
  2. Sift cake flour, cocoa powder and salt into a medium bowl; set aside
  3. In a small bowl or measuring cup, stir together milk and espresso powder; set aside
  4. In the large bowl of an electric mixer with a paddle attachment, combine the butter and sugar on medium high speed for several minutes or until light and fluffy
  5. Reduce speed to medium and add eggs, one at a time, mixing until combined; mix in vanilla
  6. Reduce speed to low and slowly add half of sifted dry ingredients; carefully add all of milk and then add remaining dry ingredients mixing just until combined
  7. Remove bowl from mixer and fold in grated chocolate
  8. Pour batter into prepared baking pan and bake in center of oven for 60-70 minutes or until a knife comes out clean from center
  9. Allow cake to cool on a wire rack for twenty minutes; run a knife around edges of loaf before carefully removing from pan
For the whipped cream
  1. While pound cake is cooling, chill the large bowl and whisk from an electric mixer in refrigerator
  2. When ready to make whipped cream (right before serving), place all ingredients into bowl
  3. Beat on medium-high speed for two to three minutes or until stiff peaks form
  4. Serve in a bowl alongside pound cake or dollop onto slices before serving
Notes
Cake barely adapted from Sugar Hero
Store cake wrapped tightly with seran wrap. Enjoy within two days of baking for best results, or freeze for up to one month
Whipped cream should be made just prior to serving for best results

Chocolate Pound Cake with Peanut Butter Whipped Cream!!!

Make something from the blog? Be sure to share it on Instagram with the tag #KeepItSweetDesserts.

You might also like:

Extra Dark Chocolate Cake with Cookie Butter ButtercreamExtra Dark Chocolate Cake with Cookie Butter Buttercream

Fudgy Black and White Devil’s Food Cake

Fudgy Black and White Devil's Food Cake

Chocolate Chip Cream Cheese Pound Cake with Whipped Chocolate Ganache

Chocolate Chip Cream Cheese Pound Cake with Whipped Chocolate Ganache

Keep It Sweet Desserts Weekly Wrap-up 9/19/15

Thanks to the holidays, this past week just flew by! We had a great time celebrating Matt’s birthday last weekend (dinner, by the way, was good but not amazing) and now Matt and I are just regretting that his birthday cake (recipe to come) is all gone. Let’s just say that there was a lot of butter involved and it was well worth it.

L is 11 months old!

11 months old

On a completely different note, I finally upgraded my Dropbox account after not knowing what to do about cloud backup. I really liked how well the app was working on my phone to back up the endless photos and now we have enough space to really back up everything. I know there are a billion options for cloud storage, but if you want me to send you an invitation for Dropbox let me know.

Now for this week’s updates….

New posts on the blog:

Chocolate Covered Peanut Butter Ritz Sandwiches

These Chocolate Covered PB Ritz Sandwiches are so much fun!

Mini Pumpkin Chocolate Chip Cookies

CHEWY mini pumpkin chocolate chip cookies

This week’s most popular recipe/blog post:

Easy Low Fat Pumpkin Sheet Cake

Easy Low Fat Pumpkin Sheet Cake from Keep It Sweet Desserts

Five favorite things I pinned all week:

Caramel Apple Butter Layer Cake from Chocolate Moosey

Salted Caramel Apple Cupcakes from Blahnik Baker

Apple Oatmeal Crumb Muffins from Baked by Rachel

Oreo Cookie Layer Cake from Confessions of a Cookbook Queen

One Pot Chili Mac from Shugary Sweets

I hope that you all have a wonderful weekend!

Make something from the blog? Be sure to share it onInstagram with the tag #KeepItSweetDesserts.

Mini Pumpkin Chocolate Chip Cookies

These are the perfect pumpkin cookie. Crispy edges, chewy middle and lots of chocolate chips!

Mini Pumpkin Chocolate Chip Cookies!!!!!

We are getting closer to L’s birthday, just under a month to go. In fact, I can see so many ways he is now transitioning from baby to toddler (insert many, many tears). There’s the way he arches his back and immediately turns around to stand in his car seat and play rather than sit so I can buckle him in. There are the moments when we are reading books and he is very, very opinionated about which ones we read. Farm books are almost a guaranteed win but my favorite Little Blue Truck is not so popular these days. Oh yeah, and last week he started diving towards his crib instead of letting me walk him around with his head rested on my shoulder before naps and bedtime. So amazing to watch him grow, yet so very bittersweet.

Mini pumpkin chocolate chip cookies - chewy and so delicious!

And as we are getting closer to his birthday, I’m realizing I really need to get my you-know-what together for a menu plan. I already told you about all the mini cookies I want to make but after that I’m still all over the place. I’m also thinking about doing cookie favors (it’s a mostly adult / family party) but I don’t even know what flavors to make. I think I’m in a little bit of denial that his birthday will be here before we know it.

CHEWY mini pumpkin chocolate chip cookies

The good news? These cookies. If the only thing to eat at the party is these perfect mini pumpkin cookies, I don’t think anyone will mind. Seriously. I knew they were going to be winners before they even went into the oven (hello, delicious cookie dough). The flavor and texture is insanely perfect. It’s hard to get that in a pumpkin cookie but here are a few reasons they are still the perfect balance of crispy and chewy:

  1. 1) Canned pumpkin is limited to just 1/3 of a cup (high amounts of canned pumpkin = cakey cookies). Don’t worry, we make up for it with seasonings!
  2. 2) The pumpkin is cooked with the butter to reduce some of the excess liquid and enhance flavor.
  3. 3) There are no eggs! Eggs sometimes make baked goods cakey so I took them out. Pumpkin cookie dough for everyone!

So if you make one new cookie recipe this month, please do me a favor and make it this recipe for mini pumpkin chocolate chip cookies.

5.0 from 1 reviews
Mini Pumpkin Chocolate Chip Cookies
 
These are the perfect pumpkin cookie. Crispy edges, chewy middle and lots of chocolate chips!
Author:
Recipe type: Dessert
Makes: 5 dozen cookies
Ingredients
  • 170g (3/4 cup) unsalted butter, softened at room temperature
  • 81g (1/3 cup) canned pumpkin
  • 262g (~2 cups) all-purpose flour
  • 3g (½ teaspoon) baking soda
  • 5 grams (1 teaspoon) salt
  • 3g (1 ½ teaspoons) ground cinnamon
  • ½g (1/4 teaspoon) ground nutmeg
  • 234g (~1 cup, packed) light brown sugar
  • 106g (~1/2 cup) granulated sugar
  • 15 milliliters / 1 tablespoon vanilla extract
  • 215g (~1¼ cups) mini semi-sweet chocolate chips
Instructions
  1. Melt butter and pumpkin in a saucepan over medium heat, stirring constantly; set aside to cool
  2. In a medium bowl, whisk together flour, baking soda, salt, cinnamon and nutmeg; set aside
  3. In the large bowl of an electric mixer with a paddle attachment, beat butter mixture, sugars and vanilla for several minutes on medium speed or until well-combined
  4. Reduce speed to low and stir in flour mixture (do not overmix)
  5. Fold in chocolate chips
  6. Chill dough in refrigerator for at least 24 hours (you can do less chilling, but texture will not be as good)
  7. Once dough has chilled, pre-heat oven to 325 degrees; cover baking sheets with parchment paper
  8. Scoop cookie dough with small cookie dough scoop (~1 tablespoon) onto prepared baking sheets so that cookies are spaced one inch apart
  9. Bake cookies 8-10 minutes or until brown around good portion of edges
  10. Set aside to cool
  11. Store cookies in an airtight container at room temperature up to a week (texture best first day or two) or freeze up to two months
Notes
Dough requires 24-48 hours of chilling time for best results

This post contains affiliate links.

Make something from the blog? Be sure to share it on Instagram with the tag #KeepItSweetDesserts.

You might also like:

Pumpkin & Ginger Ice Cream Sandwich Cookie Cake

Pumpkin and Ginger Ice Cream Sandwich Cookie Cake

Cinnamon Chip Whole Wheat Pumpkin Scones

Cinnamon Chip Whole Wheat Pumpkin Scones

Pumpkin Blondies with Caramelized White Chocolate

Pumpkin Blondies with Caramelized White Chocolate

Chocolate Covered Peanut Butter Ritz Sandwiches

A no-bake treat that every kid and adult will love, these chocolate covered peanut butter Ritz sandwiches are almost too good to be true!

Chocolate Covered Peanut Butter Ritz Sandwiches!!! only 4 ingredients!

These hardly need any explanation or recipe.

Except, they kind of do.

This past spring in Florida, when I took a brief break from eating Kilwins’ ice cream, I picked up an array of chocolates to bring back to the house and hide in my room share with everyone. When I saw that they had chocolate covered peanut butter and Ritz sandwiches, I couldn’t resist getting a few. But to be honest, I was a little disappointed in the finished product. They weren’t bad, per say, but you really couldn’t taste the peanut butter.

These Chocolate Covered PB Ritz Sandwiches are so much fun!

Well, it took me about four months to finally pick up a box of Ritz crackers (those would not typically be safe in my pantry), but I’m glad I did. I recreated the treat (and put it all on snapchat because I couldn’t resist), this time with the right amount of peanut butter, and then proceeded to eat too many to count. I wish I was kidding.

Anyway, this is definitely one of the easiest no-bake desserts (or really I’d prefer to call them snacks) you could possibly make. Buttery crackers topped with peanut butter and then dipped in chocolate should happen in your kitchen immediately.

5.0 from 1 reviews
Chocolate Covered Peanut Butter Ritz Sandwiches
 
A no-bake treat that every kid and adult will love, these chocolate covered peanut butter Ritz sandwiches are almost too good to be true!
Author:
Recipe type: Dessert
Makes: 2 dozen sandwiches
Ingredients
  • 4 dozen Ritz crackers
  • 120g (~1/2 cup) creamy peanut butter
  • 500 grams good quality dark chocolate chocolate (I used 72%), roughly chopped (can substitute good quality milk chocolate if preferred)
  • 14g (1 tablespoon) unsalted butter
Instructions
  1. Lay half of your crackers (24) out on a baking sheet; spread about 1 teaspoon (5 grams) of peanut butter into each cracker (don't use much less or you won't be able to taste it!)
  2. Top each with a second Ritz cracker
  3. Place tray in freezer for a half hour to chill
  4. When ready, place chocolate and butter in a medium microwave-safe bowl; melt by microwaving in 30-second increments and stirring in-between; continue until melted and smooth
  5. Use two forks to dip sandwiches into melted chocolate
  6. Place dipped sandwiches onto parchment or wax paper and chill in refrigerator one hour
  7. Keep stored in an airtight container in a cool room or refrigerator until ready to enjoy
  8. Enjoy within one week for best results


Chocolate PB Ritz Sandwiches = winning!!!

Make something from the blog? Be sure to share it on Instagram with the tag #KeepItSweetDesserts.

You might also like:

Peanut Butter Caramel Candy Cups

Peanut Butter Caramel Candy Cups

Peanut Butter Ripple Chocolate Ice Cream

PBRippleIceCream3_thumb.jpg

Chocolate & Peanut Butter Lover’s Bark

Chocolate & Peanut Butter Lover’s Bark

Chocolate PB Ritz Sandwiches... in LOVE

Keep It Sweet Desserts Weekly Wrap-up 9/12/15

First of all, HAPPY BIRTHDAY to my amazing husband! We will be celebrating today for sure. We kicked things off last night with a family dinner at the diner and then cookie baking courtesy of (classic chocolate chip FTW). Today, Matt wants to take L to the driving range and I’m sure we will do some relaxing before we go out to dinner. Date night courtesy of my parents, woohoo! Check in on Snapchat (keepitsweet_LL) or Instagram for some pictures.

Smoothie Stealer
Smoothie Stealer

Tomorrow we have a second birthday party to go to and I can’t wait to see how L does with the big kids. After that, we head to Long Island for the holiday. Just an FYI, I won’t be posting on Monday but there will be new recipes on Wednesday and Friday. They are good ones, too!

Now for this week’s updates….

New posts on the blog:

30 Fun After-School Snacks for Kids

After School Snacks for Kids

Vegan Apple Cake

Vegan apple cake that still really tastes good!

Keeping it Sweet with DŌ Cookie Dough

Cookie DO NYC cookie dough

This week’s most popular recipe/blog post:

Butternut-Pumpkin Spice Sheet Cake

Butternut-Pumpkin Spice Sheet Cake with Bourbon-Vanilla Cream Cheese Frosting

Three favorite things I pinned all week:

Peanut Butter Caramel Oreo Ice Box Cake from Cookie Dough and Oven Mitt

Healthy Pumpkin Chocolate Chip Bread from Well Plated

S’mores Cake from Urban Bakes

I hope that you all have a wonderful weekend!

Make something from the blog? Be sure to share it on Instagram with the tag #KeepItSweetDesserts.

Keeping it Sweet with DO Cookie Dough

An interview with Kristen Tomlan of Cookie DO NYC!

Cookie DO NYC cookie dough

A few weeks ago I had the opportunity to meet Kristen, the smart, creative and very sweet owner of . I was so impressed with her, the company, and the sample she brought me (cake batter!), that I asked if she would send me some additional samples to photograph and feature on the blog. Even better, I asked her a few questions to give you all a little inside look at running a food business. I always like talking to other entrepreneurs in the food world so this was a wonderful experience for me!

Cookie DO NYC holiday cookie dough
Holiday Cookie DŌ Flavors


KISD: What made you want to leave your career for the food world?

DŌ: I’ve always had a passion for baking, and my background is in design, marketing and branding, so it really was the perfect mix of everything I love! I love sharing sweets and food with everyone I can, so starting my own business in the food world has been a dream come true!

Cookie DO NYC cookie dough packaging
Seriously adorable packaging


KISD: What’s the most rewarding part of having your own business?

DŌ: The most rewarding part is getting to hear the excitement, happiness and compliments from the customers. I’m so grateful that our product and brand has been so well received. It’s fun to share my passion with others!

Cookie DO NYC chocolate chip cookie dough
Classic Chocolate Chip Cookie DŌ


KISD: What’s the downside to owning your own business?

DŌ: The stress and the never ending amount of work! It’s actually no longer work. It’s my life, so there is no “turning off” or “taking time off” or “waiting until Monday”. But the rewards far outweigh the downsides.

Cookie DO NYC cookie dough
Confetti Cookie DŌ


KISD: Are there any entrepreneurs or other companies that you look to for inspiration?

DŌ: Yes! I’ve looked at entrepreneurs like Bethany Frankel and Melissa Ben-Ishay and brands such as Poppin’, The Skimm, Dry Bar and SoulCycle to name a few! There are so many success stories and cool stuff happening – inspiration is everywhere!

Cookie DO NYC nuts over nuts cookie dough
Nuts Over Nuts Cookie DŌ


KISD: How do you decide which flavors to offer and how do you come up with new ideas?

DŌ: I wanted to have a little bit of everything – the classics like our Signature Chocolate Chip and Sugar Cookie, as well as some more trendy flavors like Cake Batter and Salty & Sweet. And then I took cues from what other people liked to help figure out our regular flavors. As for our seasonals, we think about what would be relevant – and delicious – for the time of year!

Cookie DO NYC cookie dough
Holiday Cake Batter Cookie DŌ


KISD: How do you keep yourself from eating all of your products? (I got asked this all the time!) And on that note, what’s your favorite flavor?

DŌ: I do eat the product all the time – that’s the problem! We’re constantly tasting each batch and devouring the extras! It’s the best part of the job :) And my favorite flavor is Heavenly – I LOVE Nutella!

Cookie DO NYC hot cocoa cookie dough
Hot Cocoa Cookie DŌ


KISD: Do you ever get bored with cookie dough?

DŌ: Not really! There are so many options, ways to change it, and ways to serve it! I have fun trying to find the perfect solution for an event or customer with special needs! I like having fun with it!

Cookie DO NYC peppermint bark cookie dough
Peppermint Bark Cookie DŌ

Kristen Tomlan is a designer and dessert-lover turned pastry chef and entrepreneur when she founded her one-of-a-kind confectionary specializing in the most DŌlicious sweet treat of all: cookie dough. After working in corporate branding for 5 years, Kristen, a Midwest native, left her job and founded DŌ, Cookie Dough Confections in early 2015. DŌ allows you to eat cookie dough exactly how you crave it, with safe-to-eat cookie dough creations that are edible, bakeable and customizable. Based in Manhattan, the concept quickly gained followers, fans and cookie dough lovers-alike, being called the “next big thing in desserts” by Glamour Magazine, and being featured in Business Insider, Refinery 29, Gothamist and more. DŌ is available online and offers shipping to 48 states. Connect: @cookieDOnyc | Chat: info@cookieDOnyc.com | Order: cookieDOnyc.com

Cookie DO NYC cookie dough
Cookie DŌ for daysssss

Vegan Apple Cake

A healthier spin on the classic apple dessert, this cake does not disappoint. No mixer needed for this apple cake!

Vegan apple cake that still really tastes good!

I’m pretty lucky that any photos of this cake exist. I baked it one morning while L was napping and then was setting up my shoot that afternoon while he decided that an afternoon nap just wasn’t necessary. So I took the pictures quickly and then proceeded to rock / feed L to sleep. There are worse things. I know those moments are fleeting these days so rather than be frustrated by the lack of “real” nap, I try to enjoy the sweet moment of a sleeping baby while I can. However, I don’t recommend that move with a full bladder. Just saying.

Awesome vegan apple cake

In the end it all worked out. L slept enough to play the late afternoon away, I got photos AND cuddle time. Oh yeah, and we got a pretty delicious cake. What’s interesting about this recipe is that you separate the apples so that you can top the batter with slices (which then end up on the bottom of the cake). I wasn’t sure how that would translate but I actually think it really helped seal in the moisture. That’s always a good thing when baking with whole wheat flour and less fat than a typical dessert.

Need a last minute high holiday dessert? This is dairy-free and perfect for your Rosh Hashanah spread. Don’t let the “vegan” scare you. There are no weird ingredients and you wouldn’t even know with the taste.

4.5 from 2 reviews
Vegan Apple Cake
 
A healthier spin on the classic apple dessert, this cake does not disappoint. No mixer needed for this apple cake!
Author:
Recipe type: Dessert
Makes: 12 servings
Ingredients
  • 237 milliliters (1 cup) almond milk
  • 5 milliliters (1 teaspoon) apple cider vinegar
  • 450g (~2 large) apples, peeled
  • zest and juice of one lemon
  • 160g (~1 cup + 2 ½ tablespoons) all-purpose flour
  • 150g (~1 cup) white whole wheat flour
  • 10g (2 teaspoons) baking powder
  • 2g (1 teaspoon) ground cinnamon
  • ½g (1/4 teaspoon) ground ginger
  • 160g (3/4 cup) granulated sugar
  • 118 milliliters (1/2 cup) canola oil
  • 15 milliliters (1 tablespoon) pure vanilla extract
  • 15g (1 tablespoon, packed) light brown sugar
Instructions
  1. Pre-heat oven to 350 degrees; grease a bundt pan with non-stick baking spray
  2. Combine milk and vinegar; set aside
  3. Slice one of the two apples (1/8 -¼ inch in thickness) into half-moons; mix with half of lemon juice and set aside
  4. Chop other apple into ¼-inch cubes and in another bowl, mix with remaining lemon juice; set aside
  5. In a large bowl, whisk together the flours, baking powder, cinnamon and ginger; set aside
  6. In a separate large bowl, whisk together the milk and vinegar, granulated sugar, oil and vanilla
  7. Slowly whisk in dry ingredients just until combined; fold in chopped apple
  8. Pour the batter into your prepared baking pan
  9. Place sliced apple on top of the batter and sprinkle with brown sugar
  10. Bake in the center of the oven for 35-40 minutes or until a skewer inserted into the cake comes out clean
Notes
Adapted from Cake Duchess


This apple cake was so good and it actually is vegan!

Make something from the blog? Be sure to share it on Instagram with the tag #KeepItSweetDesserts.

You might also like:

Vanilla Bean Apple Bundt Cake

Vanilla Bean Apple Bundt Cake

Pumpkin Cake with Pecan Pie Glaze

Pumpkin Cake with Pecan Pie Glaze

Vanilla Bean Bourbon Nectarine Bundt Cake

Vanilla Bean Bourbon Nectarine Bundt Cake

Apple Cake!!!

30 Fun After-School Snacks For Kids

30 fun after-school snacks for kids including low fat, whole grain and gluten-free options!

After School Snacks for Kids

When I was growing up, my mom always had the best snacks waiting for us at home. Seriously, kids would come over for play dates and be astounded at our pantry selection (not to mention the endless bowls of candy out). After school snacks were their own story. Some days we just had graham crackers and milk, other days rice cakes with peanut butter and then in my teenage years, giant bowls of popcorn. But sometimes, there was something a bit more special. Occasionally there would be fresh baked cake, cookies and or even a quick-bread. Lunch was always so early in the day (I’m talking before 11am), so there was no way we were making it to dinner without something to eat.

It sure would be nice if my mom was still making afternoon treats for me, but I guess it will be my turn to do that for L soon(ish). Here is a little roundup of some tasty treats that your kids will love. Some are on the healthier side, and some are a little bit indulgent. It’s all about balance here!

Make something from the blog? Be sure to share it on Instagram with the tag #KeepItSweetDesserts.

Keep It Sweet Desserts Weekly Wrap-up 9/5/15

I hope you are having a really wonderful Labor Day weekend! Over here we are heading into a very busy but good couple of months. We actually kicked things off this weekend with wedding dress shopping for my sister! It was so much fun and she unexpectedly, but excitingly, found her dress. Ah she is going to be the most beautiful bride!!!!!

Next weekend we will be celebrating Matt’s birthday and then heading right into the high holidays (don’t forget your honey cake). After that  will be my sister’s engagement party and then L’s birthday is right around the corner. Now let’s mix some apple / pumpkin picking in there and I will be very, very happy!

L on chair

10 months going on three years?

Now for this week’s updates….

New recipes on the blog:

Mini M&M Cookies

I just love these mini cookies for a party! Plus, M&M cookies are the best.

My Favorite Pumpkin Bread

My Favorite Pumpkin Bread of All Time

This week’s most popular recipe/blog post:

Peanut Butter Caramel Candy Cups

Peanut Butter Caramel Candy Cups - dying over these

Five favorite things I pinned all week:

Easiest Chocolate Cupcakes from Tutti Dolci

Peanut Butter and Jelly Cupcakes from Baking a Moment

Confetti Cookies from Eats Well With Others

Cinnamon Roll Pound Cake from Dinner then Desserts

Fresh Pear Cake with Whipped Brown Sugar Buttercream from A Bajillion Recipes

I hope that you all have a wonderful weekend!

Make something from the blog? Be sure to share it on Instagram with the tag #KeepItSweetDesserts.

My Favorite Pumpkin Bread

Moist and flavorful pumpkin bread. This classic recipe is perfect for pumpkin bread or pumpkin muffins.

My Favorite Pumpkin Bread of All Time


*Sometimes things need a refresh. My favorite pumpkin bread was originally posted in 2010 with some painful-to-the-eyes photos. And while my photography skills have thankfully improved, the recipe, that I’ve loved ever since I was a kid, has not changed. My mom and I both make it every year! So here we are again with my very favorite pumpkin bread from childhood and some photos that I like to think are much easier on the eyes.*

In case you haven’t noticed, I have a sweet tooth:-) I always have room for dessert, but if you can make a side dish that tastes like a dessert, isn’t that even better?  Combining that with the fact that pumpkin is one of my all time favorite dessert flavors, you can understand why I’d be a fan of pumpkin bread.

Seriously good (and easy) pumpkin bread

I’ve had lots of pumpkin muffins and breads, some are dry, some are too dense, and some just lack a true pumpkin flavor.  This recipe, however, produces a light, moist and flavorful bread that also works for muffins.

Pumpkin Muffins
Just for kicks… one of the original photos!
Pumpkin Bread
And another, ouch.

This recipe is super easy.  It is the one my mom has been making for years and she had gotten it from a friend of hers originally.  You can do all of the stirring by hand so no mixer necessary.

First, take your dry ingredients (flour, sugar, baking soda, cinnamon, nutmeg and salt) and whisk them in a large bowl.

Set that aside and combine your wet ingredients, pumpkin, oil, water and eggs. Then add your wet ingredients to the dry. Stir until well combined. Pour into your pans and bake until bread and muffin tops are rounded and a knife comes out clean.

Perfect pumpkin muffins that are so easy to make

The recipe is originally set to make 3 pumpkin bread loaves, however I wanted a little bit of variety and made muffins too. (Sidenote: an ice cream scoop makes the perfect transfer to muffin tins). Eat it as a side dish or for breakfast.

My Favorite Pumpkin Bread
 
Moist and flavorful pumpkin bread. This classic recipe is perfect for pumpkin bread or pumpkin muffins.
Author:
Recipe type: Dessert
Makes: 3 regular-sized loaves; 3 dozen regular sized muffins or 6 dozen mini muffins
Ingredients
  • 460g (~3½ cups) all-purpose flour
  • 635g (3 cups) granulated sugar
  • 10g (2 teaspoons) baking soda
  • 7½g (1½ teaspoons) salt
  • 4g (2 teaspoons) cinnamon
  • 2g (1 teaspoon) nutmeg
  • 425g (~1¾ cup) canned pumpkin, NOT pumpkin pie filling
  • 237 milliliters (1 cup) canola oil
  • 160 milliliters (2/3 cup) water
  • 220g (4 large) whole eggs
Instructions
  1. Pre-heat oven to 350 degrees
  2. Grease pans with non-stick cooking spray and/or line muffin tins with cup holders
  3. Whisk together dry ingredients (flour through salt) in a large bowl and set aside
  4. Combine wet ingredients (pumpkin through eggs)
  5. Add your wet ingredients to your dry ingredients and mix well until combined
  6. Pour batter into baking pans
  7. Baking times for different forms:
  8. Loaves: 45 minutes to 1 hour
  9. Regular muffins: 18 to 25 minutes
  10. Mini muffins: 16 to 20 minutes
  11. Bake until bread and muffin tops are rounded and a knife comes out clean
  12. Cool pumpkin bread out of baking pans on wire rack
Notes
Store bread wrapped in seran and muffins in a ziplock bag at room temperature up to one week or frozen up to two months

What is your favorite dessert-like side dish?

Make something from the blog? Be sure to share it on Instagram with the tag #KeepItSweetDesserts.

You may also like:

Pumpkin Cake with Pecan Pie Glaze

Pumpkin Cake with Pecan Pie Glaze

Gluten-Free Pumpkin Muffins

Gluten-free Pumpkin Muffins


Easy Low Fat Pumpkin Sheet Cake


Easy Low Fat Pumpkin Sheet Cake


Pumpkin bread and pumpkin muffins, what could be better?

Mini M&M Cookies

Mini cookies loaded with M&Ms. These are the perfect party cookie!

I just love these mini cookies for a party! Plus, M&M cookies are the best.

Now that I’m thinking about a special someone’s first birthday, I’m fully focused on what his first sweet treat should be and what kinds of sweets we will have at his party. I change my mind constantly going back and forth on different ideas, but thought that having a variety of mini cookies at the celebration would be fun.

My whole family was obsessed with these cute little M&M Cookies

The first recipe I decided to try out was this Mini M&M Cookie recipe. They are made from a pretty fabulous brown-sugar based cookie dough that bakes up so nicely. Usually I find that a larger cookie is best for maximizing texture quality, but this dough really worked well this way. Crispy edges? Check. Chewy middle? Check. Sweet and delicious? You bet!

Mini M&M Cookies!!!!!

5.0 from 1 reviews
Mini M&M Cookies
 
Mini cookies loaded with M&Ms. These are the perfect party cookie!
Author:
Recipe type: Dessert
Makes: ~5 dozen cookies
Ingredients
  • 262g (~2 cups) all-purpose flour
  • 5g (1 teaspoon) salt
  • 3g (½ teaspoon) baking soda
  • 170g (3/4 cup) unsalted butter, melted
  • 350g (~1½ cups, packed) light brown sugar
  • 15 milliliters / 1 tablespoon vanilla extract
  • 75g (~1 large egg + 1 yolk) eggs at room temperature
  • 170g (~1½ cups) mini M&Ms
Instructions
  1. In a medium bowl, whisk flour, baking soda and salt; set aside
  2. In the large bowl of an electric mixer with a paddle attachment, beat butter and sugar until well-combined
  3. Beat in eggs and vanilla until a mixture is a light creamy color
  4. Reduce speed to low and stir in flour mixture (do not overmix)
  5. Fold in M&Ms
  6. Chill dough in refrigerator for 24-48 hours for best texture and flavor results
  7. Once dough has chilled, pre-heat oven to 325 degrees; cover baking sheets with parchment paper
  8. Scoop cookie dough with small cookie dough scoop (~1 teaspoons) onto prepared baking sheets
  9. Bake cookies ~10 minutes or until brown around good portion of edges
  10. Set aside to cool
  11. Texture of cookies best within 24 hours; cookies can be enjoyed up to one week at room temperature or one month frozen if stored in an air-tight container
Notes
Dough requires 24-48 hours of chilling time for best results


Make something from the blog? Be sure to share it on Instagram with the tag #KeepItSweetDesserts.

You might also like:

No Churn Monster Cookie Dough Ice Cream

Monster Cookie Dough Ice Cream

Mega M&M Cookies

Mega M&M Cookies

M&M Cookie Dough Cups

M&M Cookie Dough Cups

Keep It Sweet Desserts Weekly Wrap-up 8/29/15

Happy weekend! This week actually few by and so much happened.

Good things started when my brand new niece, Ariel, was born last Saturday morning. We got to meet her just a few hours later and it was so different and wonderful to hold a brand new baby. It’s been a while! If you follow me on Snapchat (@keepitsweet_ll) you can see just how big L is getting comparatively. I’ve been posting videos of him babbling (lots of “mamas” this week!) and making games of climbing chairs just to fall off of them. Never a dull moment around here.

my gym

L looking for his next adventure at our new gym class

In other news, I’ve been working hard on new recipes and making the blog more user friendly as well. All of the recipes from the last year and a half are now printer friendly (there were some problems before) and hopefully the rest of my archives will be converted soon as well. If you have any issues please let me know!

Also, thank you for the positive feedback on my renewed blogging inspiration. It feels amazing to get back into things with much more energy and excitement. I really can’t wait to see what this brings.

P.S. Did you see this cookie dough I tried the other day? I got to meet the owner of  (I now adore her) and she gave me a sample. It tasted pretty amazing and my friends are now huge fans as well.

Now for this week’s updates….

New recipes on the blog:

Easy Honey Cake for Rosh Hashanah

My family loves this honey cake. It's our new tradition for Rsh Hashanah!

Small Batch Chocolate Chip Cookies

The perfect mini batch of cookies and only 20 minutes from start to finish!

This week’s most popular recipe/blog post:

Mixed Berry Sauce

slice of cheesecake 8a

Three favorite things I pinned all week:

Double Chocolate & Peanut Butter Skillet Cookie from Port and Fin

Black and Tan Stout Cake from The Beeroness

Apple Pie Layer Cake from The Suburban Soapbox

I hope that you all have a wonderful weekend!

Make something from the blog? Be sure to share it on Instagram with the tag #KeepItSweetDesserts.

Easy Honey Cake for Rosh Hashanah

An easy and traditional Rosh Hashanah dessert to celebrate a sweet new year.

The easiest honey cake for Rosh Hashanah!

The Jewish holidays are so early this year so it’s a bit of a rush to get organized. Granted, I don’t have that much to do for the holidays, just some baking, but it’s hard to think about those warm fall flavors that we are used to when menu planning in August.

So I eased into things and started with this honey cake. At first glance the honey cake might be overlooked in its simplicity, but this version is so moist and full of warm comforting flavors (lots of cinnamon and some nutmeg, too) that it’s worth of a spot on your table. It’s sweet (for a sweet new year of course) so while there is a part of me that wants to fancy things up with whipped cream or powdered sugar at least, the smarter side of me knows that a slice of this honey cake just calls for a cup of hot tea or dark coffee.

A delicious and easy honey cake for a sweet new year

You know what else made this cake exciting? See that photo above? We got two huge jars of beautiful raw local honey through our CSA. At first I didn’t know what to do with it, we really don’t use honey often, but it was perfect to have on hand when I wanted to bake this honey cake. Some people discourage baking with raw honey because it kind of defeats the purpose of it being “raw”, but if you have a lot of honey, I say you should bake this cake!

My family loves this honey cake. It's our new tradition for Rsh Hashanah!

5.0 from 1 reviews
Easy Honey Cake for Rosh Hashanah
 
An easy and traditional Rosh Hashanah dessert to celebrate a sweet new year.
Author:
Recipe type: Dessert
Cuisine: Jewish
Makes: 16 servings
Ingredients
  • 440g (~3⅓ cups)all-purpose flour
  • 5g (1 teaspoon) baking powder
  • 5g (1 teaspoon) baking soda
  • 3g (1/2 teaspoon) salt
  • 8g (4 teaspoons) ground cinnamon
  • ½g (1/2 teaspoon) ground nutmeg
  • ¼g (1/2 teaspoon) ground cloves
  • 237 milliliters (1 cup) vegetable or canola oil
  • 340g (1 cup) honey
  • 300g (~1⅓ cups) granulated sugar
  • 95g (~1/3 cup, tightly packed) brown sugar
  • 165g (3 whole large) eggs at room temperature
  • 237 milliliters (1 cup) warm coffee
  • 118 milliliters (1/2 cup) orange juice
  • 30 milliliters (2 tablespoons) whiskey
  • 30 milliliters (2 tablespoons) vanilla extract
Instructions
  1. Pre-heat oven to 350 degrees; line a 9x13 pan with parchment paper and lightly butter or spray well with nonstick cooking spray
  2. In a large bowl, whisk together the flour, baking powder, baking soda, salt, cinnamon, nutmeg and cloves; set aside
  3. In the large bowl of electric mixer combine remaining ingredients (oil through vanilla) on low speed until well combined
  4. While mixer is still on low, slowly add dry ingredients; continue mixing for several minutes just until combined.; batter should be smooth and have a little thickness
  5. Pour batter into baking pan and bake 40-45 minutes or until a knife or toothpick comes out clean from center
  6. Allow cake to cool for 30 minutes before carefully removing from pan
  7. Cake can be wrapped well in seran and stored at room temperature up to five days or frozen up to one month
Notes
Barely adapted from Smitten Kitchen (who got the recipe from this cookbook)

Make something from the blog? Be sure to share it on Instagram with the tag #KeepItSweetDesserts.

This post contains affiliate links.

You might also like:

Black and White Cookie Cake

Black and White Cookie Cake

Rugelach, Three Ways

Rugelach, Three Ways

Apple Pie Crumble Bars

Apple Pie Crumble Bars

The easiest honey cake for Rosh Hashanah!

Small Batch Chocolate Chip Cookies

A small batch of chocolate chip cookies that’s perfect a cookie craving!

The perfect mini batch of cookies and only 20 minutes from start to finish!

Let’s be honest, one cookie is never, ever enough. And a whole big batch, while appealing, is too many to eat in one sitting. Plus, sometimes you just want a homemade cookie and you want it fast. This chocolate chip cookie recipe is exactly what you need when you:

  1. 1) …want homemade cookies in just twenty minutes (not exaggerating!),
  2. 2) …want enough cookies to satisfy a craving and maybe share
  3. 3) …don’t want to be tempted by a giant batch of baked goods

In fact, not only do you need this recipe, but you need to get your hands on a copy of Christina’s wonderful Dessert for Two Cookbook. (And while you are at it, pre-order her next cookbook!) I’ve been drooling over her cookbook for months now and while I pretty much wanted to make everything (hello chocolate covered key lime pie and oatmeal cream sandwich cookies…), chocolate chip cookies seemed the best place to start.

Oh, and I think Matt agreed since the only complaint I got was the lack of milk in the fridge. Oops!

Small Batch Chocolate Chip Cookies - perfect for those cravings

5.0 from 2 reviews
Small Batch Chocolate Chip Cookies
 
Small Batch Bakery-Style Chocolate Chip Cookies
Author:
Recipe type: Desserts
Makes: 8-12 cookies
Ingredients
  • 60g (4 tablespoons) unsalted butter, softened at room temperature
  • 24g (2 tablespoons) solid vegetable shortening (I subbed softened unsalted butter)
  • 45g (1/4 cup) light brown sugar
  • 39g (3 tablespoons) granulated sugar
  • 25g (1 large) egg yolk
  • 4 milliliters (3/4 teaspoon) vanilla extract
  • 75g (1/2 cup + 2 tablespoons) all-purpose flour
  • 1g (1/4 teaspoon) baking soda
  • 1g (1/4 teaspoon) baking powder
  • ½g (1/8) teaspoon fine salt
  • ⅛ teaspoon instant espresso powder
  • 55g (1/3 cup) semi-sweet chocolate chips
Instructions
  1. Pre-heat oven to 375 degrees and line a cookie sheet with parchment paper or a silicone mat; set aside
  2. In the bowl of an electric mixer with a paddle attachment, beat butter, shortening and sugars on medium-high speed until well combined (about one minute); add egg yolk and vanilla and mix on medium speed until combined
  3. In a separate small bowl, whisk flour, baking soda, baking powder, salt and espresso powder; slowly add to mixer while on low speed and mix just until combined; stir in chocolate chips
  4. Spoon cookie dough into prepared baking sheet (I used a medium cookie dough scoop) and bake 8-9 minutes or until edges are lightly browned; remove from baking sheet and place on a wire rack to cool (or better yet, eat warm out of the oven!)
Notes
I got 10 cookies with a medium cookie dough scoop
From the Dessert for Two Cookbook

Make something from the blog? Be sure to share it on Instagram with the tag #KeepItSweetDesserts.

This post contains affiliate links.

You might also like:

Comfort Food Chocolate Chunk Cookies

Comfort Food Chocolate Chunk Cookies

Gluten Free Brown Butter Chocolate Chip Cookies

Gluten Free Brown Butter Chocolate Chip Cookies


Chewy Milk Chocolate Ginger Cookies

Chewy Milk Chocolate Ginger Cookies

Keep It Sweet Desserts Weekly Wrap-up 8/22/15

Life Updates:

Birthdays are similar to celebrating the New Year in that they give you a time to reflect on where you are in life and what you want to do to make the next year better and more fulfilling. I actually hadn’t been thinking too much about my birthday (hello, mom life), but coincidentally I’ve been thinking a lot lately about what I want for myself right now.

Without going into all the different thoughts that scramble through my brain, I will say that I’m very excited about a new and refreshed motivation for work. When L was born, he became my sole focus and the last ten months have been pretty darn amazing, but I’m finally feeling like it’s time for something else, too.

So happy after napping!

Happy baby post nap!

As a result, you will start seeing more posts here (think lots of recipes just in time for baking season!). I’d love to hear if there is anything you are looking for. In addition, I’m going to work on evolving these weekly posts to have a little more content and more pretty pictures (or baby pictures!). Again, if there is anything you want to see I’m all ears.

Oh yeah, I caved and started using Snapchat for more than just random pictures and videos to send to my sister. I have no idea if I’m doing it “right” and I’m pretty sure you can find me @KeepItSweetDesserts (and if not maybe @keepitsweet_ll). It’s kind of fun sharing random pictures and videos throughout the day.

P.S. Matt baked for me for my birthday! Remember this cookie cake? We ate it warm right out of the oven with salted caramel ice cream. The best.

New recipes on the blog:

Gingersnap Crumble Peach Ice Cream (no churn)

Gingersnap Crumble Peach Ice Cream (and you don't need an ice cream maker!)

Cranberry and White Chocolate Pistachio Dusted Cookies

Cranberry and White Chocolate Pistachio Dusted Cookies <--- such a fun party gift idea!

This week’s most popular recipe/blog post:

Giant Caramel Apple Cinnamon Bun with Cream Cheese Glaze

Giant Caramel Apple Cinnamon Bun - pretty much the best thing ever

Three favorite things I pinned all week:

Lemon Zucchini Cake from Mindy’s Bakeshop

40 Epic Birthday Cake Recipes from Pass the Sushi

Dinner for Two: Creamy Lobster and Shells from Dessert for Two

I hope that you all have a wonderful weekend!

Make something from the blog? Be sure to share it on Instagram with the tag #KeepItSweetDesserts.

Gingersnap Peach Crumble Ice Cream

Other title considerations: Brown Butter Gingersnap Crumble Ice Cream; Peach Cobbler Ice Cream with Gingersnap Crumbs; Gingersnap Crunch Ice Cream with Peach Filling; Peach Cobbler Ice Cream; Bourbon Peach Crumble Ice Cream with Gingersnap Crumbs. Decisions, decisions.

Gingersnap Crumble Peach Ice Cream (with bourbon and brown butter!!!)

It’s my birthday week which means that nothing but ice cream will do! I wanted to make one more batch of homemade ice cream before the summer ended (though I have a few other ideas so it might not be my last) and asked on Facebook what it should be. A few of you had some good ideas so I combined a couple of them into one!

Gingersnap Crumble Peach Ice Cream (and you don't need an ice cream maker!)

It actually was the perfect week to make peach ice cream because Matt had bought the biggest white peaches I’ve ever seen at Costco. No joke, these peaches were as big as grapefruits. My mom actually walked into my apartment and asked “what are these?!”

The gingersnap crumble is all sorts of awesome… it’s just brown butter and and gingersnap crumbs. Thank you, Gerry, for the fabulous idea! The peach filling is easy to make, barely any sugar, just the sweetness of perfect late summer peaches to carry it. And then the no churn ice cream base, you know the drill: cream, sweetened condensed milk, vanilla. Oh yeah, and bourbon. Because with peach and ginger it just seemed right!

Gingersnap Crumble Peach Ice Cream <------ omg making this!

Gingersnap Peach Crumble Ice Cream
 
Other title considerations: Brown Butter Gingersnap Crumble Ice Cream; Peach Cobbler Ice Cream with Gingersnap Crumbs; Gingersnap Crunch Ice Cream with Peach Filling; Peach Cobbler Ice Cream; Bourbon Peach Crumble Ice Cream with Gingersnap Crumbs. Decisions, decisions.
Author:
Makes: ~1½ quarts
Ingredients
Crumble:
  • 120g (~1 cup) ground gingersnaps* (16 cookies)
  • 71g (5 tablespoons ) unsalted butter
Peach filling:
  • 360g (~2½ cups) fresh peeled and chopped ripe peaches (~2-3 medium peaches)
  • 16g (~1 tablespoon, packed) light brown sugar
  • 15 millimeters (1 tablespoon) fresh lemon juice (about ½ lemon)
  • 10g (~1 tablespoon) cornstarch
  • 1g (1/2 teaspoon) ground cinnamon
Ice cream:
  • 237 millimeters (2 cups) heavy cream
  • 1 14-ounce can sweetened condensed milk (I used fat free, but any type would work)
  • 30 millimeters (2 tablespoons) bourbon
  • 5 millimeters (1 teaspoon) vanilla extract
Instructions
  1. Make crumble
  2. Melt butter in a heavy-duty pan over medium heat; once melted, stir constantly until browned and then remove from heat; stir in gingersnap crumbs; set aside to cool
  3. Make peach filling
  4. Place peaches, sugar and lemon juice in a medium pot stove with medium heat
  5. Stir occasionally for several minutes until some of the fruit begins to break down and juice begins to form
  6. Turn the heat to high, add cornstarch and stir quickly until sauce reaches desired thickness (1-2 minutes); stir in cinnamon
  7. Place sauce in refrigerator to cool for 30 minutes
  8. Once ready, finish making ice cream
  9. In the large bowl of an electric mixer with whisk attachment, beat cream on high speed for several minutes, just until stiff peaks form
  10. While whipping cream, in a separate large bowl, stir together sweetened condensed milk, vanilla, and bourbon
  11. Once cream is ready, fold it into sweetened condensed milk mixture
  12. Fold in peach filling
  13. Pour half of ice cream into a regular-sized loaf pan and drop one half of crumble over top; top with remaining ice cream and then with remaining crumble; wrap well with seran wrap or tin foil
  14. Freeze for 6 hours or overnight
Notes
*Can easily be adapted to be gluten-free by using gluten-free gingersnaps
Sauce and crumble can be made up to one day before putting ice cream together, refrigerate the filling in an airtight container until ready to use and store the gingersnap crumble in an airtight container at room temperature

Gingersnap Crumble Peach Ice Cream - now I know how to use up all my peaches!!

Make something from the blog? Be sure to share it on Instagram with the tag #KeepItSweetDesserts.

You might also like:

No Churn Cookie Butter Ice Cream

No Churn Cookie Butter Ice Cream

No Churn Lemon Ice Cream

No Churn Lemon Ice Cream

No Churn New York Crumb Cake Ice Cream

New York Crumb Cake Ice Cream

Keep It Sweet Desserts Weekly Wrap-up 8/15/15

Somehow I let the occasion pass by, but last Sunday was the five year anniversary of the Keep It Sweet blog. The very first published post got lost in the moves from one site, to another, and then to another, but I do remember that it was a recipe for an ice cream dessert. I sort of wish that post still existed but I think it’s better that I can’t go back and cringe over the photos!

So much has happened in five years. When I first started the blog, I had just gotten married, was working a corporate finance job that I liked but didn’t love, and was living in a very tightly packed one-bedroom apartment in NYC storing kitchen equipment in the bedroom. An apartment move, a bakery and a baby later, here we are!

Where we are now is another post for another day, but overall, I’m happy and feel blessed. The above changes seem straightforward when you list them out, but it really was a lifetime ago that I first started sharing in this space. I could go on and on in multiple digressions on that, too. Regardless, I’m so happy that I’m still here blogging.

Thank you so much for visiting the site, commenting, sharing posts and making my life a little more full!

Now for this week’s updates

Most popular recipe/blog post: Mixed Berry Sauce

Mixed Berry Sauce

Three favorite things I pinned all week:

S’mores Rice Krispie Treats from I Am Honeybee

Healthy Blueberry Muffins from Well Plated

Whole Wheat Pumpkin Zucchini Bread from The Baker Mama

I hope that you all have a wonderful weekend!

Cranberry and White Chocolate Pistachio Dusted Cookies

Chewy cookies loaded with dried cranberries and white chocolate chips then coated with layers of MORE white chocolate AND pistachios.

Cranberry and White Chocolate Pistachio Dusted Cookies <--- such a fun party gift idea!

Last week I needed a dessert to use as a thank you gift and wanted something pretty and portable. Cookies are always great for that sort of thing but this time I felt like jazzing mine up. I started with a brown sugar cookie dough base, loaded them up with white chocolate and cranberries (always a good sweet and tart flavor combination) and then dipped them in more white chocolate. The addition of pistachios was key for a bit of salt and a nice little crunch. Who needs sprinkles when pistachios are pretty AND add flavor?!

I’ll definitely be keeping this recipe up my sleeve when it comes time for holiday baking. Maybe I’ll even swap in fresh cranberries when the season permits!

Cranberry White Chocolate Pistachio Dusted Cookies <----- MUST make!


Cranberry and White Chocolate Pistachio Dusted Cookies
 
Chewy cookies loaded with dried cranberries and white chocolate chips then coated with layers of MORE white chocolate AND pistachios.
Author:
Recipe type: Dessert
Makes: ~20 cookies
Ingredients
  • 262g (~2 cups) all-purpose flour
  • 5g (1 teaspoon) salt
  • 3g (½ teaspoon) baking soda
  • 170g (3/4 cup) unsalted butter, melted
  • 350g (~1½ cups, packed) light brown sugar
  • 15 milliliters / 1 tablespoon vanilla extract
  • 75g (~1 large egg + 1 yolk) eggs at room temperature
  • 175g (~1 cup) white chocolate chips
  • 120g (~3/4 cup) dried cranberries
  • 450g  good quality white chocolate in disks or roughly chopped
  • 75g (~1/2 cup) salted pistachios in a mix of finely chopped and crumbs
Instructions
  1. In a medium bowl, whisk flour, baking soda and salt; set aside
  2. In the large bowl of an electric mixer with a paddle attachment, beat butter and sugar until well-combined
  3. Beat in eggs and vanilla until a mixture is a light creamy color
  4. Reduce speed to low and stir in flour mixture (do not overmix)
  5. Fold in craisins and chips
  6. Chill dough in refrigerator for 24-48 hours for best texture and flavor results
  7. Once dough has chilled, pre-heat oven to 325 degrees; cover baking sheets with parchment paper
  8. Scoop cookie dough with large cookie dough scoop (~3 tablespoons) onto prepared baking sheets
  9. Bake large cookies 16-18 minutes or until brown around good portion of edges
  10. Set aside to cool and lay out wax or parchment paper for when you dip your cookies
  11. Once cookies have cooled, melt your white chocolate for dipping; place it in a heat-safe bowl and microwave in 30-second increments, stirring in-between each, until melted
  12. One at a time, dip half of a cookie into white chocolate and immediately sprinkle with pistachio crumbs
  13. Place cookies on wax or parchment paper and allow white chocolate to harden before serving or wrapping as a gift
Notes
Dough requires 24-48 hours of chilling time for best results

Make something from the blog? Be sure to share it on Instagram with the tag #KeepItSweetDesserts.

 You might also like:

Whipped Caramelized White Chocolate Ganache

Whipped Caramelized White Chocolate Ganache

Pistachio Muffins

Pistachio Muffins

Cranberry Chocolate Chunk Brown Butter Cookies

Cranberry Chocolate Chunk Brown Butter Cookies

Keep It Sweet Desserts Weekly Wrap-up 8/8/15

Another summer weekend is here at last! August sure snuck up on us because I’m already bypassing my August and Matt’s September (sorry!) birthdays and charging right ahead to L’s October birthday. I know, SO crazy that it’s happening soon(ish)! We are trying to plan something small and low-key but still, I want it to be special. So yeah, I’m trying to channel my fall brain but keep getting stuck on thoughts of watermelon and tomatoes.

Speaking of which, our CSA was pretty awesome this week with a TON of cucumbers (actually, LEMON cucumbers), heirloom tomatoes and basil. Please share your favorite recipes with me. I’m thinking this pizza perhaps?

Now for this week’s updates

Most popular recipe/blog post: Pumpkin Cinnamon Bun Ice Cream

Pumpkin Cinnamon Bun Ice Cream - incredible and no ice cream maker needed

Three favorite things I pinned all week:

Espresso Toffee Chocolate Chip Cookies from Baker by Nature

Zucchini Brownies from Well Plated

Corn and Zucchini Galette from Oh My Veggies

I hope that you all have a wonderful weekend!

No Churn Blueberry Crisp Ice Cream

Another amazing no churn ice cream recipe full of homemade blueberry sauce and buttery crisp topping. No ice cream maker, no problem!

No Churn Blueberry Crisp Ice Cream <- must make before summer is over!

Sometimes weeks are just insane. Last week was crazy for numerous reasons, add to that, my husband didn’t have an operating cell phone for five days, but I managed to make this ice cream and that made everything better.

That’s a lie, it didn’t fix everything, but it made the stress of what we were going through much more palatable. Besides, this isn’t any old ice cream. This ice cream is basically two desserts in one.

No Churn Blueberry Crisp Ice Cream OMG!!!!!

So if you are completely strange anything like my sister, and you like fruit crisp and you like ice cream but DON’T like them together because of the contrasting temperatures (seriously, who are you?), this ice cream pretty much has solved your life’s biggest problem.

No Churn Blueberry Crisp Ice Cream
 
Another amazing no churn ice cream recipe full of homemade blueberry sauce and buttery crisp topping. No ice cream maker, no problem!
Author:
Recipe type: Dessert
Makes: ~1½ quarts
Ingredients
Crumble:
  • 55g (~1/2 cup) oat flour* (I pulsed my oatmeal in the food processor until it was the consistency of flour)
  • 40g (~1/2 cup) old fashioned oatmeal*
  • 70g (~1/3 cup, tightly packed) light brown sugar
  • 1g (1/2 teaspoon) ground cinnamon
  • 55g (1/4 cup / ½ stick) cold unsalted butter, cut into small cubes
Blueberry filling:
  • 140g (~1 cup) fresh blueberries (frozen can be substituted for slightly longer cooking time)
  • 25g (~2 tablespoons) granulated sugar
  • 15 milliliters (1 tablespoon) fresh lemon juice (about ½ lemon)
  • 5g (~1/2 tablespoon) cornstarch
Ice cream:
  • 16 fluid ounces (2 cups) heavy cream
  • 1 14-ounce can sweetened condensed milk (I used fat free, but any type would work)
  • 5 millimeters (1 teaspoon) vanilla bean paste (or vanilla extract)
Instructions
Make crumble
  1. Pre-heat oven to 350 degrees; line a baking sheet with parchment paper and set aside
  2. In a medium bowl, prepare topping; mix together oat flour, oatmeal, brown sugar and cinnamon
  3. Add butter and use fingers to combine until mixture is slightly lumpy
  4. Spread mixture out in parchment paper and bake for 12-14 minutes or until lightly browned; set aside to cool
While crumble is baking, make blueberry sauce
  1. Place blueberries, sugar and lemon juice in a medium pot stove with medium heat
  2. Stir occasionally until some of the berries begin to break down and juice begins to form (~4 minutes)
  3. Turn the heat to high, add cornstarch and stir quickly until sauce reaches desired thickness (1-2 minutes)
  4. Place sauce in refrigerator to cool for 30 minutes
Once ready, finish making ice cream
  1. In the large bowl of an electric mixer with whisk attachment, beat cream on high speed for several minutes, just until stiff peaks form
  2. While whipping cream, in a separate large bowl, stir together sweetened condensed milk and vanilla bean; fold in blueberry sauce
  3. Once cream is ready, fold it into sweetened condensed milk mixture
  4. Pour half of ice cream into a regular-sized loaf pan and drop one third of crumble over top (use fingers to break into pieces); top with remaining ice cream and then with half of remaining crumble; wrap well with seran wrap or tin foil
  5. Freeze for 6 hours or overnight before serving
  6. Use remaining crumble for serving
Notes
Sauce and crumble can be made up to one week before putting ice cream together, refrigerate each in an airtight container until ready to use
Blueberry filling from this mixed berry sauce
Topping from this fruit crisp

No Churn Blueberry Crisp Ice Cream <--- my new favorite

Blueberry Crisp Ice Cream --- no ice cream maker needed!!

Make something from the blog? Be sure to share it on Instagram with the tag #KeepItSweetDesserts.

You might also like:

Blueberry White Chocolate Brown Butter Cookies

Blueberry White Chocolate Brown Butter Cookies

No Bake Blueberry Pie

No Bake Blueberry Pie

Summer Berry Skillet Crisp

Summer Berry Skillet Crisp

Drumstick Ice Cream Cake

An ice cream cake with all the important components of the classic Drumstick treat!

Drumstick Ice Cream Cake!!! OMG

You didn’t think I’d let National Ice Cream Month pass without a new ice cream related recipe on the blog, did you? Please, I wouldn’t dare! Actually, I almost forgot, but last week I finally got around to making this pretty epic ice cream cake.

This cake was entirely inspired by the Drumstick cake that Kristan made a couple of months ago. As soon as I saw it I knew I had to do an ice cream version and I’m so glad that I finally did!

This might be the most epic ice cream cake!

This ice cream cake uses one of my favorite chocolate cake recipes (I wanted something on the fudgier side), store-bought vanilla ice cream (homemade would be even better), rich chocolate ganache (the unexpected mvp?), and a mix of crushed peanuts and ice cream cones. So much good stuff, such a good cake. I keep on cutting myself massive slices and rationalize that I won’t be burning breastfeeding calories forever so I might as well live it up.

So I realize that the recipe looks long, but it really isn’t all that hard. It just takes a little bit of planning ahead for freezer time and you can actually do 90% of the work while your chocolate cake is baking / cooling. As a mom of a 9-month old that does not stop moving and climbing and crawling, I have to do my baking during naps. I actually did the ice cream and cake prep one day and then finished everything else plus took photos the next. Poor little L doesn’t know what he’s missing while he sleeps!

Drumstick Ice Cream Cake
 
Fudgy Chocolate Cake Barely adapted from Sticky, Chewy, Messy, Gooey Make ahead note: chocolate cake can be made and frozen for up to two weeks before putting cake together
Author:
Recipe type: Dessert
Makes: 12
Ingredients
  • 1 recipe for fudgy chocolate cake (see below)
  • ½ gallon vanilla ice cream
  • 1 recipe for chocolate ganache (see below)
  • 62g (~1½ cup crushed) ice cream cones (5 cones) plus one optional additional cone for decoration
  • 90g (~3/4 cup) chopped peanuts (use salted and roasted for the most flavor)
  • 56g dark chocolate (I used 72%) roughly chopped (optional for decorating)
Instructions
  1. Bake cake according to below directions and do the following steps while cake layers are cooling
  2. Line a 9-inch cake pan with seran wrap and press ice cream down into pan; cover completely and then put this layer in the freezer until firm, about 1 hour
  3. Combine crushed ice cream cones and peanuts and set aside
  4. Make chocolate ganache and set aside to cool
  5. Optional: Place dark chocolate in small heat-safe dish and melt by microwaving in 30-second increments and stirring between each; dip open end of cone into chocolate and coat with spoon so that a some of the outside of the cone is covered; sprinkle with peanut and cone pieces and then set aside on wax or parchment paper to dry
  6. Once cake has cooled completely, you will start to put your full cake together (do these steps quickly)
  7. Place first layer of cake down on a cake plate; top cake with unwrapped ice cream layer; top ice cream with second layer of cake and press down lightly
  8. Cover cake with saran wrap and re-freeze until ice cream is frozen again, about 20 minutes
  9. Once cake has frozen, remove from freezer to finish
  10. Remove seran wrap and spread ganache over top of cake with some dripping down the sides
  11. Coat sides of cake with chopped cone and peanut mixture
  12. Place entire cake back in freezer to chill for one hour or until ready to serve
  13. Optional: Place decorated ice cream cone on top of cake for serving
  14. Allow a few minutes for cake to soften before slicing
  15. Store in freezer for up to two weeks

 
Fudgy Chocolate Cake
 
Ingredients
  • 43g (~1/3 cup) good quality dark unsweetened cocoa powder
  • 1g (1 teaspoon) instant espresso powder
  • 112g dark chocolate (I used 72%), roughly chopped
  • 240 milliliters (1 cup) ounces boiling water
  • 10 milliliters (2 teaspoons) vanilla extract
  • 227g (1 cup) unsalted butter, softened at room temperature
  • 232g (~1 cup, tightly packed) light brown sugar
  • 210g (~1 cup) granulated sugar
  • 150g (~3 large) whole eggs, at room temperature
  • 246g (~2¼ cups) cake flour
  • 5g (1 teaspoon) baking soda
  • 4g (1/2 teaspoon) salt
  • 240 millilters (1 cup) buttermilk
Instructions
  1. Pre-heat oven to 350 degrees
  2. Grease and flour two 9-inch round pans and line bottoms with parchment paper
  3. In a medium heat-proof bowl, combine the cocoa powder, espresso powder and chocolate; pour boiling water over mixture and whisk together until melted and smooth; stir in vanilla; set aside to cool
  4. In the large bowl of an electric mixer with paddle attachment, beat butter until light and creamy; add sugars and beat on medium speed until light and fluffy; add eggs, one at a time, mixing at medium speed between each
  5. Sift cake flour, baking soda and salt into a medium bowl and set aside
  6. Whisk buttermilk into cooled chocolate mixture
  7. Add about ⅓ of the flour mixture to mixing bowl and mix on low speed just until combined; add half of chocolate mixture and mix on low again, just until combined; scrape the sides of the mixing bowl and repeat with ⅓ of flour mixture remaining chocolate mixture; remove bowl from mixer and fold in remaining dry ingredients; be careful not to overmix the batter
  8. Pour batter into prepared pans and bake for 30-35 minutes or until a toothpick comes out clean from center of cakes
  9. Set cake layers aside to cool for 10 minutes then carefully remove each layer from pans; run a knife around the edge of each layer for easier removal
  10. Allow to cool completely before building cake
Notes
Barely adapted from Sticky, Chewy, Messy, Gooey
Make ahead note: chocolate cake can be made and frozen for up to two weeks before putting cake together

Chocolate Ganache
 
Author:
Recipe type: Dessert
Ingredients
  • 225g dark chocolate (I used 72%), finely chopped
  • 237 milliliters (1 cup) heavy cream
  • 28 g (2 tablespoons) unsalted butter at room temperature
  • 30 milliliters (2 tablespoons) light corn syrup
Instructions
  1. Put chocolate in a heatproof bowl and set aside
  2. Put remaining ingredients in a heavy saucepan and place over medium-high heat; stir constantly until butter is melted
  3. When cream mixture comes to a boil and bubbles begin to rise on entire surface, remove from heat and pour over chocolate
  4. Allow chocolate to sit for one minute then stir to combine until smooth and creamy
  5. Allow to cool before using on ice cream cake

Drumstick Ice Cream Cake!!! <--- this is amazing

You know you want that slice.

Make something from the blog? Be sure to share it on Instagram with the tag #KeepItSweetDesserts.

This post contains affiliate links.

You might also like:

No Churn Chocolate Ice Cream with Salty Candied Peanuts

No Churn Chocolate Ice Cream with Salty Candied Peanuts


Sublime Peanut Butter Cup Ice Cream Pie

SUBLIME Peanut Butter Cup Ice Cream Pie!!!


Fudgy Brownie Crunch Banana Ice Cream Pie

Fudgy Brownie Crunch Banana Ice Cream Pie

Keep It Sweet Desserts Weekly Wrap-up 7/26/15

Not too much to report here this week. Lately I find myself in a constant wave of ups and downs. The highest moments of joy are with L… he is such an incredibly happy baby and watching him grow and learn continues to be the most amazing experience. But there are moments for sure where I’m tired, a little burnt out from cleaning food off the floor or figuring out if I have a teething baby or just someone who has a bad case of FOMO and I just want a timeout. Of course I feel incredibly guilty for those feelings and wouldn’t trade one second of being a mom, but man, it is an adventure in emotions for sure! 

The weekends, though, are always the highs. Getting to spend time with Matt, see family and friends and just relax a little bit is a treat. L’s beginning to get more and more vocal so we relish in listening to him “talk” and “sing.” Other highlights are seeing him explore. He’s a BOY for sure. Last week I caught him climbing up his chair and onto the adult bed in his room. Climbing. At 9 months. The world is his jungle gym!

Now for this week’s updates

Most popular recipe/blog post: No Churn Oreo Fudge Swirl Ice Cream

Oreo Fudge Swirl Ice Cream - you don't even need an ice cream maker!!

Three favorite things I pinned all week:

Double Chocolate Avocado Zucchini Bread from  I Wash You Dry

S’mores Pavlova from We Are Not Martha

Salted Caramel Crunch Cheesecake from Bite me More

I hope that you all had a wonderful weekend!

Keep It Sweet Desserts Weekly Wrap-up 7/18/15

First things first. My little sister is getting married! Well, not right now, but last weekend she got engaged and I’m just so darn excited for her. Jessica and her fiancé are a pretty great couple and it seemed only a matter of time until this happened. I love them both and m so happy for them. Oh and the ring… rose gold diamond band band and round diamond. Just so gorgeous! Now I just have to start planning a shower (and if you know my sister, this better be a pretty fabulous shower) and bachelorette party. Nashville is likely on the agenda. Thoughts?

Other than that, it felt like a bit of a crazy week here but much better than last. L started napping in the crib again (SO thankful!!!) and is now officially cruising. Eek. Also, I took him in for his 9-month check-up the other day. What the what?! What else? Oh, I did some baking and have a few fun recipes up my sleeve so that’s a good thing. Oh yeah, and yesterday I went to pay for my groceries at Trader Joe’s only to find that my credit card wallet was left at home. My debit card didn’t work and I ended up walking out empty handed. Nothing like a good waste of time to put you in a good mood on a Friday afternoon… Another new mom post for you will hopefully come soon and there will definitely be a breastfeeding update down the line but any other requests or topics of interest?

Now for this week’s updates

Most popular recipe/blog post: No Churn Cookie Butter Ice Cream

Super Creamy Cookie Butter Ice Cream - NO ice cream maker needed!  So easy and so delicious!

Five favorite things I pinned all week:

Blueberry Muffin Cake from Cookies and Cups

Peach Streusel Coffee Cake from Amy’s Healthy Baking

Malted Milk and Stracciatella Gelato Pops from Top with Cinnamon

Magical Chocolate Shell from Cookistry

Roasted Strawberry and Balsamic Vinegar Ice Cream Sandwiches from Hint of Vanilla

I hope that you all had a wonderful weekend!

Brown Butter Blueberry Chocolate Chunk Blondies

Chewy brown butter blondies bursting with fresh blueberries and dark chocolate chunks.

Brown Butter Blueberry Chocolate Chunk Blondies <----- drooling!

I guess I’m on a blondie bender. Is that a thing? After this recipe, I made a monster batch of my famous KISD blondies for a friend, last week I ran into the kitchen to make this new recipe and then I actually doubled it to make it again for a crowd but swapped cherries for the blueberries.

Oh brown butter. I made a brown butter blueberry cookie last summer and loved them so much I just knew this blondie would be good. And if my lack of self-control immediately after taking pictures of the blondies is any indication, the recipe is seriously good. It’s a good thing I brought a few to a friend because otherwise I would have eaten the entire batch that day.

Pretty much the best blondies ever

*This post has been edited to include the recipe*

Brown Butter Blueberry Chocolate Chunk Blondies
 
Chewy brown butter blondies bursting with fresh blueberries and dark chocolate chunks.
Author:
Recipe type: Dessert
Makes: 12 servings
Ingredients
  • 112 grams / 4 ounces (1/2 cup / 1 stick) unsalted butter
  • 350 grams / 12⅜ ounces (~1½ cups packed) light brown sugar
  • 200 grams / 7 ounces (~1½ cups) all-purpose flour
  • 8 grams (1 teaspoon) salt
  • 3 grams (1/2 teaspoon) baking powder
  • 110 grams / 3⅞ ounces (2 large) whole eggs
  • 5 milliliters (1 teaspoon) vanilla extract
  • 112 grams / 4 ounces (~3/4 cup) dark chocolate chunks
  • 100 grams / 3½ ounces (~3/4 cup) fresh blueberries
Instructions
  1. Pre-heat oven to 350 degrees; line an 8×8 or 9×9 baking dish with parchment paper and set aside
  2. In a medium-sized saucepan over medium heat, brown the butter (stir butter constantly until it turns an amber/light brown color) and remove from heat
  3. Whisk in sugar until well combined and set aside
  4. In a medium bowl, whisk together flour, salt and baking powder; set aside
  5. In a large bowl, whisk together eggs and vanilla; whisk in butter and sugar mixture
  6. Whisk in flour mixture until almost combined and then fold in any remaining crumbs with a spatula
  7. Fold in chocolate and blueberries until evenly distributed throughout batter
  8. Pour into prepared baking pan
  9. Bake for 35-40 minutes or until a knife comes out clean
  10. Set aside to cool before cutting
Notes
Blondies will stay fresh for up to two days if wrapped or packaged in an air-tight container. They also freeze incredibly well, just wrap them tightly in tin foil.

Make something from the blog? Be sure to share it on Instagram with the tag #KeepItSweetDesserts.

Keep It Sweet Desserts Weekly Wrap-up 7/11/15

Happy weekend! Ahhhhhhhhh deep breathe. This week was a rough one… good, but rough. L seems to be teething (I think/hope) and decided he didn’t want to nap in the crib at all. I don’t mind a few car and stroller naps, but when there are zero naps that involve me getting a break I start to feel a little beat up. Hopefully we will see a new tooth break through soon so that he can feel good again. Oh, and did I mention I wasn’t eating anything with (added) sugar this week? A big bowl of ice cream sure would have helped ease the pain for Mommy. Don’t worry, that was just a five-day thing and dessert eating resumes today. Meanwhile, we are visiting a (mostly) paleo friend and I dropped the ball on making a dessert he could eat (like I said, no nap breaks). For future reference, please tell me some paleo-friendly desserts I can make that don’t taste like coconut!

We actually have a ton of plans packed into this weekend but get to see a lot of people so it will be fun! BBQs, shore visits, and lots of wine dinner plans are included. I also scheduled in some time for me to take advantage of my favorite sale of all time so beware, bank account.

Now for this week’s updates

Most popular recipe/blog post: No Churn Cookie Butter Ice Cream

Super Creamy Cookie Butter Ice Cream - NO ice cream maker needed!  So easy and so delicious!

Five favorite things I pinned all week:

Milk Chocolate Cookies and Cream Cookies from Joy the Baker

Funfetti Gooey Butter Shortbread Bars from The Little Kitchen

No-Bake Chubby Hubby Chocolate Bars from Brown Eyed Baker

Chocolate Rocky Road Ice Cream Cake from Foodess

Healthy Zucchini Muffins from Giimme Some Oven

I hope that you all had a wonderful weekend!

Gluten free Banana Cake with White Chocolate Whipped Cream

Moist, flavorful gluten-free banana cake topped with a sweet light white chocolate whipped cream.

Gluten free Banana Cake with White Chocolate Whipped Cream <- no weird ingredients!

I’ve mentioned it before, but when I bake gluten-free treats, I tend to steer towards those that are lower maintenance on the ingredient spectrum. I don’t like to keep stock of a ton of different flours because I can’t use them fast enough. Almond meal/flour, though, is pretty versatile. I’ve used it in a few different recipes. It’s even used in macarons. If I was smart, I’d use it more often in savory cooking as well (think veggie burgers, meatloaf, etc.).

Anyway, this cake is right there in the simple ingredient list. Just almond meal and other ingredients most bakers regularly have stocked in their pantries. The best part? It was seriously good. Matt almost always turns his head at gluten-free desserts but went for seconds (maybe thirds?).

And let’s take a minute to talk about the white chocolate whipped cream. If you love white chocolate you will go crazy over it. If you don’t, like me, just trust me and put this whipped cream on your cake. It is the perfect flavor compliment. Just so, so good.

I served this cake to a friend who doesn’t eat much gluten anymore. It was a few days after her birthday so I knew there had to be a dessert to celebrate. Seriously, when you have friends that cook dinner for you right before AND after your baby is born, you make them birthday cake. End of story!

This gluten free banana cake was so good!


Gluten free Banana Cake with White Chocolate Whipped Cream
 
Gluten free Banana Cake with White Chocolate Whipped Cream
Makes: 6-8
Ingredients
  • White Chocolate Whipped Cream
  • 115g good quality white chocolate, finely chopped
  • 177 milliliters / 6 fluid ounces (3/4 cup) heavy whipping cream
  • 44 milliliters (3 tablespoons) water
  • ½g (1/8 teaspoon) salt
  • Cinnamon for topping (optional)
  • Gluten-Free Banana Cake
  • 411g (~1⅓ cups / 4 medium) ripe bananas, mashed
  • 250g (~5 large) whole eggs at room temperature
  • 235g (~1 cup packed) light brown sugar
  • 5 milliliters / 1 teaspoon vanilla extract
  • 250g (~2½ cups) almond meal or flour
  • 6g (1 ¼ teaspoons) baking powder
  • 3g (1/2 teaspoon baking soda)
  • 2g (1 teaspoon) ground cinnamon
  • 3g (½ teaspoon) salt
  • 1g (½ teaspoon) ground nutmeg
Instructions
  1. Start the whipped cream
  2. Place chocolate in the large bowl of an electric mixer
  3. In a small pot, bring the cream and water to a low rolling boil in a saucepan and immediately pour over the chocolate; let stand for 30 seconds and then stir well
  4. Let stand for 10 minutes and then whisk until mixture is smooth; whisk in salt
  5. Cover bowl and chill in refrigerator for three hours or overnight
  6. Make the cake
  7. Pre-heat oven to 350 degrees
  8. Grease a 9-inch round cake pan and line bottom with parchment paper; grease top of parchment paper as well; set aside
  9. In a large bowl, whisk together bananas, eggs, brown sugar, and vanilla
  10. In a separate large bowl, whisk together remaining ingredients
  11. Whisk dry ingredients into wet but do not overmix
  12. Pour the batter into prepared pan and bake for 50 –60 minutes or until a knife comes out clean from center
  13. Let the cake cool for ten to fifteen minutes before carefully removing from pan and placing on wire rack
  14. Allow cake to cool completely
  15. Finish making whipped cream
  16. Once mixture is completely chilled, use whisk attachment of mixer and beat on high speed for about three minutes or just until stiff peaks begin form, do not overbeat
  17. Spread over the cooled cake immediately; sprinkle with cinnamon if desired
  18. Keep cake in refrigerator until about a half our prior to serving; best enjoyed day of making
Notes
Cake barely adapted Delicious Every Day
Whipped Cream from Food 52

Make something from the blog? Be sure to share it on Instagram with the tag #KeepItSweetDesserts.

You might also like:

Gluten-Free Chocolate Chunk Blueberry Banana Bread

Gluten-Free Chocolate Chunk Blueberry Banana Bread

Lighter Chocolate Chip Banana Cake

Lighter Chocolate Chip Banana Cake

Brown Butter Banana Cake with Brown Butter Cream Cheese Icing

Brown Butter Banana Cake with Brown Butter Cream Cheese Icing

Keep It Sweet Desserts Weekly Wrap-up 7/4/15

I hope everyone is enjoying a long summer weekend with good food, good weather and fun! Somehow last weekend’s post never went up but I don’t feel like all that much happened in the last couple of weeks. I’m just trying to take advantage of any good weather that comes our way and find fun activities for L and me. He’s so active now and really all over the place (crawling, standing climbing…) that he definitely keeps me on my toes! 

Now for this week’s updates

Most popular recipe/blog post: No Churn Cookie Butter Ice Cream

Super Creamy Cookie Butter Ice Cream - NO ice cream maker needed!  So easy and so delicious!

Five favorite things I pinned all week:

Peanut Butter Magic Shell from Dinners Dishes and Desserts

Campfire S’mores Ice Cream from Sift and Whisk <— This looks EPIC

Mixed Berry S’mores from Dessert for Two

Peach Brown Butter Sweet Rolls with Cream Cheese Brown Butter Glaze from Cooking for Keeps

Brownie Caramel Cookie Sandwich from Bakerella

I hope that you all had a wonderful weekend!

Mango Summer Cake

A light chiffon cake topped with mango glaze and a layer of whipped cream. The perfect light and refreshing summer cake.

Mango Summer Cake

So last week I overloaded you with chocolate because that’s what I was craving. Today, though, I have a dessert to satisfy someone else’s cravings. Sweet Zainab is having a baby boy and loves all things tropical. As a result, her big group (seriously, everyone loves this girl and for good reason) of blog friends are throwing her a tropical virtual baby shower!

Mango cake!!!

You know I don’t do coconut, and actually, I don’t really bake with tropical fruit all that often so it took me some time to find the right dessert. My first try was a mango shortbread bar but the mango was a bit muddled and it just wasn’t all that great. This cake, however, has a really sweet layer of mango glaze that I love, though, that brings out the bright and fruity flavor. The cake and whipped cream topping surrounding that are super light and really perfect for summer dessert eating. While this wasn’t my typical dessert of choice, I really did like it. It definitely fulfills its obligations of being a light tropical summer treat!

Zainab, I wish we could sit down together with a fork and enjoy this cake! I’m so excited for you and all that you have to come. Baby boys are the best (not that I’m bias or anything) and you are going to be such an amazing mom!

Scroll down for the recipe and links for everyone else participating in the shower.

Mango Summer Cake


Mango Summer Cake
 
Author:
Recipe type: Dessert
Makes: 12-16 servings
Ingredients
  • Cake:
  • 1 9.6-fluid ounce can mango nectar (~1 ¼ cups)
  • 130g (1¼ cups) sifted cake flour (sifted, then measured)
  • 150g (~¾ cup) granulated sugar + additional 6 grams (½ tablespoon)
  • 8g (1½ teaspoons) baking powder
  • 3g (1/2 teaspoon) salt
  • 65g (3 large) egg yolks, at room temperature
  • 59 milliliters / 2 fluid ounces (1/4 cup) canola oil
  • 2g (1/2 tablespoon) lime zest (~1 lime) plus additional for serving
  • 160g (~4 large) egg whites, at room temperature
  • Glaze:
  • 90 milliliters / 3 fluid ounces (6 tablespoons) mango syrup (see directions below*)
  • 50g (~1/4 cup) granulated sugar
  • 15 milliliters / 1 tablespoon fresh lime juice (~1/2 lime)
  • Whipped Cream:
  • 237 milliliters / 8 fluid ounces (1 cup) whipping cream, cold
  • 25g (~2 tablespoons) granulated sugar
Instructions
  1. Make the Cake:
  2. In a small heavy-duty medium saucepan, make mango syrup* by simmering mango nectar over medium heat for about twenty minutes or until reduced to just under ¾ cup; remove from heat and set in fridge to cool to room temperature
  3. While mango syrup is cooling, make cake
  4. Pre-heat oven to 325; line a 9x13 cake pan with parchment paper and set aside
  5. Sift together flour, sugar (excluding additional amount), baking powder, and salt into a medium bowl; set aside
  6. In a separate large bowl, whisk egg yolks, canola oil, lime zest, and half of mango syrup (90 milliliters / 3 fluid ounces) until well combined (set aside remaining mango syrup); whisk in dry ingredients but do not overmix
  7. In the large bowl of an electric mixer, beat egg whites on medium high until soft peaks form; add and beat until stiff
  8. Gently fold one half of egg whites into yolk mixture; fold in remaining egg whites
  9. Pour batter into prepared pan and bake 24-28 minutes or until golden and knife comes out clean from center (do not overbake!)
  10. Set pan aside on a cake rack to cool
  11. Make the glaze:
  12. In a small heavy duty saucepan, boil sugar, lime juice, and mango syrup* until liquid is reduced to about ¼ cup (~5 minutes); pour glaze over cake
  13. Make whipped cream:
  14. In the large bowl of an electric mixer, combine whipping cream and sugar on medium-high speed for several minutes or until stiff peaks begin to form
  15. Carefully spread whipped cream over cake and cover and chill cake until ready to serve
  16. Top with additional lime zest before serving
  17. Enjoy within 1-2 days for best results
Notes
Adapted from Epicurious

Check out all the other recipes!

Blackberry Coconut Cupcakes, by Baking a Moment
Blueberry Coconut Meusli Bars, by The Spiffy Cookie
Blueberry-Ginger Coconut Cheesecake Popsicles, by Floating Kitchen
Caramel Coconut Cluster Bars, by Eats Well with Others
Chocolate Coconut Cake, by Brunch with Joy
Coconut Breakfast Pudding with Sauteed Nectarines, by Cooking and Beer
Coconut Cake, by I am Baker
Coconut Cream Pie Ice Cream, by The Recipe Rebel
Coconut Energy Bites, by The Kitchenarium
Coconut Key Lime Angel Food Cake Roll, by Flavor the Moments
Coconut Key Lime Pie Cookie Bars, by Two in the Kitchen
Coconut Key Lime Macarons, by Life Made Sweeter
Coconut, Lime, and White Chocolate Milkshake, by A Clean Bake
Coconut Pineapple Banana Smoothie, by The Bitter Side of Sweet
Coconut Pineapple Fried Rice with Shrimp, by Healthy Nibbles and Bits
Coconut Sweet Potato Muffins, by Luci’s Morsels
Double Chocolate Chip Cookies with Toasted Coconut, by The Cooking Actress
Key Lime Coconut Button Sandwich Cookies, by Culinary Concoctions by Peabody
Key Lime Coconut Pound Cake, by Grandbaby Cakes
Lavender Coconut Macarons, by Broma Bakery
Macaroon Tarts with Ginger Coconut Whipped Cream and Pineapple, by A Cookie Named Desire
Mango Coconut Donuts, by Chez Catey Lou
Mango Coconut Smoothie, by Jessica in the Kitchen
Mango Summer Cake, by Keep it Sweet Desserts
Mini Coconut Cream Pies, by Hip Foodie Mom
Pina Colada Pie, by Life, Love, and Sugar
Skinny Blueberry Lime Scones, by Club Narwhal
Spiced Lentils with Toasted Coconut, by This Gal Cooks
Toasted Coconut Banana Meringue Pie, by The Sweet {Tooth} Life
Triple Coconut Rum Layer Cake, by bethcakes
Tropical Pineapple Coconut Sangria, by Shared Appetite
White Chocolate Coconut Key Lime Cookies, by Culinary Couture

Make something from the blog? Be sure to share it on Instagram with the tag #KeepItSweetDesserts.

Fudgy Mocha Chip Brownies with Espresso Sea Salt

The fudgiest brownies with a hint of mocha and touch of salt to kick any chocolate craving in the butt.

Incredible Fudgy Mocha Brownies! Look at the bits of espresso sea salt on top!!

Kind of like my beloved blondies, it’s been too long since I’ve made brownies. I know it’s summer and time for light fruit desserts or frozen ice cream treats, but all I wanted last week was a rich fudgy chocolaty brownie.

These brownies turned out to be perfect. They are thick and crazy fudgy. If anyone was looking for an end piece, I’m sorry but I pretty much ate all of the edges while cutting them for photos. I just couldn’t help myself and I don’t regret it one bit. And even though I don’t usually choose to put chips in my brownies, for some reason they seemed appropriate here. The dark chocolate mocha brownies are full of semi-sweet chips (you could use milk chocolate if you want to go sweeter) and they help the brownie to have layers of flavor. The mocha flavor is more an essence than overpowering and the espresso salt helps enhance it. If you don’t have espresso salt don’t expect too much coffee to come through.

Super Fudgy Mocha Brownies <---- need

Fudgy Mocha Chip Brownies with Espresso Sea Salt
 
The fudgiest brownies with a hint of mocha and touch of salt to kick any chocolate craving in the butt.
Author:
Recipe type: Dessert
Makes: 24-30 servings
Ingredients
  • 256g unsweetened chocolate, roughly chopped
  • 340g (1½ cups / 3 sticks) unsalted butter
  • 415g (~2 cups) granulated sugar
  • 400g (~1¾ cups, packed) light brown sugar
  • 275g (~5 large) whole eggs, at room temperature
  • 89 milliliters (6 tablespoon) strong brewed espresso (4 grams (1½ tablespoons) espresso + 89 milliliters (6 tablespoons) water))
  • 10 milliliters (2 teaspoons) vanilla extract
  • 290g (~2 cups + 2 tablespoons) all-purpose flour
  • 2g (1/2 teaspoon) salt
  • 270g (1½ cups) semi-sweet chocolate chips*
  • ½g (1 teaspoon) espresso salt (can substitute flaky sea salt**)
Instructions
  1. Pre-heat oven to 350 degrees;
  2. Line a 9x13 baking pan with parchment paper; set aside
  3. In a medium bowl, whisk together flour and salt; set aside
  4. Melt butter and chocolate in large pot over low to medium heat; remove when melted
  5. Stir in sugar until combined; stir in eggs, espresso and vanilla until smooth
  6. Whisk in flour mixture just until combined; do not overmix; fold in chocolate chips
  7. Pour batter into prepared baking dish and sprinkle with espresso salt
  8. Bake 40-45 minutes or until a knife comes out clean
  9. Set brownies aside to cool completely before slicing and serving
  10. Notes:
  11. *You can use milk chocolate chips instead if you want to enhance the sweetness of the brownies instead of the rich chocolate flavor
  12. **If you don’t have espresso salt don’t expect too much coffee to come through
  13. These brownies are great for making in advance. Just wrap them tightly in foil and store them in the freezer for up to one month. They might also taste good right out of the freezer. Not like I would know.

Make something from the blog? Be sure to share it on Instagram with the tag #KeepItSweetDesserts.

This post contains affiliate links

You might also like:

Espresso Salted Caramel Buttercream Brownie Bites

Espresso Salted Caramel Buttercream Brownie Bites

Thick and Fudgy Peppermint Mocha Brownies

Thick and Fudgy Peppermint Mocha Brownies

Fudgy Double Creme de Menthe Brownies

Fudgy Double Creme de Menthe Brownies

Keep It Sweet Desserts Weekly Wrap-up 6/20/15

Happy weekend! Hopefully most of you are able to be with your families this weekend. This is Matt’s first Father’s Day so L and are hoping that we can make it extra special. We will be with his family this weekend to celebrate one grandpa and then next weekend we will be with my family to celebrate a very special Poppy. We are very lucky to have so many loving family members who love L so much. And who can blame him? He is edible.

This week was a bit long but I made a big effort to see friends and get out every day. I also started a couple of new yoga videos for a change. I’ve been doing the same Bob Harper video for years so it was good to change things up. This one was great a great mix of breathing, stretching and challenging poses while this Jillian video was all hard but doable. Luckily the ladder is a 30-minute workout (well, there are two of them). I’m definitely experiencing more sore muscles than I have in a very long time.

Now for this week’s updates

Most popular recipe/blog post: Healthy Blueberry Banana Bread

HEALTHY Blueberry Banana Bread<- most popular recipe of the week! 

Three favorite things I pinned all week:

S’mores Ice Cream Sundaes from Handmade Charlotte

Cookie Dough Blizzard from Buns in my Oven

Blueberry Cake with Peanut Streusel from Food52

I hope that you are all having a wonderful weekend!

Healthy Blueberry Banana Bread

My go-to banana bread recipe loaded with blueberries is perfect for easy summer baking.

My new go-to banana bread! You would have no idea it's healthy

There are a few basic recipes everyone should have in their back pocket. A chocolate chip cookie, a basic dependable chocolate cake, and fudgy brownies. You should also have a go-to banana bread recipe. Need something to bring to brunch? Banana bread. A bazillion almost-rotten bananas on your counter? Banana bread. Want an easy after-school treat for your kids? Banana bread.

I’ve made a few and shared them here, but this is my favorite. I think of it as an every day banana bread because it’s made with whole wheat flour and very little butter and it’s super easy to make (no mixer required). Plus, the light and moist base lends itself to any kind of mix-in you would like (blueberries, chocolate chips, cinnamon chips, or even peanut butter chips!) making it extra handy. Have I sold you yet? If so, head over to Meyer’s Styles for the recipe. Save it and use it all the time!

My Go To Banana Bread!

Make something from the blog? Be sure to share it on Instagram with the tag #KeepItSweetDesserts.

You might also like:

Healthy Apple Cinnamon Muffins

Healthy Apple Cinnamon Muffins

Healthy Pumpkin Banana Oatmeal Breakfast Bake

Gluten-Free Pumpkin Banana Breakfast Bake

Low Fat & Whole Wheat Vanilla Roasted Strawberry Banana Bread

Vanilla Roasted Strawberry Banana Bread

Keep It Sweet Desserts Weekly Wrap-up 6/13/15

This weekend is extra special because yesterday Matt and I celebrated our 5-year anniversary! We took L out to an early dinner of Cuban food (so early that we were there for the wait staff’s pre-service meeting ha). I’m so excited, though, because tonight we are going on a date (first real date night in monnnnnths). Instead of gifts we are treating ourselves to a meal at Blue Hill. I’ve been wanting to go forever and really can not wait. Plans for cocktails and wine pairings have already been discussed. Oh yeah, and I’ll get dressed up (heels?!), do my hair and put on makeup (do I remember how to do that?). Like I said, so excited!

Happy anniversary, Matt! LOVE YOU!!

Now for this week’s updates

Most popular recipe/blog post: No Churn Cookie Butter Ice Cream

Super Creamy Cookie Butter Ice Cream - NO ice cream maker needed!  So easy and so delicious!

Three favorite things I pinned all week:

Strawberry Rhubarb Dump Cake from The Baker Chick

Black Pepper & Black Cherry Marble Cheesecake from Eats Well With Others

Bruce Bogtrotter’s Revenge Chocolate Cake from Sift and Whisk <- each component sounds amaaaaazing

I hope that you are all having a wonderful weekend!

New Mom Real Talk Edition 10

New Mom Real Talk: Day in the life with a 7 1/2 month old

5:30am I wake up bright and early. Sometimes I can go back to sleep for a few minutes but this morning I catch up on my phone in bed for a bit.

6:00am Now I’m hungry so it’s time to go make breakfast (oat bran with egg white cooked in, lots of blueberries and a spoonful of peanut butter) so I can eat and finish my coffee before L needs me. Generally he doesn’t need to get up until 7 but some days it’s earlier and I really, really prefer to get to eat first so I have that little bit of time to myself in the morning.

Day in the life with a 7 1/2 month old

6:15am L is up! Or DJ L as we call him in the morning. I know because he’s playing with his mobile in the crib. The hanging part isn’t there anymore but the music piece is still attached to the crib and generally great for entertaining him for a while. Meanwhile I drink my coffee and spend some time on the computer. Will I ever catch up on emails, blogs and social media? Nope!

6:30am It’s quiet on the monitor. Did L go back to sleep?

6:45am Oh he’s up. There he is playing with the diapers next to his crib oh boy… Or maybe it’s the wipes? A few minutes later Matt is back from the gym and goes to get him. You know, so he doesn’t eat a wipe or anything. I follow him in a couple of minutes later because L getting his morning diaper cha nge sometimes turns into a hangry moment. Fifteen minutes for the feeding, nice and quick!

Day in the life with a 7 1/2 month old

7:15am L is in the pack-and-play with a bunch of toys (he doesn’t always love this but it’s necessary) so I can pump. I can’t believe there was a day where I could HOLD him while I pumped. Ah that was a lifetime ago. Today he seems to be playing and laughing so that’s good!

I put the ~4 ounces in the fridge and actually transfer some milk from fridge to freezer (after supply concerns for a while it’s crazy that I’ve built up a major freezer stash). L still seems happy so I push my luck and brush my teeth.

7:30am He is done in the pack-and-play! We go play in his room on the floor.

7:45am L is already seeming tired so we read for about ten minutes until I realize it’s most definitely nap time. On napping: Most days I just take his signals for naps though they tend to fall into the same time range. Once he seems tired we read for a few minutes (this helps settle him). Then the sound machine goes on and lights are out. Typically he will cry for a minute or two when I put him down and then go to sleep, but nothing is guaranteed!

Once I confirm he’s asleep, I head to the kitchen for a snack (yes, it’s 8am and I’m already hungry again). Bottles and pumping supplies get boiled and I make some toast with jelly and cottage cheese. Seemed the most “normal” thing I could eat and write about.  Some more time on the computer while I eat. I think about what I should try to do while L is napping and window shop online instead…Should have had more coffee! The lack of sunshine this week is killing my motivation and energy levels.

8:45am To solidify my plans of a walk later I get dressed in yoga pants (a downgrade from previous running considerations). L’s still sleeping, I really should try to do something. Guess I’ll snack on strawberries because for some reason I’m still hungry. Bed gets made. More online reading. I think about a book I’m supposed to read and tell you about. Laziness ensues.

9:30am L is up and I listen to him play in his crib for a while. He took such a nice hour and a half nap and I feel slightly guilty for not doing anything super productive, but it was nice for a change to kind of chill out a bit. Twenty minutes later I go in. Happiest baby ever, I love 90-minute naps!

Day in the life with a 7 1/2 month old

After L nurses we go to the kitchen for some “real” food. I give him blackberries and toast with yogurt spread on top. I need a snack as well, but I decide to stop telling you what I’m eating because honestly that’s making me anxious and self-conscious!

While he’s eating I also throw some blueberries and yogurt into the blender to experiment with a “frozen yogurt” treat for him. We will see if this is one of those Pinterest finds that works out. Side note, L does NOT like the sound of the Vitamix on high speed! I know he’s done eating when he starts playing with food and hitting the tray. Time for clean up!

Day in the life with a 7 1/2 month old

L proceeds to try to climb up the wall and off of his changing table while we do this. Typical. I then try to do dishes while he plays on the floor but Mr. Trouble goes straight for whatever is close to dangerous so the dishes will wait. I supervise while he plays with toys in his room.

11:10am L is getting a bit tired and I’m stir crazy. Time to get out of the apartment for a walk!

We get back around 12:40pm and L wakes up from an almost hour-long walk (not bad!). I unpack a few groceries I stopped for on the walk and go feed him. I probably should give him real food after but I’m lazy and hide out of sight while I eat my snack. Bad mom. L plays on the floor of his room (aka sometimes plays with toys, often grabs at things like drawer knobs, tracks under the glider’s foot stool and the door. I monitor but try to let him do anything he wants that doesn’t look dangerous.

Day in the life with a 7 1/2 month old

1:45pm and he already seems tired which is really weird. I read to L for 20 minutes and then put him down for a nap. Let’s just say this doesn’t go well so I go get him from the crib and try to figure out what to do next. He settles down and then happily plays in the Jumperoo for a bit and then it’s back to the floor.

A little after 3pm he’s definitely tired so read to L for about ten minutes and then put him down for a nap. Yeah, the sounds from the crib tell me that’s not happening. I have one of those “you have got to be kidding me I’m about to cry” moments and go get him. Sometimes Mom just wants a break, you know?

At 3:45pm I feed L and he passes out on me. It’s almost like the newborn days and I don’t hate it. I’m going to be so sad when he’s too big for snuggling! He takes an hour nap and is refreshed to make it through the rest of the day!

5pm, L’s dinner time. Some days I cook dinner for Matt and me while L is in the highchair. Tonight we have leftovers and I actually eat with L. My appetite has been crazy all day and I’m ready for dinner, I can’t help it! He gets a mish-mash of whole wheat pasta with veggies (all well cooked) and cherries (his first time having them and they are a hit!). I pitted and quartered the cherries though he still spit a ton of them out after chewing on them for a while.

Day in the life with a 7 1/2 month old

By 6pm he is done and I do another big clean up. It isn’t the biggest mess I’ve ever seen but how does so much food get under his legs? We go to play for an hour in his room and wonder when Daddy will be home. Matt is unfortunately still at work when it’s time for his 7pm bottle so I start that and stretch out the feeding so L can get a few minutes of Daddy time before going to sleep. He’s so tired by the time that happens and when Matt puts him to bed at 7:30pm he falls asleep almost immediately.

Sometimes I wish L’s bedtime was a little later for weekend flexibility, but it’s really nice to get some time with Matt once he goes to bed. Matt eats dinner while we do some crossword puzzles. I pump at 8:30pm (4 ounces) and then crash early. Maybe a little after 9pm?

I feel like so much has changed since I did a day-in-the-life post a few months ago. Well, maybe not my bedtime, but everything else. L is just so active now and I’m realizing that I’ll need to have more than just a few little toys to entertain him in the near future. Tips on occupying little people??

Cinnamon Chip Oatmeal Blondies

Chewy gooey blondies loaded with sweet cinnamon chips.

Cinnamon Chip Oatmeal Blondies <- perfectly chewy, gooey and sweet!

Until this, I hadn’t made Blondies since L was born.

Which is a shame. Because 1) blondies are really my thing and 2) they are pretty much the easiest way to bake for a crowd. After churning out hundreds and thousands of them for a couple of years, I guess I just needed a little blondies hiatus. Don’t worry, though, because blondies are back!

This recipe, in particular, comes with a punch of cinnamon and that chewy gooey blondie we have all grown to love. Oh yeah and there is oatmeal for extra health chew.

Cinnamon Chip Oatmeal Blondies <- great easy recipe to feed a crowd!


Cinnamon Chip Oatmeal Blondies
 
Chewy gooey blondies loaded with sweet cinnamon chips.
Author:
Recipe type: Dessert
Makes: 24 servings
Ingredients
  • 227g (1 cup) unsalted butter
  • 700g (~3 cups packed) light brown sugar
  • 270g (~2 cups) all-purpose flour
  • 120g(1½ cups) Old fashioned oats
  • 10g (2 teaspoons) table salt
  • 5g (1 teaspoon) baking powder
  • 220g (4 large) whole eggs at room temperature
  • 15 milliliters / 1 tablespoon vanilla extract
  • 430g (2¼ cups) cinnamon chips
Instructions
  1. Pre-heat oven to 350 degrees; line a 9x13 baking dish with parchment paper and set aside
  2. In a medium-sized saucepan over medium heat, melt butter and brown sugar, stirring constantly; remove from heat and set aside
  3. In a medium bowl, whisk together flour, oatmeal, salt and baking powder; set aside
  4. In a large bowl, whisk together eggs and vanilla; whisk in butter and sugar mixture
  5. Whisk in flour mixture until almost combined and then fold in any remaining crumbs with a spatula
  6. Fold in cinnamon chips so that they are evenly distributed throughout batter
  7. Pour into prepared baking pan
  8. Bake for 41-45 minutes or until a knife comes out clean
  9. Set aside to cool for one our before cutting
  10. Note: Blondies will stay fresh for several days if wrapped or packaged in an air-tight container. They also freeze incredibly well, just wrap them tightly in tin foil.

Cinnamon Chip Oatmeal Blondies LOVE

Make something from the blog? Be sure to share it on Instagram with the tag #KeepItSweetDesserts.

You might also like:

Apple Cinnamon Blondies

Apple Cinnamon Blondies

Oatmeal Cookie Wedges with Cinnamon & Chocolate Chips

Oatmeal Cookie Wedges with Cinnamon & Chocolate Chips

Cinnamon Roll Blondie Bites

Cinnamon Roll Blondie Bites

Keep It Sweet Desserts Weekly Wrap-up 6/6/15 +Giveaway

It’s the weekend! Was this the longest week ever or is it just me? I think because last Sunday was such a rough day (that was the nail cutting event) I didn’t feel refreshed from the weekend. Never mind that, though, because we made it to Saturday.

We have a low-ish key weekend with a haircut scheduled for me (first one since last summer, yikes) and are finally seeing good friends of ours that we haven’t seen in months. I can’t wait to catch up with them! Other than that I’m ready for sunshine to resume so I can start being outside more and taking L to the pool and the park again. 

Giveaway time: THE WORLD ON A PLATE: 40 Cuisines, 100 Recipes, and the Stories Behind Them by Mina Holland

I was sent a copy of The World on a Plate by Mina Holland and get to give one away as well! I just started reading it, but can already tell you that it is a great book for anyone that loves food (especially if you love food AND travel). Mina basically explores forty cuisines from all over the world and breaks them down for you. Plus, each cuisine comes with a couple of recipes. My takeaway so far? Time to drink more wine and get back to Europe. With L around, a trip to Europe isn’t happening so fast, though, so I guess we will have to try some of the recipes from places we want to visit instead.

Anyway, if you are interested in winning a free copy of her book, just leave any comment on this post. Giveaway will end Friday June 12th midnight EST. Open to US residents only.

Now for this week’s updates

Most popular recipe/blog post: No Churn Cookie Butter Ice Cream

Super Creamy Cookie Butter Ice Cream - NO ice cream maker needed!  So easy and so delicious!

Five favorite things I pinned all week:

Strawberry Passion Fruit Macarons from Hint of Vanilla

M&M Cookie Dough Ice Cream Cake with Hot Fudge from Yammie’s Noshery

Peanut Butter Cup Cupcakes from Confessions of a Cookbook Queen

Peppermint Patty Flourless Chocolate Cake from Sugar Hero

Mango Swirl Banana Bread from Sift and Whisk

I hope that you are all having a wonderful holiday weekend!

New Mom Real Talk Edition 9

Real life. Some weeks are harder than others.

I try really hard not to complain about L because generally, he is a pretty easy baby. I’m knocking on wood as I type this, but it’s true. We’ve been so lucky with him.

New Mom Real Talk

But you know what? Some weeks, no matter how “perfect” your child is, can be really hard and tiring. Last week there was one day where I showered as fast as possible while listening to him scream in his crib. Yeah, teething + not wanting to nap = rough day all around. In fact, I didn’t write a weekly update post last week because I just couldn’t bring myself to be “chipper” and light.  It happens.

Sometimes I limit L’s “real food” meals because I just don’t feel like cleaning up another colossal mess. Sometimes I sing the ABCs for twenty minutes straight in the car out of necessity. Sometimes the Jumperoo is a lifesaver because I can’t be “on” for an additional thirty minutes. And when all of Sunday morning is spent at the doctor’s office because you clipped your baby’s finger instead of nail and it just won’t stop bleeding, you wonder how many gigantic Toblerone bars are acceptable for consuming.

But that’s life. Ups and downs. Easy days, hard days, harder days. There isn’t any real point to this post except to say that we all have those tough days. Yeah, I mostly talk about the good stuff, because 1) it’s more fun to write and 2) it’s definitely more appealing to read. But don’t let the photos, posts and all the fluff fool you. It’s real life here, too!

New Mom Real Talk

This post contains affiliate links.

Sublime Peanut Butter Cup Ice Cream Pie

This no-bake ice cream pie is the ultimate summer dessert! Oreo crust, peanut butter ripple ice cream, tons of peanut butter cups and whipped cream!

SUBLIME Peanut Butter Cup Ice Cream Pie!!!
This dessert wavers back and forth between hot mess and best thing ever. I’m going with best thing ever.

This ice cream I shared with you? It was already pretty heavenly but I just had to take it even further. All my life I’ve been a pretty big ice cream pie fanatic (as a kid I used to get one every year for my birthday from Baskin Robbins). It makes sense. You usually start with an Oreo crust (always, always good) and then load it up with your favorite ice cream. Here I decided a full pound of peanut butter cups should be used as well, because why not? Make this dessert when you are having some friends over for a barbeque because it’s something worth sharing. Just know that it may be a little messy to cut. Call it “homey” if you will.

SUBLIME Peanut Butter Cup Ice Cream Pie!!!

Sublime Peanut Butter Cup Ice Cream Pie
 
This no-bake ice cream pie is the ultimate summer dessert! Oreo crust, peanut butter ripple ice cream, tons of peanut butter cups and whipped cream!
Author:
Recipe type: Dessert
Makes: 12 servings
Ingredients
  • 285g (~2¼ cups / 25 cookies) finely crushed Oreos
  • 71g (5 tablespoons) unsalted butter, melted
  • 1 Recipe for Peanut Butter Ripple Chocolate Ice Cream
  • 454g (~3 ½ cups) chopped peanut butter cups (from about 22 large)
  • 2 cups Stabilized Whipped Cream (recipe here)
Instructions
  1. In a medium bowl, combine Oreo crumbs and melted butter; press mixture down evenly into the bottom of a spring form pan; chill in refrigerator for thirty minutes
  2. A few minutes before crust is ready to fill, take ice cream out of freezer to soften slightly
  3. Carefully spread half of ice cream over crust; top with chopped peanut butter cups
  4. Cover pan with foil and freeze; make stabilized whipped cream
  5. Spread whipped cream over peanut butter cup layer and place pie back in freezer for at least one hour or until ready to serve

Make something from the blog? Be sure to share it on Instagram with the tag #KeepItSweetDesserts.

You might also like:

Chocolate Pound Cake with Peanut Butter Whipped Cream

Chocolate Pound Cake with Peanut Butter Whipped Cream

Peanut Butter Caramel Candy Cups

Peanut Butter Caramel Candy Cups

Peanut Butter Cup Heath Bar Brown Butter Cookies

Peanut Butter Cup Heath Bar Brown Butter Cookies

Peanut Butter Ripple Chocolate Ice Cream

You don’t need an ice cream maker to make this ice cream! Rich chocolate ice cream with a ribbon of salty peanut butter.

Rich Chocolate Ice Cream with a Salted Peanut Butter Ribbon (no ice cream maker for this one!)

If you love chocolate and peanut butter as much as I do, you’ve no doubt had a variation of this ice cream flavor before. I know, not as creative as this recipe or this one, but trust me, necessary. Because, one: you can always use another no churn ice cream recipe and two: I have a follow-up dessert that revolves around this one and trust me, you don’t want to miss it.

Peanut Butter Ripple Chocolate Ice Cream
 
You don’t need an ice cream maker to make this ice cream! Rich chocolate ice cream with a ribbon of salty peanut butter.
Author:
Recipe type: Dessert
Makes: ~1½ quarts
Ingredients
  • 16 fluid ounces (2 cups) heavy cream
  • 1 14-ounce can sweetened condensed milk (I used fat free, but any type would work)
  • 50g (½ cup + 2 tablespoons) unsweetened cocoa powder (any kind will work, I used a lighter cocoa powder for a more milk-chocolatey flavor)
  • 15 milliliters 1 tablespoon vanilla extract
  • 200g (~¾ cup) creamy peanut butter
  • 1g (¼ teaspoon) salt
Instructions
  1. In a large bowl, whisk together sweetened condensed milk, cocoa and vanilla; mixture will be very thick; set aside
  2. In the large bowl of an electric mixer with whisk attachment, beat cream on high speed for several minutes, just until stiff peaks form
  3. Once cream is ready, gently fold ⅓ of it into sweetened condensed milk mixture; gently fold in remaining cream until fully combined
  4. Pour half of ice cream into a regular-sized loaf pan or ice cream storage container; microwave peanut butter for 15 seconds and stir in salt; drizzle half of salted peanut butter over top then run a knife through peanut butter to marbleize; repeat with remaining ice cream and peanut butter
  5. Wrap well with seran warp or tin foil and freeze for 6 hours or overnight
Notes
Base from Martha Stewart

Chocolate Ice Cream with Salted Peanut Butter Ripple. and you don't even need an ice cream maker!


Make something from the blog? Be sure to share it on Instagram with the tag #KeepItSweetDesserts.

You might also like:

No Churn Oreo Fudge Swirl Ice Cream

No Churn Oreo Fudge Swirl Ice Cream

No Churn Monster Cookie Dough Ice Cream

No Churn Monster Cookie Dough Ice Cream

No Churn Chocolate Ice Cream with Salty Candied Peanuts

No Churn Chocolate Ice Cream with Salty Candied Peanuts

Keep It Sweet Desserts Weekly Wrap-up 5/23/15

Florida already feels like it was forever ago, but despite some mild post-vacation blues, this week turned out to be a good one. I kept busy with L… or I should say, he kept me busy! We went to Florida with a 6+ month old baby and returned with a completely different 7 month old. Over the course of that week away he got two teeth (going on 6 I think!), went into full out crawling (why are wires, door hinges and toilet plungers so interesting?), and started “talking” a whole lot more. Babies change so much so fast but this felt like the biggest week of development since he was born. I think I’m overdue for a new day-in-the-life post.

Other than that I made a super awesome and outrageous dessert (recipe coming soon!) and met up with Erin for the first time. Such a warm, nice, smart and all around wonderful person!

We are spending this weekend this weekend at my parents’ house. There will be lots of pool time for my little swim lover and some good grandparent and aunt and uncle time, too. What are you doing to enjoy the long weekend?

Now for this week’s updates

Most popular recipe/blog post: No Churn Cookie Butter Ice Cream

Super Creamy Cookie Butter Ice Cream - NO ice cream maker needed!  So easy and so delicious!

Three favorite things I pinned all week:

Honey Bee Cupcakes with White Chocolate Honey Ganache from We Are Not Martha

Drumstick Cake from Confessions of a Cookbook Queen

Chocolate Malt Smoothie from Well Plated

I hope that you are all having a wonderful holiday weekend!

New Mom Real Talk Edition 8

Family Vacation and Tips on Travelling with a Baby

Baby Travel Tips

We had the BEST time in Florida last week. It was our second time flying with L (last time at 5 months, this time at 7 months) and luckily he did well again. This trip was so wonderful for a lot of reasons. We started off with a few days on the West Coast with my family. My parents had rented a house for the 6 1/2 of us to stay in. That part of the trip was pretty easy to manage in terms of taking care of a baby. Plus, there were quite a few other people around who wanted to play with the little monkey. The second half of the week we stayed at a hotel with Matt’s parents on the East Coast. It was also so fun and nice to be somewhere with someone else to clean up after you, but there are obviously a few other challenges when you stay with a baby in a hotel.

Before our first family flight, I had done some searching online and found a few blogs that gave great tips on packing and preparing for a plane ride with a baby (some helpful posts are pinned here). A few of you have asked for advice on this as well, so I figured I’d give some general travel tips that I found really helpful.

1) Before you do anything, make lists. I started making lists of what to pack for L weeks before we went away. I actually did this on my phone so that any time something popped into my head I’d add it. This was broken down into items I needed for the plane, items to pack generally and then a few things to ship or buy when we arrived (more details below).

Baby Travel Tips

2) Plan to ship or buy. This goes for you or for the baby. No matter how much you try to convince yourself otherwise, there is a LOT to pack for travelling with a baby. Beyond the basic needs like a week’s worth of diapers and wipes there’s the stroller, car seat (we learned the hard way on our first trip that not all car seat’s are created equal, L HATED the rental car seat), so many outfits, bottles, potentially pumping supplies and on and on and on. For this trip, Matt shipped his golf clubs with a few toys tucked inside as well. I actually had planned to place a Diapers.com order but it didn’t work out so we just stocked up on diapers at the grocery store the first day.

3) Pack extra. Especially in your carry-on. Diaper blowouts don’t happen often anymore, but on the return flight from our first trip, there were two on the plane. And did I mention that I was travelling alone with L for that leg of the trip? Don’t worry, by the second time around I felt like a pro in the airplane bathroom. Never mind the fact that we landed in a snowstorm and the two of us were drastically underdressed to be waiting outside for a bus to our car. But I digress….

Baby Travel Tips

4) Prepare for challenges and limitations in a hotel. Call your hotel ahead of time to make sure you can get a fridge in your room or have the mini bar emptied out for use. If you have bottles or pump equipment to clean, consider splurging on the sanitizing wipes or make the bathroom sink work for you. Push the limits on laundry. We do so much laundry for L at home, but away he was re-wearing PJs and other items if they weren’t a mess. I also washed things like bathing suits out in the shower. Also call ahead about a crib solution. In the house, we were able to rent a crib (I was really happy with Happy Baby) and the hotel provided one (although it wasn’t full size so check to see what you are getting). We also brought our own clean sheet for the mattress.

5) Add extra time for the airport. Seriously. First of all, you never know how long security will take etc. Second, there are all sorts of variables with a baby. Will they need to eat? Will it be one of those feedings where it somehow takes forever? Will there be a surprising but necessary diaper change? Will you need to buy food for yourself? Of course, you don’t have time or space to pack your own meals;-) Regardless of whether you need that time or not, it is SO much less stressful this way. We planned way more time than we really needed and didn’t have to rush at all. I’d rather have a few minutes sitting in the airport restlessly than sweat dripping down my back as I run for the gate with a baby and alllll of the stuff.

Baby Travel Tips

Everyone always asks… L’s hat is iPlay, it’s the best!

6) Curbside check-in. Like I said, you have a lot of stuff. Even after shipping golf clubs, I had a backpack and the diaper bag. Matt had a big carry-on bag. We had the stroller and car seat. Oh yeah, and there were two checked suitcases. Watching us carry all of this was quite the comedy routine. Take my word for it, a few dollars for curbside check-in is worth it. Just note that you have to get out of the car with the baby if you are checking your car seat.

7) Wear the baby through security. More free hands, just do it.

8) Bring a selection of small toys or snacks for entertainment on the plane. I had a large ziplock bag in my diaper bag (easier to access that way) with 4-5 small toys (obviously including Sophie). L is young enough that we didn’t have to worry he’d get too bored on the flight with that selection. I also packed “puffs”, carrot pouches and extra breast milk just in case.

Baby Travel Tips

9) Take advantage of the seatbelt sign being turned off. First of all, if your baby is tired, it’s so much easier to get them to sleep while moving and walking around. Second of all, it’s a great way to provide a new form of entertainment. Babies love to look around and see new things and people. Plus, you will make some strangers’ days with cute baby smiles up and down the aisle.

10) Don’t worry about germs. Or just relax about them. The baby needs to be able to  play and you need to be able to enjoy your vacation. Let the germ fear go for the time away at least!

11) Get creative. We didn’t have a high chair (I kind of dropped the ball on a high chair travel solution) except for when we went out to eat. Since L makes the most massive mess of all time when he eats, we had to think a little bit outside of the box. Feeding him sans clothes on a towel ended up being our go-to.

Baby Travel Tips

This goes for things like naps and bedtimes as well. In order to maximize the time where we could enjoy ourselves, we had L sleeping in the stroller for quite a few naps and even some evenings. You’d be surprised what a baby can sleep through! Live music at a restaurant? Not a problem! He would have been pretty miserable if we skipped the sleep time and we wouldn’t have been happy skipping evenings with our families so this was a good compromise for us.

Baby Travel Tips

12) Have fun. It’s vacation, enjoy it! Things certainly are different with a baby and not exactly easier, but I swear everything is ten times more fun.

Baby Travel Tips

Best sister ever

Baby Travel Tips

The boys

Baby Travel Tips

L’s Great Great Uncle! Hi, Arnie;-)

Baby Travel Tips

A little beach time with Matt

Baby Travel Tips

L’s first time on the beach

Baby Travel Tips

So much love

Baby Travel Tips

L loves his Poppy!

Baby Travel Tips

Matt’s family and L’s Great-grandma

Baby Travel Tips

L’s (third?) cousin came to see him

2015-05-16 09.58.43

My best friends from Emory’ met us for breakfast, the BEST

Baby Travel Tips

Future husband and wife

*This post contains affiliate links*

5 Desserts You Should Probably Make for Memorial Day Weekend

Five desserts full of berries and bright colors for your unofficial summer kick-off!

We got back from the best vacation yesterday and I can’t wait to share some pictures of all the fun we had. Going away has always been a treat, but it was so much more fun with L! Even though it is a bummer to be back (I think L is missing all of the family members loving him 24/7), we timed it well since Memorial Day weekend is just a few days away. I started thinking about ways to celebrate and wanted to share a few desserts that should find their way to your table! Some of them are red, white and blue but all of them are delicious.

Lemon Berry Pavlova Parfaits

Lemon Berry Pavlova Parfaits! Making these for my next dinner party

No-Bake Blueberry Pie (although the original is pretty darn good, too)

No-Bake Blueberry Pie - perfect for the amazing summer blueberries

Summer Berry Skillet (gluten-free)

Gluten-Free Summer Berry Skillet Crisp - full of the best summer berries

Red Velvet Cupcakes with Blueberry Cream Cheese Icing

Red Velvet Cupcakes with Blueberry Cream Cheese Icing

Speculoos Sundae with Warm Blueberry Sauce

Speculoos Sundaes with Warm Blueberry Sauce - everything about these is amazing

Bonus Holiday Recipe:

Watermelon Salad with Lemon Cake Croutons and Blueberry Balsamic Glaze

Watermelon Salad with Lemon Cake Croutons and Blueberry Balsamic Glaze

Make something from the blog? Be sure to share it on Instagram with the tag #KeepItSweetDesserts.

Thin Mint Ice Cream

Creamy no-churn ice cream full of huge Thin Mint cookie chunks.

Thin Mint Ice Cream <-no ice cream maker needed!

Recently I found myself in a disappointing situation. The ice cream selection in my freezer was boring the heck out of me.

Thin Mint Ice Cream - loaded with thin mints but not TOO minty!

To remedy the situation I decided to take matters into my own hands and make some no churn ice cream. You all know I’m obsessed, it’s kind of becoming a problem the best thing ever. You probably should make it too. Head over to Meyer’s Styles for all the details!

Thin Mint Ice Cream <- love

Make something from the blog? Be sure to share it on Instagram with the tag #KeepItSweetDesserts.

You might also like:

Double Dip Mints

Double Dip Mints

Thin Mint Cookie Cake

Thin Mint Cookie Cake

Mint Cookies and Cream Buttercream Cups

Mint Cookies and Cream Buttercream Cups

Keep It Sweet Desserts Weekly Wrap-up 5/9/15

Sorry for the slower pace of recipes lately… that’s just how life is these days. However, I have a few ice cream recipes coming down the line and some baked goods I want to test out. Matt also was astounded at our lack of cookie inventory (except for a few lactation cookies), so as soon as we get back from Florida, I need to fix that! Plus, I’ve been sitting with two pretty fantastic cookbooks that need to be broken in: Dessert For Two: Small Batch Cookies, Brownies, Pies, and Cakes (SO many recipes I want to try) and The Sweetapolita Bakebook: 75 Fanciful Cakes, Cookies & More to Make & Decorate (pretty much the most beautiful book of cakes ever).

Yes, after Florida! Ah this trip has been planned for SO long that it felt like we never were going to get there. We are spending the first half of the week on the West Coast with my family and then the second half of the week with Matt’s parents a couple of hours east. Hopefully this morning’s travel will go well (I promise, I REALLY will write about travelling with a baby after this trip). Last time L was great on the plane but if he has any issues this time, I’ll just pass him over to my sister;-) Anyway, seems like a pretty great first Mother’s Day is in store for us. And after what my mom has been through over the last couple of months, I’m so glad we get to celebrate this way! Family and health…. so very important!

Now for this week’s updates

Most popular recipe/blog post: No Churn Cookie Butter Ice Cream

Super Creamy Cookie Butter Ice Cream - NO ice cream maker needed!  So easy and so delicious!

Three favorite things I pinned all week:

S’mores Brownies from Eats Well With Others

S’mores Quick Bread from Yes to Yolks

Chocolate Peanut Butter Pretzel Tart from Girl Versus Dough

I hope that you are all having a wonderful weekend!

Keep It Sweet Desserts Weekly Wrap-up 5/3/15

And just like that, it’s Spring. Actually, we are even about to get some summer-like temperatures. It’s basically practice for our trip to Florida next week (!!!!!!!). We’ve been planning this trip with family for what seems like eternity and I just can NOT wait. I’m not sure I really need to pack anything besides bathing suits. Okay, that’s a lie. I have a ten-mile long list of things to pack for L. Apparently babies have a few needs of their own. Ha!

Other than that, we’ve just been trying to enjoy life. Lots of walks, trips to the park, swim classes and the like. There may be some challenges with having a baby, but everything is really just so much more fun. Who cares if I rush through 99% of my meals? Yesterday we took L with us to a super early dinner where he proceeded to light up the entire restaurant with his smiles. And the giggles, it doesn’t get better than baby giggles.

Now for this week’s updates

Most popular recipe/blog post: The 30 Best Ice Creams to Make Without an Ice Cream Maker

30 of the best ice cream recipes without a machine!  Love how easy these recipes are

Three favorite things I pinned all week:

Banana Bread French Toast from Adventures in Cooking

Salted Caramel Snickerdoodle Bundt Cake from Sprinkle Bakes

Mocha Cake from Well Plated

I hope that you are all having a wonderful weekend!

New Mom Real Talk Edition 7

New Mom Real Talk: 6-month postpartum body image, dieting, working out etc. My last post on the topic of post-baby body image, etc. was written almost three months ago, so I thought it was time to revisit the topic.

Confession time. A few days ago, for the first time since my first trimester of pregnancy, I thought to myself, “I feel fat and disgusting. Maybe I shouldn’t eat as much today.” But you know what, about one second later I thought, “What a horrible way to feel. I don’t think that way anymore and I’m not going to start.” Well, that’s the short version but it’s true. My thoughts about my body changed so much when I got pregnant as did my perspective towards food. Postpartum, I’ve actually surprised myself at how little I’ve “cared” about the two subjects. And you know what? It’s liberating. I always wondered what I’d have time to worry about if I didn’t worry about my weight, calories, etc. and turns out I have time to worry about a baby and family. Seems like a pretty good trade-off to me.

New Mom Real Talk: 6-month postpartum body image, dieting, working out etc.  

Airport selfie

The   thing is, I basically let myself off the hook. After L was born, for a while it felt like it would be pretty selfish to worry about counting calories and losing the baby weight. And frankly, I didn’t have the time or the energy. Plus, I’ve been breastfeeding, so my main concern has been eating enough to make sure I can adequately feed L. Generally I eat when I’m hungry (pretty much whatever I want though I typically choose healthy foods) and every day (usually at night), I have some sort of treat. Sometimes it’s two cookies or a couple pieces of chocolate. Some days I go a bit overboard and have a bowl of ice cream too many. The amazing thing, though, is that I realize I’m a little too full and I probably shouldn’t eat so much but don’t let that feeling of guilt creep in. Like I said, liberating.

New Mom Real Talk: 6-month postpartum body image, dieting, working out etc.

Hi, Rach! <3

Somehow I’ve been lucky enough to get back to my pre-baby size (er, well, my shape and form is a bit… different). For the last couple of weeks I’ve even been able to wear some of my long-lost and neglected jeans. There are still plenty of shirts that don’t fit and don’t expect me to wear a tight shirt with pants that button, but still, progress. If you are counting, that’s about six months to get back to my pre-baby and pre-hormone size (I gained a few pounds while trying to get pregnant). That might sound like a long time to some people, but I actually thought it would take much longer than that. Letting myself off the hook made it SO not stressful. Seriously, I think back to the days where I’d let my weight consume me and wonder how I can prevent that from happening again.

I’m not perfect and I know that there will be ups and downs in life (and weight) that may mess with my mind. There is a part of me that’s afraid for what will happen when I stop breastfeeding. Will I be able to continue to eat intuitively and maintain my weight? I certainly don’t want to go back to the days of diets, restrictions, and all-consuming body shaming thoughts.

New Mom Real Talk: 6-month postpartum body image, dieting, working out etc.

With L on Passover

Brown Butter Banana Cake with Brown Butter Cream Cheese Icing

Three layers of brown butter banana cake slathered with amazing brown butter cream cheese icing.

Brown Butter Banana Cake with BROWN BUTTER Cream Cheese Frosting

If there ever was a cake worthy of remaking for better photos it would be this one. I don’t typically like to make a huge cake (ahem, three layers) without an occasion, but this one was too good to  hold off on. Originally I baked it for a friend’s birthday a few weeks ago but the pictures I took were semi-atrocious and just not worthy of the dessert. So when I finally had a big pile of extra-brown bananas again It was completely necessary for me to make this unbelievable banana cake just for the purpose of shooting and eating a gigantic slice.

Banana Layer Cake with Cream Cheese Frosting BUT BROWN BUTTER in both!

The cake layers are moist, flavorful, and every bit worthy of standing alone. However, the frosting just made it. I’m a cream cheese icing lover, but this… this brown butter cream cheese icing… just another level. Those lovely brown specks that you can see throughout the frosting? They just carry so much rich and nutty brown butter flavor. But also, you can still taste the tangy cream cheese.

Amazing BROWN BUTTER Banana Layer Cake

Generally my biggest pet peeve with bakery cakes is that the flavor is… sweet. And seriously, sweet is not a flavor. This cake? The flavor is banana. The flavor is tang. The flavor is BROWN BUTTER. I wish I could share a slice with every one of you but instead I guess I should just tell you to make it as soon as possible. Hoard those brown bananas!

Brown Butter Banana Cake with Brown Butter Cream Cheese Icing
 
Three layers of brown butter banana cake slathered with amazing brown butter cream cheese icing.
Author:
Recipe type: Dessert
Makes: 12-16
Ingredients
  • Cake
  • 113g (1/2 cup) plain Greek yogurt
  • 10g (2 teaspoons) baking soda
  • 320g (~3 cups) cake flour
  • 2g (1 teaspoon) ground cinnamon
  • 2 ½ g (1/2 teaspoon) salt
  • 226g (1 cup / 2 sticks) unsalted butter, browned and cooled to room temperature* PLUS 28g (2 tablespoons / ¼ stick) unsalted butter, softened to room temperature
  • 530g (~2 ½) cups granulated sugar
  • 200g (~4 large) whole eggs at room temperature
  • 20g (~1 large) egg whites at room temperature
  • 1 tablespoon vanilla extract
  • 570g (~2½ cups) mashed very ripe bananas (~4 large bananas)
  • Frosting
  • 227g regular or light cream cheese at room temperature
  • 227g (1 cup / 2 sticks) unsalted butter, browned and chilled in refrigerator for one hour
  • 640g (~4 cups) powdered sugar
  • 5 milliliters / 1 teaspoon vanilla
  • 1g (1/4 teaspoon) salt
Instructions
  1. Cake
  2. Pre-heat oven to 350 degrees; grease and flour three 8-inch round cake pans
  3. In a small bowl, stir baking soda into Greek yogurt and let stand to dissolve
  4. In a medium bowl, whisk together cake flour, cinnamon and salt; set aside
  5. In the large bowl of an electric mixer, beat sugar and butter on medium-high speed for several minutes until light and fluffy
  6. Add eggs and vanilla and mix on medium speed until combined; scrape the sides and bottom of the bowl with a rubber spatula
  7. Add bananas and mix on low speed; add flour and mix again on low speed low speed just until combined
  8. Remove bowl from mixer and fold in Greek yogurt
  9. Pour batter into prepared pans; bake 24-29 minutes or until a toothpick or knife comes out clean from the centers; set pan aside on a wire rack and allow to cool
  10. When ready to remove cake from pans; run a knife around the edges of cake and then carefully turn each cake pan upside down onto a cooling rack; allow to cool completely before frosting
  11. Frosting
  12. In the large bowl of an electric mixer, beat cream cheese and butter on low speed for one minute and then increase to high speed for two or until there are no clumps from the cream cheese
  13. Scrape the sides of the bowl and add one cup of powdered sugar; beat on low speed until combined; repeat with each additional cup of powdered sugar (make sure to mix between each cup)
  14. Add vanilla and salt; mix on medium speed for two minutes and then increase speed to medium-high for one minute
  15. Once cake has cooled and icing is ready, use a flat metal spatula to frost the first layer of cake (use ⅓ – ½ cup of frosting); repeat with second layer of cake and frosting then top with third layer and use remaining icing to frost outside of cake
Notes
Adapted from the Har Zion Cookbook
Entire cake layers can be frozen whole wrapped well with seran up to one month; defrost at room temperature before frosting; cake is best enjoyed within two days of frosting
Store frosted cake in refrigerator and bring to room temperature before serving
Leftovers can be wrapped well with seran wrap and frozen up to one month
*To brown the butter: Heat butter in a heavy duty saucepan over medium heat, stirring constantly, when butter turns to an amber/light brown color, remove from heat immediately (You should be able to smell the deeper more caramel flavor of the butter) pour browned butter immediately into a bowl

Brown Butter Banana Cake + Brown Butter Cream Cheese Icing = Heaven

Make something from the blog? Be sure to share it on Instagram with the tag #KeepItSweetDesserts.

You might also like:

Brown Butter Pistachio Cake

Brown Butter Pistachio Cake

Brown Butter Blueberry Chocolate Chunk Blondies

Brown Butter Blueberry Chocolate Chunk Blondies

Upside Down Caramel Banana Coffee Cake

Upside Down Caramel Banana Coffee Cake


Lemon Berry Pavlova Parfaits

The prettiest parfaits layered with lemon whipped cream, fluffy meringue and fresh berries.

Lemon Berry Pavlova Parfaits! Making these for my next dinner party

I’d love to say that I had this big “creative” idea to turn a pavlova into a parfait but that would be a lie. In fact, I had all intentions of sharing a perfectly pretty pavlova with you until mine crumbled a bit too much and looked like an all around hot mess.

But while it looked eh it tasted perfect. The baked meringue was light and crispy on the outside and fluffy and soft on the inside. It was way too delicious to throw away. And while the resulting dessert wasn’t exactly what I planned, it actually worked out better. I really enjoyed serving the individual glasses to friends. It’s not my usual serving choice but it was just right.

Lemon Berry Pavlova Parfaits <-so pretty for summer entertaining


Lemon Berry Pavlova Parfaits
 
The prettiest parfaits layered with lemon whipped cream, fluffy meringue and fresh berries.
Author:
Recipe type: Dessert
Makes: 6 individual servings
Ingredients
  • 6 cocktail glasses or glass bowls
  • 1 pavlova broken into bite sized pieces (can substitute broken meringue cookies as well)
  • 355 milliliters (1½ cups) heavy whipping cream
  • 44 milliliters (3 tablespoons) lemon juice (~1 lemon)
  • 53g (~1/4 cup) granulated sugar
  • 2½ cup fresh berries washed and dried (I used a mix of raspberries, blackberries and sliced strawberries)
Instructions
  1. Prepare lemon whipped cream; in the large bowl of an electric mixer with whisk attachment, beat cream and lemon juice at medium speed until foamy; increase speed to medium-high, and slowly add granulated sugar, beating until stiff peaks form
  2. Put about ⅓ of a cup of whipped cream on the bottom of each glass; layer with ⅓ cup of berries in each glass; follow that layer with crumbled pavlova (enough to reach the rim of each glass)
  3. Dollop remaining whipped cream on top of each parfait along with a couple of berries
  4. Serve immediately or chill in refrigerator until ready to enjoy
Notes
Pavlova can be baked up to three days in advance. Just store in an airtight container and break into pieces right before putting together parfaits
Parfaits prepared and served on same day but can be enjoyed within three days

Lemon Berry Pavlova Parfaits - SO light, refreshing and delicious!

Get some of everything at once for the perfect bite!

Make something from the blog? Be sure to share it on Instagram with the tag #KeepItSweetDesserts.

You might also like:

Summer Berry Skillet Crisp

Summer Berry Skillet Crisp

Blueberry Rhubarb Shortbread Bars

Blueberry Rhubarb Shortbread Bars

No Bake Blueberry Pie

No Bake Blueberry Pie

Lemon Berry Pavlova Parfaits

Keep It Sweet Desserts Weekly Wrap-up 4/18/15

Man, just when things were really looking up our household got wiped out with a stupid cold this week. At first I thought my throat was just going crazy with allergies but when Matt, L and I all woke up completely under the weather on Tuesday I was proved wrong. Nothing like a cold to make you appreciate breathing through your nose! Anyway, we are all starting to feel a bit better (L seems back to himself completely), so hopefully I can get out and enjoy the beautiful weekend!

Now for this week’s updates

Most popular recipe/blog post: The 30 Best Ice Creams to Make Without an Ice Cream Maker

30 of the best ice cream recipes without a machine!  Love how easy these recipes are

Three favorite things I pinned all week:

Chocolate Peanut Butter Ice Cream Pie from The Little Loaf

Bananas Foster Milkshakes with Bruleed Bananas & Salted Chocolate Sauce from Yes to Yolks

Toasted Marshmallow No Bake Cheesecake from Culinary Concoctions by Peabody

I hope that you are all having a wonderful weekend!

Mini Lemon Layer Cake for Two

Light and fluffy lemon layer cake slathered with delicious cream cheese frosting. This cake is sized perfectly for two people!

Mini Lemon Layer Cake for Two - perfect date night treat!

Today we are celebrating a virtual baby shower for one of my very favorite bloggers. Christina and I became friends a few years ago by commenting on each other’s blogs (you must read Dessert for Two) and exchanging a few emails. She was always so kind and generous with her blogging knowledge.

When I went to Foodbuzz in San Francisco, she met me in the city to be my “date” to one of the events. She’s just as wonderful in person as you’d imagine. The best combination of sweet and sass!

Baby Shower Badge - Dessert for Two

Now Christina is having a baby girl and I am so incredibly happy for her. Tina, from almost six months of experience, I can tell you that being a mom is pretty much the best thing ever.

Mini Lemon Layer Cake for Two - great when you want a treat and don't want too many leftovers!

Now, onto this cake! Given her love of lemon desserts and small batch treats, I thought this mini lemon cake would be the perfect recipe to share for the shower. It’s light and fluffy and topped with a generous helping of cream cheese icing. I made it the first time for Valentine’s Day and Matt loved it, but I made it a second time last week with a couple of tweaks and it was even better.

Scroll down to see what everyone else made!

5.0 from 1 reviews
Mini Lemon Layer Cake for Two
 
Light and fluffy lemon layer cake slathered with delicious cream cheese frosting. This cake is sized perfectly for two people!
Makes: 2 servings
Ingredients
  • Lemon Cake:
  • 73g (~1/2 cup + 5 teaspoons) all-purpose flour
  • 1½g (3/4 teaspoon) baking powder
  • 1g (1/4 teaspoon) salt
  • 28g (2 tablespoons) plain greek yogurt (I used fat free)
  • 30 milliliters (2 tablespoons) milk (I used skim)
  • 30 milliliters (2 tablespoons) fresh lemon juice (~1/2 of a lemon)
  • 2 teaspoons lemon zest (~1/2 lemon)
  • 2½ milliliters (½ teaspoon) vanilla extract
  • 57g (1/4 cup) unsalted butter softened at room temperature
  • 80g (~6 tablespoons) granulated sugar
  • 50g (~1 large) whole eggs, at room temperature
  • Cream Cheese Icing
  • 85g light or regular cream cheese, cold
  • 71g (5 tablespoons) unsalted butter,  at room temperature
  • 160g (1 cup) powdered sugar
  • 2½ milliliters (1/2 teaspoon) vanilla extract
  • ½g (1/8 teaspoon) salt
Instructions
  1. Lemon Cake:
  2. Pre-heat oven to 350 degrees; grease and flour two four-inch cake pans (lining the bottom of each pan with parchment paper will make for easier removal as well); set aside
  3. In a medium bowl, whisk flour, baking powder and salt; set aside
  4. In a separate bowl, combine yogurt, milk, lemon juice, lemon zest, and vanilla; set aside
  5. In a large bowl with an electric mixer, beat butter and sugar on high speed for several minutes or until light and fluffy; at this point you can’t really overbeat the batter, you want to get as much lightness at this stage as you can; scrape the sides of the bowl with a spatula
  6. Add egg and beat at medium speed for one minute; scrape the sides of the bowl with the spatula
  7. Reduce speed to low and slowly add ½ of flour mixture and then all of the wet ingredients; finish with the remaining flour mixture and remove from mixer immediately (there should still be lumps in the batter)
  8. Gently fold batter so that you can no longer see any dry ingredients but there are still some small lumps; do not overmix
  9. Evenly distribute batter between cake pans
  10. Bake 12-14 minutes or until a toothpick comes out clean from center; do not overbake
  11. Set aside to cool and prepare frosting
  12. Cream Cheese Icing
  13. In the large bowl of an electric mixer, beat cream cheese, butter and shortening on high speed for several minutes until light and creamy; make sure there are no clumps from the cream cheese
  14. Scrape the sides of the bowl and add one cup of powdered sugar; beat on high speed until combined; repeat with additional cup of sugar
  15. Scrape the sides of the bowl and add vanilla and salt; mix on medium speed for one minute and then on high speed for at least five minutes and until frosting is light and creamy
  16. Once cake has cooled and icing is ready, use a flat metal spatula to frost the first layer of cake; top with second layer and frost outside of cake
Notes
Adapted from these lemon cupcakes
Store cake in refrigerator and store at room temperature (best enjoyed within 24 hours but can be eaten within 4 days)
For additional lemon flavor, add some lemon zest to the frosting; just add it at the beginning with the butter and cream cheese

Mini Lemon Layer Cake (just for two!)

Other Shower Treats:

Fizzy Grapefruit Margaritas from Well Plated

Earl Grey Cake with Vanilla Bean Buttercream from Country Cleaver

Mini Bourbon and Bacon Tater Tot Casseroles from Climbing Grier Mountain

Maple-Chia Overnight Oatmeal from Feed Me Phoebe

Lemon Cake for Two from Keep It Sweet Desserts

Mini Raspberry Rhubarb Pavlovas from The Baker Chick

Almond Berry Cake Parfaits for Two from Edible Perspective

Peanut Butter Bourbon Blondies from The Frosted Vegan

Mixed Berry Mascarpone Scones from Bluebonnet Baker

Greek Yogurt Funfetti Cupcakes for Two from The Housewife in Training Files

Bourbon Barbeque Sliders with Bleu Cheese from Saucy Pear

Steak Fajita Tacos for Two from The Sweetphi Blog

Mango Madeleines from Stetted

Citrus Salad with Mint, Honey, and Lime from Rachel Cooks

Parfaits for Two from Order in the Kitchen

Peanut Butter Chocolate Mousse with Coconut Whipped Cream from Joyful Healthy Eats

French Breakfast Puffs from Stephie Cooks

Blueberry Vanilla Cream Hand Pies from Eats Well With Others

Banana Pudding Cheesecake from The Domestic Rebel

Make something from the blog? Be sure to share it on Instagram with the tag #KeepItSweetDesserts.

Keep It Sweet Desserts Weekly Wrap-up 4/11/15

First of all, thank you so much for all of the well-wishes that I’ve gotten regarding my mom. They are very much appreciated!

So I don’t know if it’s the warmer sunnier weather (no doubt), my mom’s seemingly good recovery (most definitely) or the free latte I got at Starbucks yesterday (didn’t hurt), but things really seem to be looking up. It’s amazing how a a few positive things can have such an impact on your overall spirits. I feel like there is a real turnaround happening and I’m slowly but surely starting to take a step back into life a bit. I’m packing in plans with friends (even trying to make new ones, yikes), motivated to work in the kitchen (it’s been a while) and taking advantage of every minute of sunshine that comes my way. On top of that, L’s starting swim classes this week. Why I signed up for something that requires me to put on a bathing suit AND a swim cap is somewhat baffling, but hopefully it will just be fun. At least I know it will be nice to be reunited with some of the girls I did prenatal yoga with since they’re babies are in the same class.

What else? I’m probably due for a New Mom post because it’s been a while. Some topics I’m thinking about are baby food, post-baby body and life with baby in general. Thoughts?

Now for this week’s updates

Most popular recipe/blog post: The 30 Best Ice Creams to Make Without an Ice Cream Maker

30 of the best ice cream recipes without a machine!  Love how easy these recipes are

Three favorite things I pinned all week:

Chocolate Chip Brittle from Cookies and Cups

Chocolate Malt Mocha Crunch Ice Cream from Bakerita

Cava Fruit Punch from Heather Christo

I hope that you are all having a wonderful weekend!

Mega M&M Cookies

Big chocolatey cookies full of Mega M&Ms.

Mega M&M Cookies!!!

I’m very aware that I eat my feelings. Tired, sad and stressed always lead me to chocolate, carbs, ice cream, cookies or all of the above. I try not to go overboard and realize that this isn’t the healthiest way to deal with emotions. But frankly, I don’t think there is anything wrong with a cookie or two to lift the spirits.You must make these cookies... puffy, chocolatey and full of MEGA M&Ms

The last month or so has been a bit of a roller coaster and after a particularly rough ten days my daily dose of chocolate was part of what was keeping me sane. I was overdue for some baking and decided to make something that could fulfill everything I was craving; warm, chocolatey and comforting carbs. Baking, photographing, and then also eating these cookies made me feel just a bit better. The bright colored M&Ms and pretty napkins were another visual way to boost my mood. I took advantage of a few minutes when the sun was actually out to take capture that.

These big chocolatey MEGA M&M cookies will cure any craving

And most importantly for you, this recipe was a success. The chocolatey base and gigantic chocolate candies (where have these Mega M&Ms been all my life?) will cure any chocolate craving you might have. Oh yeah, and they are fast and easy, too. You don’t need to chill the dough at all before baking them.

Head over to my friend Katie’s blog for the recipe! You don’t want to miss it. This is my first post as a contributor to Meyer’s Styles.

Make something from the blog? Be sure to share it on Instagram with the tag #KeepItSweetDesserts.

You might also like:

Salted Brown Butter M&M Cookies

Salted Brown Butter M&M Cookies

Mini M&M Cookies

Mini M&M Cookies

Keep It Sweet Desserts Weekly Wrap-up 4/4/15

Sorry for being MIA for the last couple of weeks. Remember when my mom had surgery six weeks ago? Long story short, she had to have another surgery early last week and I’ve been running back and forth between my apartment, my parents’ house and the hospital since. Luckily, my mom is finally home from the hospital and recovering, but it’s definitely been a rough ten days, especially for her. Hopefully having a few days with L was some good medicine.

I’ve basically neglected to do any Passover baking and have felt pretty uninspired in general, as a result. There is actually a cake I made a few weeks ago that I wanted to share, but the photos didn’t turn out at all so I’ll have to come up with an excuse to make it again (other than the fact that it was just really, really good).

Tell me something good. What are you doing for Passover or Easter or just to enjoy the weekend?

Now for this week’s updates

Most popular recipe/blog post: Chocolate Truffles, Three Ways

Chocolate Truffles - 3 ways!  a rich chocolate treat that happens to be gluten-free

Five favorite things I pinned all week:

Peanut Butter & Jelly Bars from Bakerita

Cinnamon Toast Crunch Cupcakes from Fake Ginger 

Triple Cinnamon Coffee Cake from The Baker Chick

Chocolate Ganache with Beer from Cakespy

Whole Wheat Peanut Butter Chocolate Chip Pancakes from Gimme Some Oven

I hope that you are all having a wonderful weekend!

Keep It Sweet Desserts Weekly Wrap-up 3/21/15

Thank you so much for the thoughtful comments and messages regarding last week’s post. Sometimes you just have to get something off your chest… I apologize for not being able to share details.

Other than all of that, this week felt a bit chaotic… or maybe I felt anxious about upcoming chaos. The next few weeks area jam packed with going back and forth to my parents’ house and spending some time at my in-laws as well. Along with that I have birthdays and Passover to bake for and for the first time ever I think it might not all happen. I also may or may not be behind on recipes for the blog. I told myself before that I really don’t have to get them up every week, but easier said than done! I made a pretty awesome cake yesterday but I’m not sure how soon I’ll get to posting it. I also want to put together a post on baby travel… Where does the time go?

In the mean time, I’m really trying to prioritize taking care of myself a bit. So maybe that is where the time is going? That basically means that when I’m not taking care of L (aka most hours of the day), I’m sneaking in a little physical activity (mainly yoga, some walking and a couple of miscellaneous cardio workouts very, very infrequently), keeping myself fed (I think L is in the midst of a growth spurt and I’m super hungry all the time… yes, more than usual), and squeezing in a little downtime with Matt (that means no computer and limiting the phone) when I can. Oh yeah, and passing out early like it’s my job. If I could, I’d be asleep at 8pm every night. It seems necessary for my sanity.

Now for this week’s updates

Most popular recipe/blog post: The 30 Best Ice Cream Recipes to Make Without an Without an Ice Cream Maker

30 of the best ice cream recipes without a machine!  Love how easy these recipes are

Three favorite things I pinned all week:

Guinness Cupcakes with Toasted Beer Marshmallow Meringue from Sprinkle Bakes

Tagalong Blondies from A Dash of Sanity

Marble Layer Cake from Zoe Bakes

I hope that you are all having a wonderful weekend!

Upside-down Caramel Banana Coffee Cake

Dense and moist coffee-flavored cake topped with gooey caramelized bananas!

Caramel Banana Coffee Cake

Every year it’s the same challenge for my dad’s birthday: What special dessert can I make that isn’t too sweet and doesn’t include frosting (well, I did sneak in frosting one year)? Since last year’s dessert was such a hit, I decided to find another cake with a fun topping that I thought he would like.

This upside down cake definitely fit the bill! It’s sweet enough to be dessert but mild enough to be served for brunch (his kind of dessert). It’s also looks special with the beautiful layer of caramelized bananas on top. The cake itself is dense and moist (though I think using a higher fat Greek yogurt would lighten the results just a bit; I used nonfat) and so very satisfying.

Upside-down Caramel Banana Coffee Cake
 
Dense and moist coffee-flavored cake topped with gooey caramelized bananas!
Author:
Recipe type: Dessert
Makes: 8 servings
Ingredients
  • Cake batter
  • 200g (~1½ cups) all-purpose flour
  • 5g (1 teaspoon) baking powder
  • ½g (1/8 teaspoon) salt
  • 50g (3 ½ tablespoons) unsalted butter, softened at room temperature
  • 130g  (~1/2 cup + 1 tablespoon, packed) light brown sugar
  • 100g (2 large) whole eggs at room temperature
  • 30 milliliters (2 tablespoons) strong espresso or coffee (~1 tablespoon instant coffee granules mixed with 1 tablespoon boiling water)
  • 10 milliliters (2 teaspoons) vanilla extract
  • 200g (~3/4 cups + 2 tablespoons) plain Greek yogurt
  • Banana topping
  • 2 large ripe but firm bananas (do not use overly ripe bananas here)
  • 40g (~2 tablespoons + 2 teaspoons) unsalted butter, melted
  • 80g (~1/4 cup + 1 tablespoon packed) light brown sugar
  • 3g (1 ½ teaspoons) ground cinnamon
Instructions
  1. Pre-heat the oven to 350 degrees; butter a 9-inch round cake pan and set aside
  2. Prepare cake batter; sift the dry ingredients (flour, baking powder, salt) into a medium bowl and set aside
  3. In the large bowl of an electric mixer, beat butter and sugar on medium high speed until light and fluffy
  4. Add the eggs, coffee and vanilla and mix on medium speed
  5. Reduce speed to low and add yogurt; add dry ingredients but do not overmix; batter will be thick
  6. Set aside cake batter and prepare topping
  7. Carefully slice bananas lengthwise (3-4 slices / banana) and use to line cake pan (keep in mind this is how the top of your cake will look)
  8. Combine melted butter, brown sugar and cinnamon; carefully spread over bananas
  9. Spread cake batter evenly top and bake in center of oven for 27-32 minutes or until toothpick comes out clean from center of cake; do not overbake
  10. Allow cake to cool for 10 minutes before arefully removing from pan; serve immediately
Notes
Adapted from Nutmegs Sven

Make something from the blog? Be sure to share it on Instagram with the tag #KeepItSweetDesserts.

You might also like:

Lighter Chocolate Chip Banana Cake

Lighter Chocolate Chip Banana Cake

Gluten Free Banana Cake with White Chocolate Whipped Cream

Gluten Free Banana Cake

Brown Butter Banana Cake

Brown Butter Banana Cake with Brown Butter Cream Cheese Icing

Keep It Sweet Desserts Weekly Wrap-up 3/14/15

There are some weeks that really feel like an eternity. Not in that, “oh man when will it be Friday?” way, but in that, “how was Monday only four days ago?” way. Sometimes big things happen (good and bad) that make one day feel like a big storm. This week, that’s what we got.

Monday was a big scary storm of information that you wanted to pretend you never heard. And Tuesday, well, Tuesday was like another world. The clouds began to clear and you could see rays of sun peeking through. I just had to hope that the sun would come in full force and clear the mess that had been made.

It’s ironic that this all took place the same week that Spring really did seem to be pushing it’s way through. After snowstorm after snowstorm, we’ve finally been granted glimmers of hope (60 degrees one day, what?!) and there is light in sight. We cross our fingers and might even pray that it’s really coming and staying, try to convince ourselves that it’s not just a mirage. Should we trust it?

I think yes, because, really, what other way is there? You have to hope and believe that the good things you see down the line are the only things. There is no other way to live.

And really, when things get heavy and tough, that’s why I keep blogging the light stuff, like ice cream and cookies and babies. Because you have to hold onto that.

Now for this week’s updates

Most popular recipe/blog post: No Churn Cookie Butter Ice Cream (yes, AGAIN)

No Churn Cookie Butter Ice Cream - the most popular recipe of the week!

Three favorite things I pinned all week:

One Bowl Guinness Chocolate Cake from Baking Bites

Three-Ingredient Flourless Peanut Butter Cake from Cakespy

Vegan Double Chocolate Banana Bread from Always Order Dessert

I hope that you are all having a wonderful weekend!

Monster Cookie Dough Ice Cream (No Churn!)

Vanilla ice cream loaded with monster cookie dough (peanut butter oatmeal cookie dough with M&Ms and chocolate chips!). You will enjoy cookie dough in every bite!

Monster COOKIE DOUGH Ice Cream <-no machine, no eggs, so easy!

I think the deep freeze is over (said crossing fingers and knocking on wood). And in case it’s not obvious, I (and everyone else in the northeast) am more than ready. I’m ready for shorts, flip-flops (okay, I’d settle for being outside without a puffy coat), walks with L and warm weather food. I’m ready for ice cream, lots of it.

Monster COOKIE DOUGH Ice Cream <-no machine needed!

Okay, let’s be real. I’ve been eating ice cream all winter long. Maybe not quite as much ice cream as I ate last summer, but plenty still. The main difference is that I currently eat it with the heat turned up while wearing a massive sweatshirt and wool socks. Last week, when I remembered that I had some heavy cream about to expire, I was inspired to go churn up make some super easy and delicious ice cream once again. I asked on Facebook and Twitter what flavor I should make and Erin suggested monster cookie dough. Genius much?

Monster cookies are typically peanut butter oatmeal cookies loaded with M&Ms. How could that possibly be a bad thing? And what tastes good as a cookie almost always tastes better as cookie dough. So translated into ice cream we are in clear delicious territory. Not to mention that this ice cream really is LOADED with cookie dough. No searching with the spoon to find the little chunks (don’t pretend you don’t do that). Seriously, cookie dough in every bite.

Monster Cookie Dough Ice Cream (No Churn!)
 
Vanilla ice cream loaded with monster cookie dough (peanut butter oatmeal cookie dough with M&Ms and chocolate chips!). You will enjoy cookie dough in every bite!
Author:
Recipe type: Dessert
Makes: Makes ~1½ quarts
Ingredients
  • 16 fluid ounces (2 cups) heavy cream
  • 1 14-ounce can sweetened condensed milk (I used fat free, but any type would work)
  • 15 milliliters (1 tablespoon) vanilla extract
  • 1 recipe for oatmeal cookie dough (see below)
Instructions
  1. In the large bowl of an electric mixer with whisk attachment, beat cream on high speed for several minutes, just until stiff peaks form
  2. While whipping cream, pour sweetened condensed milk into a separate large bowl and mix with vanilla
  3. Once cream is ready, fold it into sweetened condensed milk mixture; fold in cookie dough
  4. Pour ice cream into a regular-sized loaf pan
  5. Wrap well with seran warp or tin foil and freeze for 6 hours or overnight

 
Monster Cookie Dough Ice Cream (No Churn!)
 
Edible Monster Cookie Dough
Author:
Recipe type: Dessert
Ingredients
  • 65g (~1/4 cup) creamy peanut butter
  • 14g (1 tablespoon) unsalted butter, softened at room temperature
  • 28 g (~2 tablespoons packed) light brown sugar, firmly packed
  • 25g (~2 tablespoons) granulated sugar
  • 5 milliliters / 1 teaspoon vanilla extract
  • 60g (~¾ cup) rolled oats
  • ½g (¼ teaspoon) ground cinnamon
  • ½g (1/8 teaspoon) salt
  • 56g (~1/4 cup) mini M&Ms
  • 53g (~1/4 cup) mini chocolate chips
Instructions
  1. Beat butter and sugar until light and fluffy; stir in vanilla
  2. Gradually stir in oats, cinnamon salt just until combined
  3. Stir in M&Ms and chocolate chips
  4. Set aside to make ice cream

Monster COOKIE DOUGH Ice Cream <-no churn!


Make something from the blog? Be sure to share it on Instagram with the tag #KeepItSweetDesserts.

You might also like:

No Churn Peanut Butter Ripple Chocolate Ice Cream

Peanut Butter Ripple Chocolate Ice Cream

No Churn Chocolate Ice Cream with Salty Candied Peanuts

No Churn Chocolate Ice Cream with Salty Candied Peanuts

Drumstick Ice Cream Cake

Drumstick Ice Cream Cake

monster cookie dough ice cream!!!!!

Keep It Sweet Desserts Weekly Wrap-up 3/7/15

The last ten days have been a complete and crazy whirlwind. Last Wednesday we rushed to Philly when I found out my mom was having an emergency surgery (thank g-d she paid attention to pain she was having and is now recovering well). Then we came back Thursday night to pack and get ready for the quick (seriously, too short) trip to visit my friends in Florida. Sunday night I was supposed to go straight to my parents’ house from the airport, but thanks to landing in a snowstorm (because that’s what I was looking forward to after flying solo with L), I came straight home instead. Luckily the weather cooperated enough that I could drive to Philly the next morning and then spend a couple of days there. I tried to help take care of my mom but I think time playing with L was the real medicine. Then Wednesday night it was back home. Phew…

A couple of days back in routine and I think I now know which way is up. I even made some pretty darn ice good ice cream to share with you next week. And yes, I did make the ice cream on a day when it was snowing and freezing out, but when is it not?

Now for this week’s updates

Most popular recipe/blog post: No Churn Cookie Butter Ice Cream (yes, AGAIN)

No Churn Cookie Butter Ice Cream - the most popular recipe of the week!

Three favorite things I pinned all week:

Hot Blueberry Cake from Willow Bird Baking

Flourless Lemon Cake with Rhubarb Compote from Top with Cinnamon

Waffled Cheesecake from Sprinkle Bakes

I hope that you are all having a wonderful weekend!

Peanut Butter Chocolate Chip Lactation Cookies

Chewy chocolate chip peanut butter oatmeal cookies that just so happen to be perfect for breastfeeding moms! Loaded with oats, brewer’s yeast, flax and whole wheat flour, these are a delicious way to get your milk supply up!

Peanut Butter Oatmeal Chocolate Chip Cookies <---and yes, these are actually lactation cookies!

If you had asked me a year ago if I’d ever make lactation cookies, I’d probably look at your cross-eyed. I barely even know that that was a thing. Well, there obviously was a lot I didn’t know about breastfeeding. And when I think back on it, I realize how naive I was.

Once I got pregnant with L, my plan was to breastfeed if possible… maybe for a month, or maybe for a few months. But no pressure, none. I didn’t realize that there was an inbetween of possible and impossible where there are many challenges but you can make it work. I also had no idea that I’d care so much and be so emotionally attached to being able to nurse. It’s hard to explain, because I never felt like breastfeeding was a big bonding moment with L, but there was some other emotional pull that I can’t put into words.

Anyway, one of the issues that I’ve faced is milk supply. I don’t know what happened, but by the end of the first month, I felt like my supply was really suffering. I’d been eating oatmeal every day and drinking a ton of water but that apparently had not been enough. Maybe I wasn’t eating enough calories that first month (hard to believe)? Maybe it was the lack of regular sleep? Whatever it was, I immediately started doing anything I felt comfortable doing to help the problem.

I dabbled in fenugreek (eh, not for me), started drinking stout beers on occasion, drank even more water, and stocked up on snacks that contained flaxseed. I also started baking lactation cookies. While my supply isn’t massive, at some point it became at least enough for L’s daily feedings (this fluctuates and he still gets supplemented with formula for multiple reasons). I don’t know if the lactation cookies did it, but I do think they help. I eat a couple of them most days and whether or not they are “the” solution, they taste delicious so that works for me. Originally I made Audra’s recipe (really good!) but have since tweaked them to be slightly different. They aren’t health food but there are quite a few ingredients that are good for you (whole wheat flour, oatmeal, flax seed, brewer’s yeast and peanut butter). That helps me justify the daily consumption.

Actually delicious lactation cookies! Peanut Butter Oatmeal Chocolate Chip!!

5.0 from 2 reviews
Peanut Butter Chocolate Chip Lactation Cookies
 
Chewy chocolate chip peanut butter oatmeal cookies that just so happen to be perfect for breastfeeding moms! Loaded with oats, brewer’s yeast, flax and whole wheat flour, these are a delicious way to get your milk supply up!
Author:
Recipe type: Dessert
Makes: 30 cookies
Ingredients
  • 120 milliliters / 4 fluid ounces water
  • 26g (~4 tablespoons) ground flaxseed
  • 130g (~1/2 cup) creamy peanut butter (recipe not yet tested with natural)
  • 113g (1/2 cup) unsalted butter, softened at room temperature
  • 234g (~1 cup packed) light brown sugar
  • 100g (~1/2 cup) granulated sugar
  • 15 milliliters / 1 tablespoon vanilla extract
  • 126g (~1 cup) whole wheat pastry flour (or 158 grams / 5½ ounces white whole wheat flour)
  • 130g (~1 cup) all-purpose flour
  • 48g (~6 tablespoons brewer’s yeast)
  • 8g (1 teaspoon) baking soda
  • 2g (1/2 teaspoon) salt
  • 200g (~2½ cups) rolled oats
  • 125g (~3/4 cup) semi-sweet chocolate chips
  • 125g (~3/4 cup) milk chocolate chips
  • regular or smoked flaky sea salt (optional)
Instructions
  1. Pre-heat oven to 350 degrees and line baking sheets with parchment paper
  2. In a small bowl, stir together flaxseed and water; set aside
  3. In a medium bowl, whisk together flours, brewer’s yeast, baking soda and salt; set aside
  4. In the large bowl of an electric mixer, beat peanut butter, butter and sugars on medium-high speed for several minutes or until light and fluffy; scrape sides of the bowl with a spatula
  5. Add flaxseed mixture and vanilla and mix on medium speed for one minute; reduce speed to low and add flour mixture
  6. Stir in oats and chocolate chips
  7. Scoop cookie dough with large cookie dough scoop (~3 tablespoons) onto prepared baking sheets; top with flaky sea salt
  8. Bake for 10-12 minutes or until cookies appear set and edges are lightly browned; allow to cool before eating
  9. Store in an airtight container at room temperature up to one week or freeze up to two months
Notes
Heavily adapted from The Baker Chick

Make something from the blog? Be sure to share it on Instagram with the tag #KeepItSweetDesserts.

You might also like:

Salted Caramel & Peanut Oatmeal Cookies

Salted Caramel & Peanut Oatmeal Cookies

Chocolate Chunk Pistachio Oatmeal Cookies

Chocolate Chunk Pistachio Oatmeal Cookies

Cinnamon Chip Oatmeal Blondies

Cinnamon Chip Oatmeal Blondies

New Mom Real Talk Edition 6

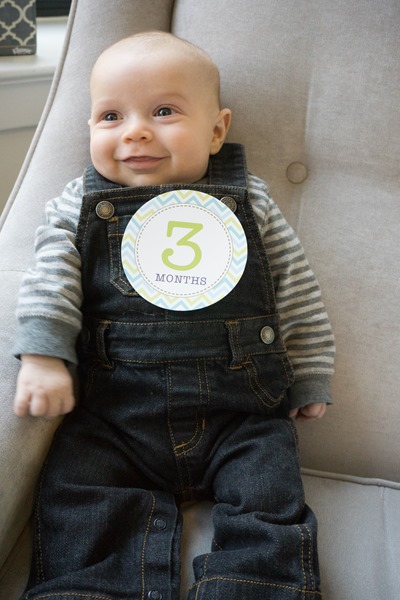
New Mom Real Talk: A Day In The Life with a Four Month Old

I’ve always enjoyed reading day-in-the-life posts so I figured I’d put one together for you. It ended up being pretty long and probably will bore you, but if you are interested, read on (or just skip the text for cute pictures of L).

6:15am I hear L on the monitor… I look and see that he’s smiling off and on with putting his hands in his mouth (this was the first night we purposely had his arms free from the swaddle). After a few minutes of fussing I realize it’s time to get up and feed him! Did I mention the big puddle on my bed? Oh yeah, one of my breasts still leaks almost every night (sorry for the TMI).

L’s pretty hungry (as he usually is in the mornings) so it’s a good nursing session. Plus, he is a huge morning person so I always get lots of smiles at this time.

Once he’s done it’s back in the PJs (too early in the day for an outfit change unless necessary!).

A day in the life with a 4-month old

6:45 I have to pump and L goes into the bouncy seat next to me. I used to pump another seven ounces after this feeding but these days it’s more like two to four (depends on how much he eats). Hopefully it’s mainly because he eats more, not because I have a lower supply. This morning I barely pump two and try not to worry about it (spoiler alert: I always worry about it).

As soon as I’m done, I put all of the bottles we used over the last 24 hours in a pot of water to boil. I’m way too lazy to clean them more often than that. Then I work quickly to start a pot of coffee (why don’t I do this the night before?) and make breakfast. I’m normally a stovetop oatmeal girl, but lately I’ve been making big batches of steel cut oats in the slow cooker. Today I mix some with PB2 and chopped apple. Not as good as my usual (mixed with egg whites and topped with peanut butter), but good enough for a change of pace. I pair it with a strong cup of coffee with skim milk and I’m happy.

A day in the life with a 4-month old

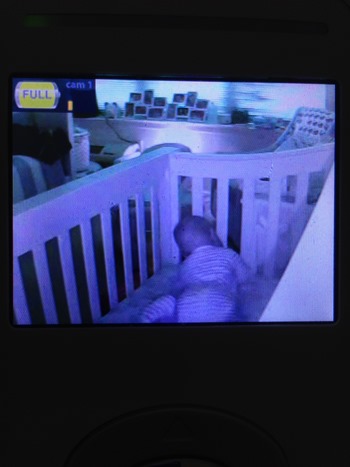
Meanwhile, by 7:15 I notice L getting tired (this is always his shortest awake time). Before I finish in the kitchen I get him ready for a nap. We finally have him napping in his crib regularly and I go through the routine: Diaper change if necessary, turn down the lights, turn on the noise machine and swaddle him with his left arm out (his thumb sucking hand). Sometimes he starts to cry a bit (more like fuss) when he realizes what’s going on but nothing too bad. I leave the room at 7:27 and he is asleep with his thumb in his mouth by 7:30. Breakfast time.

This is my me time. I sit on the couch with the TODAY Show in the background (I barely like it anymore and don’t know why I still bother), eat breakfast, drink coffee, and do some blog, email and social media catch up. Mondays are always a bit overwhelming so I have to remind myself not to stress over getting through all of it. If I’m behind on blog reading (oh, the horror), I’ll live.

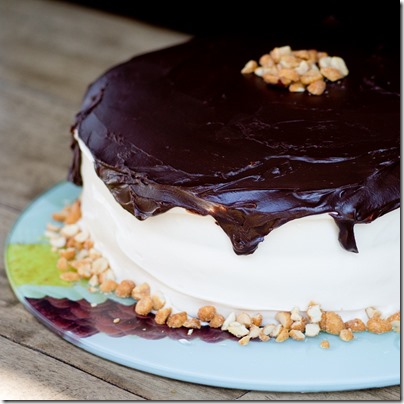
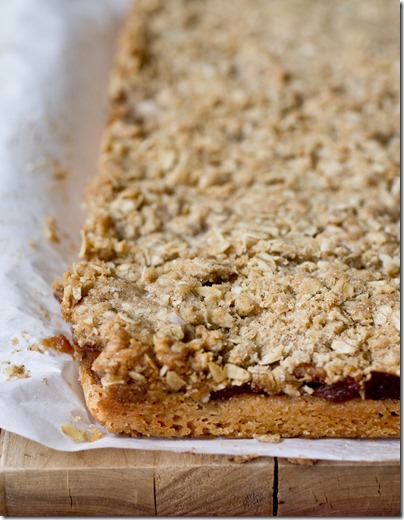
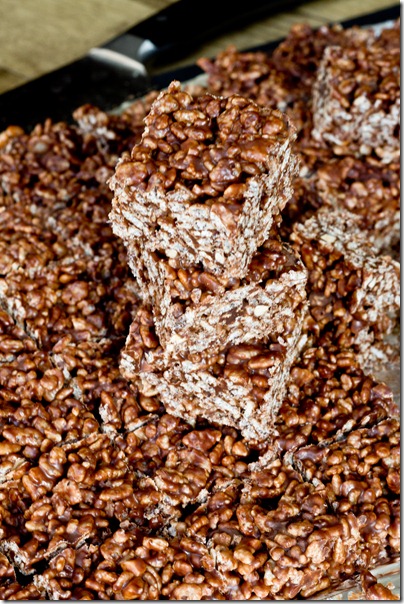
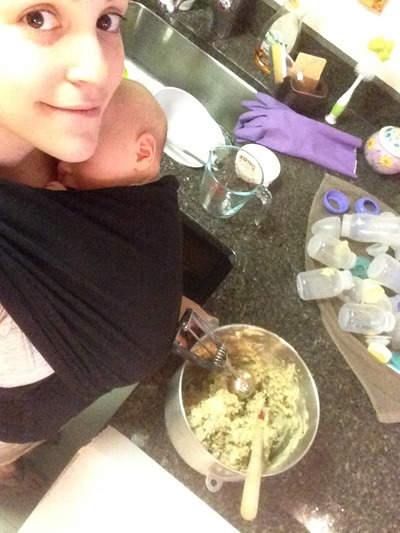
8:10 I’m finished with breakfast and coffee (always a sad moment) and it’s time to figure out what to do next. Sometimes I do yoga in the apartment at this time, but I think I’ll save that for later if I have extra time in the day (ha!). I finally deal with that pot of bottles, get dressed (skip the shower in case that yoga actually happens) and think about what to do next. I settle on making a batch of lactation cookies with the hopes that L is going to take a long nap (that darn 45 minute sleep cycle sometimes gets in the way). If L wakes up, I’ll just chill the dough to bake later.

By 8:40 I’ve started a load of laundry, gotten dressed, brushed my teeth (phew, remembered this morning!), and made my dough. By some miracle L’s made it over the 45 minute hump (must be the mediocre night sleep he had) and looks like he is still out cold. I’m so glad the mixer and my other commotions in the kitchen didn’t wake him and decide to push my luck and try to bake the dough now… I’m getting good at working fast when it comes to baking.

While the cookies are baking, I scramble to finish that load of laundry (woohoo, I didn’t forget about it) which obviously involves putting away last week’s dry laundry (aka moving it from the bathroom to on top of my bureau). I need to be as productive as possible in the mornings when he is napping because 1) you never know when I will crash/be too exhausted and lazy later and 2) naps are unpredictable, we may only get short ones later.

A day in the life with a 4-month old

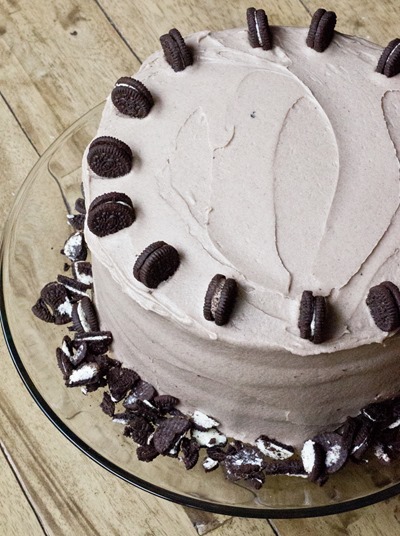
It’s 9:10, the next load of laundry is on it’s way, cookies are done and L is still sleeping (whoa!). I’m all of the sudden starving again so I grab a chunk of light cheddar and think about the warm lactation cookies on the kitchen table. Yes I do have one. Real life. I pick the ugliest one and am happy to see that the new recipe iteration I’ve tried is perfect. I’ll definitely be posting this one next week! Since L is still napping I decide to resume computer catch up. I even make the bed and then a second cookie may or may not happen (it happens).

It’s just about 10am and somehow L is still sleeping (guess I could have done yoga, too!). I decide to get him up because I don’t love him taking naps that are more than 2 1/2 hours (not that it comes close to happening often). Time to feed him!

A day in the life with a 4-month old

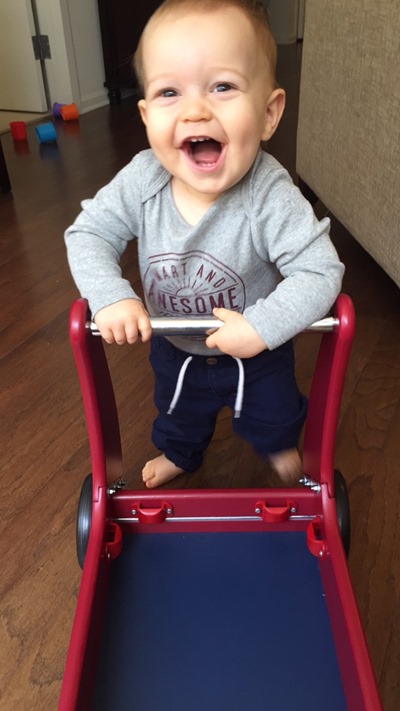
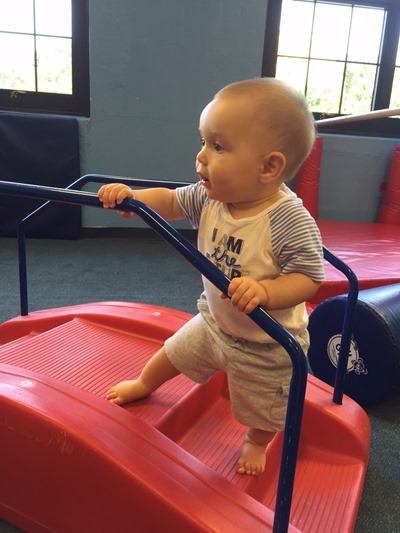
By 10:25 we are done with the feeding (some days they really go well) and I put L on the mat for tummy time. He lasts twenty minutes moving around to get to toys (see the above photo- that’s definitely not where I put him down) and rolling over a couple of times. Afterwards I finally dress him for the day and we play together on the mat.

A day in the life with a 4-month old 

By 11 my mom (Mommom) is here. L loves playing with her and her being there gives me a chance to get some more things done. Sometimes we all go out together but on the freezing cold days (which are more often than not) I can also run a quick errand by myself. I take the opportunity to photograph the lactation cookies and think about cooking some veggies for dinner. I also empty the dishwasher so I can use the now clean slow cooker insert and make some chicken as well. Gotta use my bit of energy while I have it! I can also tell that I’m going to be hungry again soon so I better move fast. Around 11:40 L goes down for his second nap.

A day in the life with a 4-month old

At 12 on the dot I’m starving so I inhale some lunch; “salad” (bagged lettuce with light blue cheese dressing) and a whole wheat pita with light cheese and tuna. I eat while standing and finishing up the veggies. Good thing I’m fast because at 12:30 L is up from his nap and hungry! I breastfeed him and then get his oatmeal together (I just love that he’s enjoying eating “real” food). My mom feeds him the cereal while I catch up on the computer for a bit. I also grab some dried baby pineapple (current addiction) because lunch wasn’t enough for me. I load and edit cookie photos while half watching my mom play with L.

A day in the life with a 4-month old

2pm comes around and I’m hitting my crashing time. I go to join my mom and L for a bit and wonder if I’ll do yoga later or if I can come up with a good excuse not to. Meanwhile, L gets tired (aka cranky) and I put him down for his third nap around 2:10. I work on the Monday crossword puzzle with my mom.

A little before 3 my mom leaves and I pull out the yoga mat. We’ve gotten over the 45-minute hump again so I think I’ve got time. Seven minutes later I’m proven wrong, L is up! I give him a couple of minutes to see if he will go back to sleep but that’s definitely not happening, time to go get him!

Normally I like to follow the eat-play-sleep routine but he definitely doesn’t need to eat yet after such a big meal earlier so I entertain him for a bit. He’s still a bit tired and cranky, but some tickles get him giggling. An afternoon highlight for sure! By 3:30 he is definitely hungry so time to eat.

Once that feeding is done L has more tummy time. I’m hungry again (obviously) so I snack on banana with peanut butter while I watch him. I love, love being home with L but this is the time of day that I wonder when Matt will get home. I also eye the leftover piece of cookie my mom left behind.

A day in the life with a 4-month old

It’s 4:30 and I put L down for his fourth (and generally last) nap of the day. I could resume yoga but I’ve lost my motivation and think about a shower again. I contemplate washing my hair (I owe the dry shampoo g-d’s hours of my life). I also think about the laundry that still needs to be folded. Man am I glad I did all of the work for dinner earlier!

A “long” hot shower (with the monitor volume on high) was exactly what I needed and now I kind of crash. It’s almost five and I sit down at the computer to do some blog browsing and pretend to be productive (recipe editing and blog post writing can wait until tomorrow). I consider folding the laundry because writing this post has motivated me to be efficient and productive… but apparently it hasn’t motivated me that much. I suddenly remember the chicken that finished cooking in the slow cooker and go check on that. It looks just okay but oh well, that’s life!

A day in the life with a 4-month old

L wakes up by 5:15 and again I give him a few minutes to potentially settle himself. He tries but doesn’t get back to sleep so I go and get him. This was the shortest nap of the day but that’s okay, I’m pretty happy with the fact that he went down for his naps so well all day. I feed him (some days when his schedule runs later we skip this feeding) and then we hang out and sing songs while we wait for Matt to come home.

A day in the life with a 4-month old

As soon as Matt walks in the door it’s a bit of a rush. I’m starving (are you surprised?) and hand over the baby so that I can inhale my dinner while Matt get some time with L and then gives him a bath. I then make Matt a plate and we trade. We’ve gotten to the time of day where L sometimes just wants to be held.

Around 7pm L starts to get hungry (and tired). Matt gives him a bottle (usually breast milk, sometimes formula) while I eat some chocolate (necessary) and keep them company. We are on poop watch (it’s been longer than normal for him) and in the middle of his feeding we hear it. Both of us head over to the changing table to assess. Nothing like a pooplosion after a bath… I take care of the new laundry while Matt puts L back in the sink. I may or may not pretend to forget that there is still a load of laundry in the dryer. Back to the feeding!

A little before 8 L is finished eating and Matt is on bedtime duty (final diaper change, burping, swaddling etc. with a little story time in the mix). I finally dry my hair (and yes, much of it does come out). Now Matt and I have a few minutes to spend together. We turn on the TV but then change our minds and decide to work on a crossword puzzle instead. Around 8:30 I do my last pumping of the day (and am relieved that this time I pump a little more than usual! Maybe it was the lactation cookies). We do a little more crosswording and I pass out by 9:30. Typical.

Things that I don’t mention because they don’t happen: leaving the apartment (it was bitter cold that day), taking my time to eat (okay, I guess I did that for breakfast), putting on makeup. Things that did happen but I didn’t mention: many diaper changes, the bazillion ounces of water that I drank (I constantly refill my water bottle!).

While every day is different the general routine is pretty consistent (at least during the week). I love spending time with L but definitely am starting to seek out a bit more time for myself (sometimes the workout actually does happen). Any other stay-at-home moms with days to compare?

Comfort Food Chocolate Chunk Cookies

Perfect chocolate chunk cookies. Chewy in the center and crispy around the edges, these cookies are pure comfort.

The most comforting cookies! Chocolate chunk with flaky sea salt mmmm

A good friend of mine recently brought her second baby home from the hospital. Even though I’m still getting a handle on some aspects of life with a baby, I realized it was time I started returning the favors of all the people who visited us with food and gifts after L was born. And while a homemade meal is even better (and will definitely happen for her), one of the things I enjoyed most post-baby was a seriously good sweet treat. Nothing like a good sugary carb for an instant energy boost!

I wanted to go with a classic comforting cookie; basically, the best version of a chocolate chip cookie you could ask for. The base of the dough bakes up nice and thick with a chewy center and crispy edges (the big size doesn’t hurt). I used rich high quality dark chocolate disks to really satisfy and topped them with a smoked flaky sea salt, though any flaky sea salt would do. While you can leave that off, I really find that the bit of salty contrast just enhances the cookie flavor.


Comfort Food Chocolate Chunk Cookies
 
Perfect chocolate chunk cookies. Chewy in the center and crispy around the edges, these cookies are pure comfort.
Author:
Recipe type: Dessert
Makes: ~20 cookies
Ingredients
  • 262g (~2 cups) all-purpose flour
  • 3g (½ teaspoon) baking soda
  • 5g (1 teaspoon) salt
  • 170g (3/4 cup / 1 ½ sticks) unsalted butter, melted
  • 234g (~1 cup, packed) light brown sugar
  • 106g (~1/2 cup) granulated sugar
  • 15 milliliters / 1 tablespoon vanilla extract
  • 75g (~1 large egg + 1 yolk) eggs at room temperature
  • 340g (~2 cups) good quality dark chocolate disksor chunks (at least 55% cocoa)
  • Flaky sea salt (I like this Smoked sea salt)
Instructions
  1. In a medium bowl, whisk flour, baking soda and salt; set aside
  2. In the large bowl of an electric mixer with a paddle attachment, beat butter and sugars until well-combined
  3. Beat in eggs and vanilla until a mixture is a light creamy color
  4. Reduce speed to low and stir in flour mixture (do not overmix)
  5. Fold in chocolate
  6. Chill dough in refrigerator for 24-48 hours for best texture and flavor results
  7. Once dough has chilled, pre-heat oven to 325 degrees; cover baking sheets with parchment paper
  8. Scoop cookie dough with large cookie dough scoop (~3 tablespoons) onto prepared baking sheets; top with flaky sea salt
  9. Bake large cookies 16-18 minutes or until brown around good portion of edges
  10. Set aside to cool
Notes
Dough requires 24-48 hours of chilling time for best results
Texture of cookies (crispy edges with chewy center) best within 24 hours; cookies can be enjoyed up to one week after baking if stored at room temperature or up to a month if frozen.

These chocolate chunk cookies make the perfect gift!

Make something from the blog? Be sure to share it on Instagram with the tag #KeepItSweetDesserts.

This post contains affiliate links

You might also like:

Small Batch Chocolate Chip Cookies

Small Batch Chocolate Chip Cookies

Chewy Milk Chocolate Ginger Cookies

Chewy Milk Chocolate Ginger Cookies

Brown Butter Chocolate Chunk Cookie Cake

Brown Butter Chocolate Chunk Cookie Cake

Keep It Sweet Desserts Weekly Wrap-up 2/21/15

From the long holiday weekend, to starting L on oatmeal a few days ago, and then to celebrating my sister’s birthday (HAPPY BIRTHDAY JESSICA!!!), it’s actually been a pretty great week. On top of that, we are heading down to Florida to visit my best friends on Friday and I can NOT wait! They haven’t met Liam yet so that will be really fun. Oh yeah, and warm weather. I might never come back…

Hopefully I can get some baking done this week before the trip so I have a recipe post for you next week (I have some good cookies coming this Monday!). Are there any requests for things you would like to see? I have a few baking projects in mind but am always open to suggestions.

Now for this week’s updates

Most popular recipe/blog post: Peanut Butter Caramel Candy Cups 

Peanut Butter Caramel Candy Cups - dying over these

Three favorite things I pinned all week:

Hot Cocoa Cake from Pass the Sushi

Peanut Butter and Jelly Chia Pudding from Eats Well With Others

Salt and Vinegar Popcorn from Cookies and Cups

I hope that you are all having a wonderful weekend!

Thin Mint Cookie Cake

Thick and fudgy cookie cake loaded with Thin Mints and topped with Thin Mint Buttercream!

Thin Mint Cookie Cake!!! Time to find some girl scouts

I’ve said it before but I’ll say it again, one of the reasons I’ve loved blogging so much (and probably why I’ve stuck with it for almost five years) is that I’ve made some great friends. Not only have I established relationships with people who live near me, but I also have wonderful friends spread out all over the country. Today we are celebrating my friend Madison! We’ve been virtual friends for years and I was lucky enough to meet her in person as well. In case you were wondering, she is just as sweet (and pretty!) in real life as she seems on the blog.

Thin Mint Cookie Cake

Madison’s shower is truly special because I know how badly she wanted a baby and she has been through so much along the way. We don’t know yet if she is having a boy or girl (it’s a secret), but I do know that baby will be LOVED. I’m just so happy for her and Joey. And Madison, from experience, it might be hard to believe, but being a mom is even better than you think it will be!

For Madison’s shower we are serving all things sweet (like her!) and of course I wanted to bring something rich and chocolatey. Plus, it’s Girl Scouts’ season and given the fact that we still had Thin Mints from last year (I cut myself off after I ate an entire sleeve in one sitting), I thought it was time I finally baked with them. This cookie cake was the perfect choice. It’s rich and fudgy (almost brownie like) with crunchy chunks of Thin Mints throughout. Oh yeah, and the Thin Mint buttercream is something to get excited about as well. The extra frosting in my freezer is calling my name…

Thin Mint Cookie Cake!!! omg!!

Thin Mint Cookie Cake
 
Thick and fudgy cookie cake loaded with Thin Mints and topped with Thin Mint Buttercream!
Author:
Makes: 12-16 servings
Ingredients
  • 113g (1/2 cup) unsalted butter
  • 170g semisweet chocolate, roughly chopped
  • 198g unsweetened chocolate, roughly chopped
  • 159g (~1 ¼ cups) all-purpose flour
  • 4g (3/4 teaspoon) baking powder
  • 3g (1/2 teaspoon salt)
  • 200g (~4 large) eggs at room temperature
  • 213g (~1 cup) granulated sugar
  • 234g (~1 cup, packed) light brown sugar
  • 10 milliliters / 2 teaspoons vanilla
  • 130g (~1 ½ cups) roughly chopped thin mints (~16 cookies)
  • Thin Mint Buttercream
  • 170g (3/4 cup) unsalted butter, softened at room temperature
  • 114gregular or light cream cheese
  • 320g (~2 cups) powdered sugar
  • 5 milliliters / 1 teaspoon vanilla extract
  • 40g (~1/3 cup) finely ground Thin Mint crumbs (~5 cookies)
Instructions
  1. Pre-heat oven to 350 degrees; grease or use non-stick cooking spray to prepare an 11-inch tart pan; set aside
  2. Place semi-sweet and unsweetened chocolate with butter in a microwave-safe bowl
  3. Microwave the ingredients for a minute and stir; microwave again for 30-second increments until everything is almost melted; stir the remaining lumps until smooth; set aside
  4. Whisk together dry ingredients (flour, baking powder and salt) and set aside
  5. In the large bowl of a stand mixer with paddle attachment, combine eggs, sugars and vanilla; beat on high speed for about 5 minutes or until mixture is light and fluffy
  6. Reduce the speed of your mixer and add in melted chocolate and butter
  7. When that is well-combined, stir in flour mixture but do not over-mix; fold in chopped thin mints
  8. Spread dough evenly into prepared tart pan
  9. Bake cookie cake for ~30 minutes or until a knife comes out clean from center (do not overbake)
  10. Remove from oven and allow to cool completely before removing from pan
  11. Once cookie cake is completely cooled, carefully remove from tart pan; pipe frosting as desired
  12. To make the buttercream:
  13. Beat butter and cream cheese in the bowl of an electric mixer with the paddle attachment on high speed for several minutes until butter is light and creamy
  14. Add 1 cup of powdered sugar and mix on low speed until combined; add remaining powdered sugar and vanilla and increase speed of mixer to high and beat until frosting is light and fluffy
  15. Stir in Thin Mint crumbs until evenly distributed
Notes
Best enjoyed within two days (cover carefully with seran wrap)
Cookie cake can be wrapped in seran and frozen up to one month

Thin Mint Cookie Cake!!! So fudgy, love!

Be sure to check out all of the other sweets for Madison’s shower!

Thin Mint Cookie Cake from Keep It Sweet Desserts
Mini Orange Creamsicle Cupcakes from  Greens & Chocolate
Gingered Pear Coffee Cake from Food Loves Writing
Peanut Butter Chocolate Chippers from Urban Wife Diaries
Lemon meringue pie cupcakes from Heather’s Dish
Chocolate Malt Milkshakes from The Avid Appetite

Make something from the blog? Be sure to share it on Instagram with the tag #KeepItSweetDesserts.

You might also like:*

Thin Mint Ice Cream

Thin Mint Ice Cream

Mint Cookies and Cream Buttercream Cups

Mint Cookies and Cream Buttercream Cups

Peanut Butter Caramel Candy Cups

Rich homemade candy  cups filled with peanut butter caramel sauce and topped with the perfect amount of flaky sea salt.

Peanut Butter Caramel Candy Cups - dying over these

I told you I had something up my sleeve for the caramel sauce. I don’t even think I need to talk too much about these little candy cups, the pictures say it all. Last minute Valentine’s Day treat perhaps?


4.0 from 1 reviews
Peanut Butter Caramel Candy Cups
 
Rich homemade candy cups filled with peanut butter caramel sauce and topped with the perfect amount of flaky sea salt.
Author:
Recipe type: Dessert
Makes: 12 candy cups
Ingredients
  • 10 ounces good quality dark chocolate (I used 72%), roughly chopped
  • ½ tablespoon unsalted butter
  • 1 cup Peanut Butter Caramel Sauce
  • Flaky sea salt (optional)
Instructions
  1. Line a mini muffin pan with 12 tin foil cupcake wrappers and set aside
  2. Place chocolate and butter in a medium microwave safe bowl; melt by microwaving the chocolate and butter in 30-second increments and stirring in-between
  3. Use a teaspoon to coat the bottom of each cup with melted chocolate; place muffin pan in fridge for fifteen minutes or until chocolate is set
  4. Remove pan from fridge and spoon caramel sauce into center of each cup (about 1 tablespoon); if caramel sauce has been chilled and is firm, microwave for 10-20 seconds and stir for a more workable consistency
  5. Spoon melted chocolate over caramel and around edges so that coated on all sides; sprinkle tops with flaky sea salt if desired (and it should be desired)
  6. Chill for one hour in refrigerator before serving; store in refrigerator up to one week

Peanut Butter Caramel Candy Cups... the picture says it all

Make something from the blog? Be sure to share it on Instagram with the tag #KeepItSweetDesserts.

You might also like:

Double Dip Mints

Double Dip Mints

No-Bake Rice Krispie Toffee Fudge Candy Bars

No-Bake Rice Krispie Toffee Fudge Candy Bars


Mint Cookies and Cream Buttercream Cups

Mint Cookies and Cream Buttercream Cups

Peanut Butter Caramel Sauce

Everybody loves caramel sauce but peanut butter caramel sauce takes your traditional ice cream topping to another level!

Homemade PEANUT BUTTER Caramel Sauce! amazing

I haven’t been doing a ton of baking since L was born. I’ve been having a little trouble motivating myself and finding my creativity. In fact, when I made these cookies, I ended up taking more pictures of L than I did the cookies. Whoops! He is just too cute sometimes and I can’t help myself.

So when I saw this recipe, I was obviously excited.since I decided to make peanut butter caramel sauce the next day. My mom was here helping with L and I took about ten minutes in the kitchen to whip this up. Basically the best way to spend a few minutes away from that little monkey if I have to.

The sauce turned out pretty darn amazing… I kind of feel like I should always have a batch of it on hand. Other than eating it straight from the jar with a spoon you can do so many things with this sauce… ice cream sundaes (obviously), cake, Oreo bars….. the list goes on! AND I have a new idea coming to you later this week.

Homemade PEANUT BUTTER Caramel Sauce! new favorite ice cream topping


Peanut Butter Caramel Sauce
 
Everybody loves caramel sauce but peanut butter caramel sauce takes your traditional ice cream topping to another level!
Author:
Recipe type: Dessert
Makes: 1¼ cups
Ingredients
  • 160 grams / 5⅝ ounces (3/4 cup) granulated sugar
  • [45] milliliters / 3 tablespoons water
  • 117 milliliters / 4 fluid ounces ( ½ cup) heavy cream
  • 29 milliliters / 1 fluid ounces (2 tablespoons) milk (any type)
  • 2 grams (1 teaspoon) coarse or flaky sea salt
  • 77 grams / 2 ¾ ounces (¼ cup) creamy peanut butter (not all natural)
Instructions
  1. Combine the sugar and water in a medium* heavy-duty saucepan and cook over high heat, whisking until the sugar dissolves
  2. Let boil for several minutes without stirring until the mixture becomes a deep amber color, watching closely so it doesn’t burn; Once the caramel begins to darken, the rest of the process happens very quickly (see photos above for caramelization process)
  3. As soon as most of the sugar water mixture is a deep amber, whisk in the cream (be careful as mixture will bubble up) and remove from heat immediately
  4. Whisk in milk and sea salt
  5. Place pot back over low heat and quickly whisk in peanut butter; remove from heat as soon as combined
  6. Serve warm or store covered in refrigerator up to two weeks**
Notes
Adapted from my salted caramel and this peanut butter caramel
*If doubling, use a large pot and allow extra time for caramelization
**For thicker sauce, chill in refrigerator for a few hours before using or serving; re-heat gently before serving

Homemade PEANUT BUTTER Caramel Sauce! To die for.

Make something from the blog? Be sure to share it on Instagram with the tag #KeepItSweetDesserts.

You might also like:

How to Make Salted Caramel

How to Make Salted Caramel

Salted Caramel Rice Krispie Treats with Mocha Ganache

Salted Caramel Rice Krispie Treats

Peanut Butter Caramel Candy Cups

Peanut Butter Caramel Candy Cups

Peanut Butter Caramel Sauce

Keep It Sweet Desserts Weekly Wrap-up 2/7/15

I don’t feel like all that much happened this week… these winter weeks are kind of all blurring together. I was doing really well but now I’m starting to get a bit stir crazy. I’m in hermit mode more than ever with little L in the picture.

I did do some baking, though, and have some good recipes coming in the next few weeks so that felt good. It seems I’m getting better at baking things that can get done during nap time. Not a bad thing! Oh, the other thing I’ve started doing is the NYT Crossword Puzzle with my mom. She loves to visit with L (okay, loves is a minor understatement), but when he is napping we sometimes feel like doing something other than staring at each other and folding laundry. The crossword puzzle ended up being a perfect activity because it actually makes me feel like I’m using my brain for a change. Plus, I feel like a genius when we complete most of the puzzle.

Now for this week’s updates

Most popular recipe/blog post: No Churn Cookie Butter Ice Cream (yes, AGAIN)

No Churn Cookie Butter Ice Cream - the most popular recipe of the week!

Three favorite things I pinned all week:

Salted Caramel Peanut Butter from Eats Well With Others

Easy Chocolate Lava Cakes for Two from Bakerita

Devil’s Food Cake with Hazelnut Crunch from bon appétit

I hope that you are all having a wonderful weekend!

New Mom Real Talk Edition 5

New Mom Real Talk: Mom and Baby Must-Haves (through 16-weeks post-partum)

Before L was born, I consulted so many online lists and asked friends what we would need for a newborn. Many of them were helpful but it took just getting through daily life with L to really know what we needed. These aren’t comprehensive lists of everything you need (obvious things like diapers and wipes are left off), just some key items that really help us out on a regular basis.

New Mom and Baby Must-Haves... especially for the swaddle escapist!

Baby Must-Haves

  • Swaddle Me Velcro Swaddles L was a swaddle escapist from the start and his startle reflex still can be a sleeping deal-breaker. Once we insured that he was in an escape-proof swaddle, his full-night sleep was MUCH more regular. I’m kind of terrified of the day we have to stop swaddling.
  • The Mamaroo- I really didn’t want to like this because it seemed so expensive for something L could only use for a few months… and in fact he didn’t like it in the beginning. However, once he was a few weeks old it was great for naps (and still is). We were also lucky because we got to borrow one from Matt’s brother.
  • LoviesI don’t know what it is, but L has started to LOVE lovies! He cuddles up with them for Mamaroo naps and it is pretty much the cutest thing ever.
  • Overnight Diapers– Okay, I lied about not listing diapers. This may seem obvious to some of you, but I really thought that these were just a way to get you to spend extra money. However, the overnights keep L from soaking his clothes / are just as important as the swaddle when it comes to him sleeping through the night! We use Pampers (and Pampers Swaddlers during the day).

New Mom Real Talk: Mom and Baby Must-Haves

  • The Snot Sucker I didn’t know about this until L got his cold and my best friend promised that it would work SO much better than the regular bulb. She was right! Plus, he doesn’t seem to mind when we use it.
  • Video Baby MonitorIt makes it so much easier not to worry about every little baby noise (especially in the beginning) when you can look at the video monitor. Plus, this one has a wifi system so if Matt or I are out we can take a peak at L in the crib. Oh yeah, and you can talk through the monitor! Not sure if that will end up being useful or not but it seems cool.

New Mom Must-Haves

New Mom Real Talk: Mom and Baby Must-Haves

  • Water Bottles I don’t even bother drinking from a glass when I’m home. Nursing makes me super thirsty and I pretty much guzzle water all day like it’s my job.
  • Lactation Cookies– I have no idea if these work, but they taste good! They freeze really well and I’m making my way through my second batch now. 
  • Nursing tanks– I should have bought more than two of these because I’d live in them. As it is, I sleep in one every night.
  • Comfy clothesOne of my best friends bought me cute sweats for my birthday this year knowing that they’d be great for post-baby. She was so right! I pretty much lived in them for the first month after L was born because they were cute, fit over my still bloated belly and didn’t irritate my incision.
  • Baby K’tanIt took me a couple tries to get it right originally, but then it was so easy to use. No tying, looping or anything complicated. In the beginning L would always fall asleep in the K’tan right away. Now he likes to look around and see everything but it’s so convenient to wear him for some errands (or even around the apartment). We also have an Ergo that Matt uses.
  • And just in case it wasn’t obvious… wine, chocolate and ice cream. 

new mom must-have - the baby ktan!

This post contains affiliate links.

The Best Birthday Desserts

Looking for the perfect birthday dessert? Here are 30 of my favorite homemade celebratory treats!

The Best Birthday Desserts

February is the start of birthday season in my world. My sister, sister-in-law, and mother-in-law all have their big days this month. March is for both of my parents (plus their anniversary!), my brother-in-law, and much of my mom’s family. Then April we celebrate my niece. So many birthdays, so many desserts to bake! Here are 30 recipes that are perfect for celebrating a birthday!

Layer Cakes

3-Layer Cookies ‘n Cream Cake and other amazing birthday desserts

3-Layer Cookies ‘n Cream Cake

Banana Cake with Mocha Ganache

Chocolate Chip Cream Cheese Pound Cake with Whipped Chocolate Ganache

Chocolate Stout Celebration Cake and some of the best birthday desserts

Chocolate Stout Celebration Cake

Extra Dark Chocolate Cake with Cookie Butter Buttercream

Fudgy Black and White Devil's Food Cake 7

Fudgy Black and White Devil’s Food Cake

M&M Kit Kat Cake

Margarita Birthday Cake

Peanut Butter Cake with Salted Caramel Cream Cheese Icing & Chocolate Ganache

Strawberry Cake with White Chocolate Buttercream

Vanilla Bean Layer Cake with Whipped Strawberry Cream Cheese Frosting

Fun Cakes

Black and White Cookie Cake!!! Plus other amazing birthday desserts

Black and White Cookie Cake

Brown Butter Chocolate Chunk Cookie Cake

Brown Butter Pistachio Cake with Candied Pistachio Topping

Butternut-Pumpkin Sheet Spice Cake with Bourbon-Vanilla Cream Cheese Frosting

Easy Low Fat Pumpkin Sheet Cake

Fluffernutter Chocolate Cake

Salted Caramel Sheet Cake - one of the best birhtday desserts!

Salted Caramel Sheet Cake

Cupcakes

Brown Sugar Cupcakes with Cinnamon Ginger Buttercream and Ginger Cookie Pecan Brittle and 30 of the best birthday desserts

Brown Sugar Cupcakes with Cinnamon Ginger Buttercream and Ginger Cookie Pecan Brittle

Caramelized White Chocolate Truffle Pumpkin Cupcakes

Chocolate Covered Strawberry Cupcakes

Peanut Butter and Jelly Cupcakes

Red Velvet Cupcakes with Blueberry Cream Cheese Icing and other amazing birthday desserts

Red Velvet Cupcakes with Blueberry Cream Cheese Icing

(Real) Pistachio Cupcakes with Brown Sugar Buttercream

Simple Vanilla Cupcakes with Chocolate Cream Cheese Icing

Triple Chocolate Cheesecake Cupcakes

Mini Cupcakes

Double Chocolate Stout Mini Cupcakes

Mini Cookies ‘n Cream Cupcakes plus some amazing birthday desserts

Mini Cookies ‘n Cream Cupcakes

Mini Lemon Cupcakes with Perfect Silky Buttercream

Mini Banana Cupcakes with Mocha Buttercream

Make something from the blog? Be sure to share it on Instagram with the tag #KeepItSweetDesserts.

Keep It Sweet Desserts Weekly Wrap-up 1/31/15

Happy Super Bowl weekend! I’m actually less excited than I normally would be for the big eating game day because we don’t have any plans this year. Matt’s out of town for most of the weekend for a wedding he is in and Sunday afternoon he’ll be picking L and me up from my parents for the drive back home. Luckily I stocked up on tortillas in case we need to make nachos, but other than that Matt will probably spend most of the time catching up on L hugs and I’ll pass out well before the game is over. I don’t even have any fun cookies or anything for us to eat. If you are looking for some fun dessert ideas for the game, though, check out this post… and this one. Or maybe you should make these… or these. Okay, I’m done now. 

Should probably make these salted caramel rice krispie treats for super bowl..........

Now for this week’s updates

Most popular recipe/blog post: No Churn Cookie Butter Ice Cream

No Churn Cookie Butter Ice Cream - the most popular recipe of the week! 

Five favorite things I pinned all week:

Funfetti Soft Pretzel Sticks from A Cookie Named Desire

Quick and Dirty Chocolate Espresso Cinnamon Rolls from Joy the Baker

XL Peanut Butter Cookie Dough Cup from Bakerita

Flourless Pistachio Oatmeal Muffins (GF) from Always Order Dessert

Skinny Green Chile Chicken Enchilada Dip from Recipe Runner

I hope that you are all having a wonderful weekend!

Easy Meyer Lemon Shortbread Cookies

An easy cookie to make with the wonderful flavor of meyer lemons.

Today we are celebrating sweet Caroline’s second virtual baby shower! I adore Caroline and am happy to help her celebrate the birth of baby number two!
Virtual Baby Shower
Today’s shower theme is citrus (one of Caroline’s current cravings!) and I just had to go with the sweet and tart flavors of meyer lemons. They are only around for a couple of months so it’s fun to take advantage of them for baking. I have a couple extras and may have to put together a cocktail or two as well;-)

Easy Meyer Lemon Shortbread Cookies

These cookies are nice and crips around the edges with a buttery chewy center. There is just enough meyer lemon flavor without overpowering the cookies at all!

*Scroll down to see the other citrus treats*


Easy Meyer Lemon Shortbread Cookies
 
An easy cookie to make with the wonderful flavor of meyer lemons.
Author:
Recipe type: Dessert
Makes: 2½ dozen cookies
Ingredients
  • 227g (1 cup) unsalted butter, softened
  • 150g (~3/4 cup) granulated sugar
  • 120g (3/4 cup) powdered sugar, sifted
  • ½ tablespoon grated meyer lemon zest (~1 lemon)
  • 29 milliliters / 2 tablespoons meyer lemon juice (~2 lemons)
  • 15 milliliters / 1 tablespoon vanilla extract
  • 2 ½g (1/2 teaspoon) salt
  • 265g (~2 cups) all-purpose flour, sifted
Instructions
  1. Pre-heat oven to 350 degrees
  2. Line baking sheets with parchment paper or slipat; set aside
  3. Cream butter and sugars with lemon zest until light and fluffy
  4. Add lemon juice, vanilla and salt and beat until well combined
  5. Stir in flour
  6. Scoop with a medium cookie dough scoop (2 tablespoons each) onto prepared cookie sheets about 2 inches apart
  7. Bake for 13-15 minutes or until very light brown around the edges
  8. Allow cookies to cool on cooling rack
  9. Store cookies in an airtight container at room temperature up to one week or in the freezer for up to two months
Notes
Barely adapted from these lemon cookies

See what else is being shared for the shower!

Make something from the blog? Be sure to share it on Instagram with the tag #KeepItSweetDesserts.

Keep It Sweet Desserts Weekly Wrap-up 1/24/15

So I pretty much spent all week with the flu and then poor little L got a cold too.  Luckily we both seem to be on the mend now. I actually went out yesterday for the first time in a week (don’t worry, no longer contagious)! My big outing was to Target where I was very excited to find one out of the three new Ben & Jerry’s flavors (important research, obviously). I actually thought I got two of them but apparently Chocolate Therapy has already been around for a while. What kind of ice cream connoisseur am I? Better keep searching .

This is the second weekend in a row where we ended up cancelling half of our plans because of the flu/ L being sick. Obviously I blame all of this on winter.

Now for this week’s updates

Most popular recipe/blog post: No Churn Cookie Butter Ice Cream

No Churn Cookie Butter Ice Cream - the most popular recipe of the week!

Three favorite things I pinned all week:

Sticky Toffee Pudding Pancakes (gf) from Top With Cinnamon

Sweet & Salty Layer Cake from The Baker Chick

Chocolate-Covered Strawberry Cakes from Sugar Hero

I hope that you are all having a wonderful weekend!

New Mom Real Talk Edition 4

New Mom Real Talk: body image, dieting, working out and all that jazz.

Per usual, I have a lot of thoughts on a subject and sometimes it’s hard to know where to start. However, I think I need to start this post by being honest and saying that prior to being pregnant, I don’t remember a single day where I wasn’t on some sort of diet (even when I tried “intuitive eating” for a while, I never really got out of my dieting mentality). So as someone who truly has considered herself a chronic dieter, it has been quite liberating to generally eat whatever I have wanted for the last twelve months.

New Mom Real Talk: Body Image, Dieting and Working Out

Don’t get me wrong, I’ve tried to eat a pretty balanced diet since what I ate affected the baby while I was pregnant and still can have an effect now that I’m breastfeeding. I also kept an eye on calories while I was pregnant to make sure I was eating enough (and not eating too, too much). Of course I was concerned with pregnancy weight gain, but only in the sense that I wanted it to be a healthy amount for the baby, not because I was worried about how I looked at the time. On top of this, I worked out most days of the week every.single.week. throughout my pregnancy. I figured if I stayed in shape and minimized the amount of time where I wasn’t exercising (presumably the six weeks postpartum before doctor clearance), getting back in shape after baby would be that much easier.

Ha! That last thought really makes me laugh a bit right now. If you read this post, you know that by two months postpartum, I hadn’t started to workout yet. It wasn’t for medical reasons, I just could not find the time, energy and motivation to do it. Since then, I’ve done a couple of workouts here and there… mostly yoga with some walking and an abbreviated T25 (yes, you can do a short amount of an already short workout) in the mix. Last week I actually decided that I’d aim to workout at least twice a week going forward. Too bad the flu put a halt on that idea!

New Mom Real Talk: Body Image, Dieting and Working Out

Anyway, I’m still a few pounds from my pre-pregnancy weight (which was up a few pounds from my “happy” weight thanks to hormone-related pills while trying to get pregnant). Some days I don’t care at all. Some days I care a lot. That’s usually just when I want to wear something other than leggings or sweatpants (and occasionally when I think about the women who are in such better shape than I am post-pregnancy). Generally, though,  I’m fine with my limited spandex-led wardrobe and extra-soft belly.

The thing is, I don’t have much motivation to really do anything about it at this point. In terms of dieting, my primary focus is eating enough so that my supply stays up for L. My second focus is just eating well enough. I mean, who has time to diet and food obsess when they have a three-month old? Plus, at the end of a long day, you better believe I’m having that cookie (or two), bowl of ice cream and/or big glass of wine. It’s just not worth it to me at this point to put limitations on that. Plus, I know myself, setting foods as “off-limit” never ends well.

New Mom Real Talk: Body Image, Dieting and Working Out

So where does that leave me? Mostly what I feel now is a desire to just keep doing what I’m doing. In reality, I’ve lost the bulk of my pregnancy weight by intuitively eating (really for the first time in my life!), and that I feel very good about. I would like to start exercising more because I know that will just make me feel good mentally and physically. But more doesn’t mean every day, it means when I can which is hopefully a couple of times each week. I just have to keep reminding myself that I don’t need to be skinny and that if I’m still wearing leggings by the time I go to Florida next month, well, that’s okay too!

Oh, and in case you were wondering, I will admit that one of my big breastfeeding motivators was/is weight-loss. Just keeping it real.

Keep It Sweet Desserts Weekly Wrap-up 1/1815

I don’t know how, but this week was actually quite productive. I made cookies and some other treats (three new recipes this week, THREE). I’m glad I got so much done because I ended up coming down with the flu at the end of the week. Ugh. Luckily Matt has been around all weekend to help with L and I’m resting as much as possible. I’m also drinking a ton of fluids to hopefully not lose any of the breastfeeding progress I’ve made. Ah!

Oh yeah, and this little guy turned three months the other day (insert cliché tear here)…

L 3 Months

Now for this week’s updates

Most popular recipe/blog post: No Churn Cookie Butter Ice Cream

No Churn Cookie Butter Ice Cream - the most popular recipe of the week!

Three favorite things I pinned all week:

No-Bake Banana and Peanut Butter Caramel Icebox Cake from Serious Eats

Blueberry Pancake Ice Cream from Broma Bakery

Brown Butter Maple Cornbread from Tutti Dolci

I hope that you are all having a wonderful weekend!

It Was Me All Along Giveaway and Review

Giving away a copy of the amazing and inspiring book, It Was Me All Along

It-Was-Me-All-Along giveaway and review

Scroll down for giveaway details

Even if you have never read Andie Mitchell’s blog, I can almost guarantee that you will love her book. Beyond being extremely well-written, it is captivating, inspiring and incredibly relatable. For any woman or man who has struggled with weight, eating issues, body image etc., Andie puts to paper what so many of us are afraid to say out loud. Her personal struggle with weight stems from many deeper emotional issues. Her book documents life growing up with an alcoholic father and a mother who couldn’t be around as much as she liked because she spent her hours working multiple jobs in order to take care of her family. Yes, the overlying theme of the book is a struggle with weight, but beyond that, she tells the stories of growing up, learning to cope with problems without food, becoming a success in various professional roles, and forming healthy, loving relationships with those around her. You can tell that she has an enormous heart and really, you just wish she could be your best friend, too. I related to many of her struggles around binge eating, obsessively dieting, and using food as a coping mechanism. She helped me understand that and inspired me to move forward with a healthier view on eating and on life.

I read It Was Me All Along in about three days. If I didn’t have a baby to take care of I would have read it faster! As soon as I finished, I gave my mom the book, and she loved it too. While I did receive a free copy from Andie’s publisher, I had also pre-ordered a copy well before that. While I’m tempted to keep both copies to myself, I’d rather get to share one with someone else. You all need to read this book!

a Rafflecopter giveaway

Eligible for US entrants only.

Super Fun Cookies (aka Oreo, Peanut Butter Cup, Chocolate Chunk Cookies)

Cookies loaded with chunks of Oreos, Peanut Butter Cups and dark chocolate!

Super Fun Cookies... Cookies loaded with chunks of Oreos, Peanut Butter Cups and dark chocolate!

Sometimes you just need a cookie full of fun things.  For this version, I loaded up my favorite cookie dough with chunks of chocolate, peanut butter cups and chopped Oreos.  How could it not be love at first bite?

Super Fun Cookies (aka Oreo, Peanut Butter Cup, Chocolate Chunk Cookies)
 
Cookies loaded with chunks of Oreos, Peanut Butter Cups and dark chocolate!
Author:
Recipe type: Dessert
Makes: 3-3½ dozen large cookies
Ingredients
  • 525g (~4 cups) all-purpose flour
  • 5g (1 teaspoon) baking soda
  • 15g (3 teaspoons) salt
  • 340g /12 ounces (1½ cups / 3 sticks) unsalted butter, melted
  • 470g (~2 cups packed) light brown sugar
  • 213g (~1 cup) granulated sugar
  • 44 milliliters / 3 tablespoons vanilla extract
  • 150g (~3 large) whole eggs eggs
  • 160g / 5⅝ ounces (~3/4 cup) dark or semi-sweet chocolate chunks
  • 200g (~1 cup) chopped peanut Butter cups
  • 112g (~1½ cups) chopped Oreos
Instructions
  1. :
  2. In a large bowl, whisk flour, baking soda and salt; set aside
  3. In the large bowl of an electric mixer, beat butter and sugars on medium-high speed for a few minutes until well-combined
  4. Beat in eggs and vanilla on medium speed until a mixture is a lighter creamy color
  5. On low speed, stir in flour mixture
  6. Stir in chips
  7. Chill rough in refrigerator for 24-72 hours (I find 48 hours+ to be best!)
  8. When ready to bake, pre-heat oven to 325 degrees and line baking sheets with parchment paper
  9. Scoop cookie dough with large cookie dough scoop (~3 tablespoons) onto prepared baking sheets (note it is normal for cookie dough to be very hard, you can dip your scoop in hot water to make it easier to scoop)
  10. Bake cookies 17-19 minutes or until centers appear set and they are brown around the edges

Super Fun Cookies... Cookies loaded with chunks of Oreos, Peanut Butter Cups and dark chocolate!

Make something from the blog? Be sure to share it on Instagram with the tag #KeepItSweetDesserts.

Keep It Sweet Desserts Weekly Wrap-up 1/10/15

Usually it isn’t until March, or at least February that I’m nagging Matt wondering why we live in the Northeast. In year’s past we joked about moving to San Diego with about a one percent chance of it ever happening.This year, however, as I took a newborn baby in and out of the car sans winter coat (the car seat safety rules make winter weather confusing and challenging) around December 1st, I was already clamoring to move to Florida (at least it’s the same coast and I have a few best friends that live there). Now we are into the thick of winter with below freezing temperatures and snow and I’ve resolved to hibernate until Spring. Or at least hibernate until our we head south to visit those friends next month.

Kind of funny that despite the crazy winter weather, the most popular post this week was an ice cream recipe. Maybe I should just pump up the heat (yeah, our electric bill would love that), fake myself out, and start eating summer foods again. Margarita anyone?

Now for this week’s updates

Most popular recipe/blog post: No Churn Cookie Butter Ice Cream

No Churn Cookie Butter Ice Cream - the most popular recipe of the week! 

Three favorite things I pinned all week:

Crumb Topped Cake Batter Blondies from Culinary Concoctions by Peabody

Perfect Peanut Butter Cookies for Two from The Baker Chick

Small Batch Double Chocolate Chunk Cookies from Dessert for Two

I hope that you are all having a wonderful weekend!

New Mom Real Talk Edition 3

New Mom Real Talk: Breastfeeding

A couple of weeks ago someone asked me if I was breastfeeding L, and when I said yes, she asked, “isn’t it the best?” I practically laughed and said, “no, not really”.

New Mom Real Talk - Breastfeeding

Truth be told, the last week and a half has been a drastic improvement over the ten weeks prior. Around six or seven weeks I was googling, “when does breastfeeding get easier?” Around two months I felt like I at least had a manageable nursing/pumping combo down. Now at twelve weeks, I finally feel like we are doing something sustainable (I’m actually afraid of saying that out loud because who knows, in one minute things could change).

There have been clogged ducts (why is it that when breastfeeding is most painful you actually can’t  quit?), around the clock pumping sessions, hour+ nursing sessions and bleeding nipples (er, one that will never be a non-issue). There have been tears, frustration, and wondering what it’s like to live in a world beyond three-hour increments.

New Mom Real Talk - Breastfeeding

But lately, things really have been better. L’s feedings are taking much less time; this morning we finished a feeding in a record twenty five minutes! Each day I nurse for three feedings, nurse + bottle for two, and then the last feeding is all bottle while I pump (that way Matt can feed him before bed). I also pump after the first morning feeding because, well, it’s necessary. Most days at least one of those bottles is formula. I can tell that L is thriving just by looking at him, and based on some before and after feeding weigh-ins, I’m confident that he is eating enough this way. That is obviously the most important part, but my sanity, which seems to be returning, is a close second.

New Mom Real Talk - Breastfeeding

Don’t get me wrong, there are still some rough feedings. The other day he decided he was hungry as soon as I walked into Trader Joe’s and I ended up nursing him in the car. That would have been fine if it didn’t take a half hour to burp him (not so uncommon around here) afterwards. But then again, he had a great feeding a week ago while I was at the mall. I fed him in the Nordstrom Ladies Lounge and things actually went pretty smoothly. Now that I feel comfortable with that, I can actually leave the house for a few hours at a time. (Well, as long as I have plenty of extra clothes in his diaper bag!). Maybe this will help me start feeling “normal” again.

New Mom Real Talk - Breastfeeding

So for now, I’m going to keep on going. I haven’t committed to any fixed amount of time because I don’t think that pressure is fair (though if I made it a total of six to twelve months I’d be very happy). Today was a “re-evaluation” point and I’m comfortable continuing. I’ll probably re-evaluate again around his four month doctor appointment.

I’ve mentioned this before, but talking to other mom’s has helped me immensely. My best friend and I text on a regular basis about our random challenges (trying to drink smoothies full of brewers yeast, sneaking into the baby’s room to grab a pump, trying anything and everything just to make it work…). I also joined this Facebook group where most women are very supportive of one another and offer advice to breastfeeding moms.

What helped you get through the challenges of breastfeeding? Did you have that “this is actually working” turning point?

Peanut Butter Banana Energy Balls {gluten-free, vegan}

A no-bake treat and healthy snack made with just a few ingredients. These naturally gluten-free energy balls are so convenient to have on hand!

Peanut Butter Banana Energy Balls - These naturally gluten-free energy balls are so convenient to have on hand

Every day since L was born, you would think I hadn’t eaten in a week. Seriously, I’m so hungry ALL the time. He eats every three hours and I do too. Sometimes I have time to make myself a big salad and inhale it in about three minutes. Sometimes I have him on my lap while I try to cut the chicken on my plate into bite sized pieces with just one hand. Other times I have him in the Baby K’tan and try not to spill food on his head (there may or may not have been an incident with turkey). And sometimes I just need something to grab. While I definitely eat a lot and have my fair share of dessert, I’ve been trying to eat mostly healthy every day since having him. Snacks like these little energy balls have saved me. I’ll often grab three or four out of the freezer and pair them with a couple sticks of string cheese for a surprisingly filling and healthy snack that you can eat with one hand. New mom win!


Peanut Butter Banana Energy Balls {gluten-free, vegan}
 
A no-bake treat and healthy snack made with just a few ingredients. These naturally gluten-free energy balls are so convenient to have on hand!
Author:
Recipe type: Dessert
Makes: 30 bite-sized energy balls
Ingredients
  • 245g(~2 medium) ripe bananas, mashed (about 1 cup)
  • 32g (2 tablespoons) creamy natural peanut butter (I prefer salted)
  • 20g (2 tablespoons) chia seeds
  • 1g (~1 teaspoon) ground cinnamon
  • 80g (1 cup) old-fashioned oats
  • 80g (1 cup) old-fashioned oats, ground
  • 24g (¼ cup) PB2, peanut flour or protein powder
Instructions
  1. Line a baking sheet with parchment or wax paper and set aside
  2. In a medium bowl, combine bananas, peanut butter, chia seeds and cinnamon
  3. Stir in oatmeal, ground oats and PB2 until well combined
  4. Use a tablespoon or small cookie dough scoop to divide up dough and then use your hands to roll into balls; place on prepared baking sheet
  5. Freeze for two hours before placing balls to store in a ziplock bag or Tupperware container
  6. Freeze for up to one month; energy balls can be enjoyed frozen or at room temperature
Notes
*If making for someone with a gluten sensitivity, make sure that all ingredients are certified gluten-free
These run about 40 calories / piece; I like eating a few at a time with some string cheese for a filling snack

Peanut Butter Banana Energy Balls - a healthy, no-bake treat!

Make something from the blog? Be sure to share it on Instagram with the tag #KeepItSweetDesserts.

This post contains affiliate links.

You might also like:


Vegan & Gluten-Free Peanut Butter and Fig Granola

Vegan & Gluten-Free Peanut Butter and Fig Granola

Vegan Chocolate Chunk Banana Ice Cream

Vegan Chocolate Chunk Banana Ice Cream

Vegan & Gluten-Free Chocolate Peanut Butter Banana Oatmeal Bites

Vegan & Gluten-Free Chocolate Peanut Butter Banana Oatmeal Bites

Keep It Sweet Desserts Weekly Wrap-up 1/3/15

Well, a very happy New Year to all of you! I decided to take off from posting after I shared last year’s favorites in order to enjoy as much time with family as possible. Even though I’m not going back to an out-of-home job at this point, I’ve been thinking about the new year as my reset and back to normal starting point. Don’t get me wrong, I definitely don’t feel like we have hit our new normal exactly yet, but it’s been two and a half months since L was born and it’s probably time for me to get back to “real” life a bit. Besides, I only have two more recipes stored up for the blog so I really need to get back into the kitchen and bake!

Speaking of the blog, I’d love to know what you would like to see going forward. More indulgent desserts? More easy recipes? More new mom talk? Something else?

I didn’t make any resolutions, but one of my thoughts is to keep the blog going at my own pace (because I truly love it) and not get jealous/feel inferior/have big-blogger envy over other sites. By doing that, I think I’ll be able to enjoy the balance of blogging and being a mom so much more. Less pressure on myself will definitely be a good thing. Some weeks I may get my three posts in, some weeks I won’t, but that will be okay!

Now for this week’s updates

Most popular recipe/blog post: Pink Champagne Cake Pops

Pink Champagne Cake Pops- most popular recipe of the week!

Three favorite things I pinned all week:

Champagne Macarons from Eats Well With Others

1-Hour Cinnabon Cinnamon Rolls from Lauren’s Latest

Chocolate Cinnamon Babka Muffins from How Sweet It Is

I hope that you are all having a wonderful weekend and start to the year!

The Top Keep It Sweet Desserts of 2014

Every December, I like to see what blog posts you enjoyed the most and compare them to my favorites. There are usually a few surprises but definitely some that I agree with. Scroll down to see the most popular recipe posts of 2014 and take a look at which I loved the most.

Top 2014 Recipes! Desserts that need to be made next year!

The ten most visited recipe posts from 2014:

10.  (Fresh) Cranberry Chocolate Chunk Brown Butter Cookies—Definitely one of my favorite cookies, too

Everyone loves these Cranberry Chocolate Chunk Brown Butter Cookies (made with FRESH cranberries)

9.  Gluten-Free Pumpkin Muffins (gf)—A good excuse to eat pumpkin year round!

These Gluten-Free Pumpkin Muffins were one of the year's most popular recipes from Keep It Sweet Desserts 

8.  Chocolate Truffles, Three Ways (gf)—Who doesn’t like truffles?

Chocolate Truffles - 3 ways! another top recipe of the year from Keep It Sweet Desserts

7.  No Churn Cookie Butter Ice Cream – My friends, Matt and I all loved this

No machine needed for this Cookie Butter Ice Cream- no wonder it was one of the top 2014 recipes!

6.  Peanut Butter Oatmeal Cookie Dough BallsWho doesn’t love a healthy-ish no-bake treat?

One of the most popular sweet treats of the year! Peanut Butter Oatmeal Cookie Dough Balls from Keep It Sweet Desserts

5.  How to Make Salted Caramel Without a Candy Thermometer (gf)– Definitely one of the most useful (and important???) posts on the blog!

One of the year's top recipes! How to Make Salted Caramel WITHOUT a Candy Thermometer (via Keep It Sweet Desserts)

4.  Salted Caramel Oreo BarsI’m not surprised, these are so easy and I’ve made them a few times!

One of the year's most popular recipes!!! Salted Caramel Oreo Bars from Keep It Sweet Desserts 

3.  Mixed Berry Sauce (gf) – An all around great recipe

One of the most popular recipes of the year! Mixed Berry Sauce from Keep It Sweet Desserts

2.  Pink Champagne Cake PopsIt doesn’t get more festive than this

2nd most popular recipe of the year! Pink Champagne Cake Pops from Keep It Sweet Desserts

1.  Easy Low Fat Pumpkin Sheet CakeJust a few ingredients and voila!

2014's most popular recipe! Easy Low Fat Pumpkin Sheet Cake from Keep It Sweet Desserts

My ten favorite recipes from 2014:

10.  Skillet Apple Crisp with Brown Butter Sauce (gf)—Brown butter sauce, need I repeat myself?

The brown butter sauce on this apple crisp was insane

9.  Double Dip Mints (gf)—I may or may not have eaten the whole batch myself

HOMEMADE Double Dip Mints, best candy ever

8.  Cinnamon Roll Blondie Bites—One word: addicting.

Cinnamon Roll Blondie Bites - definitely one of the best dessert recipes of the year

7.  Oreo Overload Cookie Sandwiches—Definitely one of Matt’s favorite cookies, who can blame him?

Oreo Overload Cookie Sandwiches- a majorly favorite recipe 

6.  Fudgy Black and White Devil’s Food Cake—I made this for my mom’s birthday in March and she hasn’t stopped mentioning it since!

The best birthday cake of all time- FUDGY Black and White Devil's Food Cake

5.  Pumpkin Cinnamon Bun Ice Cream (gf)I got on a huge ice cream kick over the summer and this was one of my favorites!

Pumpkin Cinnamon Bun Ice Cream... enough said

4.  Peanut Butter and Jelly Cupcakes—The cake, the filling, the frosting… all perfection!

PB&J Cupcakes - everything about them was perfect

3.  Roasted Butternut Squash Pie with Brown Sugar Marshmallow Topping—My sister, the pie lover, dubbed this the BEST pie she had ever eaten

This Roasted Butternut Squash Pie with Brown Sugar Marshmallow Topping was the BEST!

2.  New York Crumb Cake Ice Cream— Not only was this ice cream unbelievable, but it was SO easy to make. No-churn recipes are the best!

This NY Crumb Cake Ice Cream was the best ice cream I've ever made!

1.  Giant Caramel Apple Cinnamon Bun with Cream Cheese Glaze—This was worth all the extra clean up because it was one of the best things I’ve ever made

This Giant Caramel Apple Cinnamon Bun was the BEST thing I made in 2014

Merry Christmas and Happy New Year, everyone! Cheers to a 2015 full of many, many delicious sweets!

The Top Keep It Sweet Desserts of 2013

The Top Keep It Sweet Desserts of 2012

The Top Keep It Sweet Desserts of 2011

Make something from the blog? Be sure to share it on Instagram with the tag #KeepItSweetDesserts.

Keep It Sweet Desserts Weekly Wrap-up 12/20/14

Are we really just a few days away from Christmas??? Yeah, I know, everyone is saying that. But seriously.

I’m looking forward to a short week where I get some more time with Matt. We actually have Christmas Day to spend just the three of us which really hasn’t happened much lately. I think a day full of movies and maybe some Chinese food will have to happen. Then we’ll be at my parents’ that weekend and some of my family members will get to meet L for the first time so that is nice. Plus I’ll probably be eating lots of carbs and sweets at my moms which is what you are supposed to do this time of year.

Any big holiday baking plans this weekend? I actually made cookies and chocolate covered pretzels on Wednesday which was fun. Though lately I kind of enjoy when other people bring me baked goods even more.

Now for this week’s updates

Most popular recipe/blog post: Pink Champagne Cake Pops

Pink Champagne Cake Pops- most popular recipe of the week!

Three favorite things I pinned all week:

Homemade Peppermint Oreos from Eats Well With Others

Super Fancy Chocolate Cheesecake Cake from Willow Bird Baking

Champagne Cake Roll with White Chocolate from Serious Eats

I hope that you are all having a wonderful weekend!

Fluffernutter Mini Pies {Guest Post}

Today’s guest post is from Madison, a blogger that I’ve been virtual friends with for years now. We even got to meet over dinner a few years ago!  She has her own little one due at the end of this winter (a wonderful miracle that you should read about). Visit her blog and take a look at some of my favorite recipes she has posted (Sweet Potato and Black Bean Enchiladas, Classic Apple Pie with an Ultra Flaky Crust, and Peanut Butter Toffee Cookies).

Fluffernutter Mini Pies!

Hi, Keep It Sweet readers! I’m so excited that Lauren asked me to share a recipe with you while she is enjoying some much-deserved time with her new little one! Lauren and I have been blog friends almost as long as our blogs have been around and I couldn’t be happier for Lauren and Matt as they journey into parenthood.

It’s a little intimidating to share a desert recipe on Lauren’s site. That girl can bake! I think her blondies are my husband’s all-time favorite dessert. But I’m going to give it a go anyway!

The recipe that I’m sharing with you today, Fluffernutter Mini Pies, is a scaled-down dessert that makes just four small pies and can be whipped together in no time. I find that having too many sweets in the house is a recipe for disaster since my willpower is just not that strong, so sometimes it’s nice to have something that makes just a few servings.

I didn’t grow up on the marshmallow crème and peanut butter combination known as fluffernutter, but I’ve come to love the combo as an adult. These pies combine cream cheese, peanut butter and marshmallow crème into an easy pie filling. Not into mini desserts? Just double the filling amount and use a regular pie shell and you’re good to go for larger groups. Enjoy!

Fluffernutter Mini Pies!


5.0 from 1 reviews
Fluffernutter Mini Pies {Guest Post}
 
Author:
Recipe type: Dessert
Makes: 4 mini pies
Ingredients
  • ⅓ cup heavy cream
  • ¼ teaspoon vanilla
  • 4 oz cream cheese, softened
  • ½ cup creamy peanut butter
  • ½ cup marshmallow crème
  • 3 tablespoons powdered sugar
  • 4 miniature graham cracker crust pie shells
  • Salted peanuts and miniature marshmallows for garnishing
Instructions
  1. In the bowl of an electric mixer fitted with a whisk attachment, whisk heavy cream and vanilla until firm peaks form. Transfer mixture to a mixing bowl and set aside.
  2. With your electric mixer, beat together the cream cheese, peanut butter, marshmallow crème and powdered sugar until smooth. Gently fold in the whipped cream until evenly combined.
  3. Spoon or pipe mixture into the prepared pie shells. Garnish mini pies with the peanuts and miniature marshmallows and refrigerate at least 1 hour or until mixture is firm and set.

Madison Mayberry Hofmeyer is a wife to Joe and food editor (yes, that’s a real job!) for The Betty Crocker Kitchens living in Edina. They are expecting their first baby in March who will join their two fur babies, dogs Nutmeg and Pippa. Madison blogs about all things food and life over at Espresso and Cream.

Make something from the blog? Be sure to share it on Instagram with the tag #KeepItSweetDesserts.

You might also like:

Peanut Butter S’mores Parfaits

Peanut Butter S'mores Parfaits

Peanut Butter Snack Cake

Peanut Butter Snack Cake

Peanut Butter Caramel Candy Cups

Peanut Butter Caramel Candy Cups

New Mom Real Talk Edition 2

New Mom Real Talk: 2 Months Postpartum

While I still have so much to say on the topic of breastfeeding, I thought we should take a break and talk about some of the other aspects of momhood. As L turned 2 months old yesterday, I was thinking a lot about  where I am in getting back to “normalcy.” Let’s just say that as I write this post, my thoughts on the topic are completely scattered and that is basically how I feel about my life on a regular basis. This is NOT a bad thing. In fact, I am beyond happy being a mom. I actually love being a mom (even more than I ever imagined I would). I was lucky to connect with L from the moment he was born, and as he develops his personality I just become more enamored every day.

New Mom Real Talk: 2 Months Postpartum   


But I digress. So, normalcy. What does that even mean? Obviously we are talking about a new normal; one that bridges life before baby to life with baby. While I knew that my day-to-day would change and I’d be focused on taking care of a newborn, I think I figured that around the two month mark things would be settled into place and I’d have my you-know-what together. I’d be back at the gym, working on the blog, and thinking about the next step in my career. Um, what?! Maybe it’s because two months is a normal maternity leave for many women, I thought that meant that two months is how long it should take to really be a productive, functioning mom. HA!

The new normal is scheduling my day around feedings (and/or pumping time), a little play time with L, doing many, many loads of laundry (for such a little person, L sure requires a lot of outfit changes), and functioning on just enough sleep. That leaves a few 1-2 hour naps throughout the day to get as much done as possible (ahem, laundry).

New Mom Real Talk: 2 Months Postpartum

Throughout my pregnancy I did yoga, barre workouts and power walked until the very end. I thought that if I could minimize my time between stopping exercise and picking it back up (presumably 6-weeks postpartum), it would be so much easier to get back into shape. <—–HA again! Seriously, while I do miss working out (especially yoga), in the blocks of time that I have available it’s last on my list of things to do. Sometimes we need groceries. Sometimes I have errands to run, and sometimes (okay, all the time), I just don’t have the energy. If I actually find myself without laundry to fold, a bed to make or dinner to cook (who am I kidding, I’ve cooked a full dinner ONCE since L was born), working out really just doesn’t seem appealing in the moment. I’d rather sit on the couch with Matt and just chill out for an hour or so. It’s required for my mental health.

I guess what I’m saying is that life is still one big ball of crazy. Yes, I’m getting a bit more sleep than when L was first born and yes I have gone out a few times without him (often reluctantly), but I don’t feel like things have settled much at all. Or maybe they have and this really is my new normal?

New Mom Real Talk: 2 Months Postpartum

I think I am okay with that. Though, it would be nice if I didn’t feel like my eyebrow situation was out of hand and I could get more than just one thing done a day (this could be thank you notes, chopping up vegetables, or taking a return to the GAP). I’m repeatedly trying to tell myself that it’s okay that I don’t have it all together. There is plenty of time in my future for working out, dieting (er, maybe?), and getting a job. I’m trying to savor each moment and cuddle as much as possible because I know that they are fleeting. I feel extremely lucky that I have the privilege of being home with L for an undetermined amount of time.

However, there are thoughts in the back of my head that pop up every now and again. What’s wrong with me that I’m not more together at this point? How am I not in the gym already (I’ve read blogs where women are working out just three weeks postpartum!)? A month after baby leggings were okay, but shouldn’t I have lost the baby weight by now (or at least tried)? Back and forth I go trying to reassure myself that where I am now is OKAY. Frankly, I bust my butt on a daily basis just trying to keep L’s feeding in check and that really should be all that matters.

Maybe in a few weeks things will settle down, and maybe they won’t. Maybe I won’t know the new normal until L is one year old. And maybe there won’t be a normal. Maybe I should just take each day, one at a time, and see where it takes me. Really, as long as I get to snuggle with my boys, do I really need to worry about the rest?

Smoked Sea Salt Chocolate Fudge Caramel Cookies

Rich and fudgy chocolate cookies filled with caramel and dark chocolate chips and seasoned with smoked sea salt.

Smoked Sea Salt Chocolate Fudge Caramel Cookies- super rich and decadent!

Are you still adding to your cookie baking list for the holidays? I hope so, because these babies are very deserving of a spot.  The cookie itself is ultra rich and like a fudgy brownie in the center.  Outside there is a slice crisp around the edges.  To top that off, the flavor of the chocolate is dark and almost sinful but balanced with sweet caramels and flaky smoked sea salt.  And by the way, they are pretty easy too.  They bake up consistently EVERY time I make them.  And bonus, you don’t have to chill the dough at all. These cookies will be ready for your enjoyment within an hour from start to finish.  If you are making big batches for holiday gifts, just double the recipe below!

Smoked Sea Salt Chocolate Fudge Caramel Cookies-these need to happen

Smoked Sea Salt Chocolate Fudge Caramel Cookies
 
Rich and fudgy chocolate cookies filled with caramel and dark chocolate chips and seasoned with smoked sea salt.
Author:
Recipe type: Dessert
Makes: ~2 ½ dozen cookies
Ingredients
  • 113g (1/2 cup) unsalted butter
  • 170g semi-sweet chocolate, roughly chopped
  • 200g unsweetened chocolate, roughly chopped
  • 160g (~1 cup + 3 tablespoons) all-purpose flour
  • 2g (3/4 teaspoon) baking powder
  • 2g (1/2 teaspoon salt)
  • 150g (~3 large whole) eggs at room temperature
  • 215g (~1 cup) granulated sugar
  • 235g (~1 cup, packed) light brown sugar
  • 10 milliliters / 2 teaspoons vanilla extract
  • 227g (1 cup) semi-sweet or dark chocolate chips
  • 160g (1 cup) caramel bits
  • Smoked sea salt
Instructions
  1. Pre-heat oven to 350 degrees; line baking sheets with parchment paper and set aside
  2. Place semi-sweet and unsweetened chocolate with butter in a microwave-safe bowl
  3. Microwave the ingredients for a minute and stir; microwave again for 30-second increments until everything is almost melted; stir the remaining lumps until smooth (alternatively, you can melt the butter and chocolate in a heavy duty pop over medium heat stirring constantly); set aside
  4. In a medium bowl, whisk together dry ingredients (flour, baking powder, and salt) and set aside
  5. In the large bowl of a stand mixer, combine eggs, sugars and vanilla; beat on high speed for about 5 minutes or until mixture is light and pale in color
  6. Reduce the speed of your mixer and add in melted chocolate
  7. When that is well-combined, stir in flour mixture but do not over-mix; stir in chocolate chips and caramel bits
  8. Use a large cookie dough scoop and place dough on a baking sheet lined with parchment paper, 1-2 inches apart; lightly sprinkle top of cookie dough with smoked sea salt
  9. Bake cookies for 12 minutes and set aside on a wire rack to cool
Notes
Recipe can be doubled
Store cookies at room temperature up to 5 days in a ziplock bag or freeze for up to two months


Smoked Sea Salt Chocolate Fudge Caramel Cookies-they taste as good as they look!

Yes, they are as good as they look.

Make something from the blog? Be sure to share it on Instagram with the tag #KeepItSweetDesserts.


This post contains affiliate links.

You might also like:

Salted Caramel & Peanut Oatmeal Cookies

Salted Caramel & Peanut Oatmeal Cookies

Fudgy Mocha Brownies with Espresso Sea Salt

Fudgy Mocha Chip Brownies with Espresso Sea Salt

Sweet and Salty Toll House Pie

Sweet and Salty Toll House Pie